

You know that feeling when a joint fails hours after you’ve finished? It’s usually because you rushed the fit or used the wrong glue. Strong joints start with matching the right joint type to your project’s demands. You’ll need sharp chisels, accurate measurements, and patience. Let’s talk about how to make joints that won’t let you down when it matters most.
How to Pick the Best Joint for Each Build
How do you guarantee your wood joints will hold up under real-world conditions? You match the joint type to your project’s specific demands.
Dovetails excel at resisting drawers pulling out, making them ideal for toolbox construction. Mortise and tenon joints handle heavy loads perfectly, so use them for table legs and chair frames. Butt joints work fine for cabinet backs where strength matters less.
Consider wood movement—long grain to long grain joints handle expansion better than end grain connections. Pocket screws create strong, hidden fastenings for face frames and case construction. Lap joints distribute stress evenly across wide surfaces.
Your joint choice directly impacts your build’s longevity, so don’t default to whatever you know best. Study successful projects similar to yours, then select joints that have already proven themselves in real applications.
Tools You’ll Need for Strong Joints
Your joint selection sets the foundation, but having the right tools guarantees each connection reaches its full potential. You’ll need reliable equipment that matches your skill level and project demands.
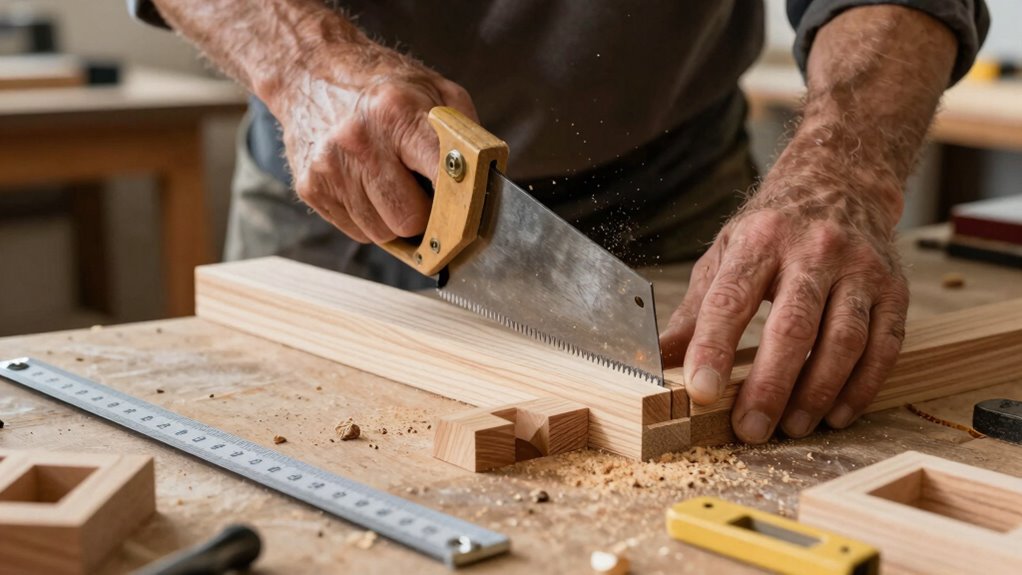
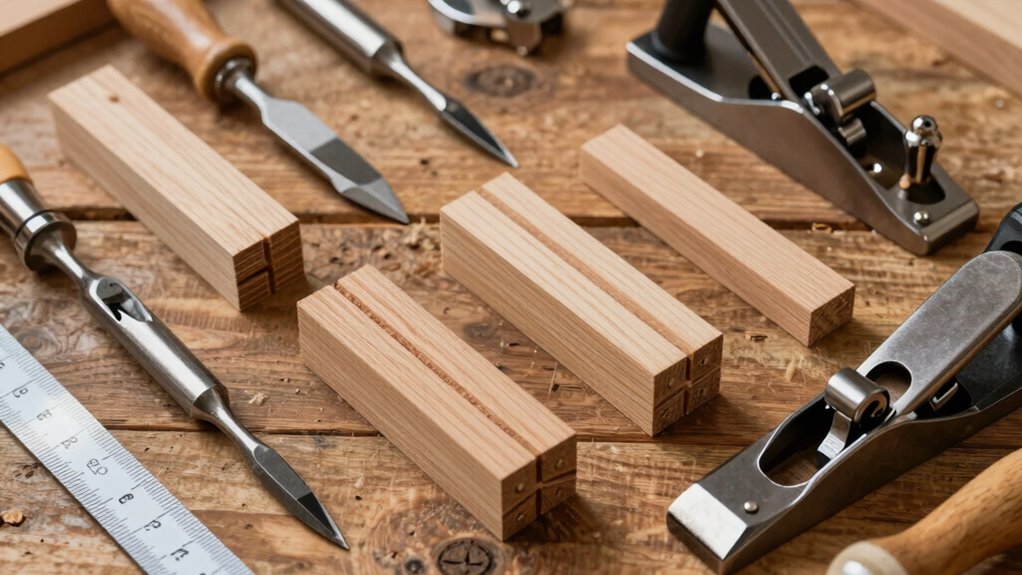
- Sharp chisels – Keep them razor-edged for clean shoulder cuts and precise mortises. Dull tools tear wood fibers and create weak joints.
- Quality saws – Whether you prefer hand saws or power tools, make sure they cut straight and accurate. Your joints depend on clean, precise cuts.
- Solid workbench – You need a stable surface that won’t move during joinery work. Clamps, vises, and stops must hold firm while you shape each joint.
These tools become extensions of your hands, helping you create joints that’ll last generations.
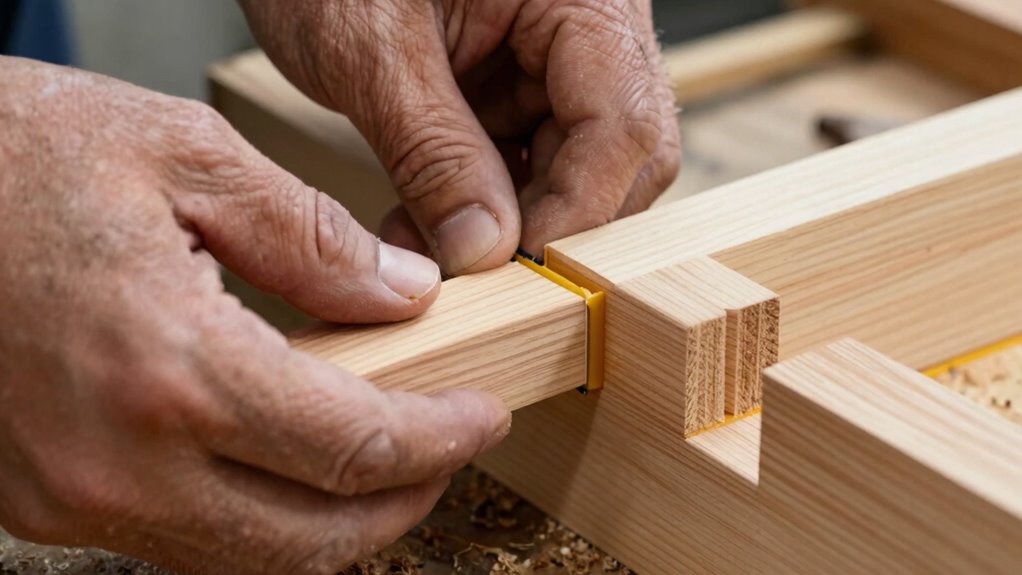
Measure Twice : Mark for Perfect Fits
You’ll need to master precise measurement techniques before cutting any wood, because even a quarter-inch error can compromise your joint strength.
Accurate marking methods matter just as much as your measuring skills, so use a sharp pencil and mark clearly on the waste side of your cut lines.
These fundamentals prevent costly mistakes and guarantee your joints fit together perfectly every time.
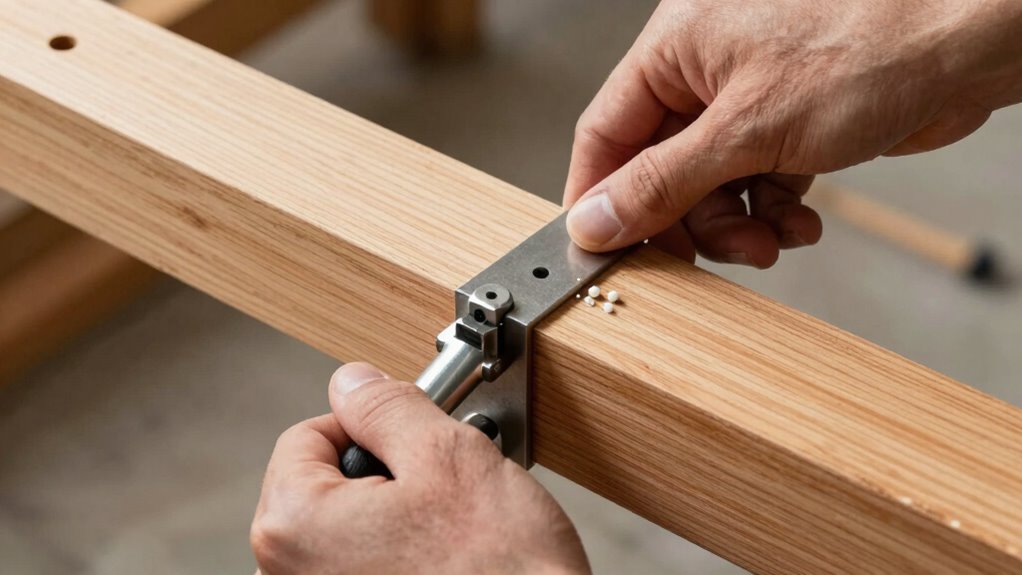
Precise Measurement Techniques
Because accurate measurements form the foundation of strong wood joints, taking time to measure twice and mark carefully prevents costly mistakes and guarantees perfect fits. You’ll discover that precision starts with your approach to measurement.
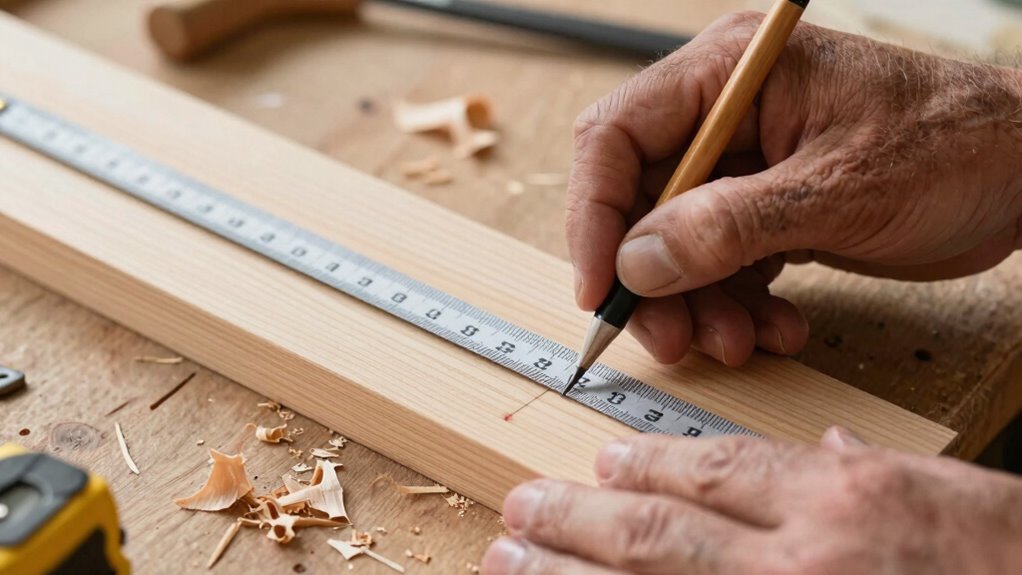
- Use a quality tape measure – Invest in a reliable steel tape with clear markings. Extend it fully before taking readings to eliminate sag error. Hook the end firmly against your reference edge, ensuring consistent contact pressure each time you measure identical components.
- Establish consistent measuring points – Always measure from the same reference face and edge throughout your project. Mark your starting point clearly with a sharp pencil, then measure from this exact spot every time to maintain uniform dimensions across all pieces.
- Verify critical measurements twice – Check long spans from both ends toward center. Cross-measure diagonals on rectangular assemblies. When cuts must fit precisely, measure the space directly rather than calculating from separate component dimensions.
Accurate Marking Methods
One essential habit separates skilled woodworkers from beginners: transferring measurements to wood with absolute precision. You must mark accurately or your joints won’t fit properly.
Use a sharp pencil or marking knife for clean, narrow lines. Position your measuring tape squarely against the wood surface. Don’t trust your eyes alone; always double-check measurements before marking.
Make tick marks perpendicular to your cutting line, not diagonal smudges. For repeated marks, use a combination square or marking gauge to guarantee consistency. Mark your waste side clearly so you know exactly where to cut.
Remember: measure twice, mark once, cut once. These fundamentals become second nature with practice, but precision marking never gets old. Your joints will thank you for taking time with these simple steps.
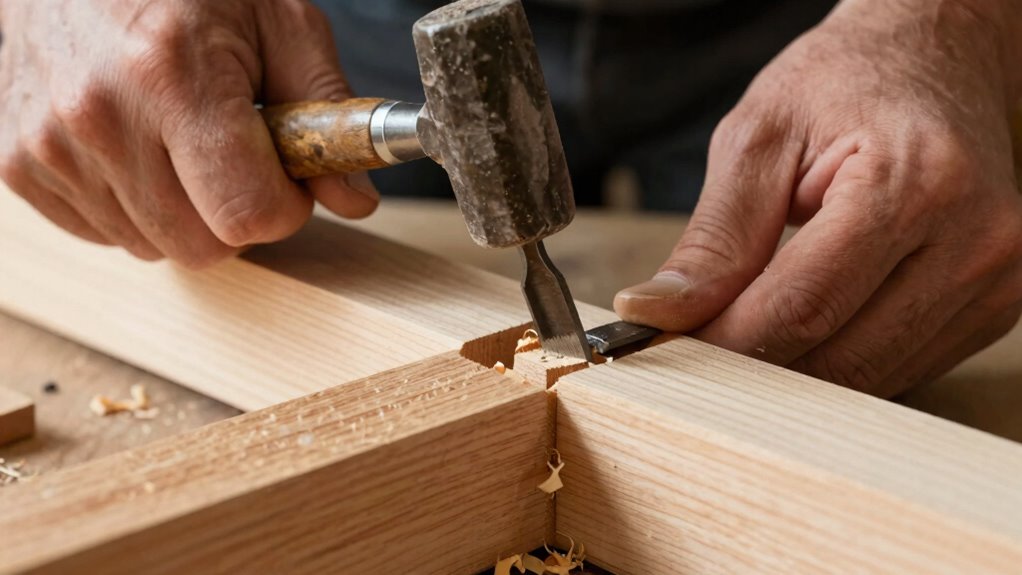
Cut Mortise and Tenon Like a Pro
You’ll need to master precise mortise cutting techniques using sharp chisels and accurate marking gauges to create clean, square corners.
Your tenon fit methods must involve careful test fitting and incremental trimming until you achieve that perfect friction fit.
These joints require patience and attention to detail, but they’ll create the strongest woodworking connections you can make.
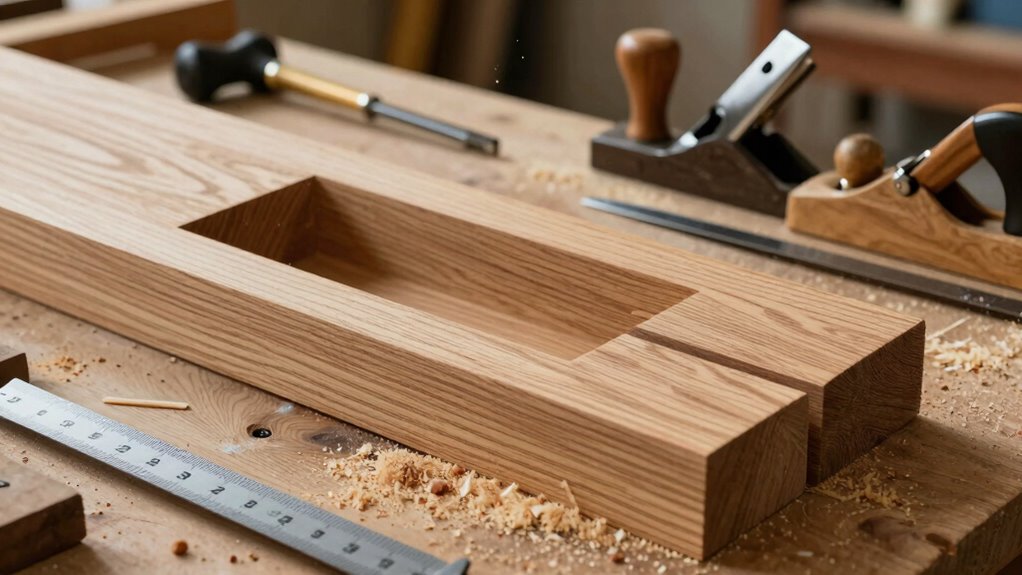
Precise Mortise Cutting Techniques
Mortise chisels demand sharp edges and steady hands for clean, precise cuts. You’ll achieve professional results when you master these essential techniques that separate amateur woodworkers from seasoned craftsmen.
- Mark your mortise lines accurately using a marking gauge and knife wall. Cut slightly inside your marked lines initially, then pare precisely to the final dimensions for perfect fit.
- Remove waste material strategically by drilling overlapping holes with a brad-point bit slightly smaller than your mortise width. This prevents tear-out and speeds up the chiseling process considerably.
- Work systematically from the center outward with your chisel, maintaining consistent depth throughout. Keep your chisel perfectly vertical and use controlled, firm blows rather than wild swings.
These methods guarantee your joints fit snugly and last decades.
Perfect Tenon Fit Methods
While precise mortise cutting forms the foundation of strong joints, achieving a perfect tenon fit requires equally careful attention to detail and technique.
You’ll want to cut your tenon cheeks first, using a tenon saw with smooth, controlled strokes. Mark your shoulder lines accurately and cut to depth gradually.
Test-fit frequently by inserting the tenon into the mortise – it should require gentle tapping but not force. If it’s too tight, pare down with a chisel or fine-tune with sandpaper. Too loose means starting over or adding a wedge.
Remember that wood movement affects fit, so account for seasonal changes. Sharp tools make cleaner cuts and prevent tear-out.
You’re not just cutting wood; you’re creating a precise mechanical connection that’ll last decades.
Build Dovetails That Hold Forever

When you cut dovetails properly, they’ll resist pulling apart under stress for decades. These joints become stronger with age when executed correctly.
- Mark your angles precisely using a quality dovetail gauge or template. Twenty-eight to thirty degrees works well for most hardwoods. Measure twice, cut once—this isn’t just saying.
- Cut pins first, then tails. This approach guarantees proper fit since you can adjust tail angles based on your actual pin cuts. Don’t rush this sequence.
- Test fit constantly during cutting. You should feel slight resistance when assembling dry. Too tight means more paring; too loose requires starting over. Your joints must squeeze together firmly.
Master these steps and your dovetails will outlast you.
Join With Finger or Box Techniques
Finger joints and box joints offer woodworkers reliable methods for creating strong, interlocking connections that don’t require complex angled cuts.
You’ll cut alternating fingers and sockets that fit together perfectly. Start by marking equal-width fingers on both pieces, typically 1/4 to 1/2 inch wide. Cut fingers on one piece, then cut matching sockets on the mating piece. Use a fine-tooth blade and make precise cuts at your marks.
Test fit frequently and trim as needed. These joints work exceptionally well for drawer construction, small boxes, and corner joints where strength matters.
Master this technique and you’ll join the ranks of woodworkers who create durable, professional-looking projects everyone admires.
Glue It Right : Clamp for Maximum Hold
Because proper glue application and clamping make or break your joint strength, you need to master these fundamental techniques before moving to complex projects. Your joints will only be as strong as your glue line, so don’t rush this critical step.
- Apply glue generously – Spread adhesive on both surfaces, guaranteeing complete coverage. You should see slight squeeze-out when clamped, indicating proper distribution.
- Use correct clamp pressure – Too much pressure starves joints of glue; too little creates gaps. Apply firm, even pressure until glue sets. Check joints periodically during curing.
- Maintain alignment – Keep pieces perfectly aligned while clamping. Use cauls or alignment tools if needed. Misaligned joints create weak spots and poor appearance.
These techniques guarantee maximum holding power and professional results every time.
Test-Fit and Trim For Tight Joints
Even with perfect glue application and clamping, your joints won’t be strong if the pieces don’t fit together properly from the start. You need to test-fit every joint before gluing. Dry-fit your pieces and check for gaps or misalignment.
Mark any high spots that prevent tight mating. Use a block plane or sandpaper to trim problem areas gradually. Don’t rush this step – patience pays off.
Check corner joints with a square to guarantee they’re truly perpendicular. If pieces bind during fitting, identify where friction occurs and remove material accordingly.
Remember that wood moves, so allow slight clearance where needed. Tight joints should require gentle tapping to assemble, not brute force.
This careful preparation separates amateur work from professional results that last decades.
Seal and Strengthen Vulnerable Joints
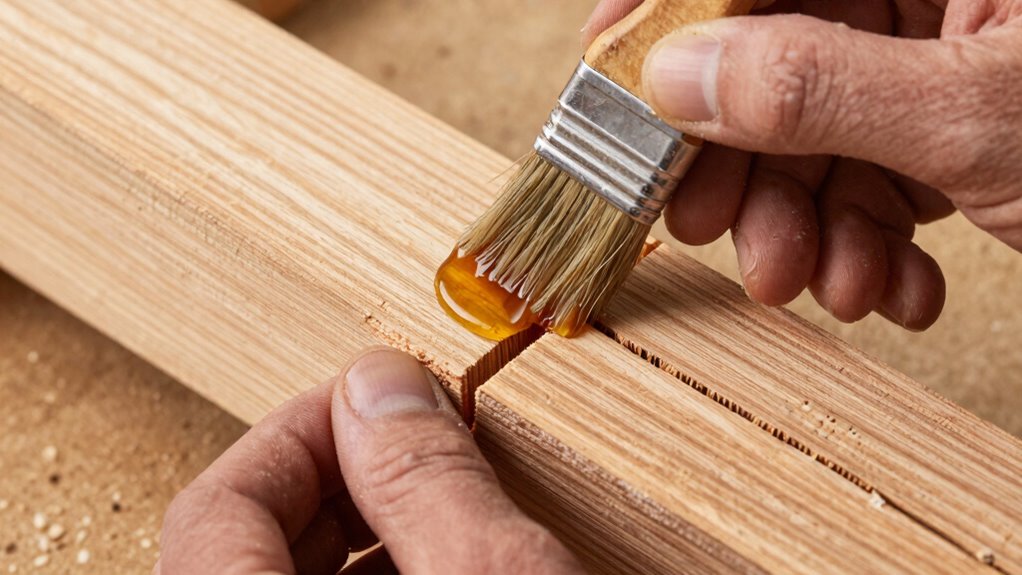
You should seal any hairline cracks immediately with wood filler or epoxy before they compromise your joint strength.
Apply wood glue generously to all mating surfaces, ensuring complete coverage where the wood meets.
Use clamps to pull joints tight and maintain pressure while the glue cures completely.
Seal Cracks Immediately
Small gaps and hairline cracks in wood joints can quickly become larger problems if left unaddressed. You need to act fast before moisture penetrates deeper into the wood structure.
- Clean debris from cracks using a stiff brush or compressed air to guarantee proper sealant adhesion.
- Apply wood filler or epoxy resin into裂缝 immediately, working it deep into缝隙 with a putty knife.
- Allow sealant to cure completely before sanding smooth and applying protective finish.
Don’t wait until tomorrow – seal those vulnerable joints today. Your wood projects deserve protection from moisture damage.
Take pride in your craftsmanship by addressing cracks before they compromise joint integrity. Prevention saves time and maintains your work’s longevity.
Apply Wood Glue Generously
Apply wood glue generously to create strong, moisture-resistant joints that won’t fail under stress.
You’ll want to spread glue across entire joint surfaces, not just dabbing small amounts. Thick, even coverage fills microscopic gaps that weaken connections.
Don’t worry about using too much – excess glue simply squeezes out during assembly. Focus on vulnerable areas like end grain, which absorbs glue rapidly and creates weak points without adequate saturation.
Wipe away squeezed-out glue immediately with a damp cloth before it hardens. Pay special attention to butt joints, miter joints, and any connection where wood fibers don’t interlock naturally.
Generous glue application guarantees maximum surface contact between mating pieces. This approach eliminates air pockets that compromise joint integrity.
Your joints will resist moisture infiltration and maintain strength throughout seasonal wood movement.
Remember: skimpy glue equals weak joints.
Use Clamps For Tight Joints
Wood glue alone won’t create maximum joint strength – even generous application needs mechanical pressure to work effectively.
You’ll achieve stronger bonds when you combine adhesive with proper clamping techniques.
- Choose the right clamp type – Use bar clamps for long joints, C-clamps for tight corners, and spring clamps for small assemblies. Match clamp pressure to your wood’s density.
- Apply consistent pressure – Tighten clamps until glue squeezes out evenly. Don’t overtighten, which can starve joints of adhesive. Check that surfaces remain flush throughout curing.
- Allow adequate drying time – Keep clamps secured for recommended periods. Rushing removal compromises joint integrity.
You’ll feel confident knowing your joints can handle real-world stress.
Clamps transform weak glue joints into durable connections that’ll last years.
Keep Your Work Solid For Years

When you properly execute wood joints, your projects will maintain structural integrity for decades.
You should select appropriate joint types for your specific application, whether that’s mortise and tenon for heavy furniture or dovetails for drawers.
Apply quality wood glue evenly, ensuring complete surface contact between mating pieces. Clamp joints firmly until glue cures completely, typically 24 hours.
Sand joints smooth before assembly to eliminate gaps. Choose hardwood species that resist movement and decay.
Finish your work with protective coatings that seal against moisture. Regular maintenance prevents small issues from becoming major repairs.
You’ll join a community of craftspeople who take pride in work that lasts generations when you master these fundamental techniques.
Conclusion
You’ve got all the pieces now – sharp tools, precise measurements, and solid techniques. But here’s what separates amateur joints from masterwork: grain direction. Cutting with the grain creates stronger bonds than you’d expect, while cross-grain joints fail under half the stress. Test this yourself next time you’re gluing up a project. Your joints will thank you for thinking beyond the blueprint and working with wood’s natural strength patterns.
