

You can replace a light fixture safely if you follow proper procedures. First, turn off power at the circuit breaker and verify it’s off with a non-contact voltage tester. Gather insulated tools and safety equipment before touching any wires. Remove the old fixture carefully, noting wire connections. Match hot, neutral, and ground wires precisely when connecting the new fixture. Secure mounting properly before restoring power. What critical mistake could instantly energize your fixture during installation?
Is Replacing a Light Fixture Safe for DIYers?
Why should you consider professional help when replacing a light fixture?
Electrical work demands precise knowledge of wiring connections, circuit loads, and safety protocols that many DIY enthusiasts lack. You risk electrocution, fire hazards, or property damage without proper training.
Professionals understand wire nuts, grounding requirements, and local electrical codes thoroughly. They possess experience identifying hidden issues like outdated wiring or inadequate electrical boxes.
While basic fixture replacement might seem straightforward, complications arise quickly when unexpected wiring configurations appear.
Professional electricians carry insurance protecting you from liability. They guarantee work meets inspection standards, preventing future problems.
Your family’s safety outweighs saving money on a job requiring specialized skills. Consider your comfort level honestly before deciding.
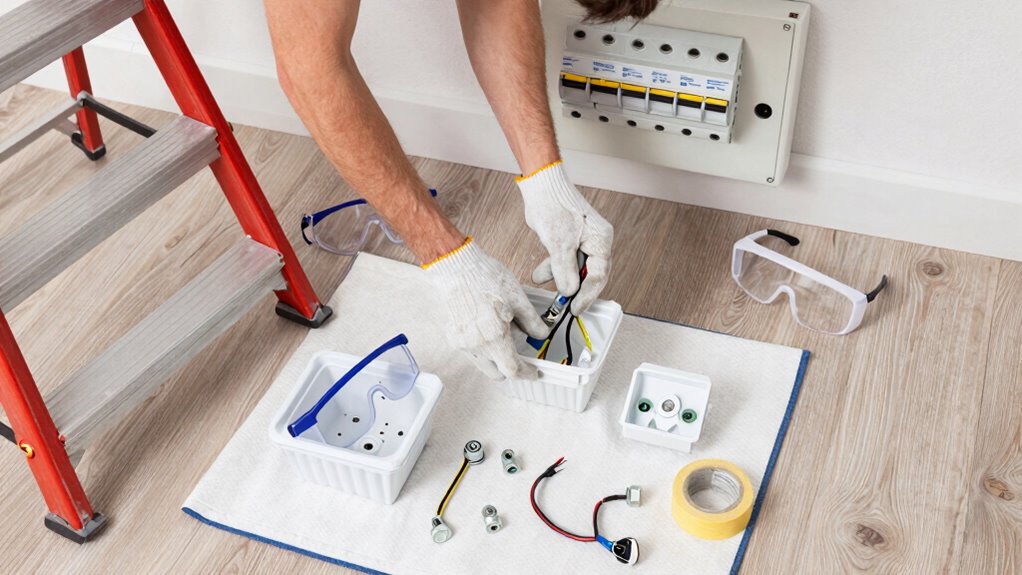
Gather Your Tools and Safety Equipment

You must gather essential tools including a screwdriver set, wire strippers, voltage tester, and adjustable wrench before beginning any fixture replacement.
Your safety gear requirements include insulated gloves, safety glasses, and non-conductive footwear to protect against electrical hazards.
Always verify your tools are rated for electrical work and inspect them for damage before use.
Essential Tools for Fixture Replacement
Replacing a light fixture requires specific tools and safety equipment to guarantee the job is completed safely and correctly.
You’ll need a non-contact voltage tester to verify power is off before touching any wires. A screwdriver set with both flathead and Phillips heads handles various mounting screws. Wire strippers prepare electrical connections properly. Needle-nose pliers help maneuver wires into position. A sturdy ladder or step stool provides safe access to ceiling fixtures.
Have electrical tape ready for securing connections. Wire nuts properly sized for your wire gauge are essential for connecting wires. A drill with appropriate bits may be necessary for mounting brackets. Keep a flashlight handy for inspecting dark electrical boxes.
Socket wrenches might be needed for certain fixture types. Always guarantee your tools are in good working condition before starting any electrical work.
Safety Gear Requirements
Before you begin any light fixture replacement project, ensuring you have the proper safety gear is just as important as having the right tools.
You’ll need insulated screwdrivers with rubber handles to prevent electrical shocks. Always wear rubber-soled shoes and use a non-conductive ladder made of fiberglass or wood. Safety glasses protect your eyes from debris and accidental drops. Insulated gloves rated for electrical work provide essential hand protection. A voltage tester lets you verify power is off before touching wires.
Keep a fire extinguisher nearby rated for electrical fires. Don’t forget work gloves for handling sharp metal edges. Your safety depends on proper equipment selection. Never compromise on quality when choosing safety gear. Each piece serves a specific protective function.
Investing in reliable safety equipment shows you belong among serious DIYers who prioritize safety first.
Turn Off Power at the Circuit Breaker

Although turning off power at the circuit breaker might seem straightforward, this critical safety step prevents electrical shock and potential injury during light fixture replacement.
You must locate the correct circuit breaker controlling your light fixture’s electrical supply. Flip the breaker switch to the “off” position completely. Don’t rely on partially switched breakers or assume someone else turned off power. Verify the breaker feels firmly in the off position.
If your breaker panel lacks clear labeling, identify the correct circuit by systematically turning off individual breakers until the fixture loses power. Always double-check that power is disconnected before proceeding. Never trust that previous homeowners correctly labeled circuits.
Take time to trace circuits properly. This prevents dangerous assumptions. Your safety depends on proper power disconnection. Never skip this essential step.
Test Voltage to Confirm Power Is Off
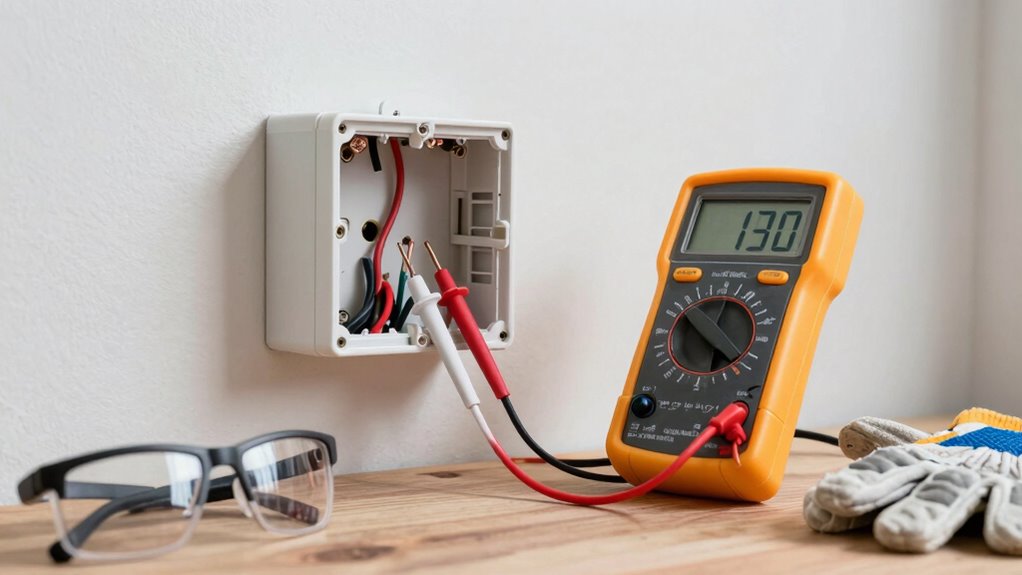
Testing voltage with a non-contact voltage tester confirms power is completely off before you touch any wires. You must verify electrical current isn’t flowing through the fixture’s wiring.
First, ascertain your voltage tester works properly by testing it on a known live circuit. Then, remove the light fixture’s mounting screws and carefully pull it away from the electrical box.
Test each wire individually – black (hot), white (neutral), and green or bare copper (ground). Hold the tester near each wire without touching bare metal. If the tester indicates voltage presence, don’t proceed until you’ve double-checked your circuit breaker identification and turned off the correct breaker.
Only continue working once all wires show no electrical current, guaranteeing your safety throughout the replacement process.
Safely Remove the Old Light Fixture
You’ll now remove the old light fixture by first turning off the power supply at the circuit breaker and verifying it’s off with a non-contact voltage tester.
Next, you’ll carefully remove the mounting hardware that secures the fixture to the electrical box, typically by unscrewing the mounting screws or nuts.
Always support the fixture with one hand while removing the final mounting point to prevent it from falling.
Turn Off Power Supply
Before touching any electrical components, turn off the power supply at the circuit breaker to prevent electrocution.
Locate the correct breaker controlling your light fixture’s circuit. Flip the switch to the “OFF” position completely. Don’t rely on dimmer switches or wall switches alone.
Use a non-contact voltage tester to verify power is disconnected at the fixture location. Test the tester on a known live circuit first to ascertain it functions properly.
Hold the tester near the fixture’s wiring; it shouldn’t detect voltage. If it does, double-check you’ve turned off the correct breaker. Always confirm power remains off throughout the replacement process.
Never assume circuits are de-energized without testing. Your safety depends on taking these precautions seriously. Keep the breaker off until you’ve completed all electrical connections.
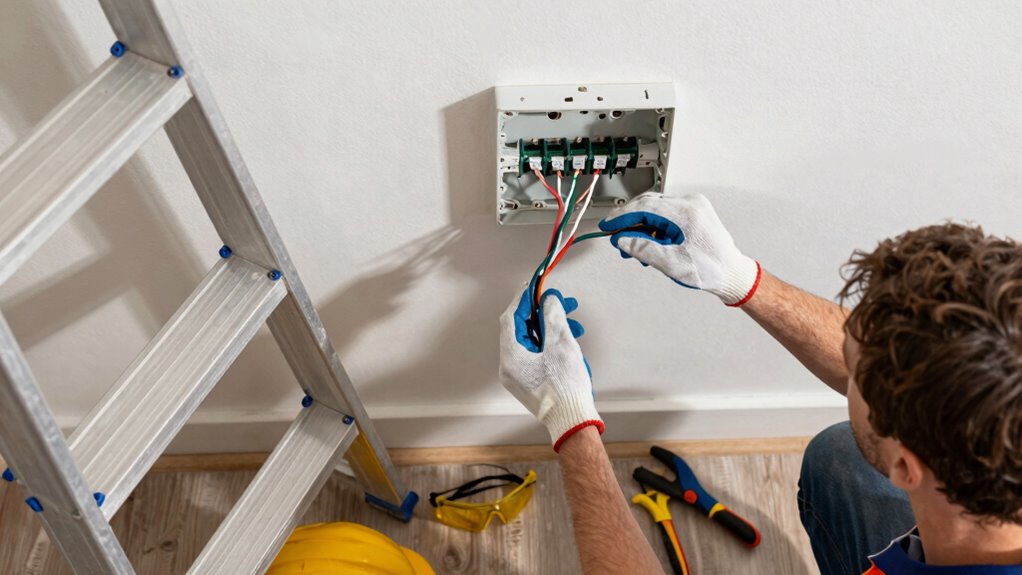
Remove Mounting Hardware
With the power confirmed off, you can now safely remove the old light fixture’s mounting hardware.
Start by removing the fixture cover or shade, then disconnect any electrical connections inside the junction box. Unscrew the mounting screws or bolts that secure the fixture to the electrical box. Support the fixture weight with one hand while removing the final mounting hardware.
Carefully lower the old fixture away from the ceiling or wall. If you encounter unexpected wiring configurations, stop immediately and consult a professional electrician.
Place the old fixture aside where it won’t create tripping hazards. Keep all removed screws and hardware organized for potential future use. Document any unusual wiring arrangements with photos before proceeding to the next installation step.
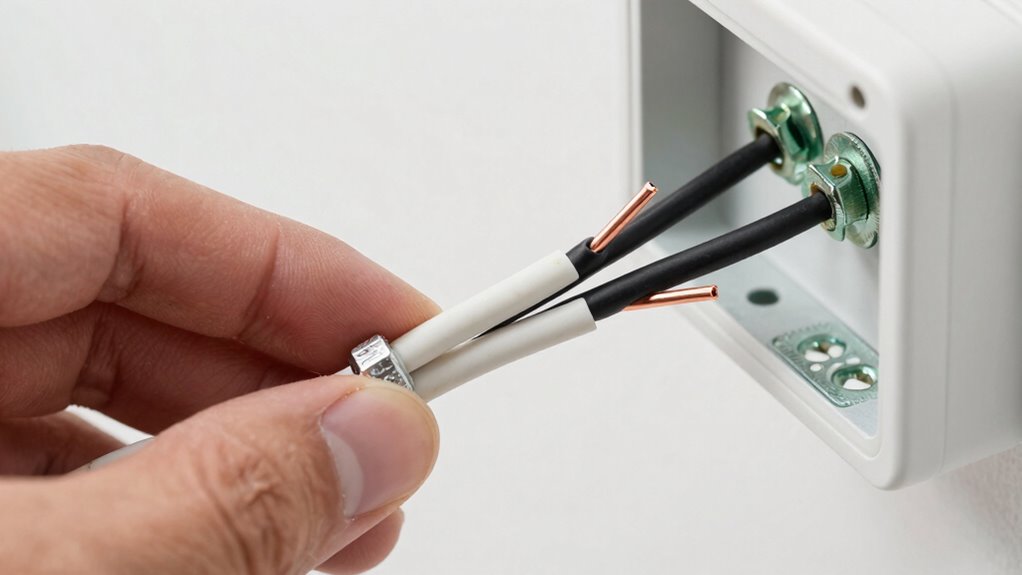
Identify Hot, Neutral, and Ground Wires
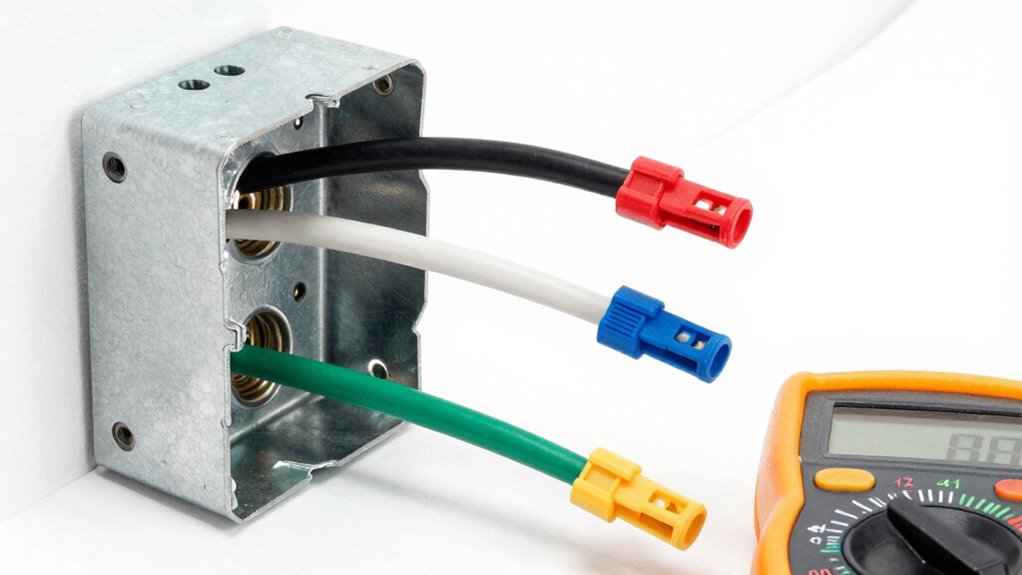
Three wires typically emerge from electrical boxes: hot, neutral, and ground. You’ll need to identify each correctly before proceeding. The hot wire carries electrical current from the source and is usually black or red. The neutral wire completes the circuit and returns current to the source, typically white. The ground wire provides safety protection and is usually green, bare copper, or yellow-green striped.
Use a non-contact voltage tester to confirm which wire is hot. Turn the circuit breaker off first, then test each wire individually. The hot wire will trigger your tester when the circuit is energized.
Mark identified wires clearly to avoid confusion during installation. Proper identification prevents electrical shock and guarantees correct fixture operation.
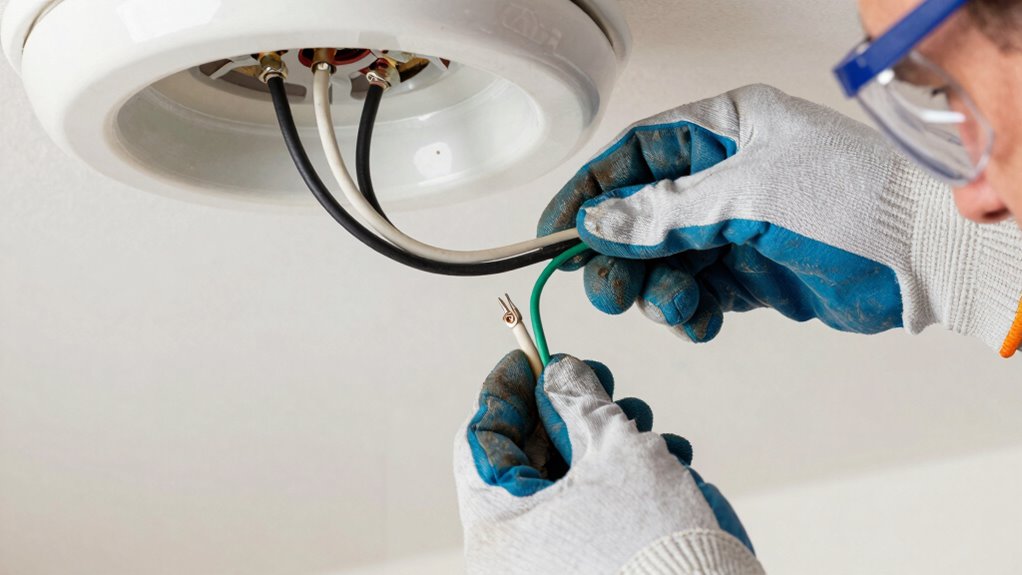
Connect the New Fixture’s Wiring
Once you’ve identified and marked the hot, neutral, and ground wires in your electrical box, you’ll connect the new fixture’s wiring by matching corresponding wire types.
Connect the black hot wire from the fixture to the black hot wire in the box using a wire nut. Join the white neutral wires together, then secure with a wire nut. Connect the green or bare ground wire from the fixture to the ground wire in the box.
Twist each connection clockwise, guaranteeing no bare copper shows. Pull gently on each wire to verify connections are secure. Tuck the wires carefully into the electrical box, avoiding pinching.
Proper wire connections prevent electrical hazards and guarantee your fixture operates safely. Double-check all connections before proceeding.
Secure the Fixture to the Ceiling
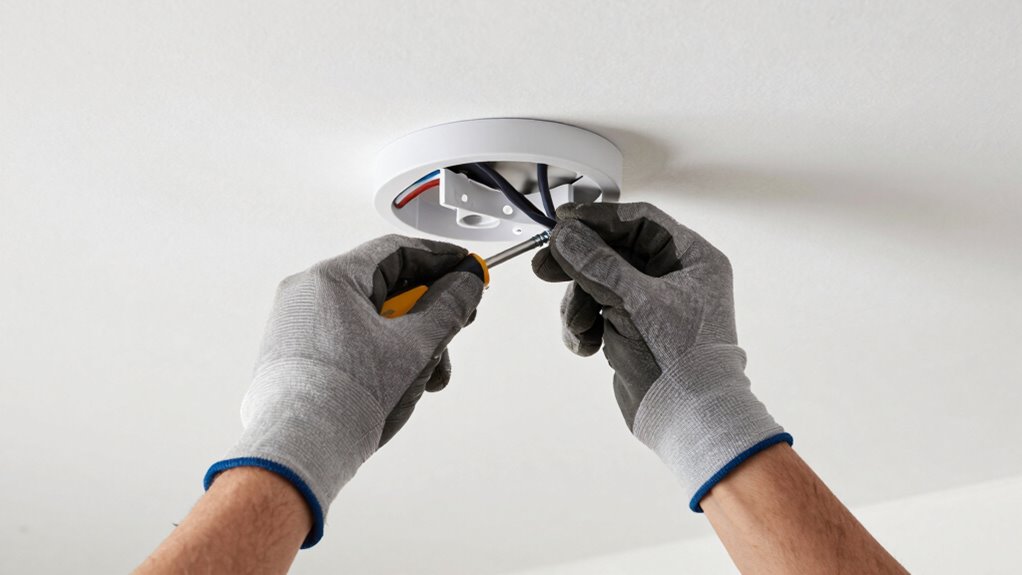
After confirming all wire connections are properly secured and tested, you’ll mount the fixture base to the electrical box.
Align the mounting bracket with the box’s screw holes, then drive the provided screws through the bracket into the box. Don’t overtighten; you’ll strip the threads.
Connect any ground wires between the fixture and the box’s grounding point.
Thread the fixture’s mounting stud through the canopy’s center hole. Place the canopy against the ceiling, ensuring it sits flush.
Tighten the mounting nut onto the stud until snug. Verify the fixture feels secure and doesn’t wobble.
Double-check that all connections remain tight after handling.
You’re almost finished installing your new light fixture safely.
Restore Power and Test the Fixture
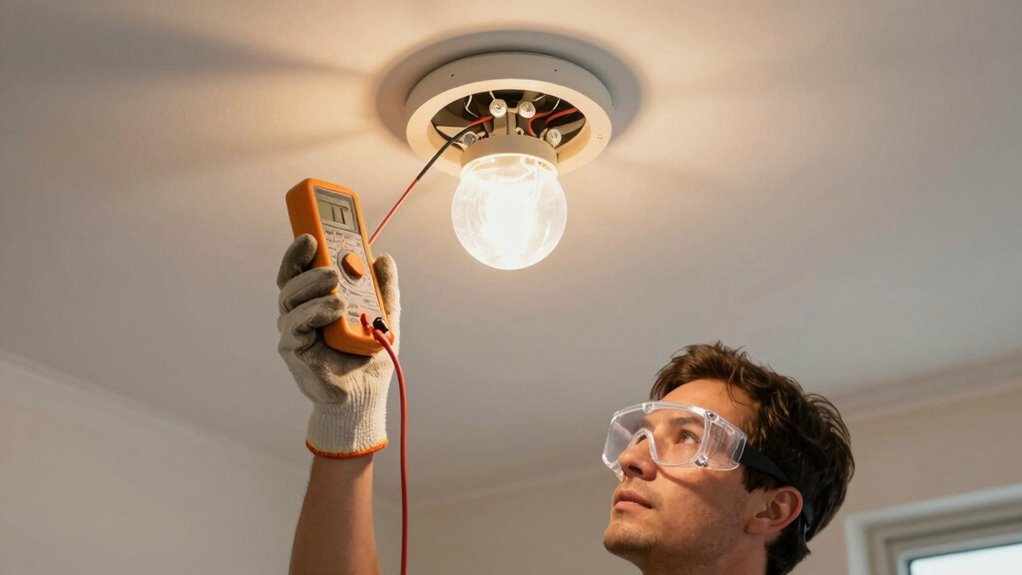
Before you flip the circuit breaker, verify your hands are dry and you’re standing on a non-conductive surface.
Locate the correct breaker and switch it on firmly. Return to your fixture and install a compatible light bulb.
Flip the wall switch to test operation. The fixture should illuminate immediately if wiring connections are secure.
If it doesn’t work, turn power off again and double-check all wire nuts are tight.
Listen for any buzzing or crackling sounds during testing. Feel the fixture housing after thirty seconds – it shouldn’t be excessively hot.
Test dimmer functionality if applicable. Ascertain mounting hardware remains secure during operation.
Verify light output is consistent without flickering. Confirm switch control works properly.
You’ve successfully restored power and confirmed proper fixture operation.
Avoid These Common Wiring Mistakes
You must always turn off the power source at the circuit breaker before beginning any electrical work.
Check all wire connections carefully to verify they’re secure and properly matched – black to black, white to white, and green or bare copper to ground.
Use proper tools like wire strippers and screwdrivers designed for electrical work to avoid damaging wires or creating unsafe connections.
Turn Off Power Source
One critical step that electricians can’t afford to skip is turning off the power source at the circuit breaker before touching any wiring.
You must locate the correct breaker controlling your light fixture’s circuit and switch it to the off position. Don’t trust outlets or switches to indicate power status—always verify deactivation at the breaker panel.
Test the fixture’s wiring with a non-contact voltage tester after shutting off power. If the tester indicates live current, you’ve selected the wrong breaker or the wiring remains energized.
Double-check your work every time. Never assume power is off based on previous experience. Circuit breakers can malfunction or be mislabeled.
Your safety depends on confirming power shutdown before handling any electrical components.
Check Wire Connections
While checking wire connections might seem straightforward, inexperienced homeowners often make critical errors that can lead to electrical hazards or code violations. You must examine each connection carefully before proceeding.
- Identify wire types correctly – Match black (hot) wires together, white (neutral) wires together, and green or bare (ground) wires together. Don’t assume wire colors match standard conventions.
- Check for damaged wires – Look for fraying, cuts, or burn marks. Replace any compromised wiring immediately rather than risking electrical fire or shock.
- Verify secure connections – Confirm all wire nuts are tight and wires are fully inserted. Loose connections cause arcing and overheating.
- Test wire integrity – Gently tug connections to confirm they won’t pull apart during fixture installation.
Use Proper Tools
Although proper tool selection seems like a basic requirement, electricians frequently encounter situations where incorrect tools create dangerous conditions or compromise installation quality.
You must use insulated screwdrivers, wire strippers, and pliers rated for electrical work. Avoid using generic tools that lack proper insulation ratings. Your wire nuts should match wire gauge specifications precisely. Don’t reuse damaged or improperly sized connectors.
Always choose screw terminals rated for your wire gauge and voltage requirements. Test your tools before each use, checking for worn insulation or loose components. Keep your toolset organized and readily accessible.
Using incorrect gauge wires or underrated connectors creates fire hazards and electrical failures. Professional electricians rely on proper tools because they understand that tool quality directly impacts safety and installation longevity.
Your reputation depends on getting these details right.
Conclusion
You’ve successfully replaced your light fixture safely. Remember: 25% of home electrical fires stem from improper wiring connections. Don’t become a statistic. Always verify power is off, match wires correctly, and secure all connections tightly. If you’re unsure about any step, call a licensed electrician immediately. Your safety matters more than saving a few dollars.
