

You can create attractive garden pathways without overspending by choosing materials that match your budget and style. Start by planning your path’s layout carefully to avoid costly mistakes. Prepare the ground properly and select affordable options like gravel, reclaimed pavers, or mulch. Each material requires specific installation techniques to guarantee stability and longevity. What groundwork steps should you prioritize before laying your first pathway?
Match Your Pathway Material to Your Budget and Garden Style
When selecting pathway materials, you’ll want to contemplate both your financial constraints and the existing aesthetic of your garden space.
Gravel offers an affordable option that works well in rustic or naturalistic settings, while concrete pavers provide durability at moderate cost.
Mulch paths create soft, informal walkways perfect for cottage gardens, though they require regular replenishment.
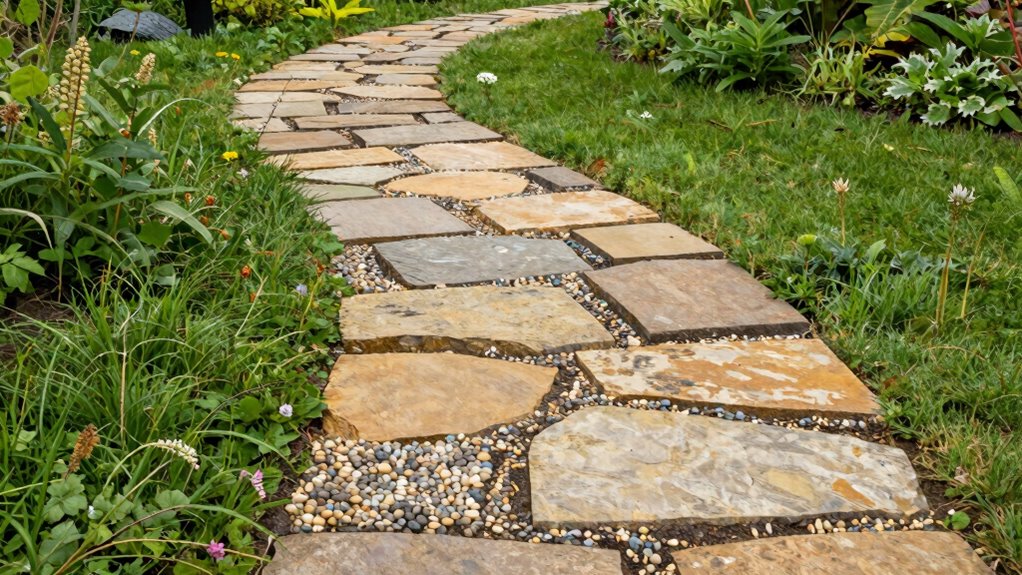
Flagstone delivers elegant results when properly installed, fitting seamlessly into formal landscapes despite higher upfront costs.
Wood chips or bark mulch suit budget-conscious gardeners seeking temporary solutions.
Consider recycled materials like broken tiles or bricks for unique, cost-effective options.
Remember that cheaper materials often require more frequent replacement, potentially increasing long-term costs.
Choose materials that reflect your garden’s character while respecting your wallet.
Your pathway should feel like a natural extension of your outdoor space, creating continuity between different areas.
Don’t overlook local suppliers who might offer better prices than big-box stores.
Map Out Your Garden Path: Layout Tips That Save Time and Money
You should plan your path’s route carefully to avoid costly mistakes and guarantee efficient installation.
Selecting cost-effective materials that match your garden’s style helps you stay within budget while achieving a professional look.
Installing your pathway with simple tools you likely already own saves both time and money on equipment rentals.
Plan Your Path’s Route
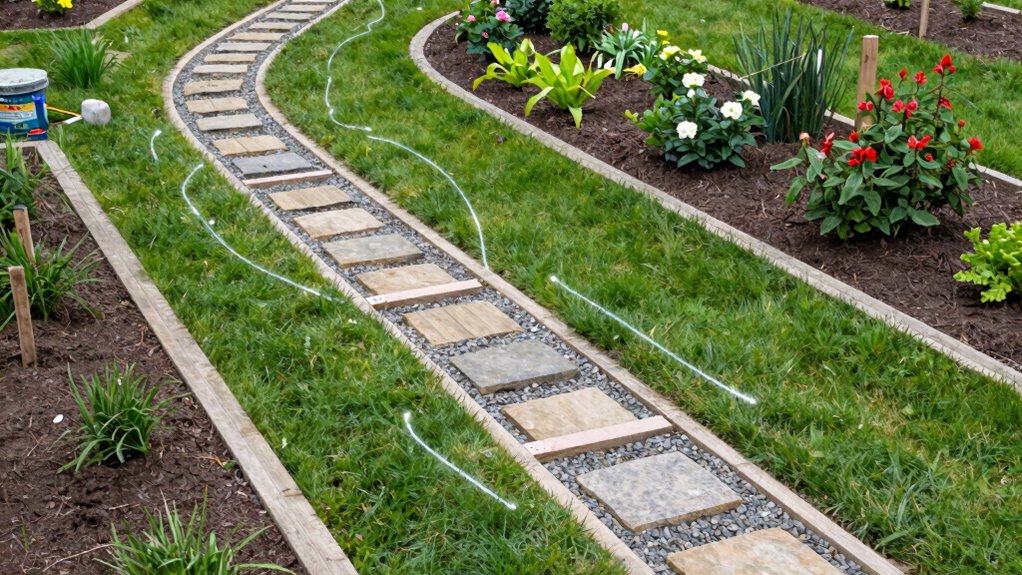
Before you start digging or laying materials, mapping out your garden path’s route saves both time and money by preventing costly mistakes and ensuring efficient material usage.
You should trace your path using stakes and string to visualize the exact route. Consider your garden’s natural flow and existing features like trees, flower beds, and structures. Your path should connect key areas logically while avoiding obstacles.
Walk the proposed route multiple times to test comfort and accessibility. Measure distances carefully to determine material quantities needed. Account for curves and straight sections separately when calculating costs.
Don’t forget to plan for proper drainage by identifying low spots where water might pool. Your pathway should feel natural within your garden’s layout while serving its intended purpose effectively.
Choose Cost-Effective Materials
Selection of affordable materials forms the backbone of budget-friendly garden pathway construction. You should evaluate locally sourced options like gravel, crushed stone, or reclaimed bricks that cost considerably less than premium materials.
Consider recycled concrete pavers or salvaged materials from construction sites, which often come at minimal cost. Mulch and wood chips provide temporary solutions while organic matter breaks down naturally.
Clay bricks offer durability without breaking your budget, especially when purchased in bulk or during sales. You’ll find that permeable materials like decomposed granite or pea gravel don’t require expensive foundation work.
Local landscape suppliers frequently offer discounted overstock materials perfect for pathway projects, helping you achieve professional results while maintaining community connections through shared resources.
Install With Simple Tools
Mapping out your garden path requires just a few basic tools that won’t strain your budget. You’ll need a measuring tape, wooden stakes, string, and spray paint or flour for marking.
Start by measuring your planned path width and marking corner points with stakes. Stretch string between stakes to visualize straight lines and adjust until satisfied. Use spray paint or flour to trace along the string, creating your path outline.
Keep measurements consistent and check angles with a carpenter’s square if needed. Don’t rush this step—accurate layout prevents costly mistakes later.
Simple tools deliver professional results when you take time for proper planning. Your finished path will look intentionally designed rather than haphazard, giving you that sense of accomplishment and garden pride you’ve been wanting.
Get the Ground Ready Before You Start Laying Materials
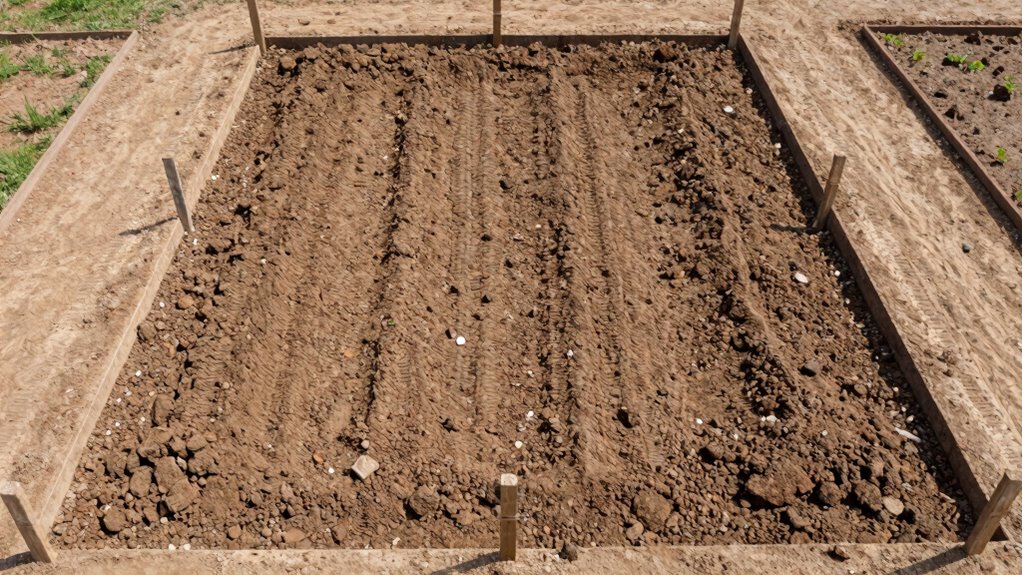
Proper ground preparation is essential for creating durable, stable garden pathways that won’t shift or settle over time. You’ll want to start by clearing all vegetation, roots, and debris from your planned pathway area. Use a garden rake to remove stones and sticks that could interfere with your base materials.
Next, you should level the ground using a hand tamper or the back of your rake. Don’t worry about perfection – you’re creating a firm, even surface that provides consistent support. Remove any high spots and fill low areas with excavated soil.
Finally, lightly compact the entire area by walking over it or using your tamper. This base preparation guarantees your pathway materials lay flat and remain stable through weather changes and regular foot traffic.
Build a Gravel Path in Minutes Without Heavy Tools
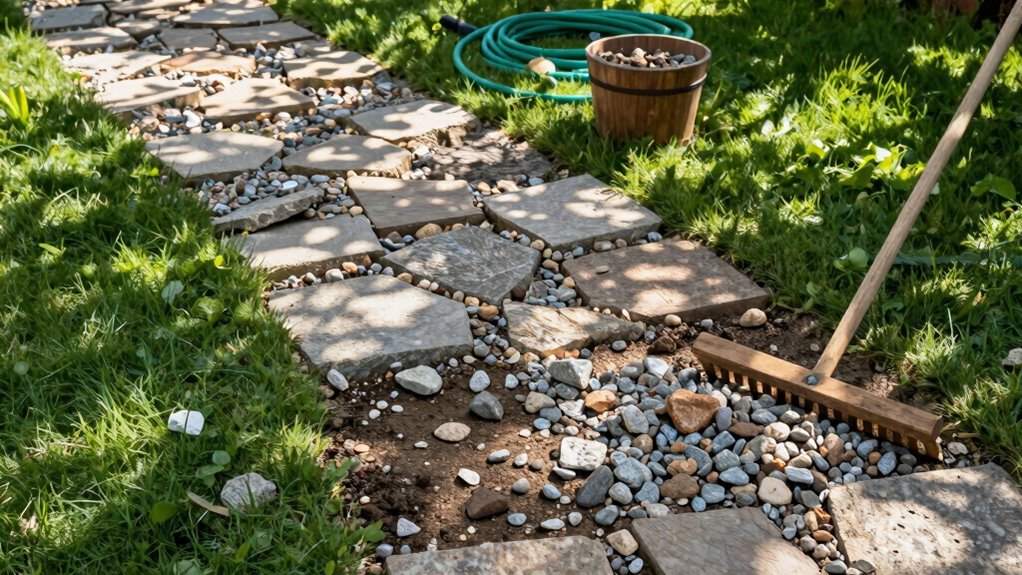
You’ll want to select gravel that’s 3/4 inch or smaller for easier handling and better stability underfoot.
Make certain your base layer is compact and level before spreading the gravel to prevent shifting and guarantee proper drainage.
Install your edging materials first to contain the gravel and maintain clean pathway borders.
Choose Right Gravel Size
Selecting the appropriate gravel size makes or breaks your pathway’s stability and appearance. You’ll want gravel between 3/8 inch and 3/4 inch for ideal results.
Smaller stones create a smoother walking surface but may shift easily underfoot. Larger gravel provides better stability yet can look chunky and uncomfortable to walk on.
Consider angular gravel over rounded stones since angular pieces interlock better, creating a more solid foundation. For main pathways, choose 1/2 inch to 3/4 inch gravel.
Secondary paths work well with 3/8 inch to 1/2 inch sizes. Crusher run or screenings offer excellent compaction properties.
Test different sizes by walking on samples before committing to your final choice. Your pathway’s success depends on this vital selection.
Prepare Base Layer Properly
While many assume that constructing a durable gravel pathway requires expensive equipment and extensive labor, you can actually prepare a solid base layer using simple hand tools and materials available at any hardware store.
Proper base preparation guarantees your pathway remains stable and weed-free for years.
- Clear vegetation and roots from the designated path area completely.
- Dig four inches deep across the entire pathway surface evenly.
- Level ground manually with a garden rake and hand tamper.
- Add two inches of coarse gravel or crushed stone base material.
- Compact the base layer thoroughly using a hand tamper tool.
This foundational work prevents future settling and creates a stable surface that belongs in your garden’s design scheme permanently.
Install Edging Materials
Installing edging materials becomes the next logical step after preparing your base layer, and this phase doesn’t require heavy machinery or specialized tools.
You’ll want to choose materials that complement your garden’s aesthetic while providing functional boundaries. Plastic or metal edging works well for curved paths, while wooden planks or pavers create clean straight lines.
Position your edging material along the pathway’s outer edge, ensuring it sits slightly below ground level. Use a rubber mallet to tap edging into place, creating a snug fit. Secure plastic edging with landscape staples every two feet. For wooden edging, drive stakes through pre-drilled holes.
Check that your edging remains level and consistent throughout installation. This creates definition between your pathway and surrounding garden areas.
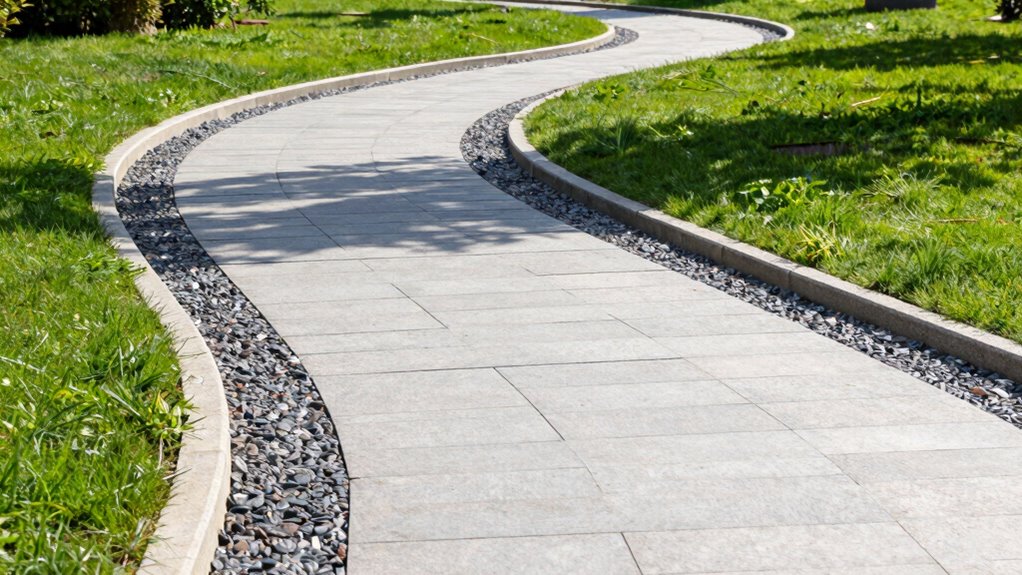
Lay Pavers Like a Pro on a Tight Budget

How can you achieve a professional-looking paver pathway without breaking your budget?
You’ll discover that laying pavers like a pro requires smart planning and the right techniques.
- Choose reclaimed pavers from demolition sites or salvage yards for significant savings.
- Rent equipment instead of buying – plate compactors and screed boards are expensive for one-time use.
- Prepare proper base materials – spend extra time on foundation work to avoid future settling issues.
- Use sharp sand as your leveling medium – it’s cheaper than specialized bedding compounds.
- Lay pavers in simple patterns – running bond or herringbone designs look professional without complex cuts.
You’ll save money by doing the heavy lifting yourself while achieving stunning results that neighbors will admire.
Proper preparation and patience create pathways that last for years.
Turn Old Bricks Into Stylish Garden Paths
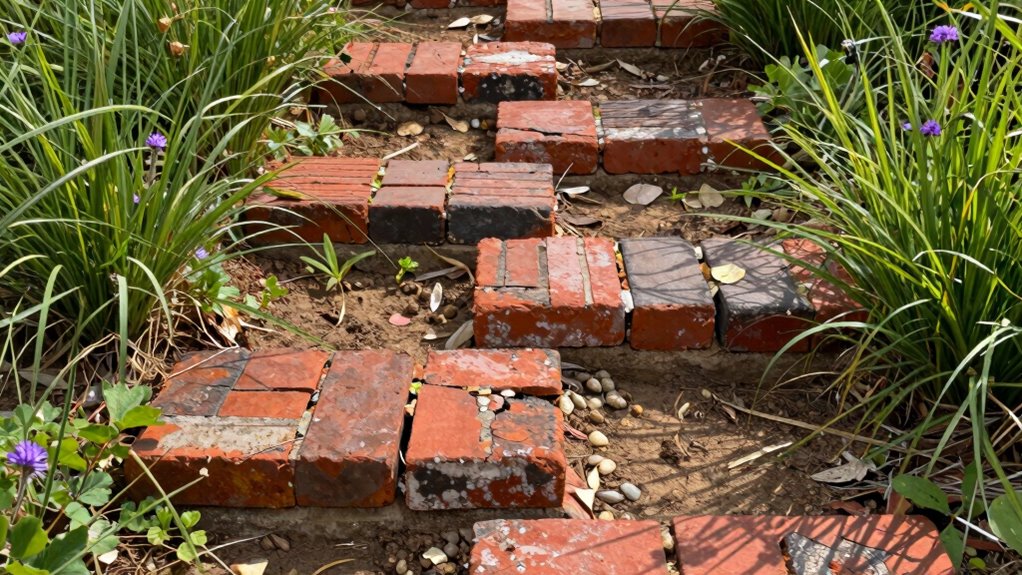
Although old bricks might seem like construction waste, you can transform them into charming garden pathways that add character and warmth to your outdoor space.
Start by cleaning bricks thoroughly and checking for damage. Plan your path layout, considering width and curves. You don’t need perfect alignment – irregular patterns create rustic appeal.
Prepare the base with compacted gravel and sand leveling. Lay bricks directly on sand or use mortar between joints for stability. Stagger joints like brick walls for strength. Fill gaps with sand or soil that settles naturally. Trim surrounding grass neatly.
These pathways handle frost well and age beautifully. Your neighbors will admire your resourceful landscaping that turns discarded materials into stunning outdoor features everyone can enjoy.
Use Mulch or Wood Chips for Rustic, Affordable Walkways
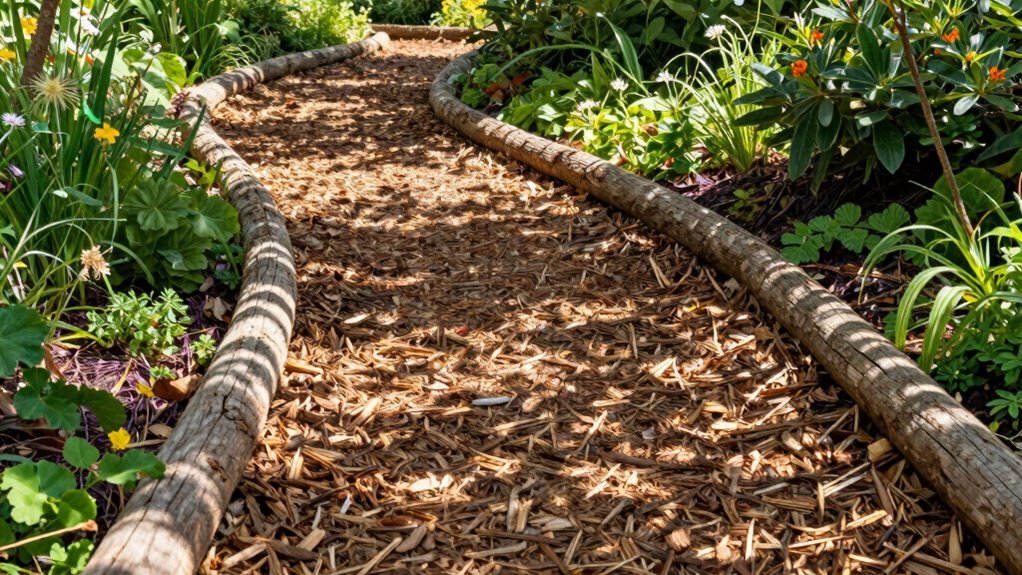
Mulch and wood chips offer one of the most budget-friendly solutions for creating natural-looking garden paths that blend seamlessly with organic landscapes.
You’ll achieve a rustic aesthetic while keeping costs minimal.
- Source materials locally from tree trimming services or municipal composting programs
- Apply 3-4 inches thick to prevent weed growth and provide adequate foot cushioning
- Choose cedar or pine varieties that resist decomposition longer than hardwood chips
- Refresh annually by adding new layers to maintain ideal thickness and appearance
- Select aged mulch over fresh wood chips to avoid nitrogen depletion in surrounding soil
This approach creates walkways that feel integrated into your garden’s natural rhythm.
Your pathways will develop character over time while requiring minimal maintenance investment.
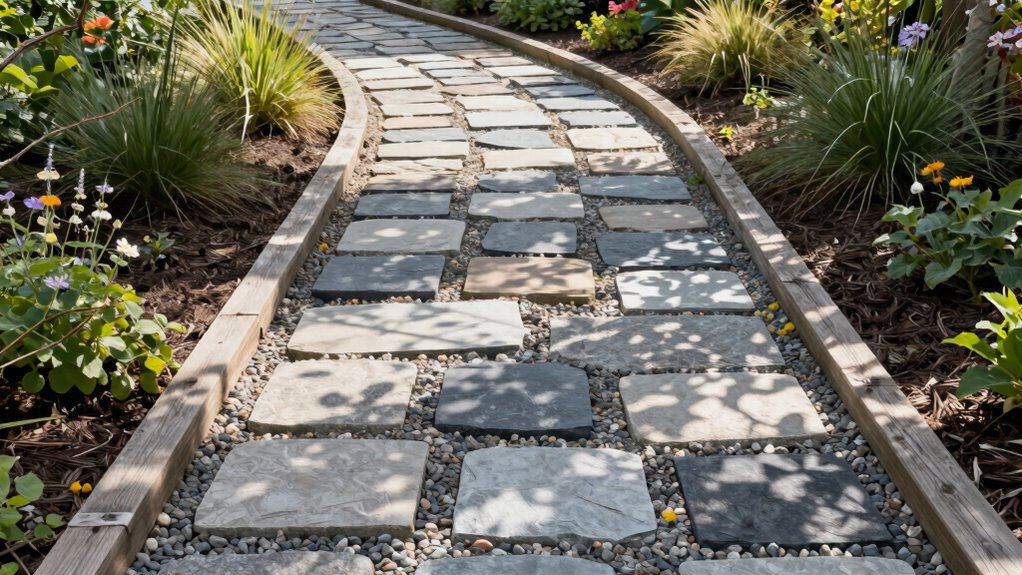
Define and Stabilize With Edging
One effective method for creating clean, lasting garden pathways involves properly defining and stabilizing your walkway edges with appropriate edging materials. You should choose affordable options like plastic, metal, or recycled materials that suit your garden’s style.
Install edging by digging a shallow trench along your pathway’s perimeter, then firmly securing the material at ground level. This prevents mulch or gravel from spreading into surrounding grass or soil areas.
Proper edging also creates visual boundaries that make your pathway look intentional and well-maintained. You’ll find that stabilized edges reduce maintenance time while giving your garden a polished appearance that neighbors will admire.
How to Keep Your Garden Path Looking Great
How often do you find yourself struggling to maintain a pristine garden pathway?
Keeping your walkway looking exceptional doesn’t require expensive treatments or complicated techniques. You can achieve professional results with consistent care and these essential maintenance practices:
- Regularly sweep debris, leaves, and dirt accumulation weekly
- Fill cracks and joints annually with fresh sand or stone dust
- Trim overgrown grass and weeds along pathway edges monthly
- Apply polymeric sand stabilizer every two years for lasting durability
- Clean stains immediately with appropriate solutions before they set
Your pathway deserves attention because it’s often the first thing visitors notice.
When you invest time in proper upkeep, you create curb appeal that makes everyone feel welcome. Don’t let minor neglect transform your beautiful path into an eyesore.
Stay consistent with these simple tasks, and your garden entrance will remain inviting for years.
Conclusion
Your dream garden pathway awaits—but will you choose the quick gravel fix or the timeless brick classic? Don’t let budget constraints limit your vision. With proper planning and these cost-effective techniques, you’ll transform your outdoor space into something extraordinary. The real question isn’t what you can afford, but what you’ll create first.
