

Like a master electrician meticulously planning each circuit, you must first assess your property’s unique characteristics before installing lawn sprinklers. Don’t overlook critical factors like water pressure, drainage patterns, and soil composition that directly impact system performance. Proper installation requires careful attention to head spacing, pipe selection, and trench depth. You’ll need to calculate flow rates, program controllers, and implement seasonal maintenance protocols. What essential step are most homeowners missing that causes system failure within the first year?
Decide If a Sprinkler System Is Right for You
Before you invest in a lawn sprinkler system, evaluate whether the benefits justify the costs and maintenance requirements for your specific landscaping needs.
You’ll need to assess your property’s water pressure, soil composition, and existing drainage patterns to determine system compatibility. Calculate potential water savings against installation expenses and monthly utility increases.
Consider your schedule flexibility for manual watering versus automated convenience. Examine local climate conditions and seasonal rainfall patterns that might affect system efficiency. Review municipal water restrictions that could limit sprinkler usage during peak months.
You should also factor in ongoing maintenance like winterization, pipe inspections, and sprinkler head replacements. Professional installation costs range from $2,000 to $5,000 depending on yard size and complexity.
DIY installation saves money but requires technical knowledge and proper permits. Your decision should align with long-term property goals and budget constraints.
Gather Essential Tools for Sprinkler Installation
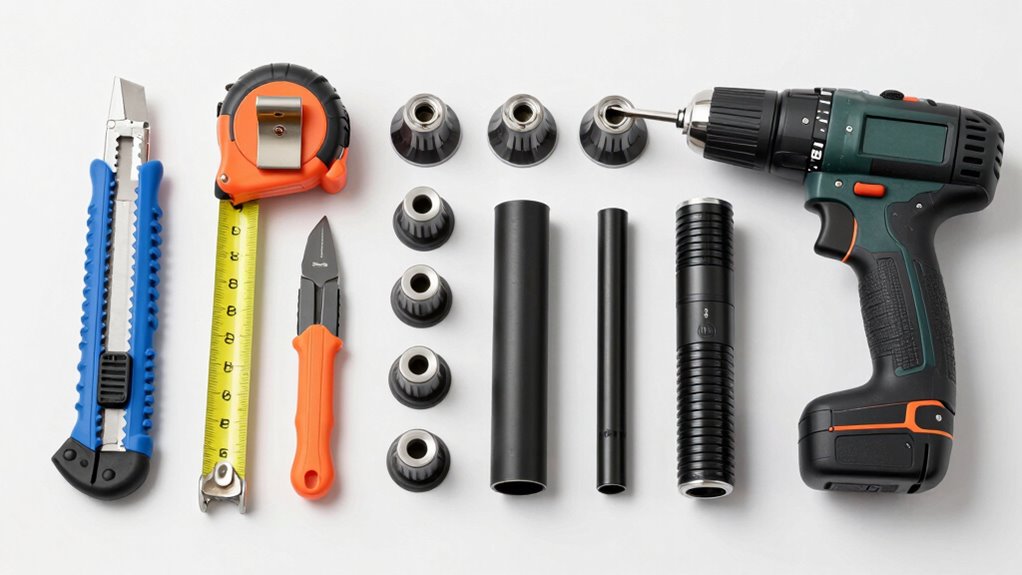
You’ll need to assemble specific tools before beginning your sprinkler installation to guarantee efficient and precise work.
Essential items include a trencher, pipe cutter, adjustable wrench, and electrical wire strippers, along with safety equipment like gloves and safety glasses.
Proper tool preparation involves checking that all equipment is clean, functional, and readily accessible at your worksite.
Required Tools List
Once you’ve planned your sprinkler system layout, gathering the proper tools becomes crucial for efficient installation.
You’ll need a trencher or shovel for digging trenches, PVC pipe cutter for precise cuts, and a hole saw for creating valve box openings.
A pipe reamer removes burrs from cut pipes while a primer and cement applicator guarantees secure joints.
Don’t forget adjustable wrenches for tightening connections and a pressure washer for cleaning debris.
A stud finder locates existing underground utilities while measuring tape determines accurate distances.
You’ll require a level for proper grading and a wheelbarrow for transporting materials.
Safety equipment including gloves, safety glasses, and steel-toed boots protect you during installation.
A quality drill with various bits handles electrical connections.
Finally, keep a first aid kit nearby for minor injuries.
These tools guarantee professional results.
Tool Preparation Tips
Gathering essential tools for sprinkler installation requires careful preparation to secure efficient system deployment.
You’ll want to organize your workspace and make sure everything’s readily accessible before starting.
- Check your trencher blades – dull blades will slow progress and create uneven cuts
- Verify water pressure requirements – confirm your system can handle the installation demands
- Organize fittings by size – keep unions, couplings, and adapters sorted for quick access
- Test your electrical connections – make sure timers and controllers function properly before burial
- Prepare backup materials – extra PVC pipe and fittings prevent project delays
Proper tool preparation prevents costly mistakes and system failures.
You’re not just installing sprinklers; you’re joining a community of homeowners who take pride in professional-grade lawn care systems.
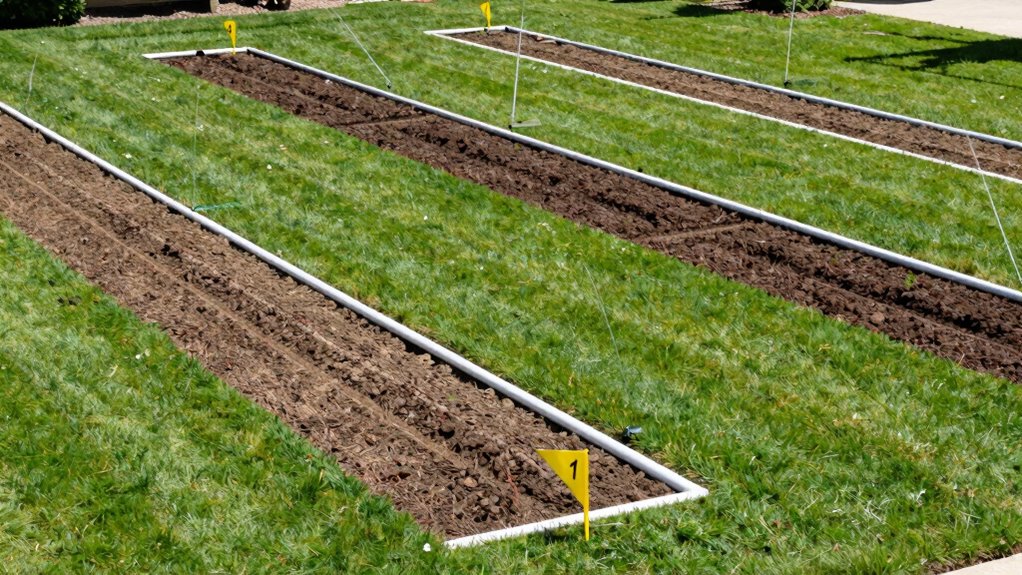
Plan Your Sprinkler Layout by Zone
You’ll need to determine each zone’s water requirements based on soil type, sun exposure, and grass species to guarantee proper coverage.
Map sprinkler head placement strategically to avoid overspray while maintaining uniform distribution across your lawn’s varying terrain.
Calculate your system’s pressure needs by measuring elevation changes and pipe lengths to select appropriate pump specifications.
Determine Zone Water Requirements
Each zone in your sprinkler system requires careful calculation of water volume and pressure to guarantee ideal coverage and plant health.
You’ll need to assess several critical factors before determining your zone requirements.
- Soil type affects water absorption rates and drainage capacity.
- Plant species have varying water needs and root depths.
- Slope grade impacts water runoff and distribution patterns.
- Sun exposure influences evaporation rates and moisture retention.
- Local climate conditions determine seasonal water demand fluctuations.
Calculate your zone’s specific water requirements by measuring square footage and identifying plant water needs.
Consider soil composition and drainage characteristics when determining application rates.
Factor in seasonal variations and local weather patterns to optimize efficiency.
Accurate zone planning prevents overwatering, reduces waste, and promotes healthy landscape growth while maintaining system performance standards.
Map Sprinkler Head Placement
With your zone water requirements clearly defined, you’re ready to map sprinkler head placement for ideal coverage. Start by marking zone boundaries using spray paint or stakes.
Position sprinkler heads 6-8 feet apart for maximum overlap, ensuring no dry spots remain. You’ll need to account for fixed obstacles like trees, walkways, and buildings during placement planning.
Map each zone separately, maintaining consistent spacing between heads. Use graph paper or landscape software to create accurate layouts.
Don’t forget to position heads at least 12 inches from solid structures. You’ll achieve better results by planning head locations methodically rather than randomly scattering them across your lawn.
Calculate System Pressure Needs
How do you determine the precise pressure requirements for your sprinkler system? You must calculate pressure needs accurately to guarantee excellent performance and prevent system failure.
Consider these critical factors when calculating your system pressure:
- Measure your water supply pressure using a pressure gauge at the main water source.
- Account for friction loss through pipes, fittings, and valves throughout the system.
- Determine sprinkler head operating pressure specified by manufacturer requirements.
- Calculate elevation changes that affect pressure delivery to higher or lower zones.
- Factor in simultaneous zone operation pressure demands when multiple zones run together.
Your system’s total dynamic head requirements depend on these variables working together.
Don’t guess pressure needs; precise calculations prevent costly mistakes and guarantee reliable irrigation performance that your landscape deserves.
Select Sprinkler Type Based on Yard Layout
When you’re planning your irrigation system, choosing the right sprinkler type depends entirely on your yard’s specific layout and characteristics.
Analyze your property’s shape, slope, and planting zones carefully. For rectangular areas, rotor sprinklers provide excellent coverage with minimal overlap. Use spray heads for smaller, irregular-shaped sections near foundations or walkways.
If your yard has significant elevation changes, consider pulsating sprinklers that handle varying pressures effectively. Sandy or clay soils require different precipitation rates, so match your sprinkler’s output accordingly.
Observe how water distributes across your landscape during testing phases. Certain areas may need multiple sprinkler types working together.
Don’t overlook narrow strips or tight corners where specialized sprinklers perform better. Your goal is achieving uniform water distribution while minimizing runoff and dry spots throughout your entire lawn.
Measure Water Pressure and Flow Rate
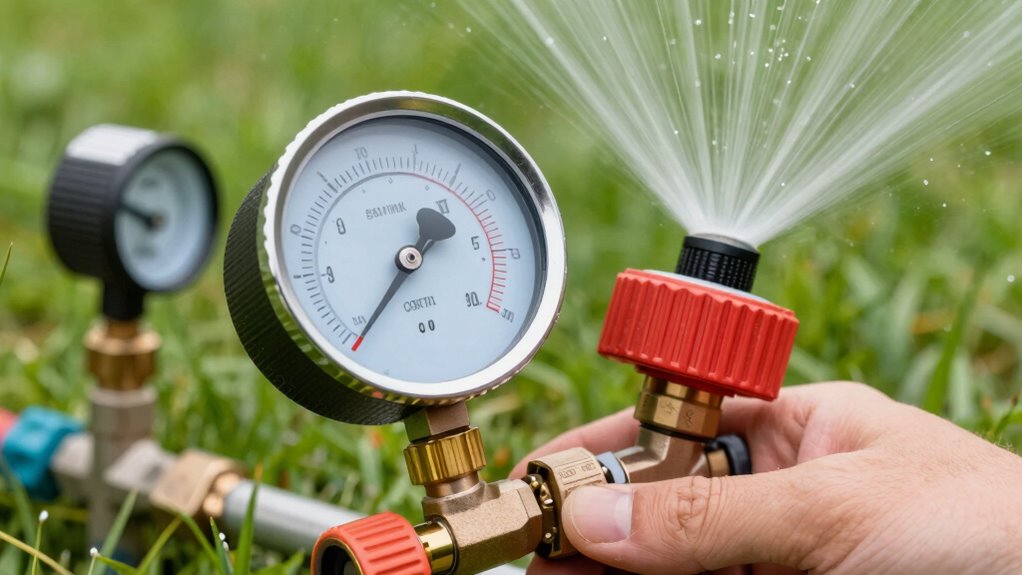
Before installing your lawn sprinkler system, you’ll need to determine your home’s water pressure and flow rate to guarantee peak sprinkler performance.
These measurements guarantee your system operates efficiently without wasting water or damaging components.
* Water pressure measures force in PSI (pounds per square inch) pushing water through pipes
- Flow rate calculates gallons per minute (GPM) your system can deliver effectively
- Use a pressure gauge attached to an outdoor spigot for accurate pressure readings
- Measure flow rate by timing how long it takes to fill a five-gallon bucket
- Test multiple faucets simultaneously to identify pressure drops across your property
- Mark utility lines before digging to avoid costly damages
- Maintain trench walls at proper angles to prevent collapse
- Remove debris and rocks that could damage pipes during installation
- Keep trenches slightly wider than pipe diameter for adequate clearance
- Document trench locations to simplify future maintenance access
- Solenoid valves control water flow electronically through your irrigation controller.
- Gate valves provide reliable shutoff capabilities for system maintenance and repairs.
- Pressure-reducing valves protect your system from excessive water pressure damage.
- Check valves prevent water from flowing backward and contaminating your main supply.
- Manual valves offer emergency shutoff options when electrical systems fail.
- Pressure Testing: Apply water pressure gradually, checking each connection point for seepage or dripping.
- Visual Inspection: Examine all fittings, couplings, and valve assemblies for proper alignment and secure fastening.
- Timing Verification: Allow adequate curing time for any adhesive joints before introducing full system pressure.
- Documentation: Record test results and note any connections requiring additional attention or reinforcement.
- System Flushing: Run water through all zones briefly to remove debris and confirm unobstructed flow.
- Check that each zone activates properly when scheduled
- Verify adequate water pressure reaches all sprinkler heads
- Confirm timer settings match your planned watering schedule
- Inspect for leaks around connections and fittings
- Ascertain sprinkler heads pop up and retract smoothly
- Check manufacturer specifications for ideal angle settings before making adjustments
- Use a screwdriver or adjustment key to rotate spray heads to desired positions
- Set arc angles between 40-360 degrees depending on coverage requirements
- Adjust radius settings to control water throw distance and prevent overspray
- Verify alignment with landscape features and property boundaries for precision
- Use proper soil: Replace excavated soil without rocks or debris that could puncture pipes.
- Compact gradually: Fill trenches in 6-inch layers, tamping each layer lightly to prevent air pockets.
- Protect wiring: Cover electrical connections with sand before adding soil to prevent crushing.
- Check for kinks: Make certain pipes aren’t bent or twisted during backfilling process.
- Mark locations: Use stakes or flags to identify buried components for future maintenance access.
- Examine all threaded connections – Ascertain tight fittings with proper tape or sealant applied.
- Check compression fittings – Verify they’re properly seated and tightened to manufacturer specifications.
- Inspect glued joints – Look for smooth, even fillets without gaps or voids.
- Test quick-connect fittings – Confirm quick-disconnects engage fully and seal properly.
- Verify hose connections – Tighten all barbed fittings with appropriate clamps.
- Visual inspection – Check all joints, fittings, and pipe surfaces for cracks, gaps, or misalignments.
- Pressure testing – Maintain system pressure for minimum thirty minutes while monitoring gauge readings.
- Soap bubble test – Apply soapy water solution to all connections and observe bubble formation indicating leaks.
- Tighten loose fittings – Secure any loose threaded connections immediately before proceeding.
- Document findings – Record all inspection results and repairs made for future reference.
- Disconnect and store controller timers in protected indoor locations
- Blow out sprinkler lines using compressed air at recommended PSI levels
- Inspect valve boxes for cracks, corrosion, or debris accumulation
- Check sprinkler heads for physical damage, clogs, or misalignment issues
- Document system performance notes for reference during spring startup
Incorrect measurements cause sprinkler zones to malfunction, creating dry spots or water waste.
Professional installers always verify these specifications before designing systems.
Take time getting accurate readings—it prevents costly adjustments later.
Your sprinkler system’s longevity depends on proper initial setup matching your home’s water capacity.
Choose Durable Pipes for Long-Term Use

Selecting the right piping material guarantees your sprinkler system operates reliably for decades without frequent repairs or replacements.
You should prioritize PVC pipes for main lines due to their exceptional durability and resistance to corrosion. Schedule 40 PVC works well for most residential applications, while Schedule 80 offers superior strength for high-pressure systems.
Consider polyethylene tubing for flexible connections and areas with ground movement. Avoid cheap alternatives that compromise system integrity.
Underground installations demand UV-resistant materials that withstand soil chemicals and temperature fluctuations.
You must also factor in local climate conditions when choosing pipe thickness and material composition. Quality piping prevents costly leaks and maintains consistent water pressure throughout your sprinkler zones.
Dig Trenches Safely and Efficiently
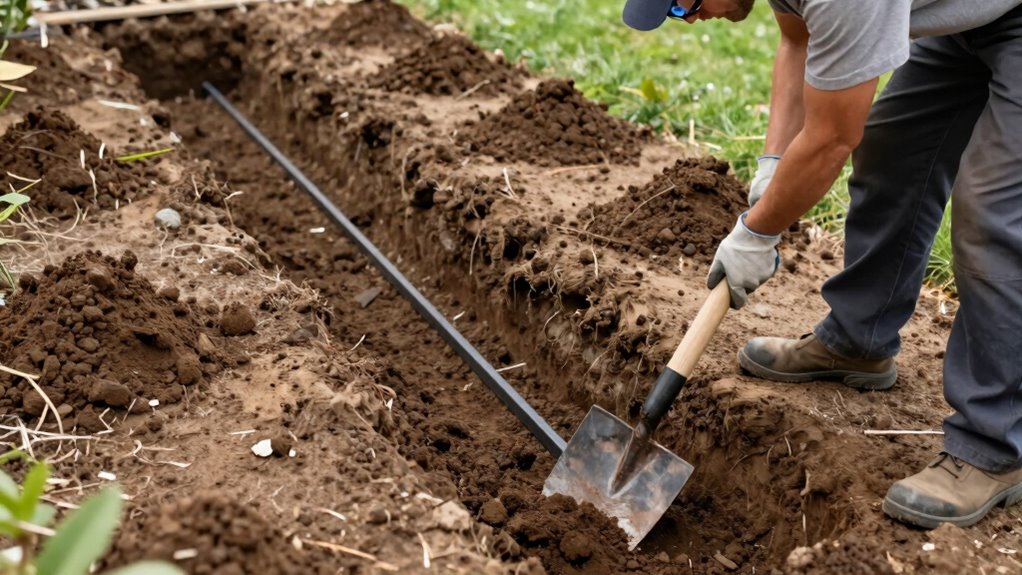
Proper trench excavation follows directly from selecting quality piping materials, as even the best pipes won’t perform well if installed incorrectly. You must dig trenches that maintain structural integrity while protecting your irrigation system.
Effective trenching requires planning and precision. You should measure twice, dig once, ensuring each trench meets local building codes.
Proper excavation technique prevents system failures and extends your sprinkler system’s lifespan while maintaining ideal water pressure throughout your lawn’s irrigation network.
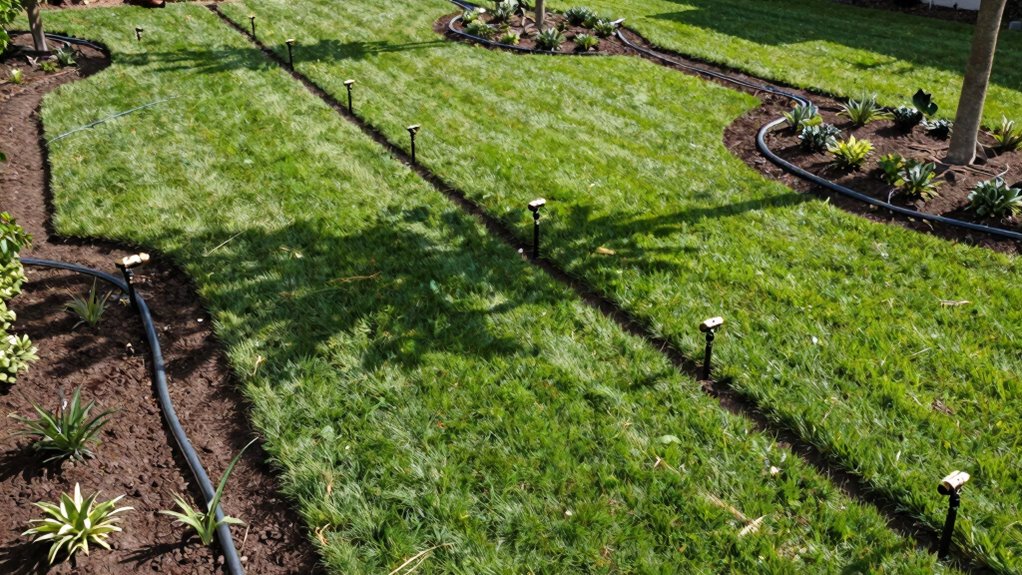
Install Main Water Lines First
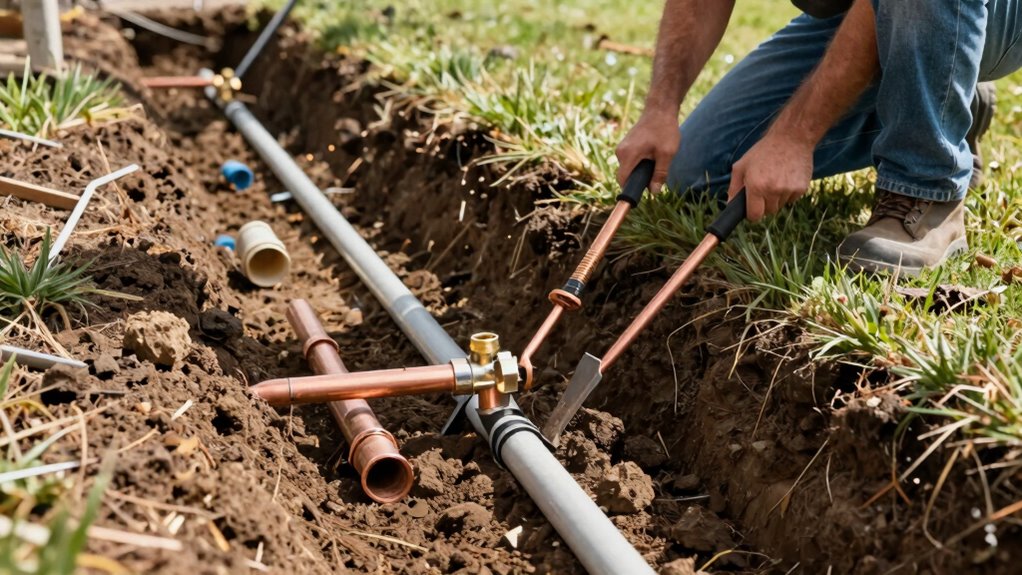
Installing your main water lines first guarantees the foundation of your sprinkler system operates efficiently.
You’ll want to lay rigid PVC or flexible polyethylene piping from your water source to each zone’s designated areas. Measure twice before cutting your pipes to avoid costly mistakes that’ll set you back hours. Use appropriate fittings and make certain all connections are properly glued or compressed tight.
Bury lines at least 12 inches deep to prevent freezing damage and accidental cuts. Don’t forget to install proper backflow prevention devices near your main water connection point. Pressure ratings matter here, so check your system’s specifications before selecting components.
Test your main lines thoroughly before covering them with soil. This critical step prevents future leaks and guarantees consistent water pressure throughout your entire sprinkler system’s operation.
Connect Control Valves to the Main Line
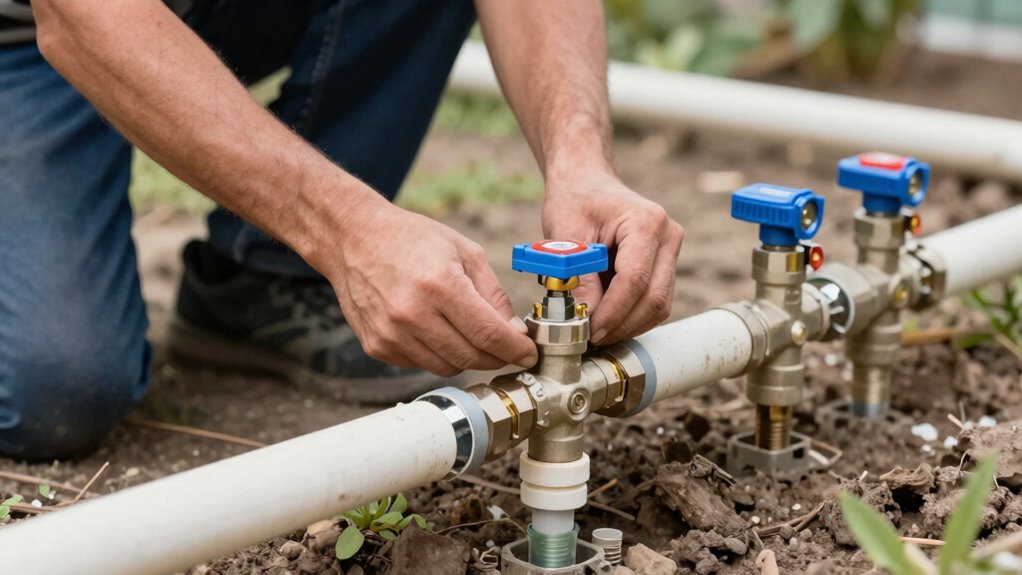
You’ll need to select control valves that match your system’s flow requirements and pressure ratings while ensuring the valve body materials resist corrosion.
Next, you must connect each valve to the main line using appropriately sized fittings and pipe that maintain system integrity without creating pressure drops.
Finally, you should test all connections under operating pressure to verify there are no leaks before backfilling trenches or covering components.
Choose Appropriate Valve Types
Selecting the right valve types for your lawn sprinkler system requires careful consideration of your specific irrigation needs and water pressure requirements. You’ll want to match valve specifications to your system’s demands for peak performance.
Choose valves rated for your specific water pressure and flow rates. Consider brass construction for durability in harsh weather conditions.
Verify valve ports match your pipe sizing requirements. Select valves with accessible manual overrides for convenient operation during installation and troubleshooting.
Quality valves prevent costly repairs and guarantee reliable system performance throughout your sprinkler system’s lifespan.
Ensure Proper Pipe Sizing
Proper pipe sizing directly affects how efficiently your control valves deliver water from the main line to each sprinkler zone. You must calculate the required flow rate for each zone and select pipe diameter accordingly.
Undersized pipes create excessive pressure loss, causing inadequate water delivery and system inefficiency. Oversized pipes waste materials and may cause water hammer issues.
Use engineering tables or hydraulic calculators to determine appropriate pipe sizes based on your system’s GPM requirements and acceptable pressure drop limits. Consider pipe material’s internal diameter, not just nominal size. PVC and polyethylene pipes have different flow characteristics.
Don’t forget to account for fittings and valves that create additional friction losses. Your system’s performance depends on maintaining adequate pressure throughout all zones.
Test Connections Thoroughly
Connect control valves to the main line and verify all joints are leak-free before proceeding with system pressurization.
You’ll want to conduct thorough testing to guarantee your sprinkler system operates efficiently.
Complete these steps methodically. Your system’s long-term performance depends on meticulous connection testing.
Don’t rush this critical phase. Take pride in executing each verification properly.
Install and Wire the Sprinkler Controller
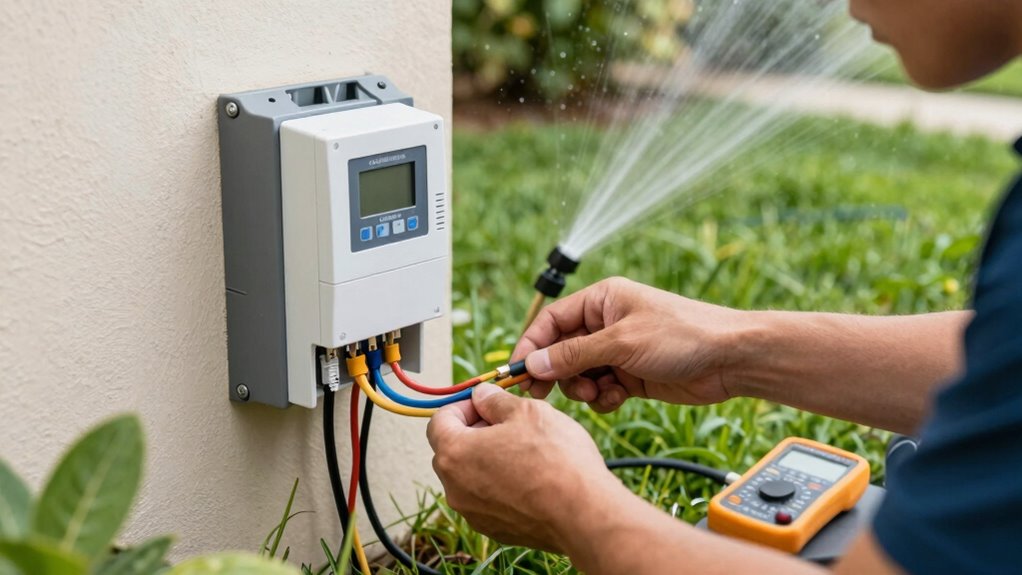
Installing and wiring the sprinkler controller requires careful attention to electrical connections and proper mounting location.
You’ll want to mount the controller near your electrical panel for easy access to power. Connect the common wire to the controller’s C terminal, then attach each zone wire to corresponding numbered terminals.
Don’t forget to connect the pump wire if you’re using one. Run the power cable from your electrical panel to the controller, ensuring proper gauge wire for your system’s amperage. Secure all connections with wire nuts and electrical tape.
Program the controller according to your watering schedule, setting start times and durations for each zone. Verify that rain sensor wires connect properly if equipped.
Keep the controller accessible for future programming adjustments and maintenance.
Test Entire Sprinkler System Before Backfilling
Activate your newly installed sprinkler system by turning on the water supply and powering up the controller to verify all components function correctly before covering trenches with soil. This critical step prevents costly repairs later.
Running a complete system test validates your installation work. You’ll identify potential issues early, avoiding excavation delays. Testing confirms proper wire connections, adequate water flow, and reliable controller operation.
Don’t skip this verification process – it’s essential for system longevity and performance. Once satisfied with test results, you can confidently proceed with backfilling trenches.
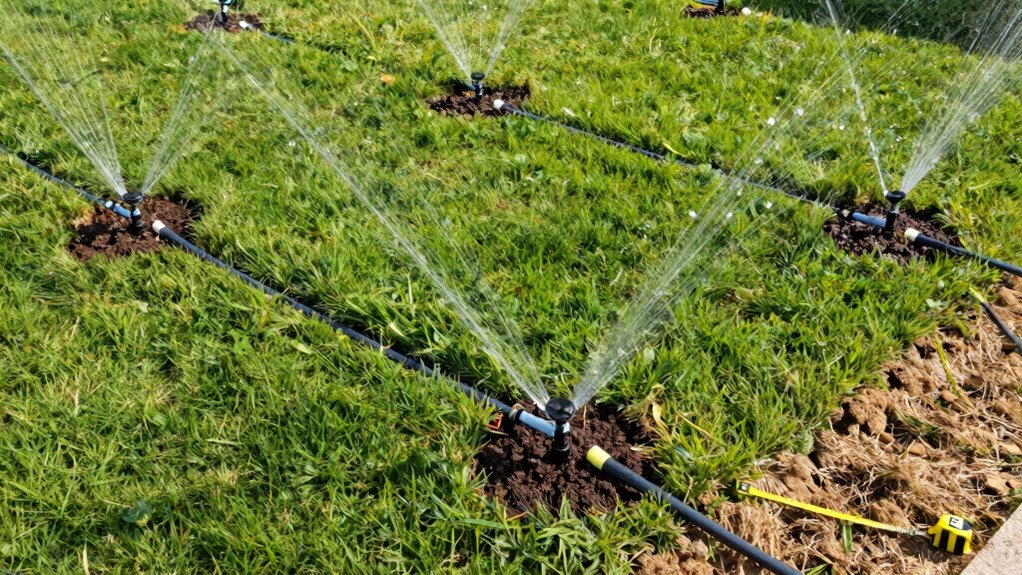
Adjust Sprinkler Heads for Even Lawn Coverage
You must adjust each sprinkler head’s angle to guarantee complete coverage of your lawn’s perimeter and eliminate dry spots.
Test the coverage patterns by running the system and observing where water distribution overlaps or falls short.
Make precise adjustments to head positions based on these observations to achieve uniform irrigation across the entire lawn area.
Adjust Sprinkler Head Angles
After completing the physical installation of your sprinkler system, proper adjustment of sprinkler head angles becomes essential for achieving uniform water distribution across your lawn.
You’ll need to fine-tune each head’s rotation and spray pattern to eliminate dry spots and prevent overwatering.
Proper angle adjustment guarantees your system operates efficiently while maintaining consistent moisture levels throughout your lawn’s root zone.
Test Coverage Patterns
Once sprinkler heads are installed and initially adjusted, testing coverage patterns becomes essential for identifying gaps or overlaps in water distribution.
You should run each zone separately for ten minutes, placing empty tuna cans or collection containers throughout your lawn to measure water depth.
Check containers after testing to guarantee uniform distribution – they should contain similar water levels. Adjust sprinkler heads by rotating or changing spray angles when you notice dry spots or overwatered areas.
Don’t overlook edge coverage; sprinkler heads near boundaries often need extra attention.
Make incremental adjustments rather than dramatic changes, testing repeatedly until achieving consistent coverage. Proper coverage patterns prevent water waste while guaranteeing healthy grass growth throughout your entire lawn area.
Backfill Trenches Safely in Your Sprinkler System
Having completed the installation of your sprinkler system components, backfilling trenches requires careful attention to prevent damage to newly installed pipes and wiring.
You’ll want to avoid common mistakes that could compromise your entire system’s integrity.
Your system’s longevity depends on proper backfilling techniques.
Take time to do this correctly.
Program Watering Times for Your Grass Type
Programming your sprinkler system’s watering schedule requires understanding your specific grass type’s hydration needs to maximize efficiency and lawn health.
You must research your grass variety’s ideal watering windows, typically early morning hours when evaporation rates are lowest. Cool-season grasses like fescue and ryegrass need 1-1.5 inches weekly, while warm-season varieties such as Bermuda and Zoysia require 0.5-1 inch. Set your controller’s start times between 4-6 AM, avoiding windy periods.
Program shorter, frequent cycles for clay soils and longer, less frequent sessions for sandy areas. Adjust seasonal settings automatically using smart controllers or manually based on rainfall.
Monitor your grass’s color and foot traffic recovery to fine-tune timing. You should avoid midday watering and evening schedules that promote fungal growth.
Proper programming guarantees your lawn thrives while conserving water resources effectively.
Inspect for Leaks Before Covering Trenches
You must thoroughly check all connections and test system pressure levels before backfilling trenches to prevent costly repairs later.
Verify pipe integrity completely by conducting a pressure test for at least 15 minutes to ascertain no leaks exist in the underground piping network.
Failure to inspect properly will compromise your entire irrigation system’s performance and longevity.
Check All Connections Thoroughly
Inspecting connections thoroughly prevents costly repairs and system failures after installation. You must verify every joint and fitting before backfilling trenches.
Professional installation requires meticulous attention to detail.
Don’t rush this critical step. Taking time to inspect prevents water damage, system inefficiencies, and expensive callbacks.
You’re building a reliable irrigation system that’ll serve your landscape for years. Make every connection count.
Test System Pressure Levels
Before covering trenches, test system pressure levels to identify potential leaks and secure peak performance.
Connect a pressure gauge to the main line and gradually increase water flow to operating pressure. Monitor readings for fifteen minutes, watching for significant drops that indicate leaks.
Pay attention to sprinkler heads, valves, and joint connections where pressure loss commonly occurs. Use soap solution to check fittings – bubbles will form at leak points.
Don’t overlook low-pressure zones that might signal blockages or damaged piping. Document baseline pressure readings for future reference.
Address any pressure irregularities immediately before backfilling trenches. Proper pressure testing prevents costly repairs and secures efficient water distribution throughout your sprinkler system.
Verify Pipe Integrity Completely
After confirming adequate system pressure, thoroughly examine all piping for structural soundness and seal integrity prior to trench backfilling. You must verify complete pipe integrity before covering any trenches.
Don’t skip this critical step. Undetected leaks cause costly repairs, property damage, and system failures.
Take your time examining every connection point. Your sprinkler system’s long-term performance depends entirely on thorough leak detection now.
You’ll thank yourself later for being meticulous during this phase.
Fix Uneven Spray Patterns and Low Pressure
When sprinkler heads produce inconsistent water distribution or weak pressure, you’ll need to systematically address several potential causes.
Check for clogged nozzles by removing and cleaning each head thoroughly.
Inspect spray patterns for proper radius adjustment and arc settings.
Examine water pressure at the source using a pressure gauge to identify if main line pressure is insufficient.
Look for leaks in underground pipes that might reduce overall system pressure.
Verify that zone valves are fully opening and closing properly.
Adjust sprinkler head heights to guarantee uniform coverage without interference.
Replace worn seals or gaskets that cause pressure loss.
Clean debris from filter screens located at system intake points.
Test individual zones separately to isolate problem areas effectively.
Winterize and Inspect System Annually
While annual winterization and inspection might seem time-consuming, neglecting these critical maintenance steps can lead to costly repairs and system failures. You should shut off water supply valves and drain all lines completely. Here’s what you must do:
Completing these procedures protects your investment and guarantees reliable operation.
Proper winterization prevents freeze damage that destroys pipes, valves, and sprinkler components. You’ll avoid expensive replacements while maintaining system efficiency year after year.
Improve Performance With Newer Parts
Upgrading older sprinkler components with newer parts greatly enhances system efficiency and reliability.
You should replace outdated spray heads with precision nozzles that deliver consistent water distribution patterns. Modern solenoid valves offer superior sealing mechanisms and reduced electrical consumption compared to older models.
Install smart controllers that integrate weather sensors and programmable scheduling features. These components communicate seamlessly with smartphone applications for remote monitoring.
You’ll notice immediate improvements in water pressure regulation when upgrading to high-efficiency rotors. Newer backflow preventers meet current safety standards while reducing maintenance requirements.
Pressure-regulating devices eliminate system stress caused by fluctuating municipal water supply. Digital timers provide accurate irrigation scheduling, preventing overwatering and runoff.
Upgrading creates a more sustainable irrigation ecosystem that belongs in today’s technologically advanced landscape management systems, ensuring peak performance and resource conservation.
Conclusion
Installing lawn sprinklers properly requires careful planning and execution. Like conducting an orchestra, each component must work in harmony – from evaluating water pressure to programming controllers. Don’t skip vital steps like measuring flow rates, digging adequate trenches, or testing for leaks. Regular maintenance and annual winterization guarantee your system operates efficiently. With proper installation and care, your sprinkler system will deliver consistent, uniform coverage for years.
