

You need to understand that precision isn’t optional when working with measuring tools. Every measurement you take builds upon the last, creating a chain of accuracy that determines your project’s success. Before you even touch a caliper or tape measure, you must know exactly what you’re trying to achieve and how tight your tolerances need to be. The difference between a good measurement and a great one often comes down to preparation and technique.
Start by Understanding Why Precision Matters

When you’re working with measuring tools, understanding why precision matters will help you avoid costly mistakes and confirm your projects meet required specifications.
You must recognize that even small measurement errors compound throughout your work, potentially derailing entire projects. Precision guarantees components fit together correctly, maintaining structural integrity and functional performance.
Your reputation depends on consistent accuracy, building trust with clients and colleagues who rely on your work. Taking time to understand tolerances prevents rework, saving both money and time.
You’ll discover that precise measurements create professional results that meet industry standards. Developing this mindset positions you as someone others can depend on.
Mastering precision transforms you from an amateur into a skilled craftsman others respect and want to work with.
Match Each Job to the Right Accurate Measuring Tool
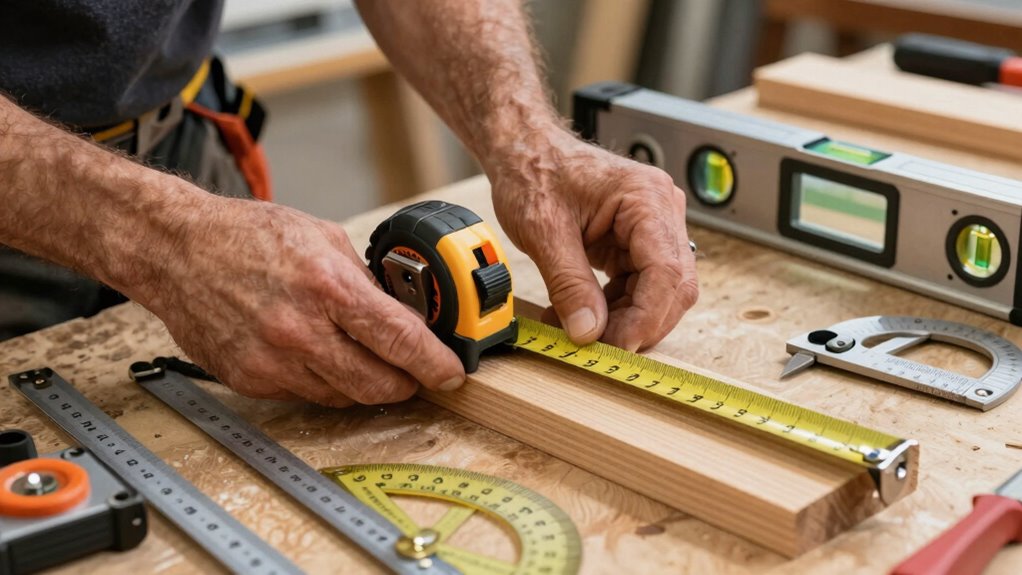
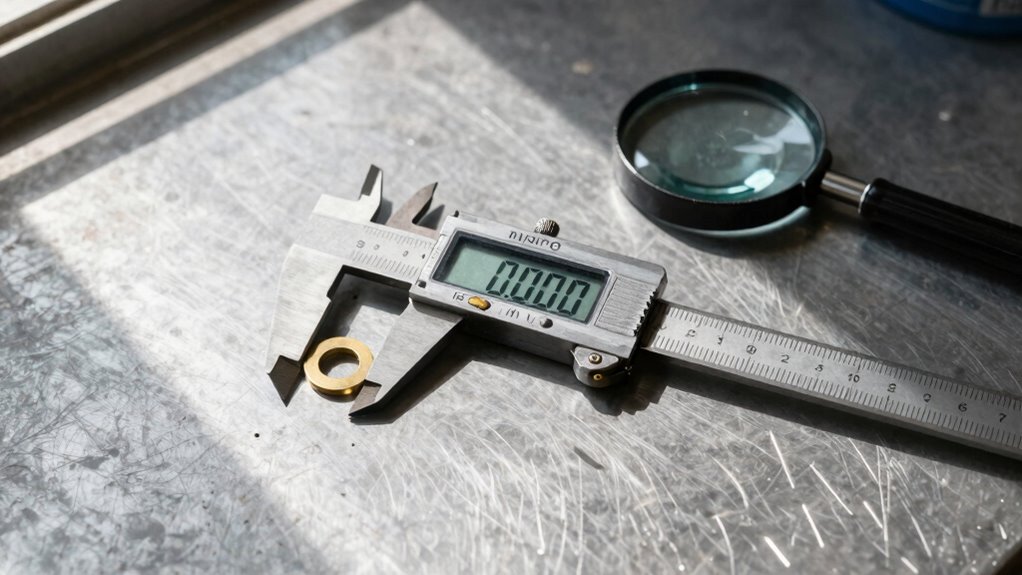
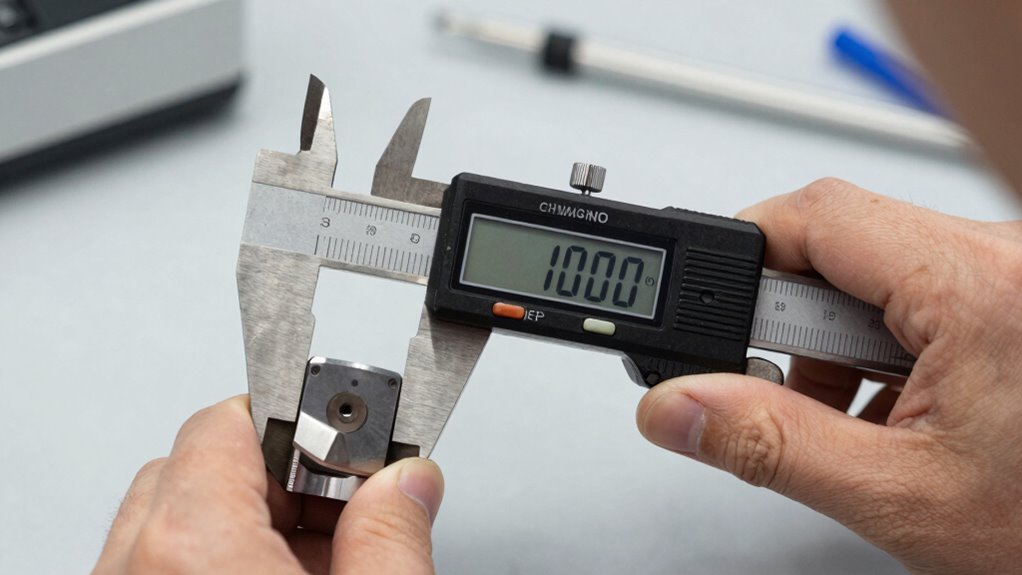
Every measuring task demands specific tools that align with your project’s precision requirements. You must select calipers for tight tolerances, rulers for general dimensions, and micrometers for ultra-fine measurements. Your choice depends on required accuracy levels.
For woodworking, tape measures and combination squares suffice. Metalworking requires dial calipers and bore gauges. Construction work demands laser levels and long tape measures. Electronics assembly needs digital multimeters and precision scales.
You should always consider material properties, environmental conditions, and measurement range. Steel rules work better than plastic ones for durability. Digital tools eliminate reading errors common with analog versions.
Choose tools that match your skill level and project complexity. Proper tool selection prevents costly mistakes and guarantees professional results every time.
Check Calibration Before Every Measurement Session
Having selected the appropriate measuring tools for your specific application, you must verify their calibration status before beginning any measurement session.
Check manufacturer labels for calibration dates and expiration periods. Inspect tools for physical damage, wear, or misalignment that could affect accuracy. Use certified reference standards or calibration blocks to test your instruments’ performance.
Compare readings against known values to confirm proper operation. Document current calibration certificates and maintain records for traceability purposes. If tools show signs of drift or damage, stop using them immediately and arrange for professional recalibration.
Never assume previous calibration remains valid without verification. Your measurements’ reliability depends entirely on properly calibrated instruments.
Make calibration checking a non-negotiable part of your measurement routine. This systematic approach guarantees consistent, accurate results every time you measure.
Avoid Parallax Errors With Strategic Positioning
You must position your eyes directly above the scale to eliminate parallax errors that distort readings.
Always align your line of sight perpendicular to the measurement mark you’re reading.
This strategic positioning guarantees accurate measurements by preventing optical illusions caused by viewing angles.
Position Eyes Directly Above Scale
When reading measurements from any scale, position your eyes directly above the marking you’re evaluating. This vertical alignment eliminates parallax error, ensuring accurate readings every time.
You’ll notice how measurements can appear different when viewed from an angle versus straight on. Your eye should form a perfectly vertical line with the scale marking and the measuring tool’s surface. Take time to adjust your head position until you achieve this direct overhead view.
Even small angular deviations create significant reading errors. You belong among precise measurers who understand that accuracy depends on proper eye positioning. Make this adjustment second nature. Your measurements will thank you for this careful attention to detail.
Practice this positioning until it becomes automatic.
Align Reading With Measurement Mark
Proper alignment between your eye, the measurement mark, and the scale eliminates parallax error that occurs from angled viewing positions. You must position yourself so your line of sight is perpendicular to the scale surface. This strategic positioning guarantees accurate readings every time.
Keep your eye directly in line with the measurement mark you’re reading. Don’t tilt your head or view from an angle. The measurement mark should appear perfectly aligned with the scale graduations when viewed correctly.
Practice this alignment technique consistently. Your measurements will become more precise and reliable.
Others who value accuracy in their work understand this fundamental principle. Mastering proper alignment makes you part of a community that demands precision and reliability in every measurement task they perform.
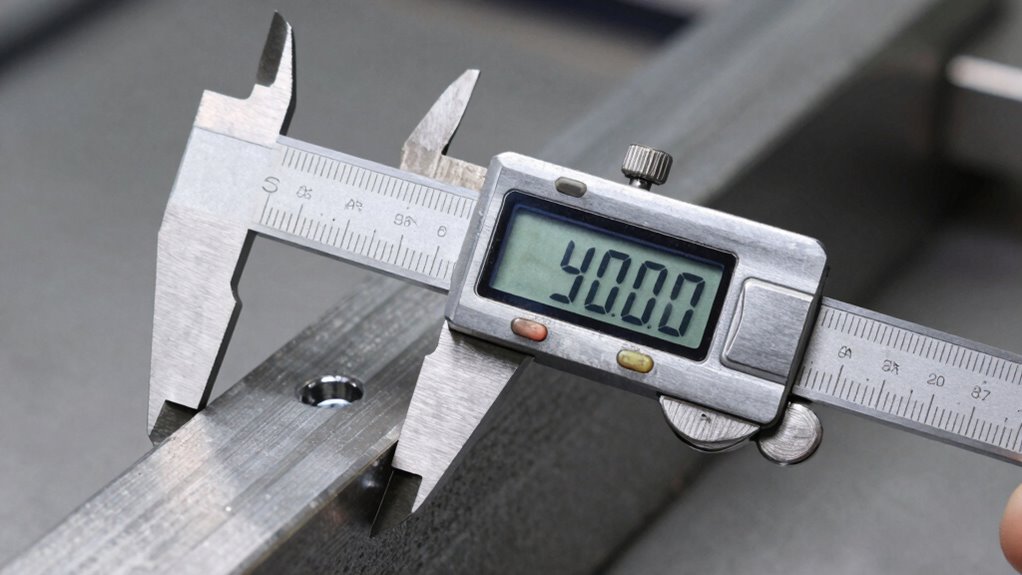
Read Numbers on Screens or Scales Eye-to-Eye
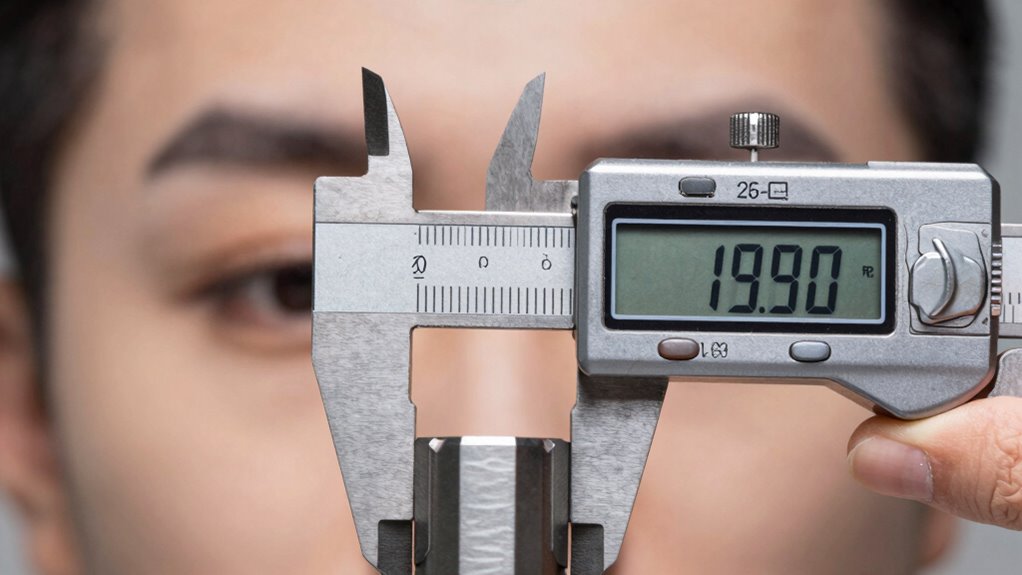
You must position your eyes directly parallel to the display surface when reading measurements. This alignment prevents parallax errors that occur when viewing angles create misleading readings.
Always check that your line of sight is perpendicular to the scale or screen for accurate results.
Position Eyes Parallel To Display
To guarantee accurate readings from any measuring instrument, position your eyes directly parallel to the display or scale.
You must align your line of sight perpendicular to the measurement surface. This eliminates angular distortion that compromises precision. Keep your head level and maintain equal distance from both sides of the scale.
Your gaze should meet the display straight-on, not from above or below. Hold measuring tools steady while reading values. Position yourself so light sources don’t create shadows across the display.
Digital screens require the same parallel approach. You’ll notice measurement variations when viewing angles change. Trust your direct line of sight for reliable results.
This fundamental technique applies universally across calipers, gauges, thermometers, and pressure meters. Master this positioning habit consistently.
Your measurements become more accurate when you eliminate viewing angle variables. Practice this alignment until it becomes automatic. Precision measurements demand this disciplined approach from everyone who values accuracy.
Avoid Parallax Reading Errors
When reading measurements from scales or digital displays, verify your eyes are positioned directly perpendicular to the surface to eliminate parallax error. This optical illusion occurs when you view readings from an angle, causing distorted values that compromise accuracy.
You should align your line of sight precisely with the measurement markings or display screen. Position yourself so your eyes are level with the indicator or needle.
Avoid looking down from above or up from below. Digital displays require the same careful alignment to guarantee you’re reading the correct numerical value.
Take time to establish proper viewing geometry before recording any measurements. Your accuracy depends on this vital positioning step.
Master this technique and you’ll belong among precision measurement professionals who consistently achieve reliable results.
Know What Your Measuring Tool Can’t Do
While measuring tools provide essential accuracy for various tasks, they can’t compensate for improper technique or environmental factors that affect precision. You must understand your tool’s limitations before expecting reliable results.
Temperature fluctuations cause materials to expand or contract, rendering measurements inaccurate. Humidity affects wooden and paper-based measuring devices. Vibrations from nearby machinery introduce errors you can’t detect. Your tool can’t correct for worn-out components or calibration drift. Digital displays may freeze or malfunction in extreme conditions. Mechanical gauges fail when exposed to corrosive substances.
You can’t rely on tools beyond their specified range or resolution capabilities. Environmental stress compromises even the most sophisticated instruments. Recognize when conditions exceed your tool’s operational parameters. Stop measuring when accuracy can’t be guaranteed. Accept that some situations demand professional calibration or specialized equipment.
Keep Your Grip and Angle Steady Every Time

You must maintain consistent hand position throughout every measurement to guarantee accuracy.
Keep your tool perfectly perpendicular to the surface you’re measuring, checking the angle from multiple viewpoints.
Apply steady, even pressure without wobbling or tilting the measuring device.
Maintain Consistent Hand Position
Because accurate measurements depend on steady technique, maintaining consistent hand position becomes essential for reliable results.
You must develop muscle memory that guarantees your grip and angle remain identical across every measurement session.
- Anchor your dominant hand at the tool’s base where it meets the surface, creating a stable foundation that prevents unwanted movement.
- Keep your non-dominant hand positioned consistently on the tool’s body, applying uniform pressure each time.
- Maintain the same finger placement on both hands throughout your measuring process.
These consistent positioning habits eliminate variables that cause measurement discrepancies.
When everyone on your team follows identical hand positioning protocols, your entire group benefits from improved accuracy and reduced error rates.
You’re not just measuring correctly; you’re becoming part of a community that values precision and repeatability.
Align Tool Perpendicular To Surface
Building on steady hand positioning, proper tool alignment requires maintaining perpendicular orientation to your measurement surface.
You must keep the tool’s base flush against the surface while guaranteeing the measuring edge remains perfectly vertical. Grip the tool firmly but avoid over-tightening, which can cause misalignment. Use your non-dominant hand to support the tool’s base, creating stability.
Check that no gaps exist between the tool and surface. Your wrist should remain steady, preventing tilting or angling variations. Mastering this perpendicular alignment guarantees accurate measurements every time.
Practice this technique consistently until it becomes second nature. Proper alignment eliminates measurement errors caused by improper tool positioning.
You’ll gain confidence knowing your measurements are precise and reliable. This fundamental skill separates accurate measurers from beginners.
Apply Even Pressure While Measuring
Maintain consistent pressure throughout the measurement process to verify accuracy and prevent tool slippage. Uneven pressure causes measuring tools to shift, creating errors that compromise your work quality and professional reputation.
- Grip firmly but gently – Apply steady pressure without crushing the tool.
- Keep your wrist stable – Avoid rocking motions that throw off measurements.
- Practice consistent finger placement – Same grip position ensures repeatable results.
You should feel the tool solidly against the surface without gaps or excessive force. Your thumb and fingers work together to create controlled, even pressure. This technique becomes muscle memory through repetition.
Master craftsmen rely on this fundamental skill because it eliminates variables that cause measurement drift. When everyone on your team uses consistent pressure, results align perfectly. You belong in that group of professionals who measure twice, cut once, and never question their numbers.
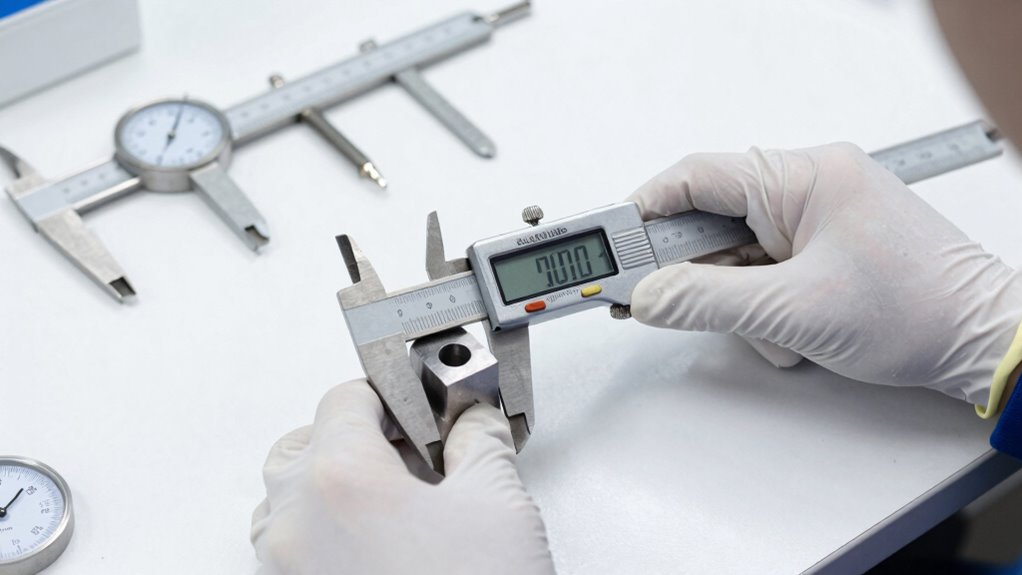
Read Digital vs. Analog Tools Without Error
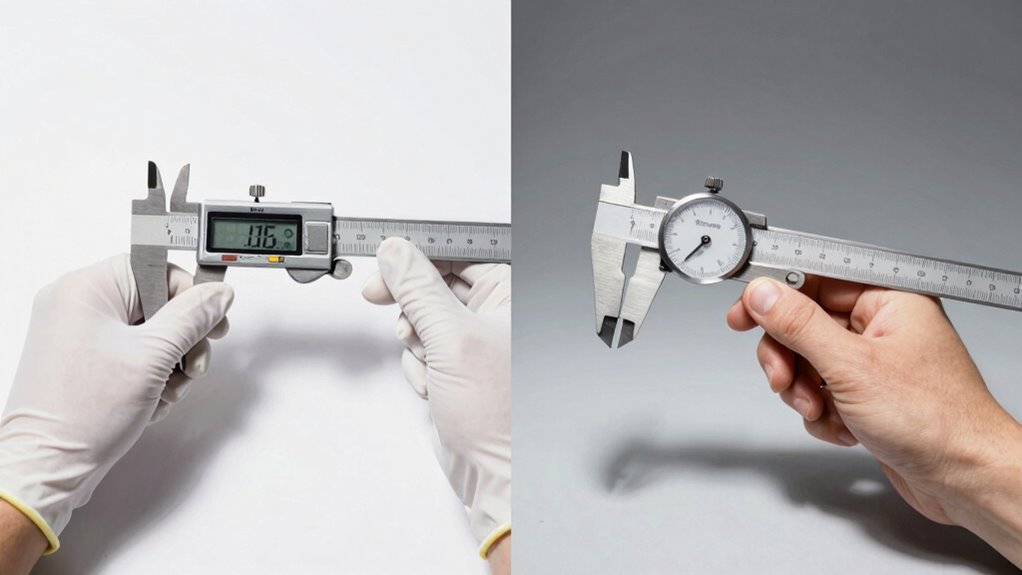
How do you guarantee accuracy when reading digital versus analog measuring tools? You must understand each type’s unique characteristics.
Digital tools display exact numerical values, eliminating interpretation errors. Read the screen directly at eye level to avoid parallax distortion.
Analog tools require you to interpret graduations between markings. Position yourself perpendicular to the scale and align your eye with the measurement line. Check that pointers aren’t sticking or binding.
Zero both types before use. Digital readings should stabilize completely before recording values. Analog scales need steady hands to prevent needle oscillation.
You’ll achieve consistent results when you master these fundamental reading techniques for each tool type.
Adjust for Heat, Light Changes, and Humidity
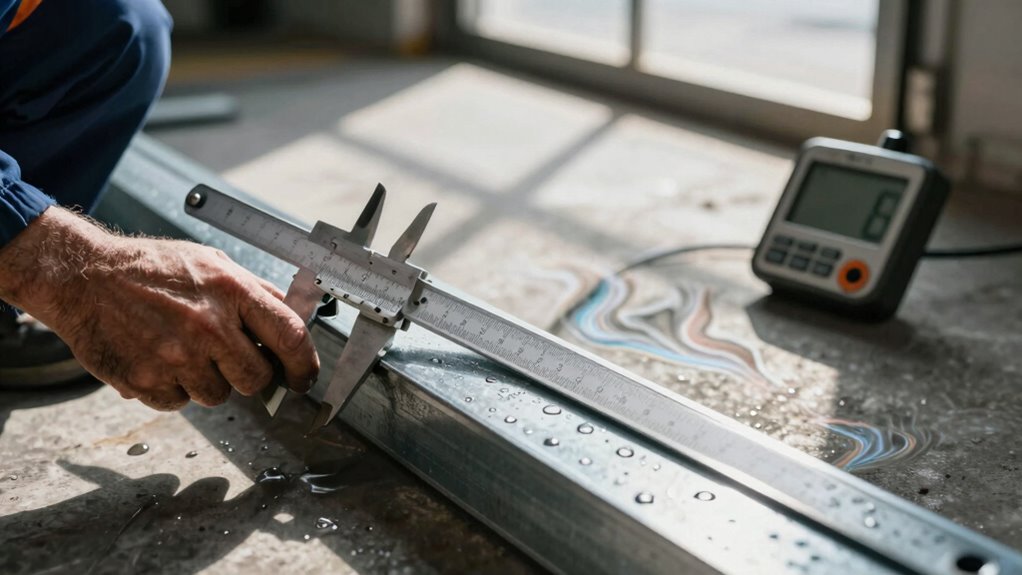
Environmental factors like heat, light changes, and humidity can greatly affect measurement accuracy if you don’t account for them properly.
You must actively monitor and adjust for these conditions to maintain precision in your work.
Temperature fluctuations cause materials to expand or contract, directly impacting measurement readings. You should wait for stabilization periods before taking critical measurements.
- Heat effects: Allow instruments and materials to acclimate to room temperature for thirty minutes before use
- Light changes: Position yourself to avoid shadows or glare that obscure readings
- Humidity impacts: Use moisture-resistant tools in damp conditions and store instruments in climate-controlled environments
You belong in the group of skilled professionals who understand that environmental awareness separates accurate measurements from costly mistakes.
These adjustments become second nature when you make them part of your standard procedure.
Calibrate or Recalibrate Measuring Instruments Quickly
Calibrating your measuring instruments regularly guarantees they maintain accuracy and reliability in your work. You should establish a routine schedule for calibration checks, typically monthly or quarterly depending on usage frequency.
Start by cleaning your instruments thoroughly, removing any debris or contaminants that might affect readings. Next, compare your device against known standards or certified reference materials. Adjust settings according to manufacturer specifications when discrepancies exceed acceptable tolerances.
Document all calibration activities with dates, measurements, and adjustments made. Don’t forget to check environmental conditions during calibration, ensuring temperature and humidity remain stable. Store calibration certificates or records systematically for future reference.
Regular calibration prevents costly errors and maintains quality standards your team depends on.
Eliminate Common Human and Device Errors
Even with regular calibration, measuring tools can produce inaccurate results due to human mistakes and equipment limitations. You must actively identify and eliminate these errors to guarantee precision.
- Parallax errors occur when you read measurements from an angle instead of directly perpendicular to the scale.
- Zero errors happen when instruments don’t reset properly, giving false starting points that skew all measurements.
- Environmental factors like temperature and humidity changes affect both digital and analog devices, causing materials to expand or contract.
You should develop consistent techniques: position yourself correctly, double-check zero settings, and monitor conditions. These simple adjustments prevent costly mistakes and guarantee your measurements belong in the sector of accuracy everyone aims for.
Verify Results With a Second Tool or Method
Why rely on a single measurement when confirming accuracy takes only moments more? You should always cross-check critical measurements using different tools or methods. This approach eliminates random errors and reveals systematic issues you might miss otherwise.
When measuring distance, use both a tape measure and ruler. For weight, verify scale readings with a second calibrated device. Temperature checks benefit from infrared and liquid thermometers.
You’re not being paranoid; you’re being thorough. Professional craftsmen and scientists routinely double-check their work because accuracy matters. Your results gain credibility when multiple methods agree.
Discrepancies signal problems requiring investigation. Don’t trust lone measurements completely. Take pride in precision by developing this verification habit. Your enhanced reliability will earn respect among peers who value meticulous work.
Accuracy becomes your signature standard.
Conclusion
You must choose the right tool for each job, yet you should also check calibration before measuring. You need to position yourself correctly to avoid parallax errors, but you must also read scales directly. You ought to adjust for environmental factors, yet you should verify results with secondary methods. You require steady technique, but you need regular recalibration. You demand precision, yet you must expect variables. You seek accuracy, but you need consistency.
