

You need to understand your soil’s nutrient profile before applying any fertilizer. Test pH levels and macronutrient concentrations to identify specific deficiencies. Don’t guess—accurate soil analysis prevents wasted applications and potential plant damage. Organic matter content affects nutrient availability and release rates. Consider your plants’ growth stages when selecting fertilizer types.
How to Tell If Your Plants Need Fertilizer
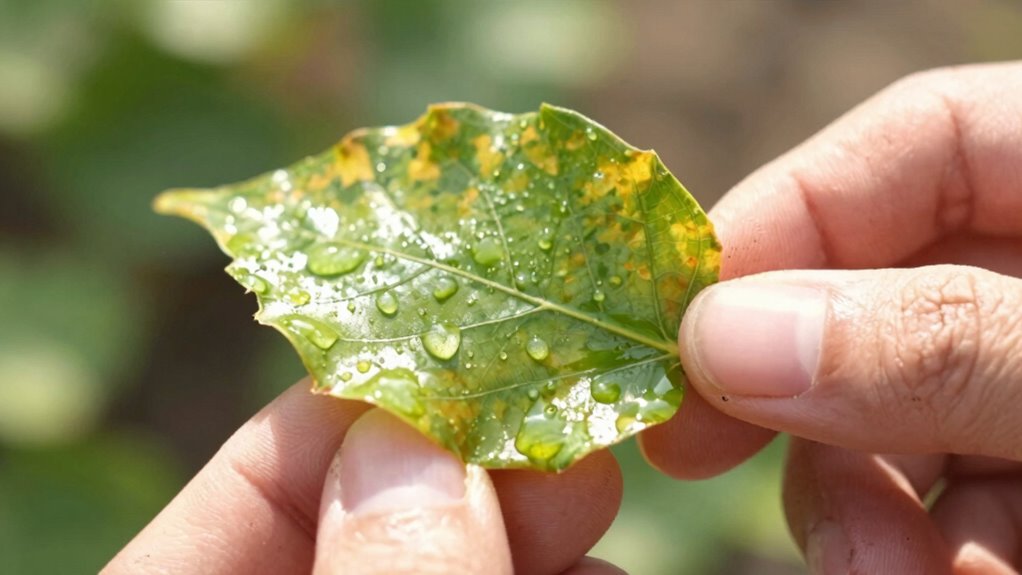
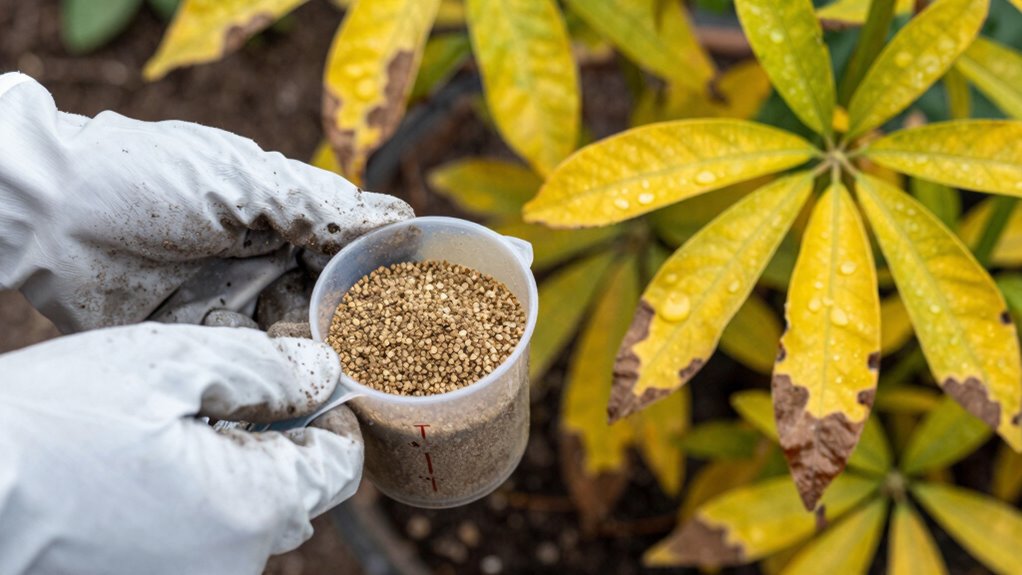
While you’re monitoring your plants’ growth patterns, watch for specific visual indicators that signal nutrient deficiencies.
Yellowing leaves, especially between veins, suggest nitrogen shortage. Purple or red discoloration indicates phosphorus deficiency, while brown leaf edges point to potassium depletion. Stunted growth despite adequate water and light conditions often means your plants need feeding.
Check for pale, wispy new growth that fails to develop proper coloration. Wilting despite moist soil conditions signals root absorption problems.
Examine stems for thin, weak development compared to healthy specimens you’ve seen. Leaf drop without apparent stress causes, and flowers that bloom poorly or fail entirely, indicate nutritional stress.
These symptoms don’t lie – they’re your plants’ way of communicating precise needs. Trust these visual cues rather than guessing.
Test Your Soil Before Adding Fertilizer
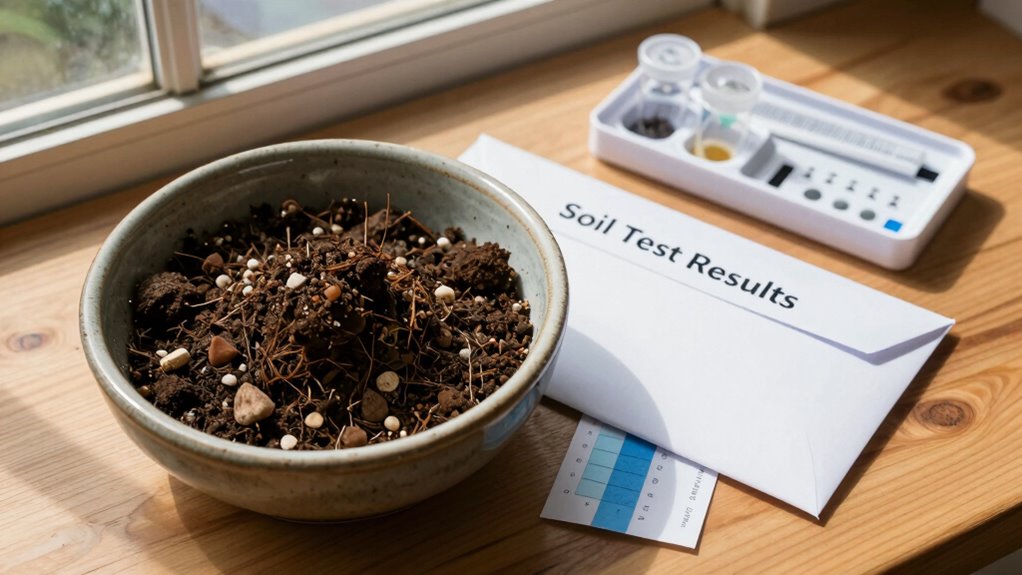
You should test your soil’s pH level and nutrient content before applying any fertilizer to avoid over-fertilization or nutrient imbalances.
Soil testing methods include using home test kits for quick pH readings or sending samples to professional laboratories for thorough nutrient analysis.
Timing your fertilizer application based on these test results guarantees you’re adding nutrients when plants can actually absorb them, typically during their active growing seasons.
Soil Testing Methods
Before adding fertilizer to your soil, conducting accurate soil tests guarantees you apply nutrients efficiently and avoid costly mistakes. You should collect samples from multiple locations, mixing them thoroughly for representative results. Test kits measure pH levels, nitrogen, phosphorus, and potassium content accurately.
Send samples to certified laboratories for thorough analysis including micronutrient deficiencies. Digital meters provide instant pH readings, helping you understand soil acidity quickly. Professional testing reveals organic matter percentages and cation exchange capacity, indicating nutrient retention abilities.
Home test strips work for basic assessments but lack precision for detailed fertilization planning. You must interpret results correctly to determine exact nutrient requirements. Understanding your soil’s baseline prevents over-application that causes environmental damage and wasted resources.
Regular testing every two to three years maintains ideal growing conditions while building your expertise in soil management practices that fellow gardeners respect.
Fertilizer Application Timing
Since soil testing reveals your garden’s specific nutrient deficiencies, applying fertilizer without this baseline data leads to inefficient applications and potential nutrient imbalances.
You should time applications based on plant growth stages and seasonal demands. Apply nitrogen-rich fertilizers during active growth periods, typically early spring for most plants.
Phosphorus works best when applied before planting or during root development phases. Potassium applications are most effective during fruiting and flowering stages.
Consider your local climate and rainfall patterns. Apply fertilizers when soil moisture is adequate but before heavy rains that might cause runoff.
Split applications throughout the growing season often prove more effective than single large doses. This approach guarantees nutrients remain available when plants need them most.
Organic vs Synthetic Fertilizer: Which Is Best?
Why choose between organic and synthetic fertilizers when understanding their fundamental differences can help you make informed decisions about nutrient management?
You need to know that organic fertilizers release nutrients slowly through microbial decomposition, improving soil structure and water retention over time.
Synthetic fertilizers provide immediate nutrient availability but don’t enhance soil biology.
Organic options like compost and bone meal build long-term soil health while synthetic alternatives deliver precise N-P-K ratios quickly.
You’ll find organic fertilizers typically require larger application rates due to lower nutrient concentrations.
Synthetic versions offer concentrated nutrients that dissolve rapidly in soil moisture.
Both types supply essential macronutrients, yet organic choices contribute beneficial microorganisms and organic matter.
You must consider your specific growing conditions, crop requirements, and soil testing results.
Understanding these distinctions helps you select appropriately rather than debating superiority.
Each fertilizer type serves distinct purposes depending on your nutrient management goals and timeline expectations for plant response.
How to Choose the Right Fertilizer Type

How do you determine which fertilizer type aligns with your specific agricultural needs?
You must first analyze your soil’s nutrient deficiencies through testing.
Consider your crops’ growth stages and nutrient requirements throughout their lifecycle. Grasses typically need higher nitrogen levels, while flowering plants demand more phosphorus for bloom development.
Evaluate whether you prefer quick-release synthetic options that provide immediate nutrient availability or slow-release organic alternatives that build long-term soil health.
Your climate zone affects fertilizer choice since temperature and rainfall patterns influence nutrient leaching rates.
Calculate your application equipment’s compatibility with different fertilizer forms—granular, liquid, or powder.
Finally, determine your budget constraints and labor capacity for application frequency.
Matching these factors guarantees you select the most effective fertilizer type for ideal crop performance and resource efficiency.
When Is the Best Time to Fertilize Your Garden?
When should you apply fertilizer to maximize nutrient uptake and minimize waste? You’ll achieve最佳 results by timing applications when plants actively grow and soil temperatures reach 50°F.
Spring feeding should occur after soil thaws but before rapid growth begins. Apply fertilizer when roots can absorb nutrients efficiently, typically early morning or late evening to reduce evaporation.
For cool-season grasses, fertilize in early spring and fall when growth peaks. Warm-season varieties respond best during late spring through early summer. Perennials benefit from early spring applications before blooming. Annuals need fertilizing at planting time and throughout their growing season.
Avoid fertilizing during extreme heat, drought conditions, or when plants show stress signs. These periods reduce nutrient absorption efficiency and increase waste runoff potential.
Your garden’s success depends on synchronizing fertilizer applications with active growth phases when plants actually utilize applied nutrients effectively.
How Much Fertilizer Should You Really Use?

While determining the correct fertilizer amount requires understanding your soil’s existing nutrient levels, you’ll achieve ideal results by applying rates that match your plants’ actual needs rather than using excessive amounts that can cause harm.
You should always conduct soil tests first to determine baseline nutrient concentrations.
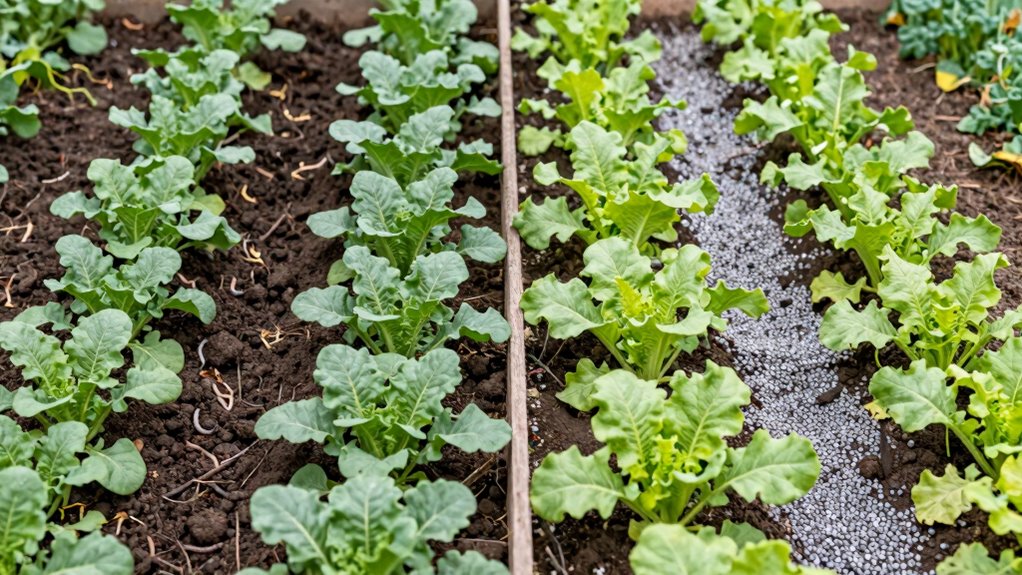
- Apply nitrogen at 1-2 pounds per 1,000 square feet for established lawns
- Use phosphorus based on soil test recommendations, typically 0.5-1 pound per 1,000 square feet
- Potassium requirements vary by crop type, generally ranging from 1-3 pounds per 1,000 square feet
- Split applications into multiple smaller doses rather than single large applications
- Adjust rates according to plant growth stages and seasonal demands
You’ll maximize nutrient uptake efficiency while minimizing environmental impact through precise application rates.
Signs of Nutrient Deficiency and Over-Fertilization
You must recognize yellowing leaf symptoms as nitrogen deficiency indicators, where chlorosis begins at leaf margins and progresses inward.
Stunted growth patterns reveal themselves through shortened internodes and reduced leaf size when essential nutrients like phosphorus and potassium are insufficient.
Burnt root indicators appear as darkened, mushy root tips that signal fertilizer salt toxicity has damaged your plant’s ability to absorb water and nutrients.
Yellowing Leaf Symptoms
Yellowing leaves often signal that your plants aren’t receiving adequate nutrients or are suffering from fertilizer burn.
You’ll notice distinct patterns that help identify the underlying issue.
- Nitrogen deficiency creates uniform yellowing across older leaves first
- Iron deficiency causes yellowing between leaf veins while veins stay green
- Magnesium shortage produces yellowing along leaf edges and between veins
- Over-fertilization results in brown, crispy leaf margins and tip burn
- Potassium deficiency shows as yellowing starting at leaf edges progressing inward
You must differentiate between nutrient shortages and excess fertilizer damage.
Nutrient deficiencies typically affect older leaves first, while fertilizer burn impacts newest growth.
Check your fertilization schedule and soil pH levels.
Adjust applications based on plant-specific requirements.
Regular monitoring prevents irreversible damage and maintains healthy plant development throughout growing seasons.
Stunted Growth Patterns
Stunted growth patterns provide clear indicators of nutrient imbalances that require immediate attention.
You’ll notice plants developing shorter internodes, producing smaller leaves, and exhibiting weak stem development when nitrogen levels drop critically low.
Phosphorus deficiency creates dwarfed growth with purplish coloration, while potassium shortage causes stunted root systems and poor fruit development.
Over-fertilization triggers different stunting symptoms entirely.
Excessive salt accumulation inhibits water uptake, forcing plants into drought-like stress responses.
You’ll observe crinkled, distorted new growth alongside shortened stems.
Micronutrient toxicities manifest as twisted leaf formations and halted meristem activity.
Monitor your crop’s growth rate consistently.
Healthy plants should demonstrate steady vertical and lateral expansion.
When you spot sudden growth cessation or abnormal size reduction, investigate root zone conditions immediately.
Document measurements regularly to catch subtle changes before they become irreversible damage.
Burnt Root Indicators
How can you identify the essential root damage that distinguishes nutrient deficiency from fertilizer toxicity? You must recognize specific visual and physiological indicators that tell you exactly what’s happening beneath the surface.
- Leaf margin necrosis – Brown, crispy edges indicate salt burn from excess fertilizer
- Chlorosis between veins – Yellowing tissue shows nitrogen or iron deficiency, not over-fertilization
- Root tip dieback – Blackened, mushy roots signal fertilizer burn rather than nutrient starvation
- Rapid wilting despite moisture – Plant cells lose water through osmotic stress from high salt concentrations
- Stem discoloration – Darkened vascular tissue reveals fertilizer toxicity damage
You belong among skilled gardeners who understand these vital distinctions.
Recognizing these signs early prevents irreversible damage and guarantees peak plant health through precise nutrient management.
How to Measure Fertilizer for Accurate Application
Why should you measure fertilizer carefully? Accurate measurement prevents over-application that damages plants and under-application that wastes resources.
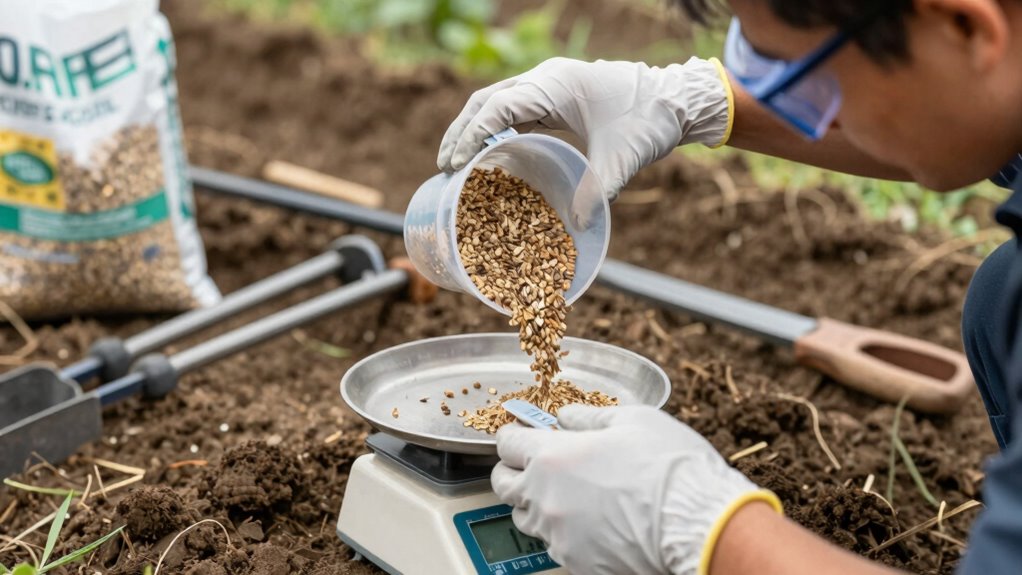
You need reliable tools: graduated containers, measuring spoons, or digital scales calibrated for small quantities. Check fertilizer labels for recommended application rates based on your specific plant types and soil conditions.
Calculate area measurements precisely using measuring wheels or tape measures for larger spaces. Convert between volume and weight measurements using fertilizer density specifications.
Keep detailed records of application rates and dates to track effectiveness. Calibrate spreaders according to manufacturer instructions, adjusting settings based on walking speed and distribution patterns.
Test soil regularly to determine existing nutrient levels, allowing you to adjust measurements accordingly.
Master these techniques and you’ll achieve ideal plant health while avoiding common application errors.
Prevent Fertilizer Burn in 3 Easy Steps
Three critical steps can save your plants from the damaging effects of fertilizer burn.
You’ll master these techniques quickly and join the ranks of successful gardeners who’ve already conquered this common challenge.
- Test your soil’s existing nutrient levels before adding any fertilizer.
- Apply fertilizers during cooler weather when plants aren’t stressed.
- Water thoroughly before application to create a protective buffer.
- Use slow-release formulas instead of quick-release alternatives.
- Maintain proper application distances from plant stems and leaves.
Your plants will respond immediately when you follow these precise methods.
You’re not just preventing damage—you’re becoming part of an informed community that understands fertilizer science.
These steps separate amateur gardeners from those who consistently achieve professional results.
What Time of Day Should You Fertilize?
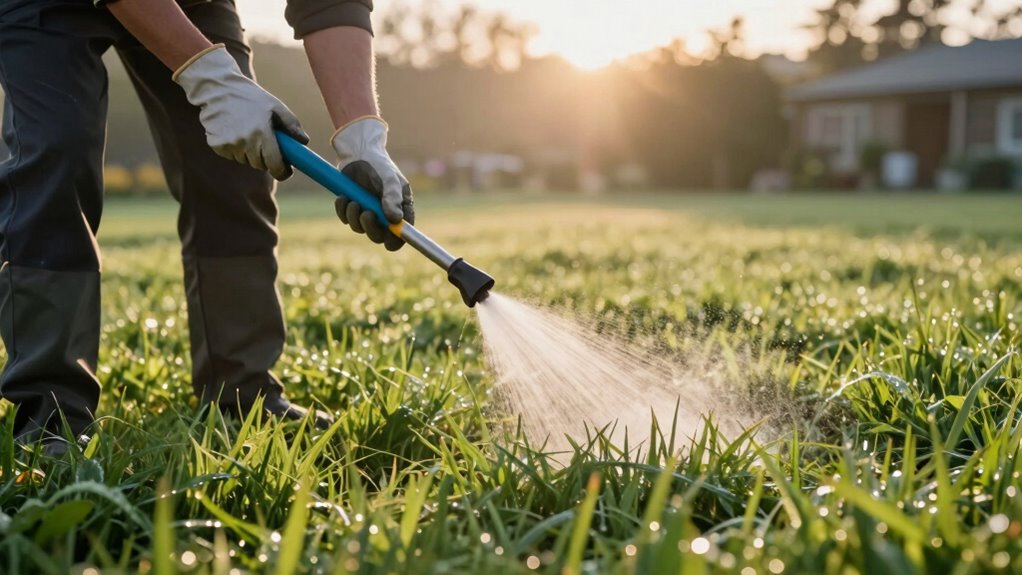
You should apply fertilizer during cooler morning hours when soil temperatures remain below 70°F, as this timing maximizes nutrient uptake while minimizing evaporation losses.
Avoid midday applications when intense heat can cause rapid nutrient breakdown and increase the risk of plant stress through excessive moisture loss.
Evening applications offer ideal soil absorption conditions as temperatures drop and moisture levels stabilize, allowing roots to efficiently process applied nutrients overnight.
Morning Application Benefits
While morning application of fertilizer offers several advantages, the timing primarily centers on maximizing nutrient uptake and minimizing potential plant stress. You should consider these key benefits when planning your fertilization schedule:
- Enhanced stomatal opening allows better nutrient absorption through leaf surfaces during cooler morning temperatures.
- Reduced evaporation rates guarantee maximum fertilizer concentration remains available for plant uptake.
- Lower wind speeds minimize drift and uneven distribution across your target area.
- Extended absorption period gives plants ample time to process nutrients before evening temperature drops.
- Improved water availability from dew or recent irrigation creates favorable conditions for root nutrient uptake.
Morning applications create ideal physiological conditions for efficient fertilization. You maximize investment returns while minimizing wasteful runoff and environmental impact through this strategic timing approach.
Midday Heat Considerations
Morning applications provide ideal conditions for nutrient uptake, but midday heat presents entirely different challenges that require careful consideration. You shouldn’t fertilize during peak afternoon temperatures because heat stress reduces plant absorption efficiency.
High temperatures cause stomatal closure, limiting nutrient transport through leaf tissues. You’ll experience increased evaporation rates that prevent proper fertilizer dissolution in soil. Midday applications also risk foliar burn when nutrients concentrate on leaf surfaces during rapid water loss.
Plant metabolic processes slow during extreme heat, reducing nutrient processing capabilities. You’re better off avoiding fertilization when soil temperatures exceed eighty-five degrees Fahrenheit.
Heat-damaged root systems can’t effectively uptake nutrients regardless of application timing. You should monitor local weather patterns and soil temperature readings before deciding.
Remember that different plant species show varying heat tolerance levels. You’ll achieve peak results by understanding your specific growing conditions and plant requirements.
Evening Soil Absorption
Afternoon heat poses significant challenges for fertilizer efficiency, making evening applications a more strategic choice for ideal soil absorption. You’ll maximize nutrient uptake when soil temperatures drop and moisture levels stabilize.
- Temperature advantages – Cool evening conditions prevent fertilizer burn and volatilization
- Extended absorption window – Plants absorb nutrients longer during night recovery periods
- Reduced evaporation risk – Lower temperatures minimize water loss from treated areas
- Optimal root activity – Plant roots remain active longer in cooler soil conditions
- Morning dew benefits – Evening applications allow nutrients to settle before overnight moisture
You should apply fertilizers between 4-6 PM when soil retains moisture but daytime heat dissipates. This timing aligns with natural plant circadian rhythms, ensuring maximum nutrient availability during peak absorption periods.
Your lawn and garden respond best to consistent evening feeding schedules.
Watering Tips Before and After You Fertilize
Although you might think that applying fertilizer and then watering immediately afterward is the best approach, timing your watering sessions strategically before and after fertilization greatly impacts nutrient absorption and plant health.
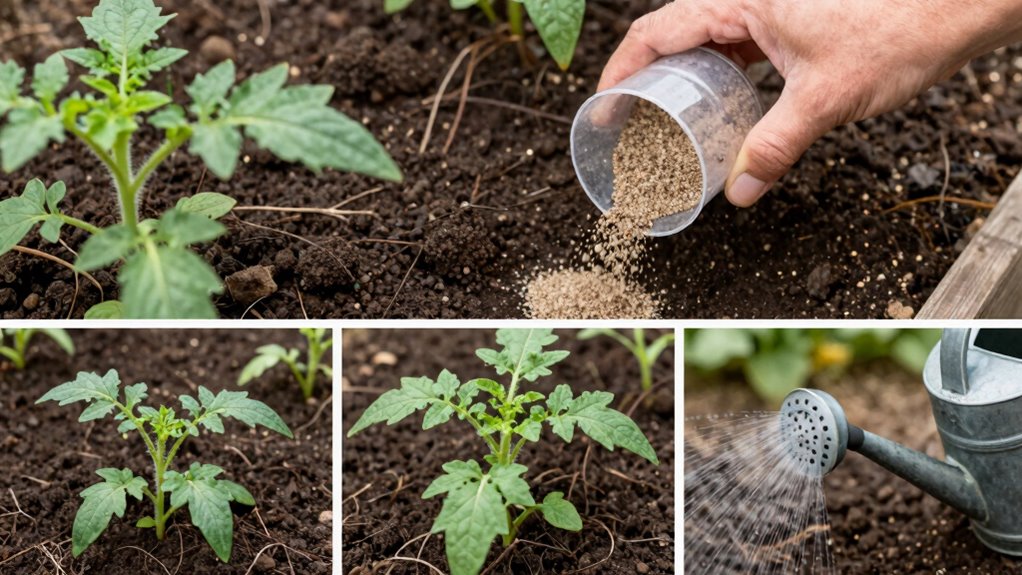
Water lightly two days before fertilizing to guarantee soil moisture doesn’t create runoff. Apply fertilizer to slightly damp soil for maximum contact.
After fertilizing, wait twenty-four hours before deep watering to allow nutrients to settle and prevent leaching. Shallow watering immediately after application pushes nutrients deeper than root zones can access.
Your plants need consistent moisture post-fertilization, so maintain regular watering schedules without over-saturating. Monitor soil moisture levels closely during the first week after application.
Proper watering timing guarantees you’re maximizing fertilizer investment while promoting healthy root development and nutrient uptake throughout your garden.
Avoid These Expensive Fertilizer Mistakes
While you’re enthusiastic to see results from your fertilizer application, applying too much product in hopes of accelerating growth actually wastes money and damages plant health. Over-fertilization burns roots and creates nutrient imbalances that stunt development.
Avoid these common mistakes:
- Applying fertilizer to dry soil, which prevents proper nutrient absorption
- Using slow-release formulas during active growing seasons when quick-release works better
- Ignoring soil pH levels that block nutrient uptake despite adequate fertilizer application
- Fertilizing newly planted specimens before they establish root systems
- Choosing premium brands without checking NPK ratios that match your plants’ specific needs
These errors cost you money while delivering poor results.
You belong to a community of gardeners who maximize efficiency through proper technique, not expensive mistakes.
Fertilize by Season for Year-Round Growth
Since different plants have varying nutrient requirements throughout the year, you should adjust your fertilizer application timing and formulation to match seasonal growth patterns.
Spring demands nitrogen-rich fertilizers to support vigorous leaf development and root establishment.
Summer requires balanced formulations as plants reach peak growth, while avoiding excessive nitrogen that causes weak growth.
Fall calls for potassium-heavy blends that strengthen plants against winter stress and promote root development.
Winter applications depend on your climate zone and plant hardiness. Cool-season grasses benefit from fall fertilization, while warm-season varieties need spring applications.
Monitor soil temperature and plant dormancy cycles. Apply slow-release fertilizers before expected growth periods.
Timing applications with natural growth cycles maximizes nutrient uptake efficiency and minimizes waste.
Customize Fertilizer Use by Plant Type
Different plants have distinct nutritional needs that require tailored fertilizer approaches for ideal growth and health. You must understand specific requirements to avoid over-fertilization or nutrient deficiencies that stunt development.
- Leafy vegetables demand high nitrogen for lush foliage production.
- Fruiting plants like tomatoes need phosphorus boosts during flowering stages.
- Root vegetables benefit from potassium-rich formulas for proper tuber development.
- Flowering ornamentals require balanced NPK ratios with trace elements like iron.
- Succulents and cacti need minimal feeding with specialized low-nitrogen blends.
You should test soil pH levels before applying any fertilizer, since nutrient availability changes dramatically across different pH ranges.
Annual plants typically need more frequent feeding than perennials, which store nutrients differently.
Slow-Release vs Quick-Release: Which Works Best?
Choosing between slow-release and quick-release fertilizers depends on your plants’ nutrient uptake patterns and growing conditions. You’ll want to understand how each type works to make informed decisions.
Slow-release fertilizers provide steady nutrient delivery over weeks or months through controlled breakdown mechanisms. You apply them less frequently, reducing application stress on plants while maintaining consistent feeding schedules that mirror natural nutrient availability.
Quick-release fertilizers deliver immediate nutrient availability, causing rapid plant response within days. You’ll see faster greening and growth spurts, but risk nutrient leaching and potential burn if over-applied.
Consider your soil type, climate, and plant species when deciding. Heavy feeders like vegetables often benefit from quick-release during growing seasons, while ornamentals typically prefer slow-release formulations for sustained nutrition without frequent intervention.
Use Eco-Friendly Fertilizing Practices
While you’re selecting between slow-release and quick-release fertilizers, incorporating eco-friendly practices guarantees your nutrient management strategy supports long-term soil health and environmental sustainability.
You should prioritize methods that minimize environmental impact while enhancing plant nutrition efficiency.
- Choose organic compost over synthetic options to improve soil microbiology
- Test soil pH and nutrient levels before applying any fertilizer to prevent over-application
- Use natural amendments like bone meal, blood meal, or fish emulsion for targeted nutrient delivery
- Implement crop rotation and cover cropping to naturally replenish soil nutrients
- Apply fertilizers during ideal weather conditions to reduce runoff and nutrient leaching
These practices assure you’re part of the solution for sustainable gardening while achieving better results.
Best Tools for Precise Fertilizer Application
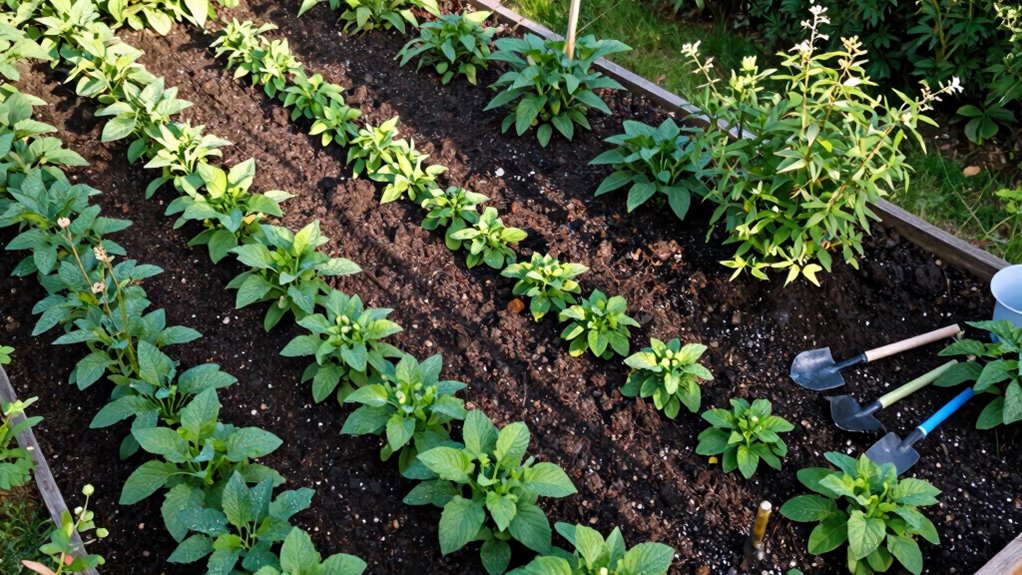
When you’re ready to apply fertilizer, having the right tools guarantees accurate distribution and ideal nutrient uptake.
You’ll want a calibrated spreader that matches your fertilizer type—drop spreaders offer pinpoint accuracy for small areas, while broadcast spreaders cover larger spaces efficiently.
Digital soil meters help you measure existing nutrient levels, preventing over-application.
Use handheld application tools like precision sprayers for targeted treatment around delicate plants.
Don’t overlook quality measuring cups and scales for mixing liquid fertilizers accurately.
Calibration kits assure your equipment disperses materials at proper rates.
Invest in weather-resistant storage containers that maintain fertilizer integrity.
These tools integrate seamlessly into your routine, helping you achieve professional results while avoiding common application mistakes that waste resources and harm plant health.
Track Your Fertilizer Use for Better Results
You should monitor your fertilizer application rates by recording exact quantities used per square foot or acre to maintain consistency across growing seasons.
Track nutrient levels in your soil through regular testing intervals, documenting nitrogen, phosphorus, and potassium concentrations before and after each application cycle.
Use these recorded results to adjust your fertilizer amounts and timing, ensuring ideal nutrient delivery while preventing over-application that can harm plant health and environmental quality.
Monitor Application Rates
Tracking your fertilizer application rates verifies you apply the precise amounts needed for ideal plant growth while preventing waste and environmental damage.
You’ll maximize nutrient uptake efficiency when you monitor these critical metrics consistently.
- Calibrate spreaders regularly – Verify equipment delivers exact rates per square foot
- Measure soil test recommendations – Apply only what deficiency analysis indicates
- Time applications precisely – Match nutrient release with plant growth stages
- Document application dates – Track seasonal variations and effectiveness patterns
- Calculate cost per application – Monitor expense efficiency alongside growth results
You’re part of a community that values precision agriculture.
Accurate rate monitoring separates amateur gardeners from professional growers.
Mastering this skill means you’re taking responsibility for sustainable practices while achieving better yields.
Your plants respond positively when you provide exactly what they need, when they need it.
Record Nutrient Levels
Maintaining detailed records of nutrient levels throughout your growing season provides essential data for optimizing fertilizer applications and achieving superior crop performance.
You should document soil test results, tissue analysis values, and visual deficiency symptoms as they appear. Track nitrogen, phosphorus, potassium, and micronutrient concentrations separately.
Record application dates, product types, and rates used. Note weather conditions and irrigation schedules that might affect nutrient availability.
Create standardized forms or use digital tools to guarantee consistent data collection. Photograph crop development stages and any nutrient-related issues.
Store records systematically by field, crop, and date. This documentation becomes your reference library for future growing seasons.
You’ll identify patterns in nutrient uptake and deficiency timing. Regular monitoring helps you understand how different factors influence nutrient dynamics in your specific growing conditions.
Adjust Based On Results
While analyzing your nutrient records reveals critical insights into crop performance, adjusting fertilizer practices based on these findings secures continuous improvement in nutrient management efficiency.
You must regularly evaluate your application rates and timing to enhance results.
- Review soil test results annually to identify nutrient deficiencies
- Compare yield data against fertilizer inputs to determine ideal rates
- Adjust timing based on weather patterns and crop growth stages
- Modify application methods according to soil type and drainage conditions
- Track economic returns to guarantee cost-effective nutrient investments
Your commitment to data-driven adjustments creates a feedback loop that maximizes both profitability and environmental stewardship.
Regular monitoring and responsive modifications guarantee you’re always moving toward peak fertilizer efficiency.
Conclusion
You’ll notice that efficient fertilization coincides with careful planning and monitoring. Test soil regularly, choose appropriate fertilizer types, and apply during ideal conditions. Organic options often align with sustainable practices while delivering consistent nutrient supply. Track application rates meticulously to avoid over-fertilization. Timing coincides with plant growth stages—nitrogen in spring, potassium in fall. Use slow-release formulas for extended benefits, and always apply during cooler hours to prevent burn damage while maximizing nutrient uptake efficiency.
