

Nearly 60% of home gardeners struggle with crop spacing, leading to reduced yields and overcrowded plants. You can avoid this common mistake by learning proper row-building techniques. Start by selecting a sunny, well-drained spot and marking straight lines with stakes and string. Clear debris, till the soil to 6-8 inches deep, and space rows according to plant size. What simple tools will you need to make this process even easier?
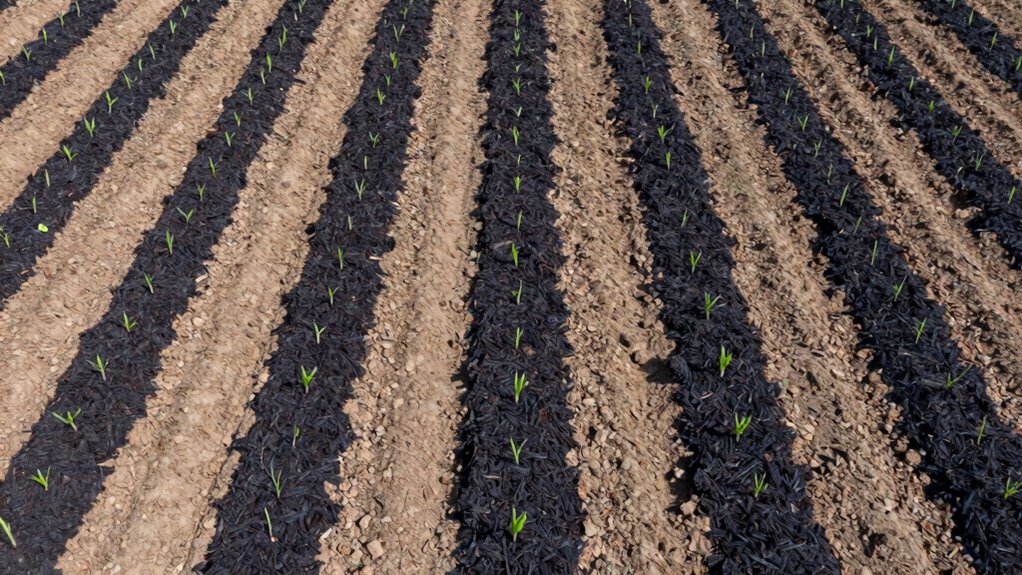
Why Neat Crop Rows Boost Your Harvest
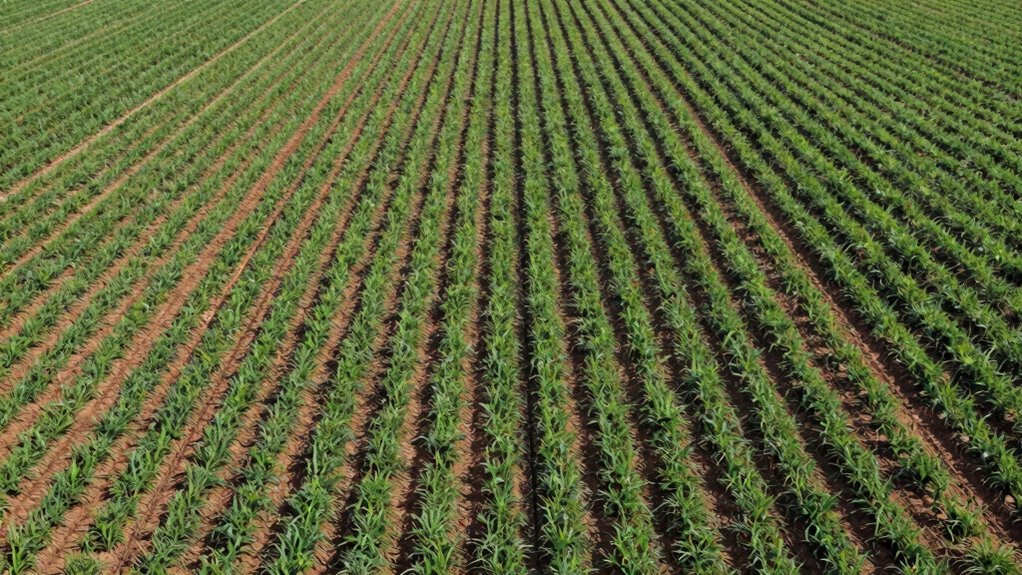
When you plant crops in neat, well-maintained rows, you’re not just making your garden look tidy—you’re actually setting yourself up for a considerably better harvest. Proper row spacing allows each plant adequate room to grow, reducing competition for nutrients and sunlight.
You’ll notice healthier plants with improved air circulation, which prevents fungal diseases from spreading. Rows make watering more efficient since water reaches roots directly instead of pooling in random spots.
Harvesting becomes easier when you can walk between rows without damaging crops. Your plants respond positively to this organized approach, producing larger yields and better-quality produce.
Neat rows also help you monitor plant health closely, spotting problems early before they spread. You’ll spend less time fighting weeds because defined rows make maintenance simpler.
This methodical approach creates structure your garden desperately needs.
6 Must-Have Tools for Crop Rows

Having the right tools makes building crop rows much easier and more precise.
You’ll need a sturdy garden hoe for breaking soil and creating straight lines. A garden rake helps smooth soil surface and remove debris. Measuring tape guarantees consistent row spacing according to your crop needs. Wooden stakes and string create straight guidelines for planting.
A garden trowel handles precise digging for seeds and seedlings. Sharp pruning shears trim damaged plants and maintain row edges. A watering can or hose with gentle spray keeps soil moist without disturbing seeds. Don’t forget comfortable work gloves for protection.
These basic tools give you everything needed to create professional-looking crop rows that maximize your growing space and yield better harvests. Quality tools last longer and make gardening more enjoyable.
How to Plan Your Garden Layout?
You’ll need to evaluate crop spacing guidelines before planting, since proper distances between plants affect yield and growth.
Soil preparation methods matter too, because loose, well-draining earth makes it easier to create straight rows.
These basics set the foundation for successful crop row building.
Crop Spacing Guidelines
Because proper spacing determines your garden’s success, planning your crop layout requires careful attention to each plant’s specific needs. You should research individual plant requirements before placing seeds or seedlings.
Large plants like tomatoes need 18-24 inches between them, while smaller crops like lettuce only need 6-8 inches. Don’t overcrowd your rows; plants need room to grow and access nutrients properly.
Consider companion planting to maximize space efficiently. Root vegetables need loose soil and adequate distance to develop correctly. You’ll harvest better yields when plants aren’t competing for resources.
Mark your rows clearly and maintain consistent spacing throughout your garden. Proper planning prevents common mistakes that beginners make. Your future self will thank you for taking time to space crops correctly from the start.
Soil Preparation Methods
Several key soil preparation methods help create the ideal foundation for your crop rows.
Proper preparation guarantees your plants thrive and produce abundant harvests.
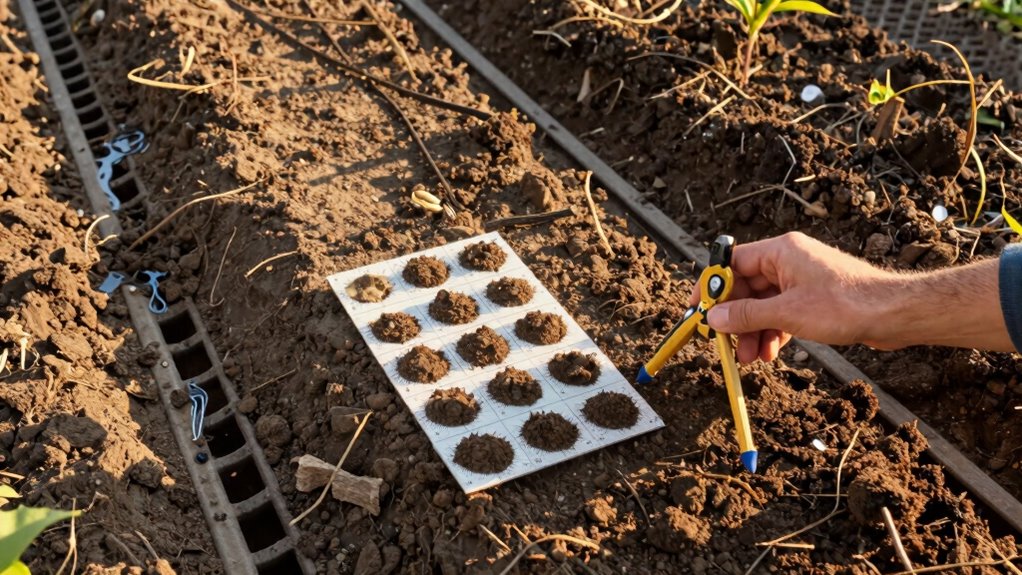
1. Test and amend your soil – Check pH levels and nutrient content before planting.
Add compost or organic matter to improve soil structure and fertility.
2. Clear and till the area – Remove weeds, rocks, and debris from your planting zone.
Loosen compacted soil to a depth of 8-12 inches for better root development.
3. Create proper drainage – Ascertain water flows away from planting areas.
Raised beds or mounded rows help prevent waterlogging that can damage crops.
These steps prepare your garden for successful crop production.
Pick the Best Garden Spot for Sun and Drainage
You should choose a garden spot that receives at least 6-8 hours of direct sunlight daily for ideal plant growth.
Test your soil’s drainage by digging a small hole and filling it with water to see how quickly it drains.
Avoid areas where water pools or sits for extended periods, as most crops need well-draining soil to thrive.
Optimal Sunlight Exposure
While selecting your garden site, make certain it receives at least six hours of direct sunlight daily since most crops thrive in full sun exposure.
You’ll want to observe your potential garden spots throughout different times of day to confirm consistent light coverage.
- Morning sun – Prioritize areas that catch early sunlight, as this gentle light helps plants start their day right and promotes healthy growth.
- Avoid shadows – Keep your rows away from large trees, buildings, or fences that cast shadows during peak growing hours.
- Seasonal considerations – Remember that sun angles change throughout the year, so what seems sunny in summer might be shaded in spring or fall.
Test your chosen spot with a sun calculator app or simply track sunlight patterns manually for several days.
Proper Soil Drainage Techniques
Good drainage complements ideal sunlight exposure by preventing waterlogged roots that can rot and kill your crops.
You’ll want to choose garden spots where water doesn’t pool after rain. Test potential areas by digging six-inch holes and filling them with water. If drainage takes longer than thirty minutes, avoid those locations. Look for slight slopes or raised areas that naturally shed excess moisture. Sandy or loamy soils drain better than heavy clay.
You can improve poor drainage by adding organic compost or creating raised beds. Never plant crops in areas where water collects, as this creates root problems.
Remember that proper drainage keeps your plants healthy and productive throughout the growing season, giving you the successful harvest you deserve.
Prepare Soil the Easy Way
One simple approach to preparing soil for crop rows involves using a garden tiller to break up compacted earth and create loose, workable ground.
You’ll want to work when the soil is moist but not soggy for best results.
- Test your soil’s readiness by squeezing a handful – it should crumble easily when poked, not stick together in a muddy ball.
- Remove weeds and debris before tilling to prevent them from getting chopped up and mixed into your planting area.
- Till to proper depth – most vegetables need 8-12 inches of loosened soil for healthy root development.
This preparation creates the foundation your crops need to thrive.
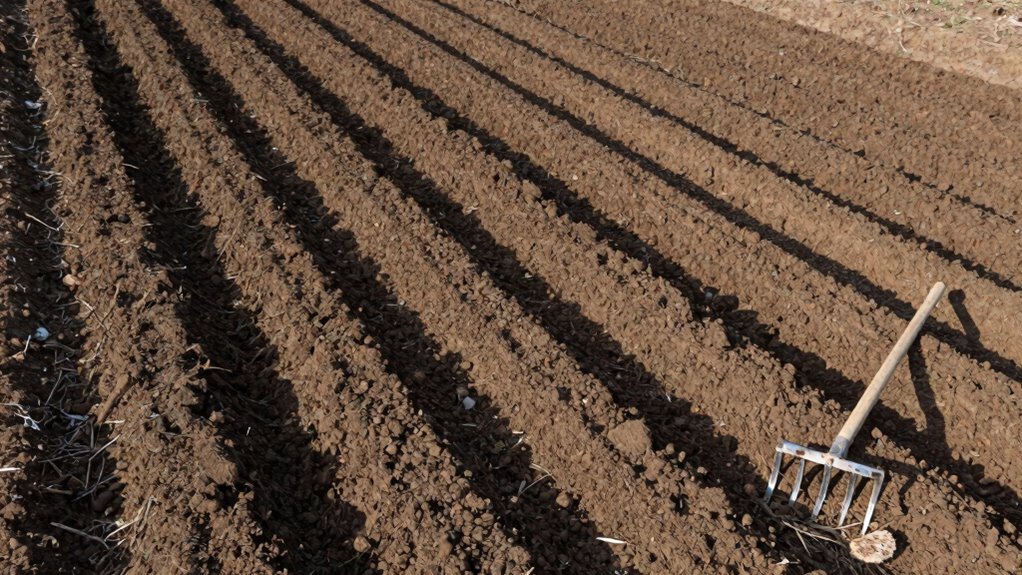
Mark Straight Crop Rows Without Fancy Gear
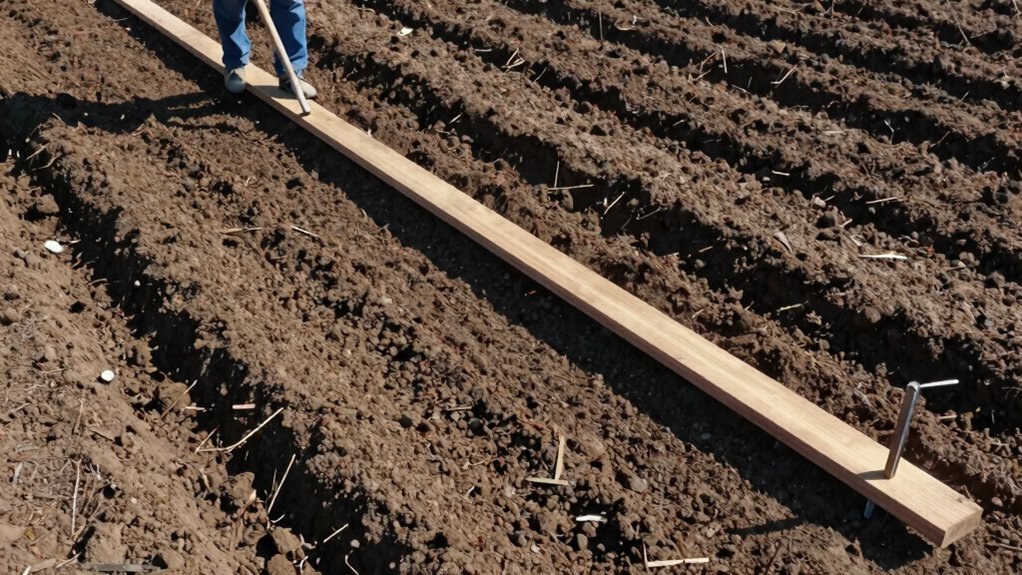
Since you don’t need expensive tools to create straight crop rows, you can easily mark your planting lines using simple household items and basic techniques.
Grab a few wooden stakes or metal rods and hammer them firmly into the ground at each end of your intended row. Tie a string tightly between these markers, pulling it taut. This creates a straight line guide for your planting. You can also use a garden hose filled with water as a straight edge, or stretch a rope between two fixed points.
For shorter rows, align wooden boards or use a long stick as a measuring guide. These simple methods work just as well as costly equipment. Everyone can master these techniques quickly, ensuring your garden looks professional while saving money on specialized tools.
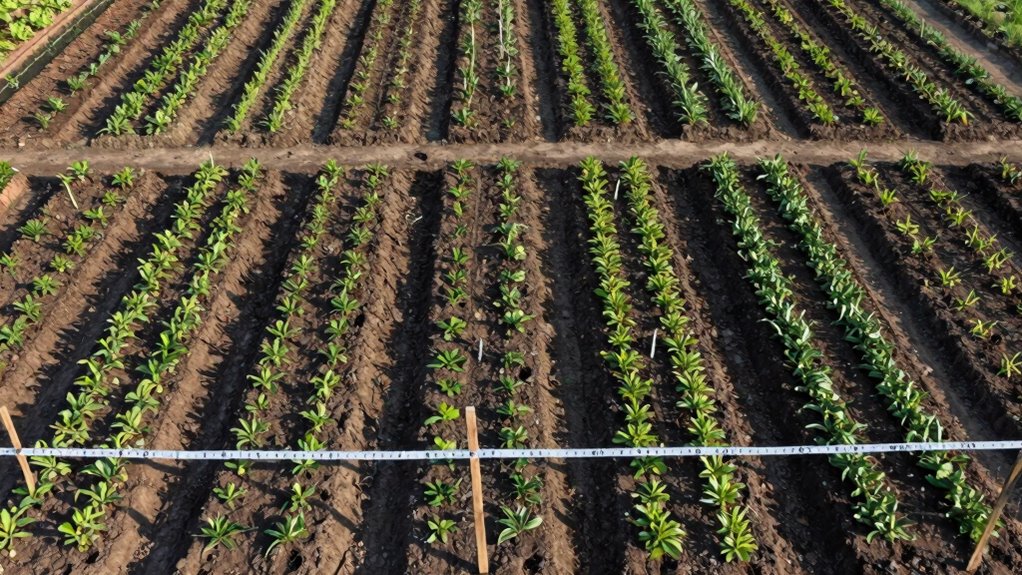
Set Ideal Crop Row Width and Spacing
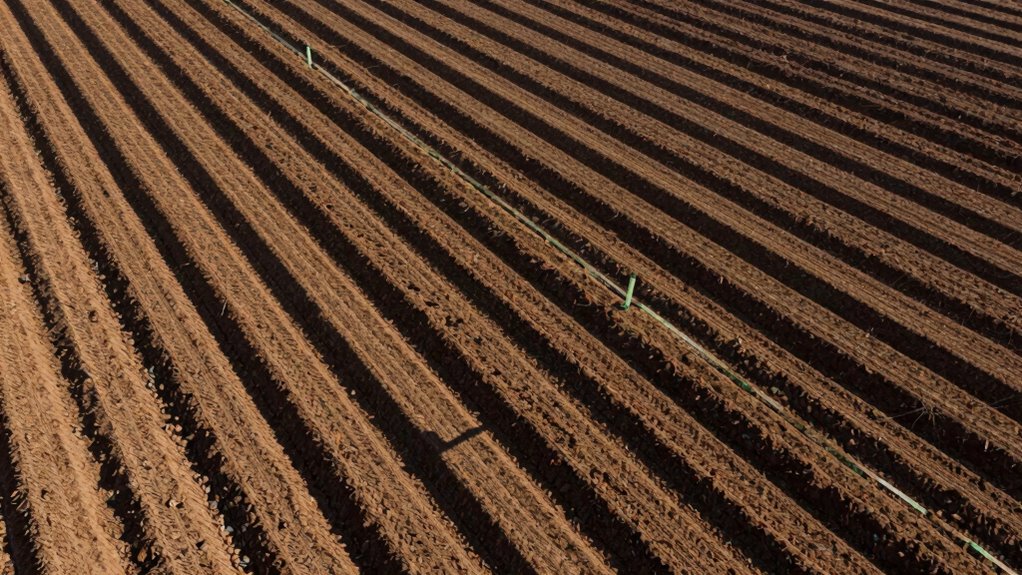
Determining the ideal width and spacing for your crop rows depends on several factors including the type of crops you’re planting, the size of your garden, and your personal gardening style.
You’ll want to maximize your growing space while ensuring plants have room to thrive.
1. Check seed packet recommendations – Most packets specify best row width and plant spacing.
Don’t guess; use this proven guidance.
2. Consider your garden tool access – Leave enough room between rows for your hands, tools, or equipment to move comfortably without crushing plants.
3. Account for mature plant size – Small seeds grow into large plants.
Plan accordingly by researching full-growth dimensions before planting.
These simple steps help create organized, productive crop rows that any gardener can master.
Plant Seeds at the Correct Depth
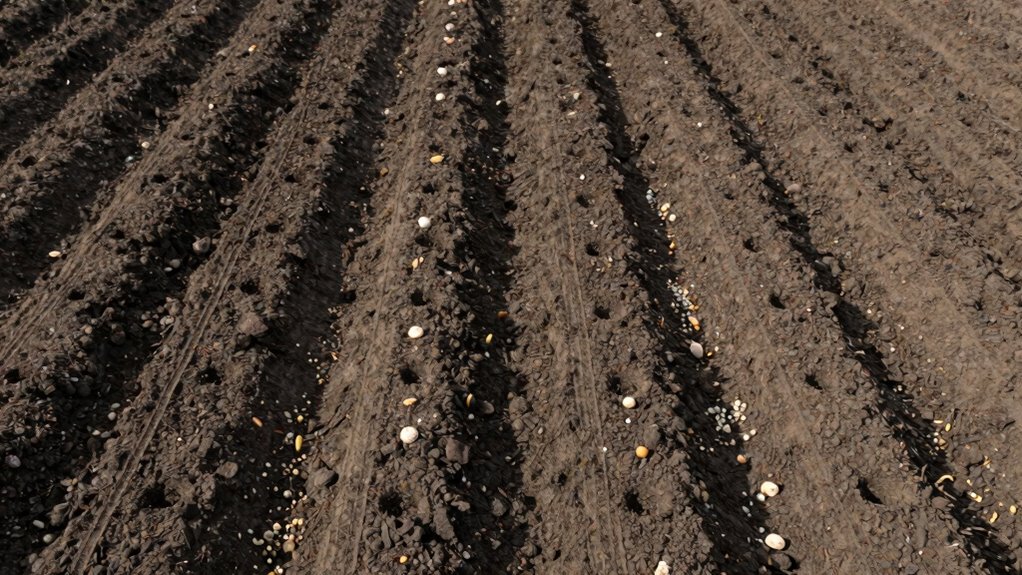
Now that you’ve planned your row spacing, it’s time to focus on how deep to plant your seeds. You’ll want to plant seeds at the right depth to guarantee successful germination and healthy growth.
As a general rule, plant seeds two to three times deeper than their diameter. Small seeds like lettuce need only a quarter-inch depth, while larger seeds like beans require one to two inches. Don’t guess – check your seed packet for specific instructions.
Planting too shallow causes seeds to dry out quickly, while planting too deep prevents sprouting. Use your finger or a small tool to create precise holes. Cover seeds gently with soil and press lightly.
Getting depth right gives your plants the best start and helps you feel confident you’re growing successfully alongside other gardeners.
Water New Crop Seedlings Properly
When you’ve successfully planted your seeds at the correct depth, you’ll want to focus on proper watering techniques to guarantee your new crop seedlings thrive. Consistent moisture is essential during germination and early growth stages.
- Water gently using a fine spray or watering can with small holes to avoid disturbing seeds and delicate roots.
- Keep soil consistently moist but not waterlogged – check moisture levels daily by feeling the top inch of soil.
- Water early morning to reduce evaporation and allow foliage to dry before evening, preventing disease issues.
Establishing proper watering habits from the start guarantees your crop rows develop strong, healthy root systems that’ll support robust plant growth throughout the growing season.
Use Mulch to Protect Rows From Weeds
You should choose organic mulch like straw or wood chips to suppress weeds while adding nutrients to your soil.
Apply a 2-3 inch layer around your crop rows, keeping it several inches away from plant stems to prevent rot.
These mulching techniques will help you maintain weed-free rows without harmful chemicals.
Mulch Types And Benefits
Why shouldn’t you ignore mulch when planning your crop rows? Mulch becomes your garden’s best friend by suppressing weeds, retaining moisture, and improving soil health. You’ll save countless hours weeding while protecting your plants’ root systems.
- Organic mulches like straw, leaves, or grass clippings break down over time, feeding beneficial soil organisms and improving structure while creating nutrient-rich growing conditions.
- Inorganic options such as landscape fabric or plastic mulch provide long-lasting weed barriers and help warm soil faster in spring, extending your growing season.
- Living mulches like clover or low-growing herbs fill empty spaces between crops, preventing weed growth while attracting helpful insects to your garden ecosystem.
Choose mulch that fits your gardening style and crop needs.
Application Techniques For Rows
Three key techniques help you apply mulch effectively around your crop rows to maximize weed suppression and plant health.
First, spread mulch evenly between rows immediately after planting, maintaining a 2-3 inch layer that won’t smother your crops. You’ll want to leave small gaps around plant stems to prevent moisture buildup.
Second, extend mulch coverage beyond the row edges to block weeds from invading from the sides.
Third, replenish mulch throughout the growing season as it decomposes, especially after heavy rains that might wash it away.
Don’t forget to check for bare spots that need topping off. These methods keep your garden looking neat while reducing weed competition. Your plants will thrive with this consistent protection, and you’ll spend less time weeding.
Avoid These 5 Common Planting Mistakes
When planting your crop rows, avoiding common mistakes can save you time, money, and frustration while greatly improving your harvest yield.
You’ll want to steer clear of these errors that trip up many gardeners.
- Planting too deep or shallow – Follow seed packet depths precisely. Too deep suffocates sprouts; too shallow dries them out quickly.
- Ignoring soil temperature – Don’t rush planting before soil warms adequately. Cool soil prevents germination and rots seeds.
- Overcrowding your rows – Give plants adequate spacing from the start. Crowded crops compete for nutrients, water, and sunlight.
These simple adjustments make you part of the successful gardener community.
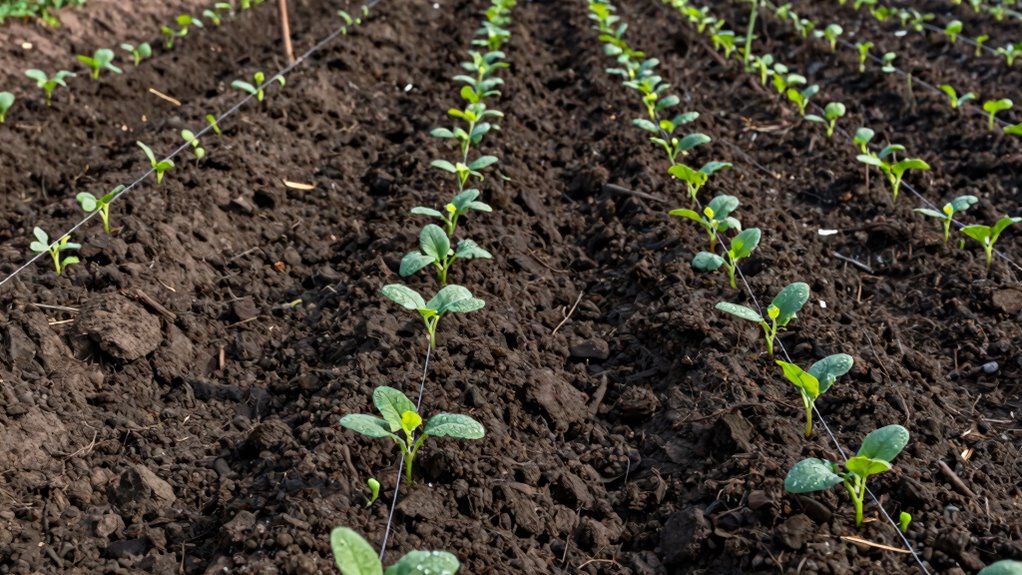
Thin Plants at the Right Time
You should thin your plants when they reach 2-3 inches tall to prevent overcrowding and promote healthy growth.
Proper spacing techniques guarantee each plant has enough room for roots, stems, and leaves to develop fully.
Waiting too long to thin creates competition for nutrients and reduces your overall yield.
Optimal Thinning Timing
The right timing for thinning your crop rows makes all the difference in achieving ideal plant spacing and healthy growth. You want to thin seedlings when they’re sturdy enough to handle but before they compete too aggressively for resources.
- Wait for true leaves: Thin when plants develop their second set of true leaves, usually 2-3 weeks after germination. This guarantees you’re working with healthy, established seedlings rather than delicate sprouts.
- Choose mild conditions: Pick cloudy days or early morning hours for thinning. This reduces transplant shock and gives plants better recovery conditions.
- Act before overcrowding: Don’t wait until plants are touching stems. Early intervention prevents stunted growth and disease issues while making your job much easier.
Proper Spacing Techniques
Thinning seedlings at the right time guarantees ideal plant spacing and prevents overcrowding issues. You should remove excess plants when they develop their first set of true leaves. Measure spacing requirements for your specific crop variety. Mark desired plant locations with small sticks or flags before thinning.
Pull unwanted seedlings gently by their stems rather than cutting them. This prevents soil disturbance around remaining plants.
Thin again if necessary when plants reach three inches tall. Overcrowded seedlings compete for nutrients, water, and sunlight. Proper spacing allows each plant adequate room for root development and air circulation.
Check spacing guidelines on seed packets or gardening resources. Remember that plants need space to mature, not just survive. Your future harvest depends on giving each plant enough room today.
Support Tall Crops Early On
Many gardeners don’t realize that tall crops need structural support from the moment they emerge from the soil.
Waiting until plants grow large creates problems you can easily avoid.
You’ll save time and prevent crop damage by starting early.
1. Install stakes or trellises immediately after planting your seeds or seedlings.
Don’t wait for visible growth.
2. Use soft plant ties or garden twine to gently secure stems to supports every few inches as plants develop.
3. Check your supports weekly and adjust them as your crops grow taller and wider throughout the season.
Early intervention guarantees healthier plants and better yields.
Your future self will thank you for this simple step.
Crop-Specific Row Adjustments for Better Growth
You need to adjust row spacing and soil preparation based on your specific crops to maximize growth potential.
Different plants require varying amounts of space and nutrient-rich soil depths to thrive properly.
These adjustments guarantee each crop receives ideal growing conditions from planting through harvest.
Crop Spacing Variations
While spacing requirements vary considerably between crops, understanding these differences is essential for maximizing your yield and plant health.
You’ll discover that proper spacing prevents competition for nutrients and sunlight.
- Leafy greens like lettuce need only 6-8 inches between plants because they form compact heads. You can fit more in smaller spaces.
- Tomatoes require 18-24 inches between plants to accommodate their sprawling growth and prevent disease spread through better air circulation.
- Root vegetables such as carrots need thinning to 2-3 inches apart for proper bulb development; overcrowding causes stunted growth.
You’re not just planting seeds – you’re creating ideal growing conditions.
These spacing adjustments guarantee each plant gets adequate room to thrive, ultimately giving you better harvests and healthier crops.
Soil Preparation Techniques
Proper soil preparation sets the foundation for successful crop rows, and each plant type demands specific adjustments to guarantee ideal growth conditions.
You should test your soil’s pH level first, then adjust accordingly. Root vegetables like carrots need loose, stone-free soil, so remove debris and consider adding sand.
Leafy greens prefer nitrogen-rich soil, so incorporate compost or aged manure. Legumes fix their own nitrogen but still benefit from well-draining conditions.
Heavy feeders like tomatoes require plenty of organic matter mixed deeply into the soil. Light feeders such as herbs thrive in leaner soil conditions.
Always work your soil when it’s moist but not waterlogged, breaking up clumps and creating smooth, level rows. Your plants will reward you with robust growth and better yields.
Protect Crop Rows From Pests Naturally
Several natural methods can effectively safeguard your crop rows from pests without relying on chemical treatments.
You’ll want to create barriers and use organic deterrents that actually work.
1. Companion planting – Grow marigolds, basil, or nasturtiums alongside your crops.
These plants naturally repel insects while attracting beneficial predators to your garden space.
2. Physical barriers – Install row covers, copper tape, or mesh fencing around your crop rows.
These simple installations prevent crawling insects and small animals from reaching your plants.
3. Diatomaceous earth application – Sprinkle this natural powder around your crop bases.
It’s harmless to humans but deadly to soft-bodied insects, creating an effective protective barrier.
These methods keep your garden healthy while maintaining natural growing practices.
Maintain Crop Rows All Season
Once you’ve planted your crops, consistent maintenance keeps them thriving from spring through harvest.
You’ll need to water deeply but less frequently to encourage strong root development. Mulch around plants to retain moisture and suppress weeds that compete for nutrients. Check soil pH regularly and adjust as needed for ideal growth.
Monitor plant health weekly, removing any diseased or damaged foliage immediately. Thin seedlings to prevent overcrowding and promote air circulation. Support taller varieties with stakes or trellises before they flop over.
Rotate companion plants seasonally to maximize space and deter pests naturally.
Stay vigilant about weed management throughout the growing season. Hand-pull weeds when soil is moist, or use shallow cultivation between rows. Regular maintenance prevents small problems from becoming major headaches later.
Harvest Neat Crop Rows Efficiently
Your careful attention to crop row maintenance throughout the growing season pays off when harvest time arrives. Neat rows make harvesting faster and more efficient.
- Use the right tools – Grab a sharp knife or pruning shears to cut stems cleanly without damaging neighboring plants. Avoid yanking or tearing.
- Work systematically – Move down each row systematically, harvesting ripe produce first. This prevents you from trampling plants and keeps your workspace organized.
- Keep pathways clear – Maintain clean walkways between rows while harvesting. This lets you move efficiently and reduces the risk of stepping on plants or missing spots.
These simple practices help you harvest like a pro while keeping your garden looking tidy.
Refresh Garden Soil After Harvest
After you’ve harvested your crops, it’s time to turn your attention to the soil that supported your plants throughout the growing season.
Remove any remaining plant debris and weeds from your rows. Loosen compacted soil with a garden fork or tiller, working to a depth of six to eight inches.
Add compost or well-aged manure to replenish nutrients your crops consumed. Spread a two-inch layer over your rows and mix it into the soil.
Consider adding organic matter like leaf mold or grass clippings. Water the refreshed soil lightly to help settle it.
Test your soil’s pH balance and adjust if necessary. This preparation guarantees your garden community thrives next season.
Your future crops will thank you for creating healthy, nutrient-rich growing conditions now.
Plan Crop Rows for Next Season
While preparing your garden soil for the next growing season, you should simultaneously plan your crop rows to maximize space and yield.
Smart planning guarantees you’ll grow more food while making garden maintenance easier.
1. Map your garden layout – Sketch your plot on paper, marking where each crop family will go.
Keep tall plants on the north side to avoid shading shorter ones.
2. Consider companion planting – Place compatible crops together, like tomatoes with basil or beans with corn.
This natural partnership improves growth and deters pests.
3. Plan for succession planting – Stagger planting dates for crops like lettuce and beans.
You’ll enjoy continuous harvests instead of overwhelming surpluses.
Your future self will thank you for this thoughtful preparation.
Conclusion
You’ve learned the essentials for building simple crop rows that maximize your garden’s potential. By following these straightforward steps—selecting the right location, preparing soil properly, and maintaining consistent spacing—you’ll set yourself up for success. Curiously, gardens with properly spaced rows can yield up to 25% more produce than randomly planted beds. Keep these principles in mind as you plan your next growing season.
