

You’re ready to use your compost when it’s dark, crumbly, and smells earthy—but how do you know it’s actually finished? Unfinished compost can harm plants or tie up soil nitrogen. Let’s walk through the key signs that your compost is fully broken down and ready to boost your garden’s performance.
Is Your Compost Fully Broken Down?
How do you know when your compost has fully decomposed into rich, dark humus ready for your garden?
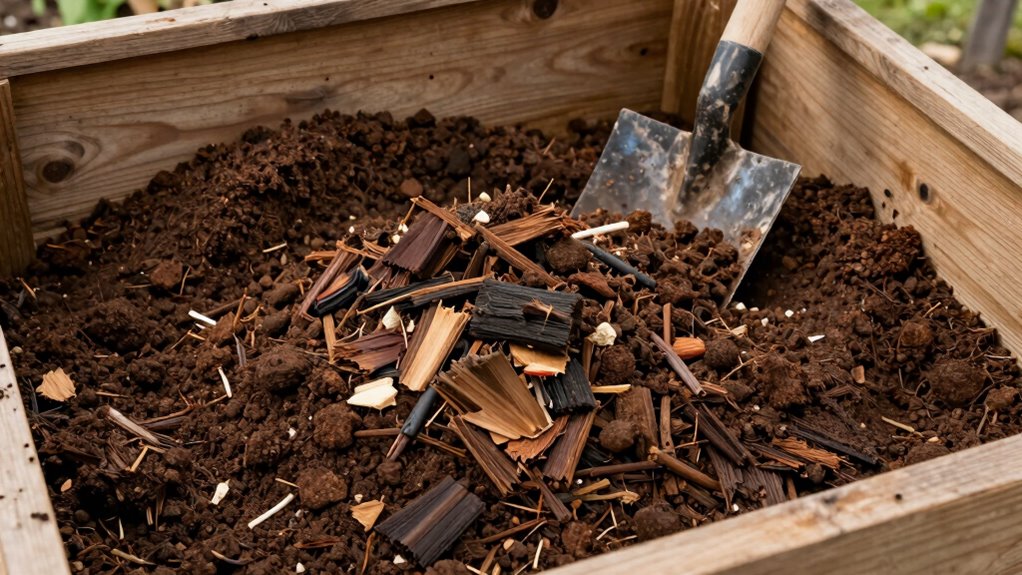
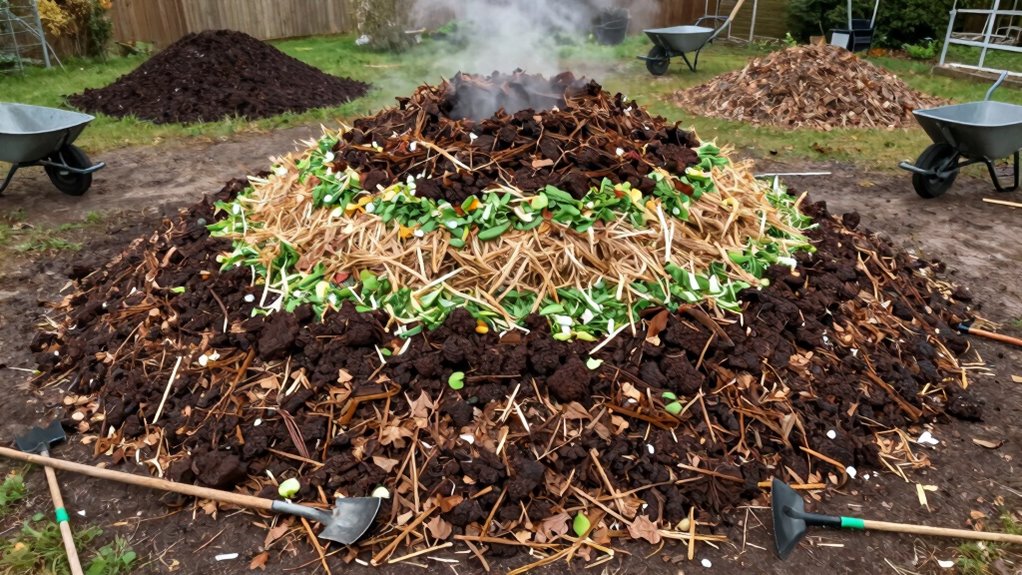
Your finished compost should look like dark, crumbly soil with an earthy smell. Pick up a handful and squeeze it—finished compost holds together without being wet or sticky.
You shouldn’t recognize original materials except for small amounts of twig pieces or corn cobs that decompose slowly.
Screen your compost through a ¼-inch mesh to remove any large, undecomposed chunks.
Temperature should match ambient air since microbial activity has slowed. Finished compost won’t heat up when remixed with water.
Spread this nutrient-rich material in your garden beds or around established plants.
Wait two to four weeks after application before planting seeds directly into amended soil.
Fix Stalled or Smelly Decomposition Batches
You’ll need to identify what’s causing your compost to stall or smell by checking moisture levels, aeration, and material balance.
Adjust these factors quickly by adding dry materials if it’s too wet, or wet materials if it’s too dry, while ensuring proper airflow through regular turning.
Adding the right organic materials in correct proportions will restart the decomposition process and eliminate odors.
Identify Common Decomposition Issues
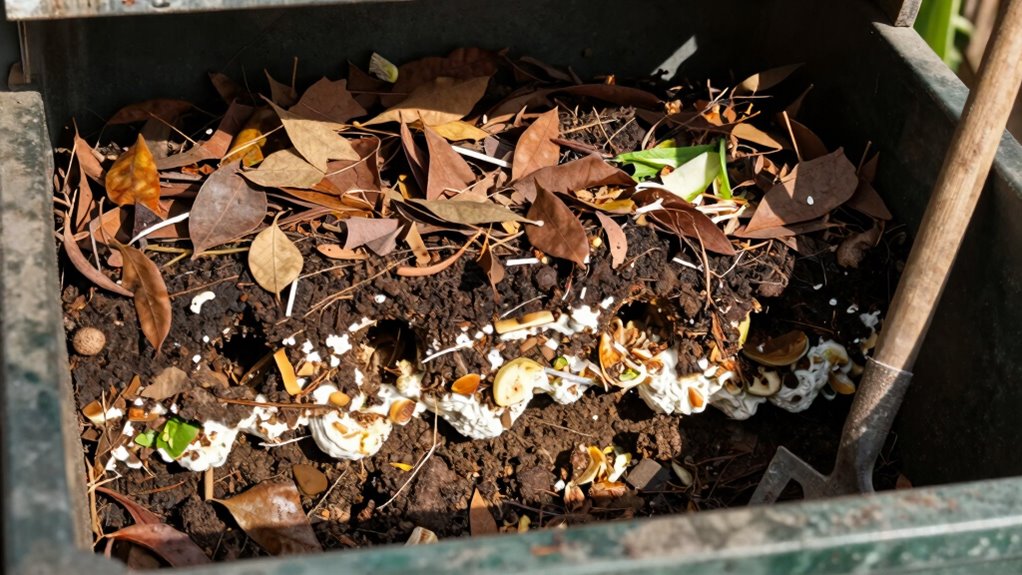
Sometimes compost piles stall or start emitting unpleasant odors, signaling that something has gone wrong in the decomposition process. You’ll notice these issues when your pile stops heating up or begins smelling rotten.
Common culprits include improper carbon-to-nitrogen ratios, where too much green material creates ammonia smells. Compaction often causes anaerobic conditions, producing foul sulfur-like odors. Temperature fluctuations can halt microbial activity entirely.
Excessive moisture leads to waterlogged conditions that prevent proper breakdown. Your pile might also suffer from insufficient particle size diversity, slowing decomposition.
Recognizing these patterns helps you troubleshoot effectively. Pay attention to visual cues like white fungal growth indicating healthy breakdown, versus black slimy sections showing poor aeration.
Smelly batches usually result from neglecting basic balance principles. Monitoring these signs keeps your compost progressing properly toward finished material.
Adjust Moisture And Aeration Levels
When your compost pile starts smelling bad or stops decomposing properly, adjusting moisture and aeration levels becomes critical for restoring healthy breakdown conditions.
Turn your pile weekly to introduce oxygen, using a pitchfork to mix outer materials into the center. If odors persist, your pile likely needs more air circulation.
For moisture issues, squeeze a handful of compost material – it should feel like a damp sponge. If it’s soggy, add dry materials and turn more frequently. If it’s bone dry, sprinkle water while turning.
Proper aeration prevents anaerobic conditions that cause foul smells. Your pile needs airflow through and around it, so don’t pack materials too tightly.
Regular monitoring keeps your compost community thriving.
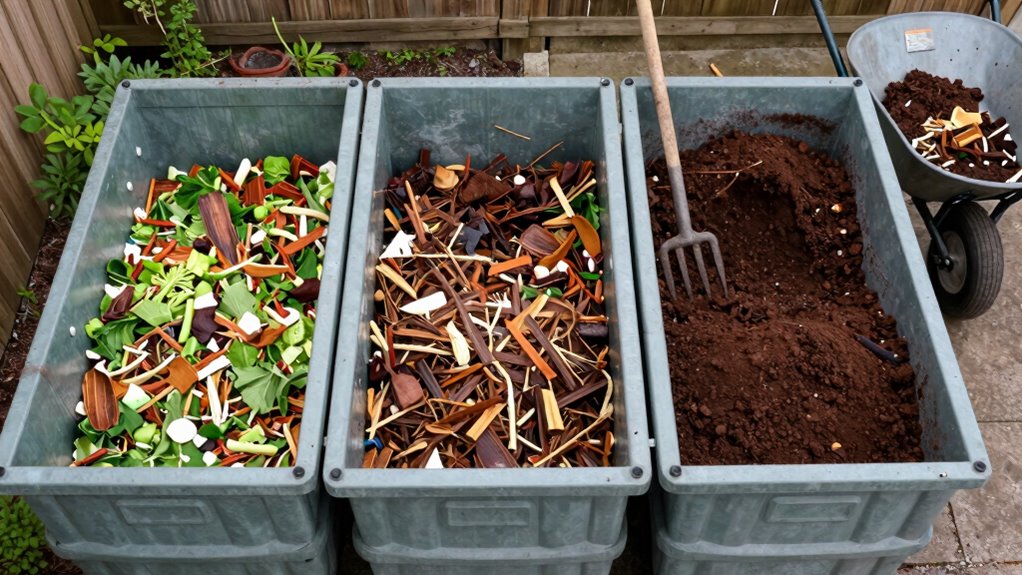
Add Correct Organic Materials
If your compost pile isn’t breaking down properly or emits foul odors, adding the right organic materials becomes essential for correcting these common problems.
You need to balance carbon-rich and nitrogen-rich ingredients for ideal decomposition.
- Brown materials: Add dried leaves, straw, or cardboard to absorb excess moisture and reduce odors.
- Green materials: Include fresh grass clippings, vegetable scraps, or coffee grounds to boost nitrogen levels.
- Woody elements: Incorporate small twigs or shredded newspaper for improved aeration.
- Avoid problematic items: Skip meat, dairy, and oily foods that cause smells.
- Soil amendments: Mix in finished compost or garden soil to introduce beneficial microorganisms.
Balance these components carefully.
Too much green material creates slimy, smelly messes.
Too much brown material slows decomposition considerably.
Sieve Out Chunky Material Easily
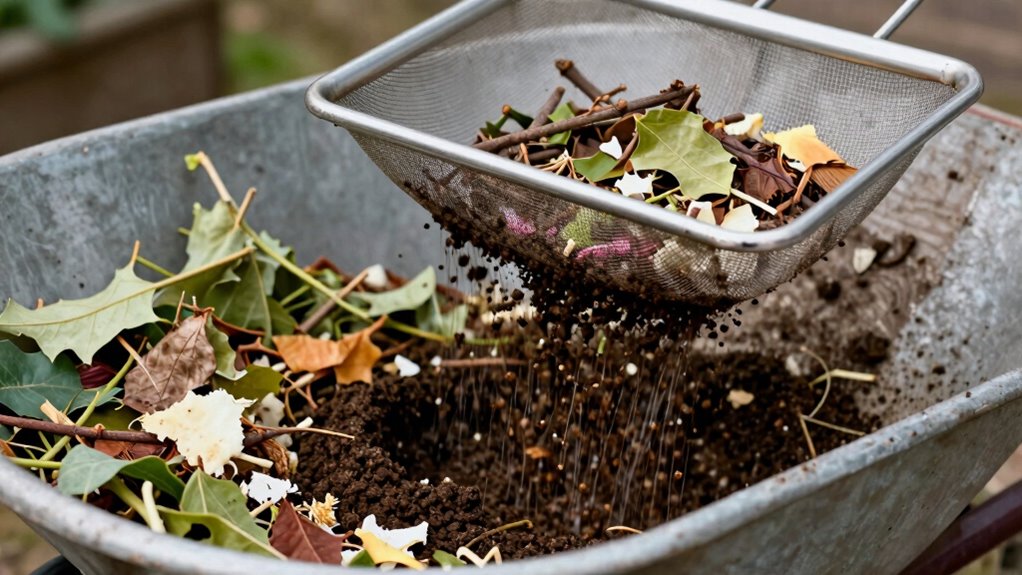
A fine mesh screen or hardware cloth makes quick work of separating large debris from your finished compost.
You should aim for a 1/4-inch mesh size to catch twigs, eggshells, and other chunky materials while letting finished compost pass through easily.
Place your screen over a wheelbarrow or tarp and shovel compost onto it.
Shake the screen gently or use a garden fork to break up clumps.
Larger pieces that don’t sift through need more decomposition time, so return them to your compost pile.
Work efficiently by processing small batches at once.
Don’t force material through the mesh – this creates unnecessary work and doesn’t improve your compost quality.
Your goal is separating, not pulverizing.
Keep the process moving smoothly.
Mix Compost Into Beds Before Spring Seeds Sprout

While you’re waiting for spring planting season to arrive, incorporate your finished compost into garden beds before seeds begin sprouting. This timing guarantees nutrients are available when plants need them most.
- Work compost 3-4 inches deep into soil for ideal root penetration.
- Mix thoroughly to eliminate air pockets that could harm germinating seeds.
- Test soil pH after incorporation to adjust acidity levels if needed.
- Remove any remaining weeds or debris before adding compost to prevent competition.
- Water beds lightly after mixing to help settle contents and activate nutrients.
Your garden community will thank you for this preparation. Rich, dark compost transforms ordinary soil into productive growing medium.
Don’t rush this process – take time to blend everything properly. Your future harvest depends on these foundational steps. Make every shovelful count.
Store Excess Batch Safely Until Next Year
Proper storage of your excess compost guarantees it remains nutrient-rich and ready for next year’s garden needs.
You’ll want to transfer finished compost into covered containers or bins immediately after your spring application. Use breathable materials like burlap sacks or wooden bins with slatted sides to prevent anaerobic conditions while maintaining moisture levels.
Store your compost in a cool, dry location away from direct sunlight and excessive heat sources. Turn the pile monthly to maintain airflow and prevent compaction.
Keep moisture content similar to a wrung-out sponge by adding water during dry periods or covering during heavy rains. Label containers clearly with dates and contents.
This systematic approach assures your stored compost maintains its beneficial microbial activity and nutrient composition throughout winter months, ready for next season’s planting.
Avoid Nitrogen Starvation and Oversized Heaps
You must monitor nitrogen levels closely because deficiencies will halt decomposition and leave you with an ineffective pile.
Keep your heap size manageable—oversized piles become difficult to turn and often develop anaerobic conditions that slow breakdown.
Prevent starvation issues by maintaining proper carbon-to-nitrogen ratios throughout the composting process.
Monitor Nitrogen Levels
Maintaining ideal nitrogen levels guarantees your compost pile decomposes efficiently without becoming an oversized, smelly mess. You need to balance green and brown materials carefully.
- Test your pile’s temperature weekly; ideal ranges stay between 104-160°F.
- Add grass clippings or coffee grounds when decomposition slows dramatically.
- Incorporate dried leaves or cardboard if you notice ammonia smells.
- Turn your pile every two weeks to redistribute nutrients evenly.
- Use a simple carbon-to-nitrogen ratio of 25:1 for maximum breakdown.
Monitoring these levels prevents your compost from becoming anaerobic and smelly. You want your pile to heat up properly, indicating healthy microbial activity.
When nitrogen drops too low, decomposition stops completely. Too much nitrogen creates ammonia odors and nutrient loss. You control this balance through careful material selection and regular pile maintenance.
Control Heap Size
While managing your compost pile’s dimensions might seem straightforward, controlling heap size directly impacts nitrogen availability and decomposition efficiency. You should maintain piles between three and five feet high and wide for best results.
Smaller heaps lose heat rapidly, slowing decomposition and causing nitrogen depletion. Oversized piles become difficult to turn and may develop anaerobic conditions. You’ll find that properly sized heaps retain adequate moisture while allowing sufficient airflow.
Turn your piles regularly to maintain uniform decomposition throughout. Keep new materials at similar sizes to facilitate even breakdown. You’re not just building a pile; you’re creating an environment where microorganisms thrive.
Proper sizing prevents common problems that frustrate many composters. Your efforts directly influence the final product quality. Size control isn’t optional—it’s crucial for success.
Prevent Starvation Issues
Proper heap sizing directly influences nutrient availability and microbial activity throughout your composting process. When heaps become too large or lack proper nitrogen balance, you’ll face starvation issues that halt decomposition.
You need to maintain ideal conditions by monitoring these critical factors:
- Keep heaps between 3-5 feet high to guarantee adequate oxygen flow
- Mix carbon-rich materials with nitrogen-heavy components regularly
- Turn piles every 2-3 weeks to redistribute nutrients and prevent anaerobic zones
- Maintain moisture levels at 40-60% to support microbial populations
- Add finished compost or soil to introduce beneficial microorganisms
Avoid creating massive piles that compress under their own weight. Oversized heaps develop dead zones where microbes die off, causing nitrogen starvation.
Your compost needs balanced nutrition just like any living ecosystem. Pay attention to these details, and you’ll belong among successful composters who consistently produce rich, nutrient-dense compost.
Use Finished Compost Inside Containers Without Risk
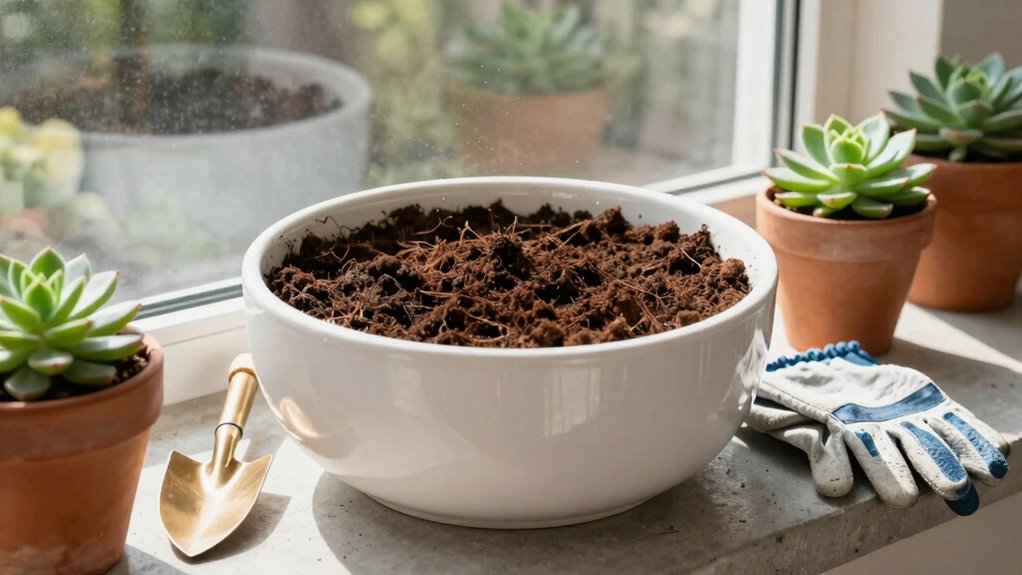
Finished compost that’s ready for use should be dark, crumbly, and earthy-smelling, indicating it’s decomposed enough to provide nutrients without burning plant roots.
You’ll want to mix it thoroughly with potting soil before adding plants. A good ratio is one part compost to three parts potting mix. This prevents compaction and guarantees proper drainage.
Screen the compost first to remove any large chunks or undecomposed materials.
When transplanting, gently loosen roots and place them directly into the compost-soil mixture. Water thoroughly after planting.
You’re creating an ideal growing environment that’ll make your container plants thrive. Remember that finished compost continues decomposing slowly, so don’t worry about overfeeding. Your plants will thank you for this nutrient-rich foundation.
Conclusion
Your finished compost should crumble like ancient parchment in your hands, dark and fragrant. Don’t let unfinished batches linger—address odors and stalled decomposition immediately. Screen out large pieces, then work 3-4 inches into beds before spring planting. Store excess properly to prevent nitrogen loss. Mix carefully in containers at 1:3 ratios. Remember, compost that’s ready will hold its shape when squeezed, never feeling damp or sticky.
