

Imagine a homeowner who installs a drip system without mapping their plant zones first—three months later, their roses are overwatered while the vegetable bed struggles. You can avoid this common mistake by planning your garden layout before selecting components. Start by grouping plants with similar water requirements together. This approach determines whether you need drip emitters or sprinkler heads, and prevents costly system inefficiencies down the line.
Quick Benefits of Auto Watering
Automatic garden watering systems deliver precise water amounts directly to plant root zones, eliminating guesswork and reducing water waste.
You’ll save time while ensuring consistent moisture levels that promote healthier plant growth. These systems prevent overwatering damage and reduce fungal diseases by keeping foliage dry.
You can program specific watering schedules based on your garden’s unique needs, adjusting frequency and duration automatically. The precision delivery minimizes runoff and evaporation losses.
You’ll notice reduced maintenance tasks since manual watering becomes unnecessary. These systems operate independently, delivering water even when you’re away from home.
You’ll achieve better crop yields and improved plant survival rates through consistent hydration. The automated approach eliminates human error in watering timing and amounts.
You’ll join countless gardeners who’ve discovered that smart irrigation transforms gardening challenges into manageable solutions.
Essential Tools & Parts List
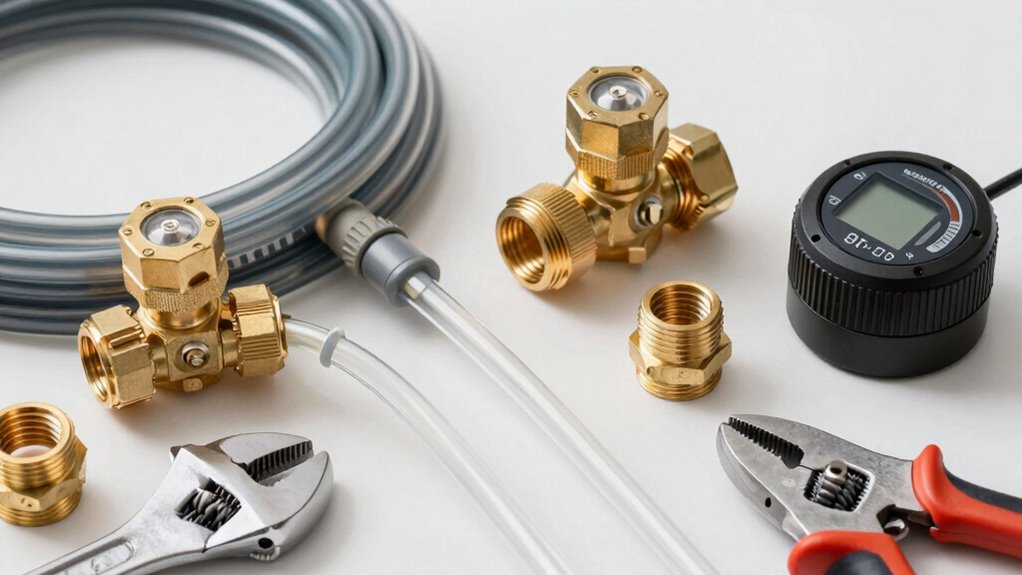
You’ll need specific tools and components before starting your automatic garden watering installation.
Gather your essential tools including a drill, pipe cutter, and adjustable wrench to handle the various installation tasks efficiently.
Make sure you have all required parts like tubing, connectors, and timer controls ready before beginning the setup process.
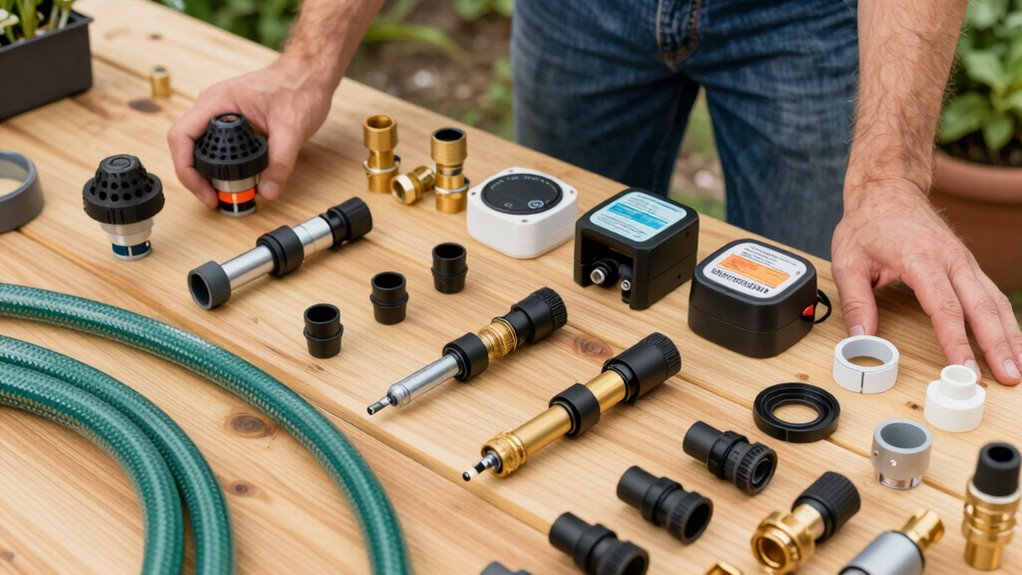
Essential Tools Needed
Before connecting your automatic garden watering system, gather these essential tools and components to confirm efficient installation.
You’ll need a drill with various bit sizes for creating holes in pipes and mounting brackets. A pipe cutter guarantees clean, straight cuts when sizing tubing. Adjustable wrenches handle most fitting connections securely. Teflon tape prevents leaks at threaded joints.
Measuring tape helps determine precise lengths for tubing runs. A level keeps your components properly aligned during installation. Wire strippers prepare electrical connections for timers and sensors. Pliers assist with tight spaces and wire management.
A stud finder locates wall supports for mounting control panels. Don’t forget safety glasses and work gloves for protection.
These tools streamline your installation process considerably. Having everything ready prevents unnecessary trips to hardware stores. You’re now prepared for successful system assembly.
Required Parts List
Installation of your automatic garden watering system requires an extensive collection of components and tools that confirm proper functionality and longevity.
You’ll need PVC pipes, fittings, and connectors sized appropriately for your water pressure. Acquire timer-controlled solenoid valves that match your irrigation zones. Purchase drip irrigation tubing, emitters, and micro-sprinklers suitable for different plant types.
Don’t forget pressure regulators, filters, and backflow preventers for system protection. You’ll also require PVC cement, Teflon tape, and pipe thread sealant for secure connections. Manual shut-off valves provide maintenance access points.
Consider adding rain sensors and moisture detectors for intelligent water management. Your controller unit should support multiple zones and programming schedules.
Invest in quality hose connectors, quick-couplers, and repair fittings. These components confirm your system operates efficiently while preventing costly leaks and water waste.
Installation Preparation Steps
Gathering the proper tools and components beforehand prevents delays and assures efficient system assembly.
You’ll need a drill with various bits, adjustable wrench, pipe cutter, measuring tape, and silicone sealant.
Don’t forget your timer, drip tubing, emitters, and fittings list from earlier planning stages.
Check that all parts match your system’s specifications before starting installation.
Lay out components systematically where you’ll work to avoid unnecessary movement.
Confirm your water source is shut off completely before beginning any connections.
Test-fit major components without sealant first to verify proper alignment and spacing.
Mark emitter locations on your layout plan for accurate placement.
Keep your instruction manual accessible throughout preparation.
Having everything organized and ready creates confidence that you’re joining the community of successful DIY irrigation installers who plan thoroughly before touching a single pipe.
Plan Your Garden for an Auto Watering System

You’ll need to map out your garden layout before installing any automatic watering components.
Start by grouping plants with similar water requirements together to create efficient watering zones.
Position thirsty plants in areas that receive consistent water pressure and avoid placing drought-tolerant species in high-water zones.
Choose Optimal Plant Locations
When planning your garden layout for an automatic watering system, positioning plants according to their water needs and root zones guarantees maximum system efficiency. You should group thirsty plants together near main water lines while placing drought-tolerant varieties in areas with reduced water access.
Consider each plant’s mature size and root spread to prevent overcrowding that compromises watering effectiveness. Place shallow-rooted plants like lettuce and herbs in easily accessible zones where water penetration remains consistent. Deep-rooted plants such as tomatoes and peppers need positioning that allows water to reach their extensive root systems.
You must account for plant height variations to avoid shading issues that affect moisture evaporation rates. Strategic placement reduces water waste while ensuring each plant receives appropriate hydration levels for peak growth and system performance.
Select Appropriate Watering Zones
An effective automatic garden watering system relies on dividing your garden into distinct watering zones based on plant water requirements and soil conditions.
You’ll need to group plants with similar irrigation needs together to avoid overwatering or underwatering.
- Assess soil drainage – Test how quickly water penetrates different areas to identify zones needing frequent or infrequent watering.
- Group plants by water needs – Combine thirsty plants like vegetables with other high-water users, and drought-tolerant species together.
- Consider sun exposure – Create separate zones for full-sun areas that dry quickly versus shaded spots retaining moisture longer.
- Account for slope and terrain – Design zones that prevent water runoff on inclines and guarantee even distribution across uneven ground.
This strategic zoning guarantees your automatic system delivers precise water amounts where needed.
Choose Drip vs Sprinkler Based on Plant Needs
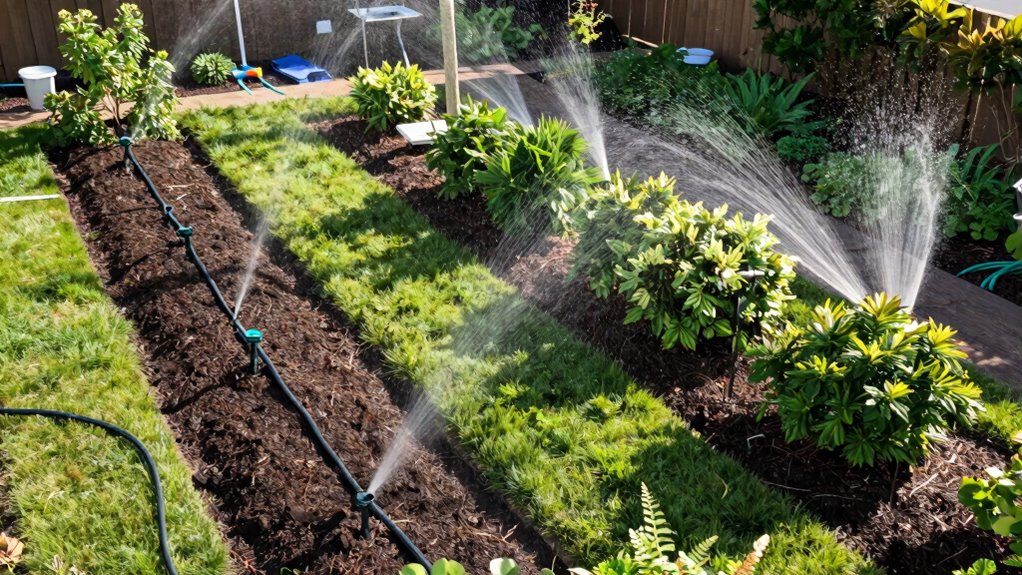
Both drip irrigation and sprinkler systems deliver water to your garden, but each method serves different plant requirements.
You’ll want to match your watering technique to specific plant needs for ideal growth. Drip systems work best for vegetables, herbs, and perennial beds where precise moisture control matters. These systems deliver water directly to root zones, minimizing waste and reducing disease risk.
Sprinkler systems suit lawns, large ground covers, and annual flower beds needing even moisture distribution. Your plant’s water requirements, soil type, and climate zone should determine your choice.
Consider grouping plants with similar watering needs together. Root depth, spacing, and growth habits help you decide which system maximizes efficiency while promoting healthy plant development in your automated garden setup.
Select the Right Watering System Type
Selecting the appropriate watering system builds directly on understanding your plants’ specific moisture requirements. You need to match your garden’s unique conditions with the right technology.
Consider these key factors when evaluating system types:
- Soil composition determines water absorption rates and drainage characteristics
- Plant spacing affects whether you need targeted drip emitters or broader coverage
- Water pressure influences system performance and component compatibility
- Climate conditions impact evaporation rates and seasonal adjustment needs
Your garden’s microclimate and plant varieties dictate whether overhead sprinklers, drip lines, or micro-sprinklers work best.
Don’t overlook existing irrigation infrastructure when making your selection.
Pick a Smart Timer for Automatic Control
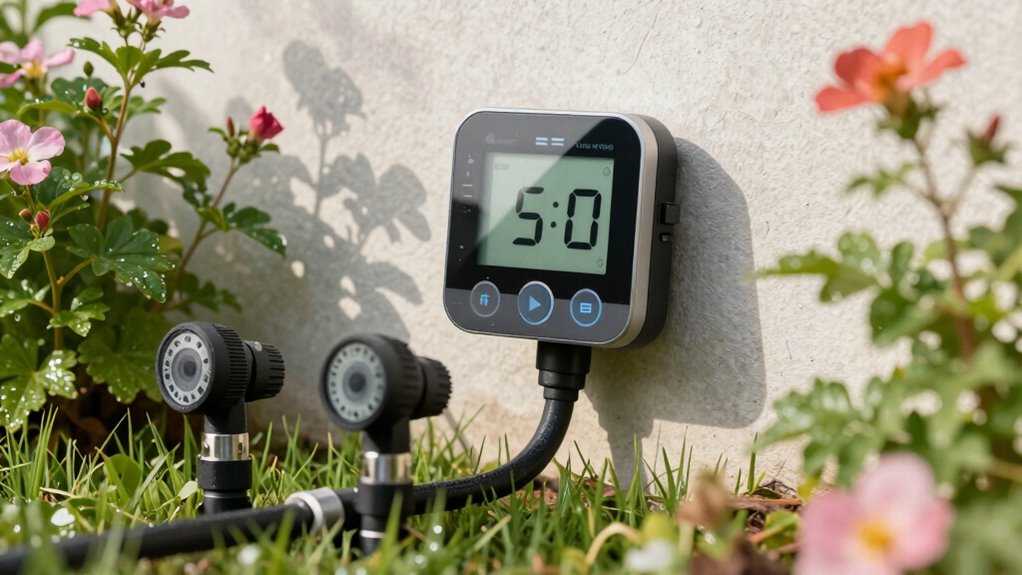
You’ll need to evaluate smart timer features like weather sensors and remote access capabilities when selecting your automatic control system.
Consider programming options such as manual overrides, seasonal adjustments, and multiple zone controls that let you customize watering schedules for different plant types.
Set up your watering schedule settings by configuring start times, duration intervals, and frequency patterns based on your specific garden’s moisture requirements.
Smart Timer Features
When choosing a smart timer for your automatic garden watering system, focus on features that match your specific irrigation needs and property layout.
You’ll want to select a timer that integrates seamlessly with your existing setup while providing reliable control.
Consider these essential features:
- Weather sensor compatibility – Your timer should connect to local weather data to automatically adjust watering schedules based on rainfall and temperature conditions.
- Multiple zone control – Look for timers that can manage several irrigation zones independently, allowing you to customize watering times for different plant types.
- WiFi connectivity – Remote access through smartphone apps lets you monitor and adjust settings from anywhere.
- Battery backup – Power outage protection guarantees your watering schedule continues without interruption.
These features create a robust system that adapts to your garden’s changing needs.
Timer Programming Options
How do you guarantee your smart timer delivers precise automatic control for your garden’s unique watering requirements?
You’ll need to evaluate programming options carefully. Look for timers with adjustable frequency settings, multiple start times, and customizable duration controls. Smart timers offer programmable delays, seasonal adjustments, and weather-based modifications that adapt to your specific climate conditions.
Choose models with user-friendly interfaces featuring clear displays and intuitive menu navigation. Consider timers supporting both manual and automatic modes, allowing you to override programmed settings when needed.
Advanced units provide zone-specific programming, letting you customize watering schedules for different garden areas simultaneously.
Ensure your selected timer accommodates your garden’s size and complexity.
Professional-grade timers feature expanded programming capabilities, including cycle-soak functions and rain delay settings that prevent overwatering during wet periods.
Watering Schedule Settings
Why settle for basic timer functions when your garden’s hydration needs demand precise, automated control? You need a smart timer that adapts to your plants’ specific requirements.
- Weather-responsive programming automatically adjusts watering frequency based on rainfall and temperature data.
- Zone-specific scheduling lets you customize timing for different plant types and soil conditions in separate garden areas.
- Seasonal adjustment features reduce summer overwatering while ensuring adequate moisture during peak growing periods.
- Mobile app integration provides remote monitoring and real-time schedule modifications from your smartphone.
Smart timers use soil moisture sensors and local weather forecasts to optimize your watering schedule.
You’ll save water while promoting healthier plant growth. These systems learn your garden’s patterns and suggest improvements.
Don’t let outdated timer technology limit your gardening success. Invest in intelligent scheduling that works with your garden’s natural rhythms.
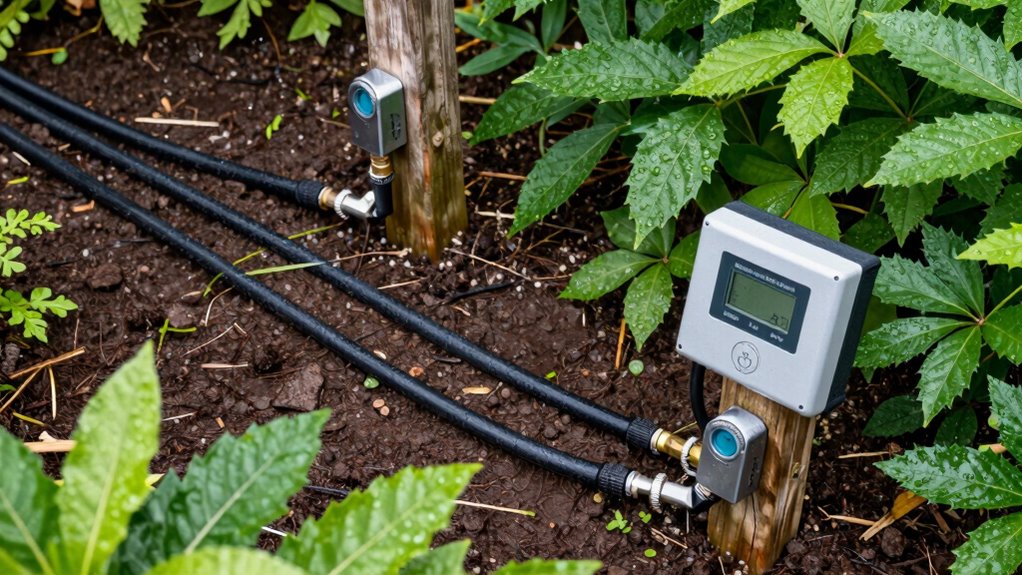
Position Your Water Connection Smartly
Since you’ll need to access your main water supply frequently during installation, positioning your water connection point strategically saves both time and materials.
Choose a location near your existing outdoor spigot or main line access point.
Verify the connection sits above ground level to prevent freezing and allows easy access for maintenance.
Position it close to your garden zones to minimize pipe runs and reduce water pressure loss.
Use a weatherproof connection box to protect fittings from moisture damage.
Confirm you can reach the shutoff valve without moving equipment or furniture.
Consider future expansion when selecting your connection point location.
A well-positioned water connection becomes the backbone of your entire automatic watering system.
Install a Water Regulator for Safe Flow
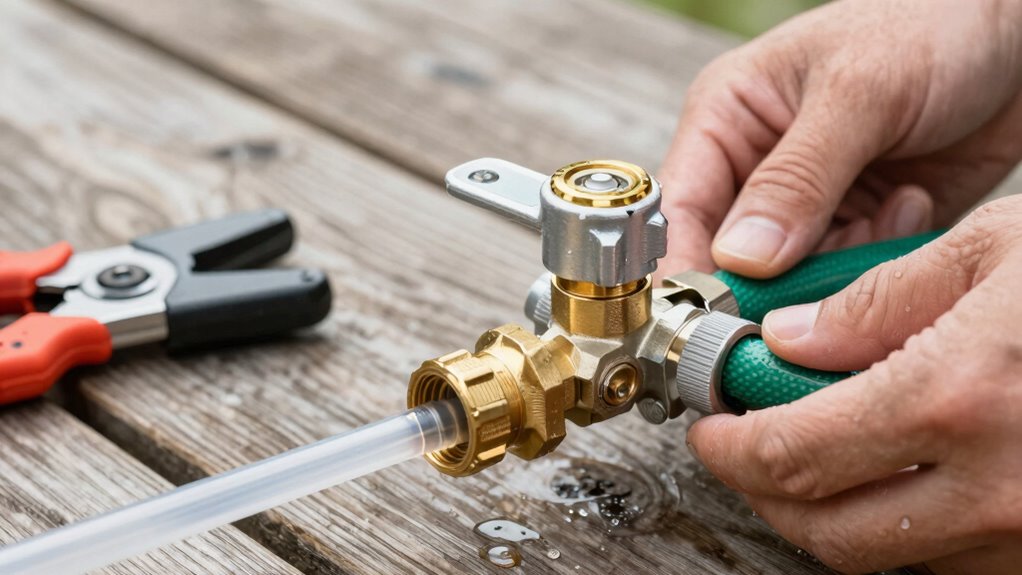
You’ll need to install a water regulator that controls pressure between 30-50 PSI to prevent damage to your irrigation system components.
Adjust the flow rate using the regulator’s built-in valve to match your garden’s specific watering requirements, typically setting it to deliver 1-2 gallons per minute for most residential applications.
This safety feature protects against pipe bursts, connector failures, and uneven water distribution that can destroy your plants or waste water.
Water Pressure Control
A water regulator installs directly into your main water line to maintain consistent pressure throughout your automatic garden watering system.
You’ll want to monitor several key aspects:
- Check your system’s maximum PSI rating before installation
- Locate the main shut-off valve near your water source
- Measure existing pipe diameter for proper regulator sizing
- Test baseline pressure with a gauge before connecting components
Your regulator prevents damaging pressure spikes that can rupture drip lines and emitters.
Thread the unit onto your main line after shutting off water supply completely. Tighten connections securely but avoid over-torquing plastic fittings.
Most residential systems operate safely between 20-50 PSI. Higher pressures require immediate regulation. You’re protecting your entire irrigation investment.
Proper pressure control guarantees every plant receives adequate water distribution. Don’t skip this critical installation step.
Flow Rate Adjustment
One critical component guarantees your automatic garden watering system operates within safe parameters.
You’ll need to install a water regulator to control flow rate effectively. This device prevents excessive water delivery that could damage your plants or system components. Choose a regulator rated for your specific watering requirements, typically between 2-10 gallons per minute for residential applications.
Install it directly after your main water source connection, before any branching lines. Adjust the regulator’s settings according to your garden’s needs by turning the adjustment screw clockwise to increase flow or counterclockwise to decrease it.
Test the output pressure using a flow meter to ascertain ideal performance. Regular monitoring prevents wasteful runoff and promotes efficient water usage throughout your automated system.
System Safety Features
Because improper water pressure can damage both your irrigation system and plants, installing a water regulator assures safe flow rates throughout your automatic garden watering setup.
You’ll protect your investment and guarantee consistent watering performance.
- Pressure monitoring: Check your system’s PSI regularly using a pressure gauge
- Regulator selection: Choose a regulator rated for your specific flow requirements
- Installation placement: Position the regulator immediately after your main water source
- Maintenance schedule: Clean and inspect your regulator every three months
Your regulator acts as the first line of defense against pressure fluctuations that can cause emitter clogging, pipe bursts, and uneven water distribution.
Don’t skip this critical component.
You’re not just installing equipment; you’re joining a community of gardeners who understand that proper water pressure management separates thriving gardens from constant repairs.
Make this investment count.
Plan Your Main Water Line Path
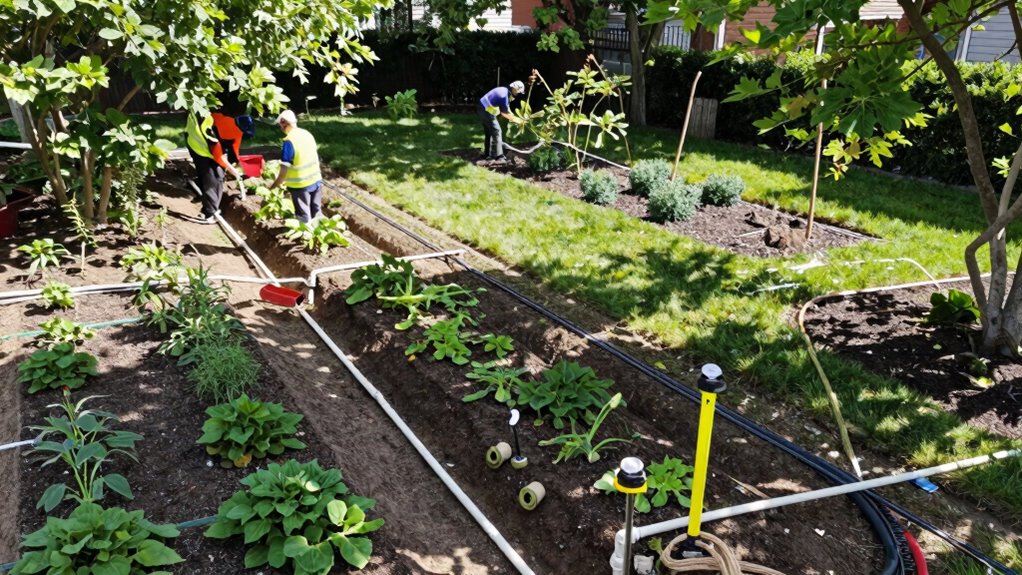
Before you begin digging trenches for your automatic garden watering system, you’ll want to carefully map out where your main water line will run from the source to each irrigation zone. Measure distances accurately and mark critical connection points with stakes or spray paint.
Consider existing structures, trees, and future landscaping changes that might affect your layout. Your main line should follow the most direct path while maintaining adequate burial depth of 6-12 inches. Check local codes for specific requirements.
Plan tee connections for branch lines early, making sure water pressure remains consistent throughout the system. Account for slope variations that may require additional fittings or pressure regulation.
Document your planned route with measurements and sketches. This preparation prevents costly mistakes during installation and guarantees reliable water delivery to every designated area of your garden.
Connect Drip Emitters Correctly
You’ll need to space drip emitters 12-18 inches apart for ideal water distribution across your planting area.
Proper emitter spacing prevents overwatering in some zones while ensuring adequate moisture reaches all plant roots.
Connect each emitter directly to the main line using barbed fittings and secure with clamps to maintain system integrity.
Proper Emitter Spacing
Proper emitter spacing guarantees uniform water distribution across your garden zones. You’ll achieve peak irrigation efficiency when you position emitters at precise intervals based on soil type and plant requirements.
Consider these critical spacing guidelines:
- Clay soils need emitters every 12-18 inches due to slow water penetration rates.
- Sandy soils require closer spacing at 6-12 inches because water drains rapidly.
- Place emitters 6-8 inches from plant bases to target root zones effectively.
- Adjust spacing for different plant types: vegetables need closer placement than trees.
You’re ensuring each plant receives adequate moisture while preventing overwatering.
Don’t guess emitter placement—measure carefully and mark positions before installation. Your garden’s health depends on systematic, precise emitter spacing that matches your specific growing conditions and plant needs ideally.
Optimal Water Distribution
When connecting drip emitters, guarantee each junction point is secure and leak-free to maintain consistent water flow throughout your irrigation system. Use compression fittings or barbed connectors with stainless steel clamps to prevent loosening over time.
Space emitters evenly along distribution tubing, typically 12-18 inches apart for vegetable gardens. Position emitters directly at plant root zones, not randomly across soil surfaces. Check manufacturer specifications for ideal flow rates – most residential systems operate between 0.5 to 2.0 gallons per hour.
Install pressure regulators if your water source exceeds 50 PSI to prevent emitter damage. Test each connection by running water through the system before burying tubing. Adjust emitter placement based on plant water requirements and soil absorption rates for maximum efficiency.
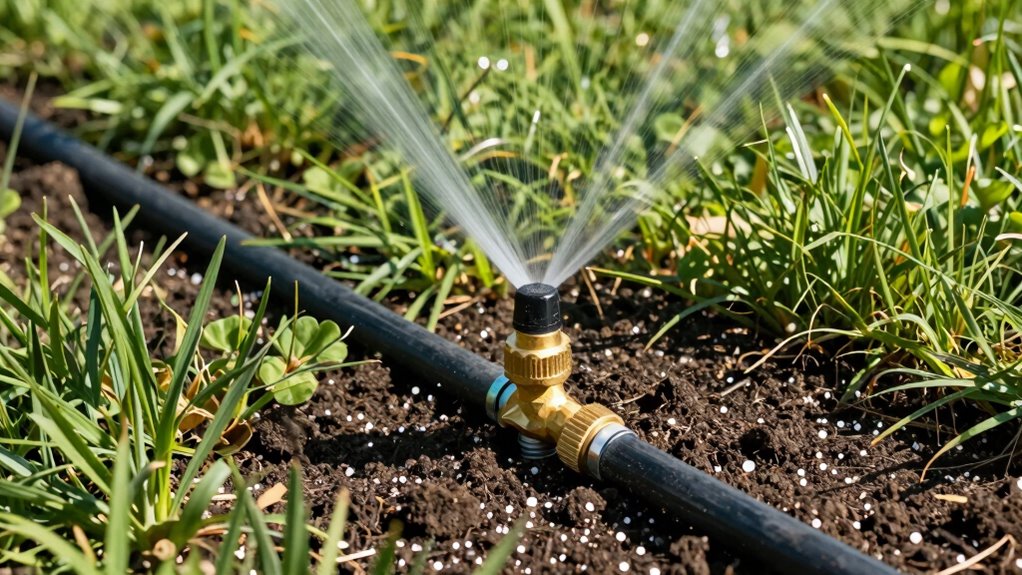
Best Practices for Proper Sprinkler Placement
Sprinkler heads should be positioned to guarantee complete coverage of your garden area while avoiding overspray onto sidewalks, driveways, or neighboring properties.
You’ll want to achieve the best water distribution without wasting resources or creating conflicts with neighbors.
- Space sprinkler heads evenly based on their spray radius to eliminate dry spots and prevent overlapping coverage zones.
- Install heads at consistent intervals matching your garden’s specific watering needs and plant types.
- Position sprinklers away from structures like walls, fences, or decorative features that could block water flow.
- Adjust spray patterns to accommodate irregularly shaped garden beds and focus water where plants actually grow.
Proper placement guarantees your automatic watering system works efficiently while maintaining good relationships with neighbors.
You’re creating a system that serves your garden’s unique layout and watering requirements effectively.
Safely Bury Water Pipes Deep Enough
Burying water pipes at the correct depth protects them from freezing temperatures, foot traffic, and lawn maintenance equipment that could cause damage.
You should dig trenches at least 12 inches deep for main supply lines, guaranteeing pipes sit below frost line in your region. Local building codes might require specific depths, so check requirements before starting.
Use a trenching shovel or rented equipment for consistent depth control. Keep pipes at least 6 inches away from other utilities to prevent interference. Compacted soil around buried pipes prevents shifting that causes breaks.
Mark pipe locations clearly with stakes or flags during installation. Consider using protective conduit sleeves for added durability.
Proper depth placement guarantees your automatic watering system operates reliably for years while protecting your investment from external damage factors.
Use These Tools During Installation
Proper tool selection makes installation more efficient once you’ve planned your pipe placement.
You’ll need specific equipment to complete this project correctly and avoid common mistakes that frustrate beginners.
- Pipe cutter or hacksaw – Cut PVC or polyethylene tubing cleanly without crushing the material
- Shovel and trenching tool – Dig precise trenches at proper depths while protecting existing utilities
- Adjustable wrench – Tighten fittings securely without over-torquing connections
- Measuring tape and marker – Mark accurate distances and guarantee proper spacing between components
These tools help you work confidently alongside experienced gardeners.
You’re not just installing pipes; you’re joining a community of successful DIY irrigation enthusiasts who take pride in their precise, professional-looking installations.
Set Up Your Programmable Timer Easily
A programmable timer lets you automate your garden’s watering schedule without constant manual intervention.
You’ll need to configure the timer settings before connecting it to your water source. Locate the control panel and set your desired watering times using the digital interface. Most timers allow you to program multiple intervals per day, so you can mimic natural rainfall patterns.
Set the duration for each watering session based on your soil type and plant requirements. Sandy soils need shorter, more frequent watering while clay soils require longer, less frequent sessions.
Don’t forget to set the days of the week for watering. Many timers let you create separate schedules for different zones.
Check that your timer’s battery backup is functioning properly. Verify all programmed settings display correctly before final installation.
Test Your Auto Garden Watering System
Before you rely on your automatic garden watering system for consistent irrigation, you should conduct a thorough test to identify any potential issues.
Run water through each zone individually to check for proper operation. Look for these critical testing points:
- Check all sprinkler heads – Verify they pop up fully and distribute water evenly across your target areas.
- Inspect connections – Confirm fittings don’t leak and tubing stays secure under normal water pressure.
- Verify timer programming – Confirm each zone activates at designated times and runs for correct durations.
- Measure water distribution – Place containers around your yard to confirm adequate coverage and adjust spray patterns accordingly.
Take notes during testing to reference later. Make immediate adjustments rather than waiting until your system runs unattended. Document any irregularities for troubleshooting.
Don’t overlook pressure variations between zones, as inconsistent flow affects plant health considerably. Keep records for seasonal maintenance planning.
Test monthly during peak growing season. Clean clogged nozzles promptly with a wire brush or compressed air after shutting off the main supply valve completely before beginning work safely while wearing protective gloves throughout the entire process, thoroughly checking every single component multiple times.
Guaranteeing maximum reliability consistently achieves desired results efficiently, maintaining healthy thriving plants automatically receiving precise amounts necessary for nutrients regularly without fail whatsoever problems occurring unexpectedly.
Top Plumbing and Programming Pitfalls
Even after thorough testing, automatic garden watering systems can encounter common plumbing and programming mistakes that compromise performance.
You’ll want to avoid improper valve sizing, which causes inadequate water pressure or hammering issues. Incorrect pipe slopes create drainage problems and system failures.
When programming controllers, don’t overlook zone timing conflicts that lead to overwatering certain areas. You should verify sensor wiring connections properly transmit moisture data. Faulty rain sensor calibration causes unnecessary irrigation during wet periods.
Check that solenoid wires aren’t crossed, preventing zone activation. You’ll also want to guarantee timer settings match your specific plant requirements. Low voltage issues from inadequate transformer capacity cause intermittent system operation.
Keep programming simple initially, avoiding overly complex scheduling that’s difficult to troubleshoot later.
Maintain Your System Regularly
While you’ve successfully installed your automatic garden watering system, regular maintenance guarantees it continues operating efficiently throughout the growing season. You should schedule these essential tasks to prevent common issues.
- Check sprinkler heads monthly for clogs, misalignment, or damage that reduces coverage.
- Inspect all connections and fittings weekly for leaks, tightening loose components immediately.
- Clean filter screens every two weeks to maintain proper water flow and prevent blockages.
- Test timer settings bi-weekly, adjusting for seasonal weather changes and plant water requirements.
You’ll want to establish a consistent maintenance routine that becomes part of your gardening workflow. Document any adjustments or repairs in a system log.
Pay attention to water pressure changes, which often indicate underlying problems requiring immediate attention. Your system’s longevity depends on these regular maintenance practices.
Enhance Your System Over Time
Your automatic garden watering system will benefit from periodic upgrades and modifications that improve efficiency and adapt to changing landscape needs.
Add smart controllers that integrate weather data and soil moisture sensors to optimize watering schedules. You should replace outdated sprinkler heads with more efficient models that reduce runoff and overspray.
Install drip irrigation zones for shrubs and garden beds to deliver water directly to root zones. Upgrade timers to programmable versions that adjust automatically based on seasonal changes.
Add rain sensors to prevent unnecessary watering during wet periods. You’ll want to expand coverage gradually as your garden grows, incorporating additional zones with proper pressure regulation.
These enhancements guarantee your system evolves with your landscape while maximizing water conservation and plant health.
Conclusion
Your automatic garden watering system’s success hinges on proper planning and installation. Like a well-oiled machine, every component must work in harmony—drip lines delivering precise moisture, sprinklers covering broad areas efficiently. Don’t let common plumbing mistakes or programming errors undermine your investment. Regular maintenance keeps your system running smoothly, while strategic enhancements boost performance. Remember: a thriving garden depends on consistent, targeted water delivery.
