

Vertical gardening maximizes space while reducing water usage by up to 70% compared to traditional beds. You’ll need to evaluate structural load capacity before mounting any system. Choosing modular components allows for scalability and easier maintenance. Proper drainage prevents root rot and nutrient leaching. Selecting drought-tolerant plants reduces long-term irrigation demands. What specific wall preparation steps guarantee your vertical garden won’t fail prematurely?
Why Go Vertical With Your Garden
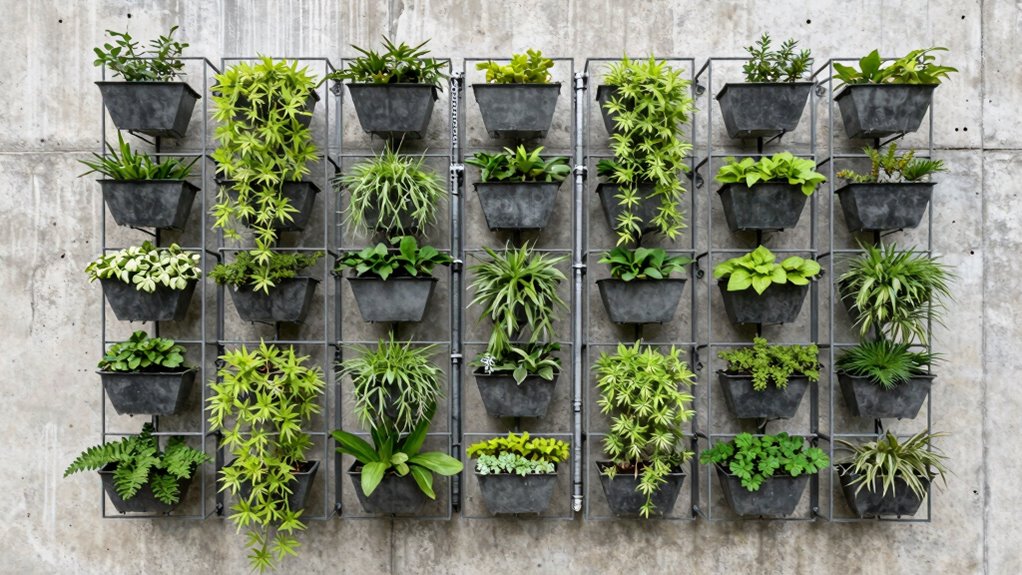
While traditional gardening methods have their place, vertical gardening systems offer distinct advantages that make them increasingly popular among urban gardeners and those with limited space.
You maximize growing area by utilizing vertical surfaces, walls, or structures. These systems optimize sunlight exposure through strategic plant placement.
You’ll discover that vertical gardens require less water due to improved drainage and reduced surface evaporation. The contained environment minimizes soil erosion and nutrient loss.
Companion planting becomes more manageable when plants grow in stacked layers. You’re cultivating sustainability by reducing lawn area and creating habitat for beneficial insects.
Maintenance tasks like weeding, pruning, and harvesting require less bending and kneeling. Vertical systems accommodate various plant types, from shallow-rooted herbs to deep-rooted vegetables.
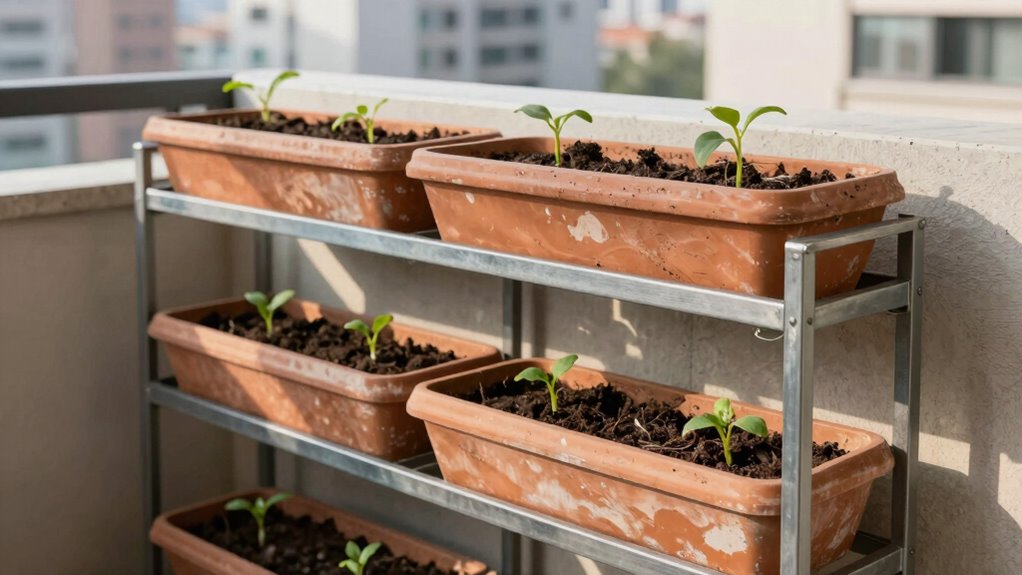
You’re joining countless gardeners who’ve transformed small balconies, patios, and yards into productive growing spaces that nurture both food security and environmental stewardship.
Find the Best Spot for Your Garden
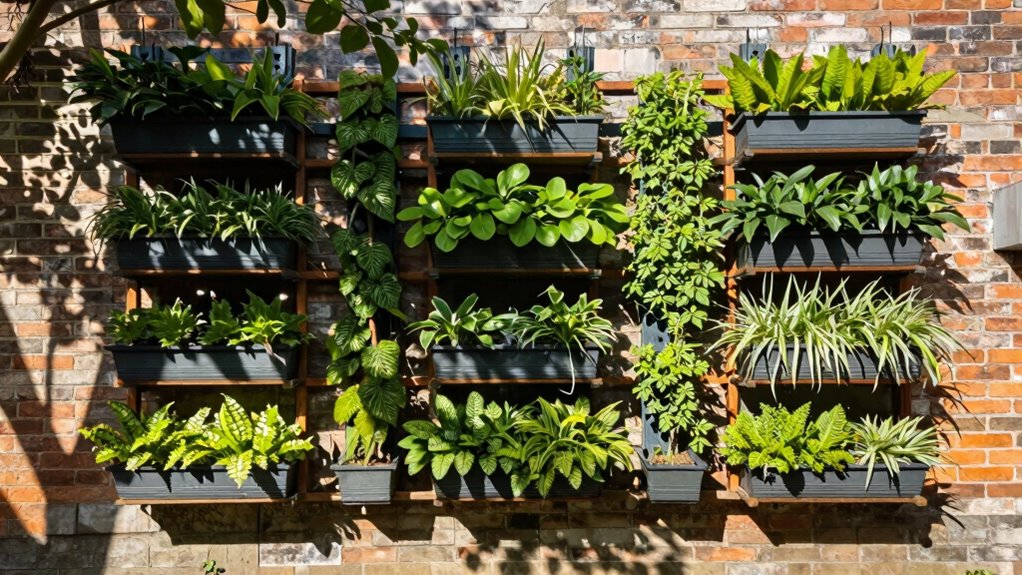
You’ll need to identify a location that receives 6-8 hours of direct sunlight daily while ensuring adequate space for your vertical structure’s footprint.
Consider proximity to water sources and electrical outlets for irrigation systems and grow lights, as these utilities will greatly impact your garden’s long-term sustainability.
Evaluate wall stability, drainage capabilities, and microclimate conditions to maximize plant health and minimize maintenance requirements.
Optimal Location Selection
Several key factors determine whether your vertical garden will thrive or merely survive in its chosen location. You must evaluate structural integrity first—ensure walls can support your system’s weight when fully saturated.
Check for proper drainage pathways to prevent water damage to underlying surfaces. Consider accessibility for maintenance; you’ll need room to reach all planting pockets comfortably.
Wind exposure matters greatly, especially for outdoor installations where strong gusts can damage delicate foliage. Indoor locations should accommodate humidity levels that plants require without causing discomfort to household members.
Temperature fluctuations affect plant health, so avoid areas near heating vents or drafty windows. Your chosen spot should integrate seamlessly with existing architecture while supporting long-term growth patterns.
Selecting the right location creates the foundation for sustainable gardening success.
Light And Space Requirements
Where exactly does your vertical garden need to be positioned to receive ideal light exposure?
You’ll want to analyze your space’s solar patterns throughout the day. South-facing walls typically provide maximum sunlight exposure, while east and west orientations offer moderate light conditions. North-facing areas usually receive insufficient natural light for most plants.
Measure light intensity using a lux meter or observe shadow patterns for several days.
Plants requiring full sun need at least six hours of direct sunlight daily. Partial shade plants thrive with three to six hours of indirect light.
Consider reflective surfaces like white walls or mirrors to enhance light distribution.
Guarantee adequate spacing between plants to prevent overcrowding and promote air circulation.
Evaluate your vertical structure’s footprint carefully. You’ll need proper clearance for maintenance access, watering systems, and plant growth expansion.
Strategic positioning creates sustainable growing conditions while maximizing your gardening potential within available space constraints.
Pick the Perfect Vertical Garden Setup
The ideal vertical garden setup depends on your specific growing conditions, available space, and plant selection.
You’ll need to evaluate structural support requirements based on wall type and load capacity. Consider modular systems for flexibility and expansion potential. Your chosen setup should accommodate root zone depths and mature plant sizes.
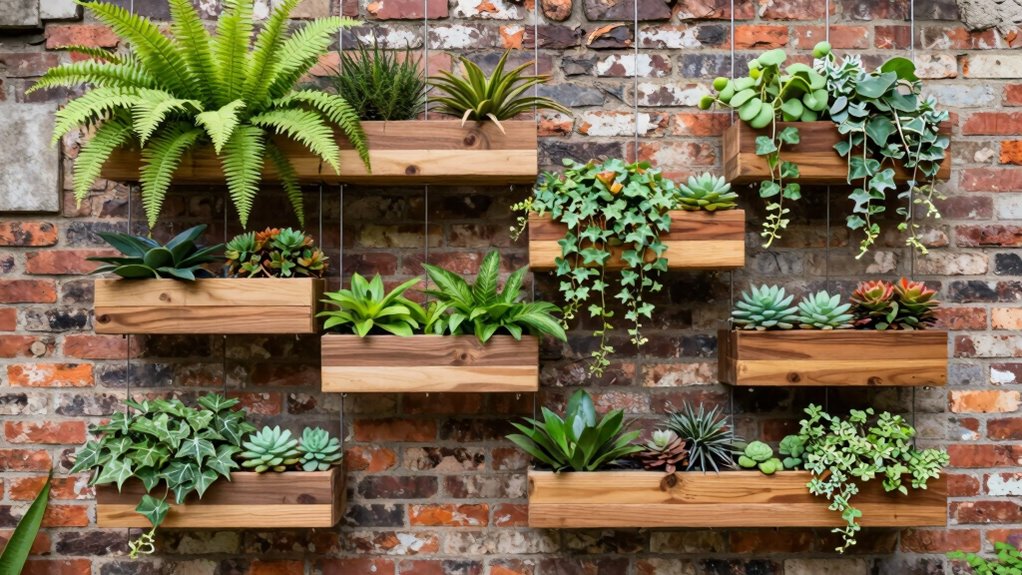
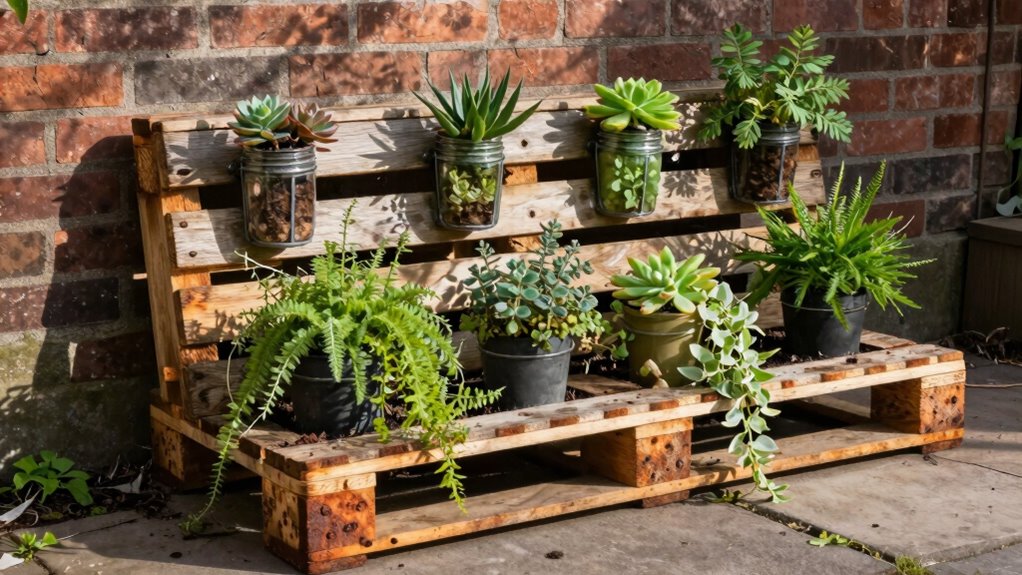
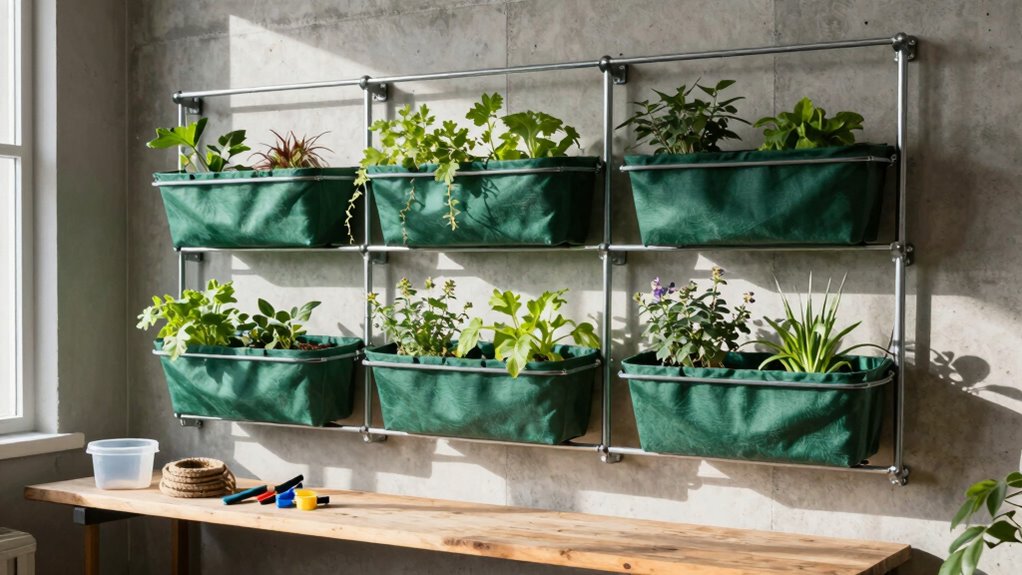
Pallet gardens work well for shallow-rooted herbs, while tower systems suit deep-rooted vegetables. Fabric pocket systems provide excellent aeration and drainage control. You’re better off selecting setups that allow proper air circulation and prevent moisture buildup.
Structural integrity matters most when mounting heavy planters. Your system should integrate easily with existing irrigation infrastructure.
Don’t overlook maintenance accessibility when positioning vertical elements. You’ve got to guarantee future plant care doesn’t become cumbersome.
Consider how seasonal plant changes will affect your chosen setup’s functionality.
Gather What You’ll Actually Use
Now that you’ve evaluated your vertical garden setup requirements, it’s time to assemble the specific components you’ll actually need for installation.
Select durable, weather-resistant materials like cedar or recycled plastic for your frame structure. Choose appropriate growing medium – lightweight potting mix designed for container gardening works best.
Gather essential hardware including stainless steel screws, brackets, and waterproof backing material. Don’t forget irrigation components such as drip lines, emitters, and timer systems for consistent watering.
Select planters or pockets made from sustainable materials like felt or recycled fabric. Include proper drainage elements like mesh screens and excess water collection trays.
Consider integrating vertical supports like trellises for climbing plants. Prioritize reusable, eco-friendly supplies that align with your sustainability goals while ensuring structural integrity and long-term garden success.
Prep Your Wall or Freestanding Frame
Before installing your vertical garden system, you’ll need to properly prepare either your wall surface or freestanding frame structure. Clean your chosen surface thoroughly, removing dirt, debris, and loose materials.
For walls, check for structural integrity and water damage. Concrete and brick surfaces should be sound and free from cracks that could compromise mounting hardware. Wooden frames require treatment with weather-resistant sealers to prevent rot and insect damage.
Ensure your surface can support the combined weight of moist soil, plants, and the support structure itself. Standard drywall typically can’t handle vertical garden loads without additional reinforcement. Consider moisture barriers to protect interior walls from potential water damage.
If using a freestanding frame, verify its stability and level positioning. Uneven frames cause water drainage issues and plant stress.
Your preparation determines your garden’s longevity and success.
Mount Your Garden Support System
Several mounting methods exist for securing your vertical garden support system, each requiring specific tools and techniques based on your chosen surface type.
You’ll need to assess whether you’re working with concrete, wood, or metal surfaces to determine the appropriate fasteners. Concrete walls demand masonry anchors and a power drill, while wooden surfaces accept standard screws. Metal installations require specialized fasteners rated for outdoor conditions.
Your support structure needs proper spacing from the wall to allow air circulation and prevent moisture buildup. Maintain at least two inches of clearance. Use levelers and measuring tape to guarantee straight installation.
Stainless steel or galvanized mounting brackets provide durability against weather exposure. Check local building codes for height restrictions and permit requirements before beginning installation.
Add a Smart Watering Solution
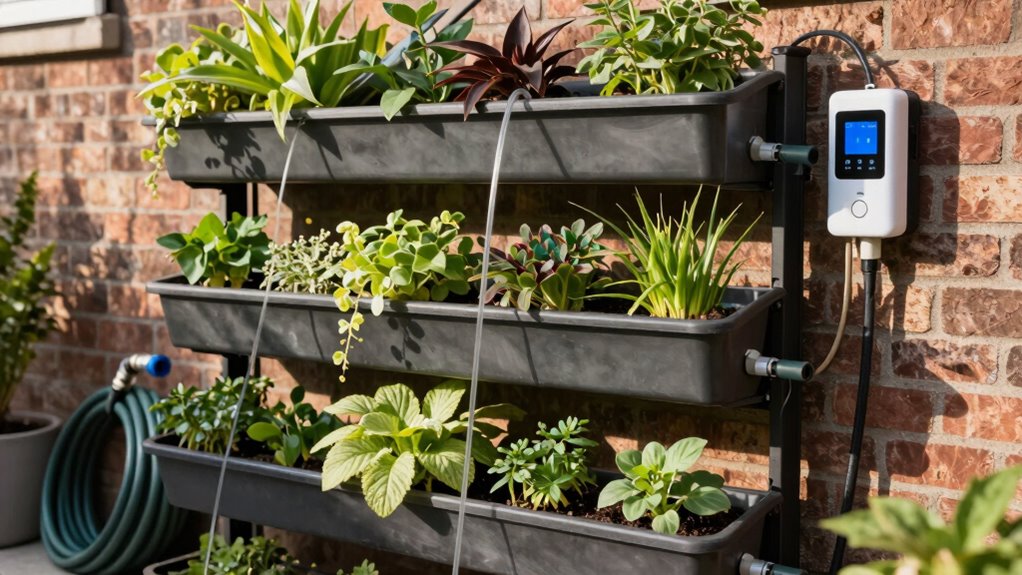
You’ll want to install an automated drip irrigation system that delivers precise water amounts directly to each plant’s root zone, reducing waste and ensuring consistent hydration.
Adding moisture sensors to your setup provides real-time data that prevents overwatering and automatically adjusts irrigation schedules based on actual soil conditions.
These components work together to create a sustainable watering solution that maximizes plant health while minimizing resource consumption.
Automated Drip Irrigation Setup
An automated drip irrigation system transforms your vertical garden into a self-sustaining ecosystem that maximizes water efficiency while minimizing maintenance.
You’ll need a water reservoir, submersible pump, timer, and drip lines with emitters. Position emitters every 6-8 inches along each plant tier, ensuring even distribution. Connect the mainline tubing to your pump using 1/4″ barbed fittings, then branch to individual plant zones.
Program your timer for 15-30 minute cycles, twice daily, adjusting frequency based on plant needs and climate conditions. Install a backflow preventer between your water source and system. Use pressure regulators to maintain 25-30 PSI throughout the network.
Choose recyclable polyethylene tubing and biodegradable emitters for sustainability. Test your setup thoroughly before planting, checking for leaks and proper flow rates at each emitter location.
Moisture Sensor Integration Benefits
A smart watering solution elevates your vertical garden’s efficiency through precise moisture sensor integration that eliminates guesswork from irrigation scheduling.
You’ll achieve ideal water usage while preventing overwatering and underwatering scenarios that stress your plants.
- Real-time soil moisture monitoring prevents water waste and reduces your environmental footprint
- Automated triggering activates irrigation only when plants actually need water
- Customizable thresholds let you set specific moisture levels for different plant varieties
- Data logging capabilities help you track watering patterns and enhance your garden’s health
Capacitive sensors detect moisture levels accurately without corrosion issues.
You’ll connect these sensors to microcontrollers that process readings and activate solenoid valves.
This sustainable approach reduces water consumption by up to forty percent while ensuring consistent plant hydration.
Your vertical garden becomes smarter, more efficient, and environmentally responsible through this integration.
Choose Soil and Containers That Work
Selection of suitable growing media and containment systems determines your vertical garden’s long-term success.
You’ll want to choose lightweight, well-draining potting mixes with perlite or vermiculite for ideal aeration. Avoid garden soil, which compacts easily in containers.
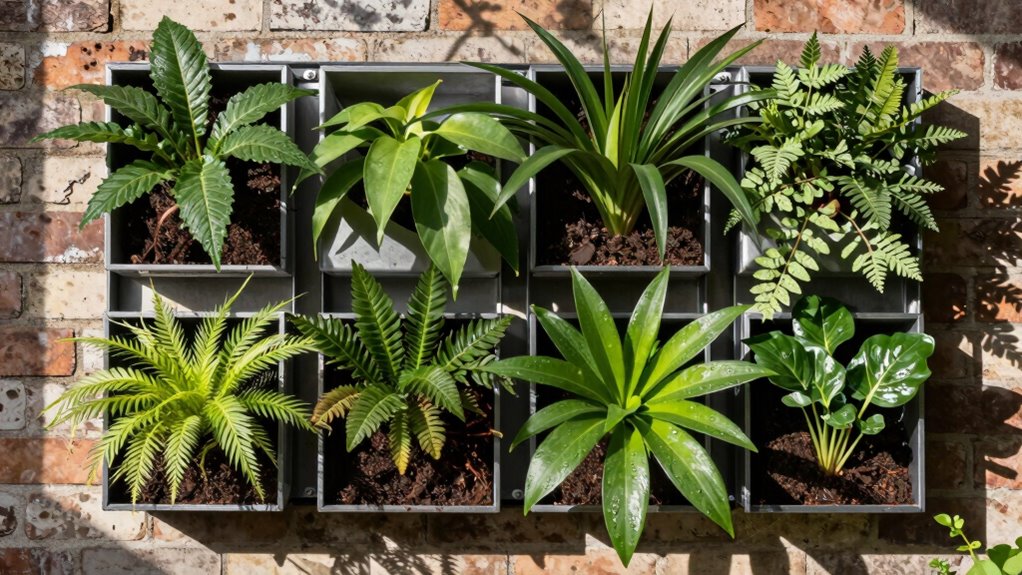
Select containers rated for vertical mounting that resist weather degradation. Fabric pots work excellently for their breathability and root-pruning benefits that prevent circling roots. Confirm containers have adequate drainage holes to prevent waterlogging and root rot.
Consider recycled plastic containers when budget-conscious or wooden planters for aesthetics. Match container size to mature plant dimensions, accounting for root spread.
Use modular systems allowing easy maintenance access. Your choices directly impact plant health, maintenance demands, and system longevity.
Quality soil and proper container selection form your garden’s foundation for sustained productivity and visual appeal.
Select Plants Made for Vertical Growth
Since you’re building a vertical garden system, choosing plants that naturally thrive in upward orientations will maximize your space efficiency and reduce maintenance demands.
These climbers and trailers require minimal structural support while creating lush, living walls that integrate seamlessly into your environment.
Select specimens with strong root systems and flexible stems that adapt well to confined growing spaces.
Prioritize varieties that exhibit vigorous vertical growth patterns without becoming top-heavy or requiring excessive pruning.
- Climbing plants like pothos and philodendrons cascade beautifully.
- Succulents such as sedum provide low-maintenance coverage.
- Herbs including thyme and oregano spread horizontally then climb.
- Ferns like staghorn create dramatic, textured displays.
Choose plants that complement your local climate zone and lighting conditions.
Research each species’ mature dimensions to guarantee proper spacing within your vertical framework.
Plant It Step by Step

Once you’ve selected appropriate plants for your vertical garden system, prepare the growing medium by mixing high-quality potting soil with perlite and compost to guarantee proper drainage and nutrient retention.
Fill your containers or pockets halfway, then carefully remove plants from their nursery pots. Loosen root balls gently before positioning them in prepared spaces.
Space plants according to their mature width requirements. Backfill around root zones with your prepared mix, ensuring firm contact without compacting excessively.
Water thoroughly until drainage flows freely from container bottoms. Check that all plants sit at correct depths—crown level with soil surface.
Apply slow-release organic fertilizer according to package directions. Mulch exposed soil surfaces lightly to retain moisture and suppress weeds.
Your vertical garden now needs proper maintenance routines.
Keep It Thriving With Easy Maintenance
While establishing your vertical garden system requires careful attention to detail, maintaining its health and productivity depends on implementing consistent care practices that address the unique challenges of vertical growing.
You’ll need to monitor moisture levels closely since vertical systems can dry out faster than traditional gardens. Regular feeding becomes essential as nutrients drain quickly through multiple layers.
- Water smartly: Install drip irrigation or self-watering reservoirs to maintain consistent moisture without over-saturation
- Feed regularly: Apply liquid fertilizers every two weeks during growing season to replenish lost nutrients
- Prune strategically: Remove dead growth weekly to prevent disease and encourage new development
- Check support structures: Inspect mounting systems monthly for stability and adjust as plants mature
These practices guarantee your vertical garden remains productive while reducing maintenance workload.
Solve Common Vertical Garden Issues
You’ll need to implement integrated pest management techniques that combine physical barriers, beneficial insects, and organic repellents to protect your vertical garden from common pests like aphids and spider mites.
Regular inspection of your irrigation system prevents clogging issues while ensuring consistent water distribution throughout all plant levels.
These proactive measures maintain system efficiency and promote sustainable growing conditions for your vertical garden ecosystem.
Pest Control Strategies
When vertical gardens face pest infestations, immediate identification and targeted intervention prevent widespread damage to your carefully cultivated plants.
You must regularly inspect foliage for early signs of aphids, spider mites, or whiteflies that thrive in vertical systems’ microclimates.
- Beneficial insects: Introduce ladybugs and lacewings that naturally control aphid populations without chemicals
- Neem oil application: Spray this organic compound weekly to disrupt pest reproduction cycles effectively
- Companion planting: Position marigolds and basil strategically between vulnerable crops to repel harmful insects
- Physical barriers: Install fine mesh screens and copper tape to prevent crawling pests from accessing your vertical planters
These integrated approaches create sustainable pest management that protects your garden while maintaining ecological balance.
You become part of a community practicing responsible, chemical-free cultivation methods.
Watering System Maintenance
After addressing pest control strategies, maintaining your vertical garden’s watering system becomes the next critical focus for preventing common issues that compromise plant health and system efficiency.
You should inspect drip emitters monthly for clogs, using a thin wire to clear debris. Check water pressure regularly; ideal PSI ranges between 15-25 for peak distribution.
Replace worn tubing annually to prevent leaks that waste water and nutrients. Install a filtration system to reduce mineral buildup that blocks emitters.
Monitor soil moisture sensors weekly, calibrating when readings seem inconsistent. You’ll want to flush the entire system quarterly with diluted hydrogen peroxide to eliminate algae and bacteria.
Keep backup emitters handy for quick replacements. Document maintenance schedules in your garden log.
These practices guarantee consistent water delivery, promote healthy root development, and maximize your vertical garden’s productivity while minimizing resource waste.
Keep It Productive and Beautiful
While vertical garden systems maximize space efficiency, maintaining productivity and aesthetic appeal requires strategic plant selection and ongoing management practices.
You must choose complementary species that thrive in your specific light conditions and support each other’s growth cycles. Regular pruning keeps plants healthy and prevents overcrowding that reduces yields.
- Companion planting – Pair nitrogen-fixers with heavy feeders
- Succession sowing – Plant new crops every two weeks for continuous harvest
- Integrated pest management – Use beneficial insects and organic deterrents
- Seasonal rotation – Swap summer and winter crops to maximize yearly production
You should monitor nutrient levels regularly since vertical systems deplete soil faster.
Implement cover crops during dormant periods to maintain soil health and prevent erosion.
Conclusion
You’ve learned to assess your wall’s sunlight and structure, choose modular containers with drainage, install automated irrigation, fill with lightweight potting mix, select appropriate plants, maintain moisture and nutrients, troubleshoot common issues, and keep your garden productive. Now you’ll build, install, plant, water, monitor, adjust, and harvest. Your vertical garden system will thrive when you follow these detailed steps consistently.
