

You might think choosing wood for DIY projects is overwhelming, but it’s simpler than you imagine. Start by understanding your project’s needs—whoever picks the right wood from the beginning saves time and money. Hardwoods like oak offer durability for indoor furniture, while softwoods like cedar work better for outdoor use. Grain patterns affect both strength and appearance, so examine each board carefully before purchasing. Consider your skill level too; softer woods are more forgiving for beginners. What specific project are you planning, and which wood characteristics matter most to you?
How to Choose the Right Wood for Your First Project

Where should you start when selecting wood for your first DIY project?
Begin by considering your project’s purpose and budget. You’ll want materials that match your skill level and wallet.
Start with softer woods like pine or cedar – they’re more forgiving when you’re learning cuts and joins.
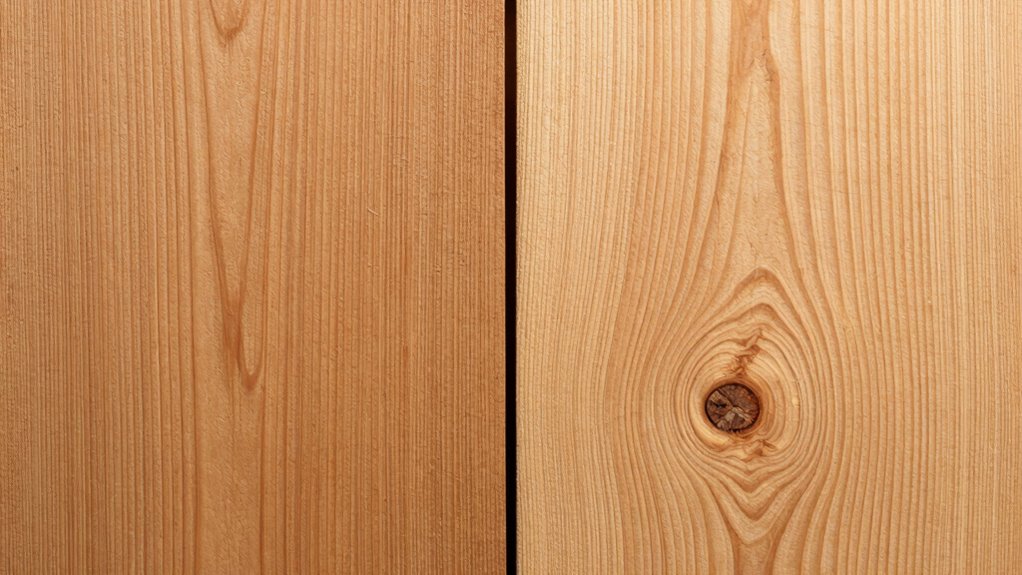
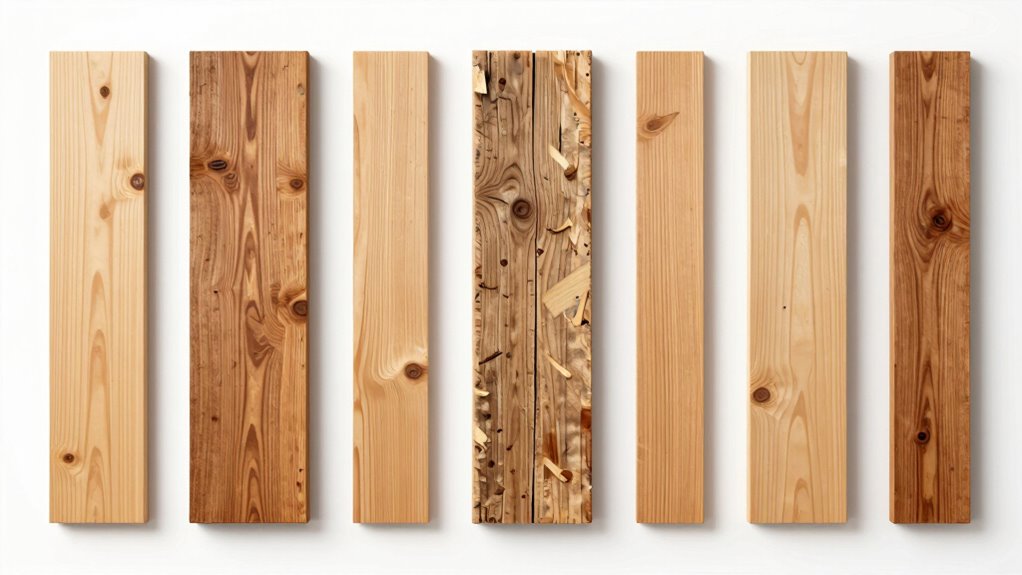
Examine boards carefully before purchasing. Look for straight grain patterns and minimal knots. Avoid warped or twisted pieces that’ll frustrate you during construction.
Feel the wood’s surface – it should be smooth without splinters. Check for moisture content; green wood warps as it dries.
Measure twice, cut once, but also measure your confidence level. Choose woods that inspire you to create rather than intimidate you.
Hardwood vs Softwood: A Quick Identification Guide
Now that you know how to evaluate wood for your projects, it’s time to understand the fundamental difference between hardwood and softwood.
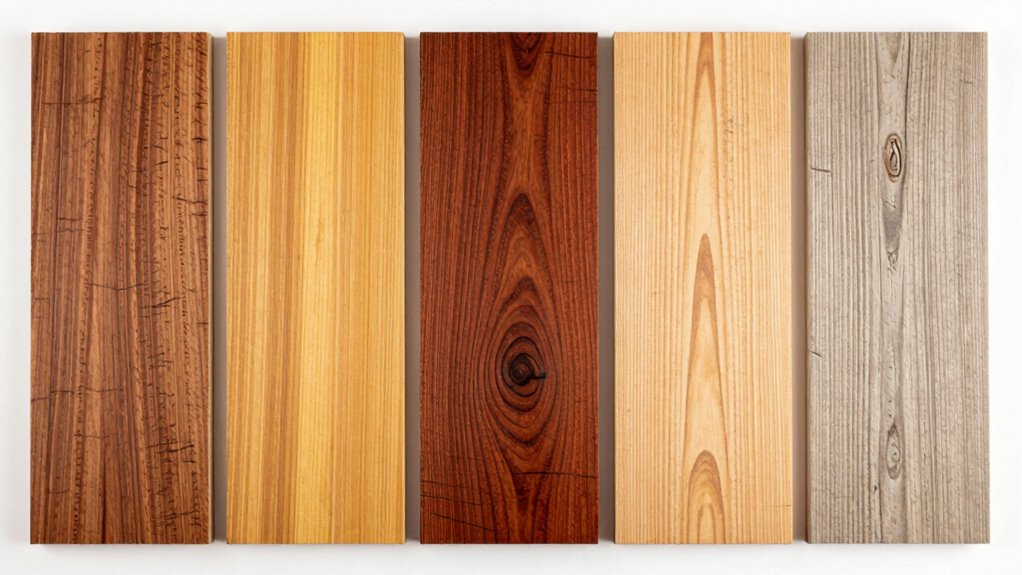
You’ll find hardwood comes from deciduous trees like oak, maple, and cherry, while softwood originates from coniferous trees such as pine, cedar, and fir. Don’t let the names fool you – hardwood isn’t always harder than softwood.
Check the end grain: hardwood shows visible pores and vessels, while softwood displays straight, uniform lines. Hardwoods typically feel heavier and produce a denser sound when tapped.
Softwoods usually cost less and work easier with hand tools. Understanding these differences helps you select appropriate materials for your specific DIY needs.
Which Woods Are Best for Indoor Furniture Builds?

Why should you care about wood selection for indoor furniture? Your choices affect both beauty and longevity. You want pieces that complement your home while lasting years.
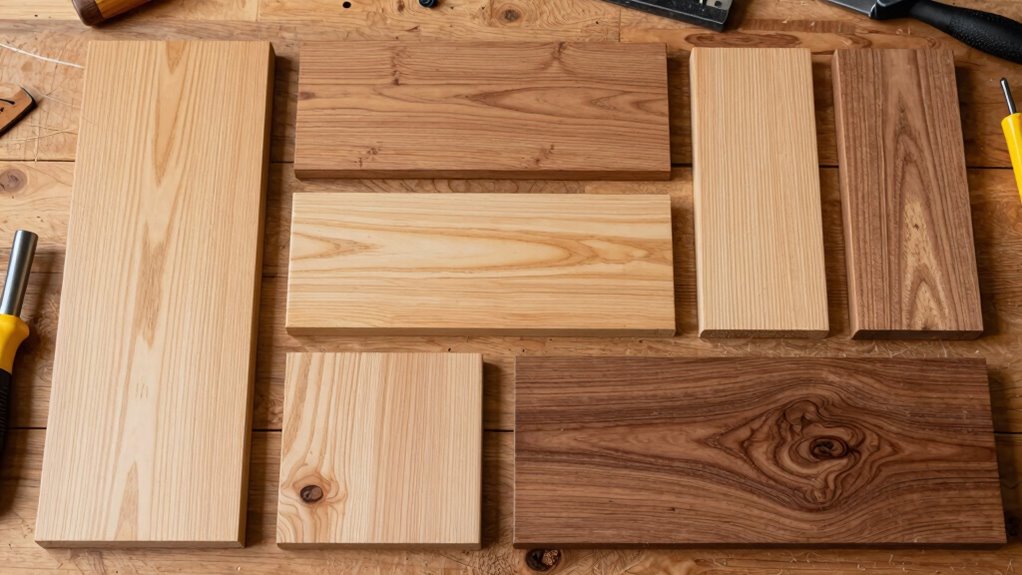
Focus on hardwoods like oak, maple, and cherry for durability. These woods handle daily wear better than softwoods. Oak offers strength and classic appeal. Maple provides smooth surfaces ideal for staining. Cherry develops rich patina over time.
Consider your budget and skill level. Poplar works well for painted furniture and costs less. Walnut delivers premium looks but demands more experience. Pine suits casual styles and beginner projects.
Match wood characteristics to your project’s needs. Heavy-use tables require sturdier options. Decorative pieces allow more flexibility.
You’re building something personal, so choose woods that reflect your taste and lifestyle.
Top Woods for Outdoor DIY That Resist Weather
Outdoor projects demand wood that can handle moisture, temperature swings, and UV exposure without splitting, warping, or rotting.
You need materials that stand up to weather while maintaining their integrity and appearance season after season.
When selecting outdoor wood, consider these five options that resist weather naturally:
- Cedar – Contains natural oils that repel insects and prevent decay
- Teak – High oil content makes it virtually waterproof and stable
- Redwood – Naturally resistant to bugs and moisture with beautiful grain
- Cypress – Heartwood contains preservatives that fight rot and insects
- Pressure-treated pine – Chemically enhanced to withstand outdoor conditions
These woods give you confidence that your outdoor furniture, decks, or structures will last years without constant maintenance or replacement worries.
How Wood Grain Impacts Strength and Finish Quality
While you’re selecting wood for your project, understanding how grain orientation affects both strength and finish application can save you from common mistakes that compromise your work’s durability and appearance.
Straight grain patterns typically provide maximum strength, while irregular grains create weak points that may split under stress.
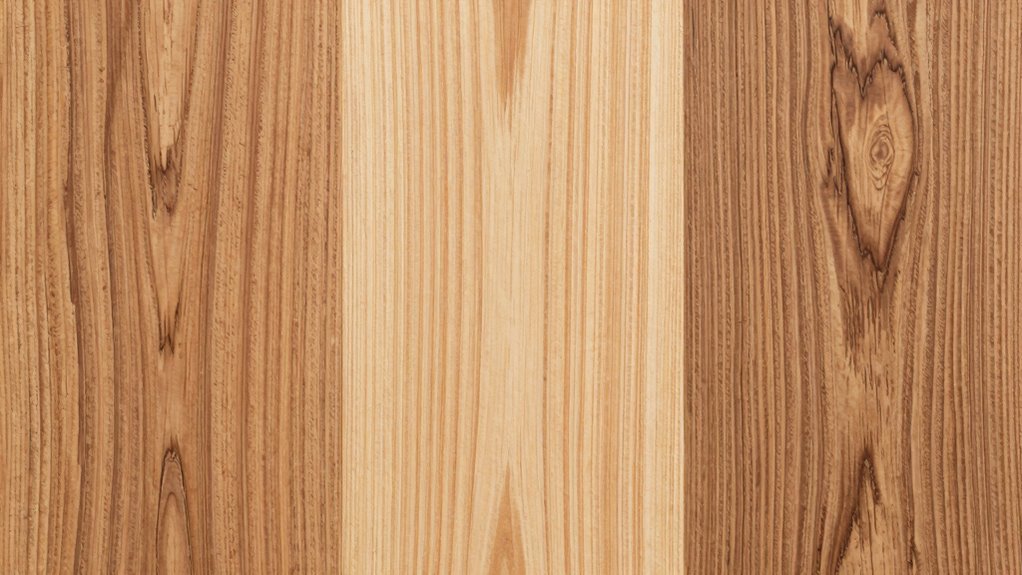
When applying finishes, remember that tight, even grains absorb stains uniformly, creating smooth, professional results. Open grains, like those in oak, require different approaches – they need more filler and careful sanding to achieve clean finishes.
You’ll find that quartersawn lumber offers superior stability and consistent grain patterns compared to plainsawn alternatives.
Don’t overlook grain direction when cutting joinery; working with the grain prevents tear-out and guarantees cleaner edges.
Test your chosen wood’s grain reaction with samples before committing to your final project.
Why Moisture Levels Matter When Choosing Wood
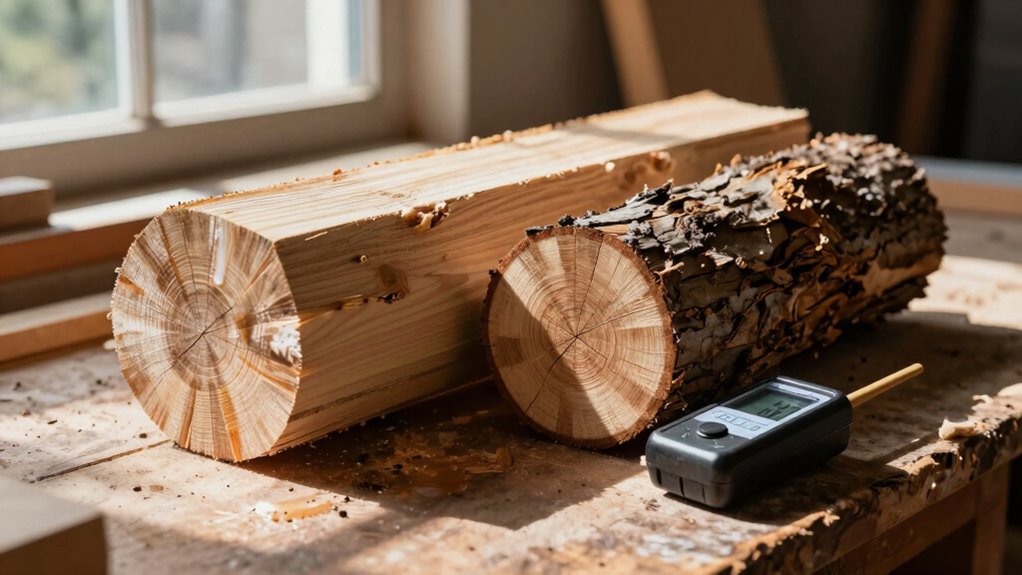
Since wood naturally expands and contracts with changes in moisture content, you’ll want to pay close attention to the moisture levels in your lumber before starting any project.
Wood that’s too wet or dry can ruin your hard work.
- Check moisture content using a reliable moisture meter before purchasing
- Store lumber properly in dry, ventilated areas away from concrete floors
- Acclimate wood by letting it sit in your workspace for several days
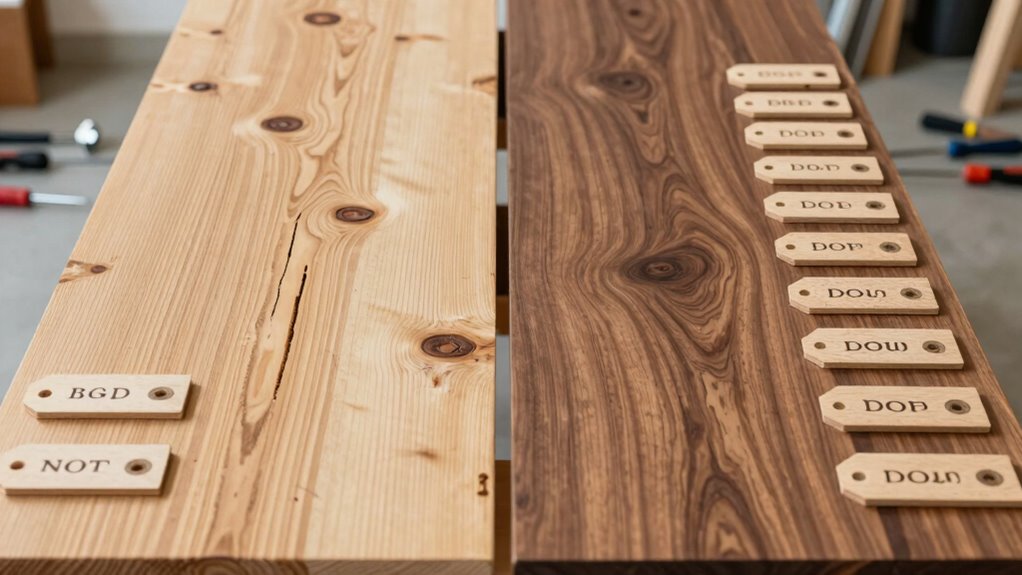
- Look for end tags showing moisture percentage on kiln-dried lumber
- Avoid cupping or warping by selecting boards with consistent moisture throughout
Understanding moisture content prevents costly mistakes and guarantees your projects last longer while maintaining their integrity.
Budget-Friendly Wood Options for Every DIY Level
You don’t need to break the bank to find quality wood for your projects.
Beginner-friendly softwoods like pine and cedar offer excellent workability at low prices, while hardwood alternatives such as poplar and maple provide durability without premium costs.
These budget-friendly options give you room to practice your skills and complete projects without financial stress.
Affordable Softwoods For Beginners
What makes softwoods the perfect starting point for your DIY journey?
These woods are forgiving, easy to work with, and won’t break your budget. You’ll find they cut cleanly, accept screws well, and show minimal splintering.
- Pine – Lightweight and readily available at every lumber yard
- Cedar – Naturally resistant to insects and moisture damage
- Fir – Strong yet soft enough for beginner woodworking projects
- Spruce – Excellent for structural pieces and framing work
- Cypress – Beautiful grain patterns with good weather resistance
Softwoods let you practice essential techniques without expensive mistakes.
You’ll build confidence working with materials that respond predictably to tools. These affordable options help you develop skills before moving to more challenging hardwoods.
Start here and you’ll discover why countless woodworkers began their craft with softwoods.
Hardwood Alternatives On A Budget
Several hardwood alternatives deliver excellent results without exceeding your budget.
Pine plywood offers strength and workability at a fraction of hardwood costs. You’ll find it perfect for cabinets, shelves, and furniture frames.
Bamboo provides durability similar to oak while being more affordable and eco-friendly. It’s surprisingly easy to work with and accepts stains beautifully.
MDF works wonderfully for smooth finishes and intricate cuts, especially for decorative projects. Don’t overlook reclaimed lumber from pallets or old furniture – it’s free and often surprisingly stable.
Ash and birch plywood grades give you hardwood appearance without premium pricing.
Poplar remains an excellent choice for painted projects since it takes paint exceptionally well.
Cherry plywood mimics expensive hardwood grains at reasonable prices.
Remember that proper preparation and finishing techniques make any wood look professional. Sand thoroughly, seal appropriately, and your budget-friendly materials will impress everyone.
What Tools Work Best With Different Wood Types?
You’ll want to match your tools to your wood type for clean, efficient cuts.
Softwoods like pine and cedar work best with sharp blades that won’t tear the grain, while hardwoods such as oak and maple demand heavy-duty tools that can handle their density.
Plywood requires specialized cutters to prevent chipping and achieve smooth edges.
Softwoods Require Sharp Blades
When working with softwoods like pine, cedar, or spruce, your tools need sharp blades to prevent tear-out and achieve clean cuts. Softwoods have long, smooth fibers that easily splinter when dull blades crush rather than slice through them.
Keep these points in mind for successful softwood projects:
- Sharpen chisels and plane blades regularly to maintain clean edges.
- Use freshly sharpened saw blades to avoid rough, torn surfaces.
- Check that router bits are sharp before shaping softwood edges.
- Replace dull drill bits that tear wood fibers instead of cutting cleanly.
- Store cutting tools properly to preserve sharp edges between uses.
Your finished projects will look professional and splinter-free when you prioritize sharp tools over power. Softwoods respond beautifully to well-maintained blades.
Hardwoods Need Heavy-Duty Tools
Hardwoods demand robust tools that can handle their dense, interlocking grain patterns without bogging down or burning out.
You’ll need powerful motors and sturdy construction to cut through oak, maple, or walnut effectively. Invest in heavy-duty circular saws with carbide-tipped blades designed for dense materials.
Your drill should have sufficient torque to drive screws without stripping heads. Router bits must be sharp and made from high-quality steel to prevent tear-out.
Don’t expect lightweight tools to perform well here. Choose chisels with thicker blades that won’t bend under pressure.
Quality matters more than quantity when working with hardwoods. Cheap tools will frustrate you and compromise your project’s outcome.
Your tools should feel substantial in your hands, giving you confidence with every cut.
Plywood Demands Specialized Cutters
Plywood requires different cutting strategies than solid hardwoods, and your tool selection needs to adapt accordingly.
This engineered wood demands specialized cutters that prevent tear-out and deliver clean edges. You’ll want tools designed specifically for plywood’s layered structure.
- Circular saws with fine-tooth blades cut through plywood layers smoothly
- Router bits with spiral flutes prevent chipping on veneer surfaces
- Jigsaws using carbide-tipped blades handle curved plywood cuts cleanly
- Table saws equipped with crosscut blades provide straight, precise cuts
- Oscillating multi-tools with fine blades work well for detailed plywood trimming
Choose cutters that match plywood’s unique construction.
Your finished projects will show professional results when you use the right tools for this versatile material.
5 Common Wood Selection Mistakes to Avoid
Why do so many DIY enthusiasts end up with warped, cracked, or splitting wood projects? You’re not alone in making these common mistakes.
First, you shouldn’t ignore wood’s moisture content – always check it’s properly dried before starting.
Don’t assume all hardwoods are superior; some softwoods work better for specific projects.
You’ll regret skipping grain direction analysis, leading to splitting during cutting.
Avoid buying cheap wood without inspecting it thoroughly; visible defects mean trouble later.
Don’t mix different wood species without considering their expansion rates – they’ll separate over time.
Finally, you shouldn’t overlook storage conditions; proper acclimation prevents warping.
These mistakes cost time, money, and frustration. Learn from others’ errors and choose your wood carefully.
Your projects will thank you for it.
Plywood vs Solid Wood: Which Fits Your Build?
You’ve learned to avoid common wood selection mistakes, but now you’re faced with another important decision: choosing between plywood and solid wood for your project.
Both materials have distinct advantages depending on your specific needs and budget constraints.
Consider these key factors when making your choice:
- Cost: Plywood costs markedly less than solid wood for similar dimensions.
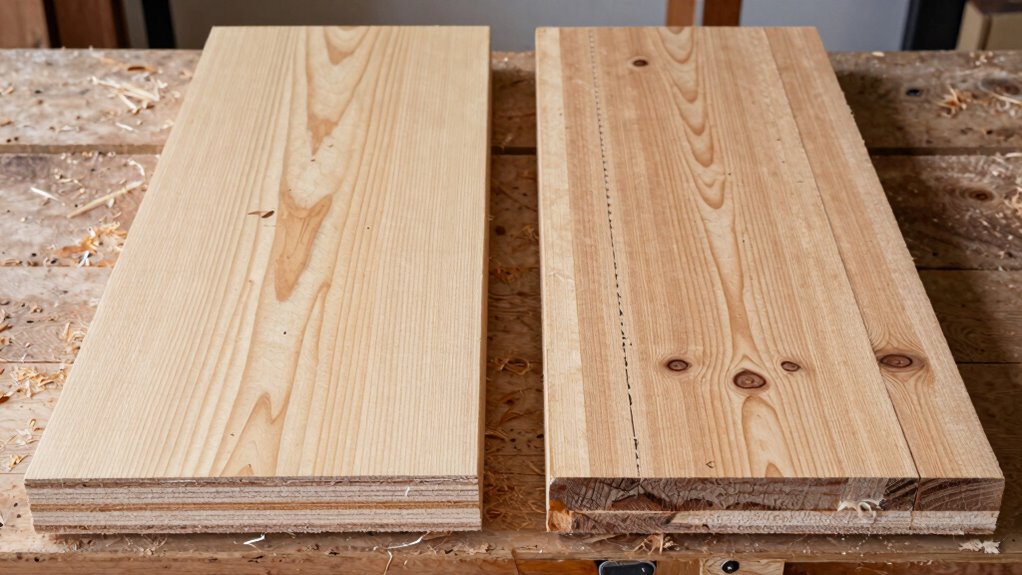
- Stability: Plywood resists warping and cracking better than solid wood.
- Strength: Solid wood offers superior structural integrity for heavy-duty applications.
- Workability: Solid wood accepts screws, nails, and joints more reliably than plywood.
- Appearance: Solid wood provides natural grain patterns that plywood can’t replicate.
Your project’s requirements should guide this decision.
Furniture makers often prefer solid wood for its authentic look and durability, while builders frequently choose plywood for its stability and affordability.
Consider what matters most for your specific build before making your final choice.
Which Woods Take Stain and Finish the Best?
How do you guarantee your DIY project achieves that flawless, professional finish you’re after? You pick woods that absorb stain evenly and showcase beautiful grains.
Cherry, walnut, and oak accept stains beautifully while maintaining their natural character. Maple takes lighter stains well but can appear blotchy with darker ones. Poplar accepts any stain color without issue, making it ideal for painting or staining.
Birch plywood works great for furniture projects. Avoid pine for staining; it tends to look uneven. Test your stain on scrap wood first. You’ll build confidence knowing your chosen wood complements your vision.
Matching Wood Type to Your Skill Level
What wood should you choose when starting out versus tackling advanced projects? Your skill level determines which woods work best for your success.
Beginners should stick with forgiving, stable woods that don’t split easily or require special techniques. As you gain confidence, you can experiment with more challenging species.
- Pine and cedar – Perfect for novices because they’re soft, affordable, and easy to work with hand tools.
- Plywood and MDF – Excellent starting materials since they’re consistent and don’t have unpredictable grain patterns.
- Poplar – Great for intermediate woodworkers learning joinery techniques without fighting dense hardwood.
- Oak and maple – Save these for when you’ve mastered basic cuts and joints.
- Exotic hardwoods – Wait until you’re experienced before tackling expensive, difficult-to-work species.
What to Look for When Buying Wood at the Store?
When buying wood at the store, several key factors determine whether your project will succeed or end up as expensive firewood.
You should check moisture content first – green wood warps and cracks as it dries. Look for wood that feels dry and weighs less than you expect.
Examine the grain pattern closely; straight, even grains are easier to work with than wild, irregular patterns. Check for knots, splits, and warping – these create weak spots and cutting challenges.
Feel the surface for smoothness and consistency. Smell the wood; fresh, mild odors indicate good quality while musty smells suggest storage problems.
Don’t forget to verify dimensions match your project needs. Quality lumber may cost more initially but saves time, effort, and frustration later. Your finished project deserves starting materials that won’t let you down.
Can You Mix Wood Types in One Project Safely?
You’ve selected your lumber carefully, checking moisture content and grain patterns to guarantee quality.
Mixing wood types safely requires understanding how different species behave together. You’ll want to weigh expansion rates, finishing compatibility, and structural requirements before combining materials.
- Match similar moisture content to prevent warping or cracking as woods adjust
- Choose compatible hardness levels so softer woods don’t dent excessively compared to harder ones
- Evaluate grain direction when joining pieces to avoid stress concentration points
- Use appropriate fasteners that accommodate different wood densities and expansion characteristics
- Test finish compatibility on scrap pieces first since stains and sealers react differently across species
You’re creating something beautiful and functional, so take time to plan your wood combinations thoughtfully.
Conclusion
You’ve got this. While softwoods like pine make beginner projects forgiving, hardwoods like oak demand patience but reward you with durability. Don’t let knots discourage you—embrace them for character or avoid them for strength. Match your wood to your project’s purpose: indoor elegance calls for maple, outdoor resilience needs cedar. Your perfect wood waits at the store, ready to transform from rough lumber into your next masterpiece. Choose wisely, work carefully, and let your project shine.
