

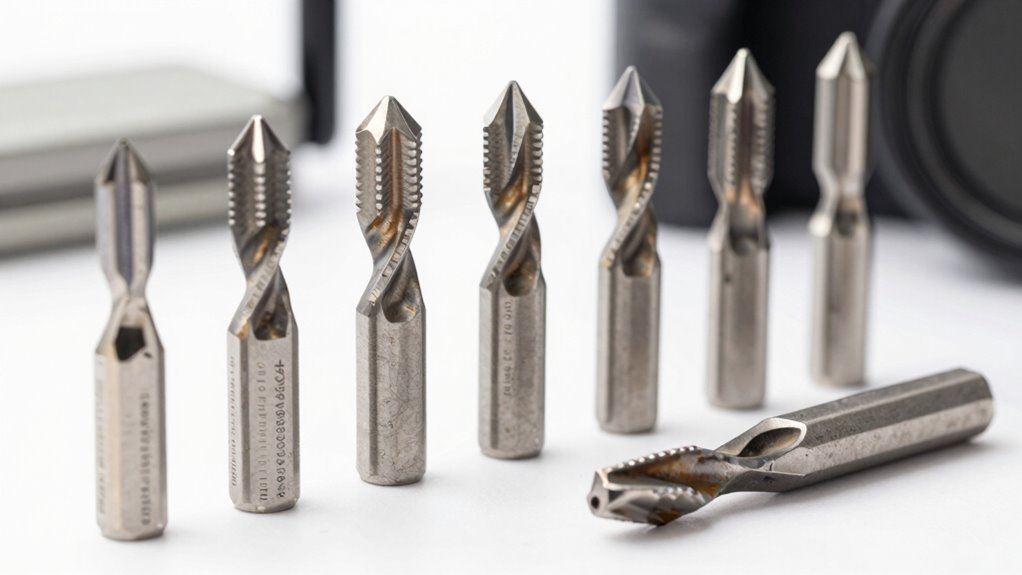
You probably haven’t considered how router bit geometry directly affects tear-out and surface finish quality. Choosing the right bit involves more than picking a shape that matches your project. You’ll need to evaluate material compatibility, cutting edge type, and flute configuration to achieve precise results. Understanding these specifications prevents costly mistakes and guarantees top performance. Let’s explore the critical factors that separate professional-grade routing from amateur attempts.
What Are Router Bits and When Do You Use Them?

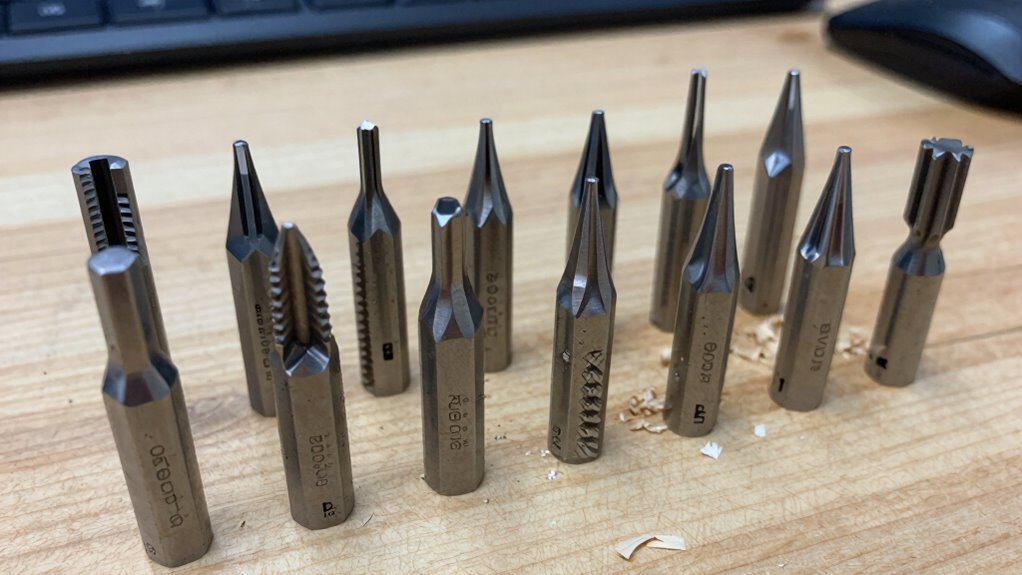
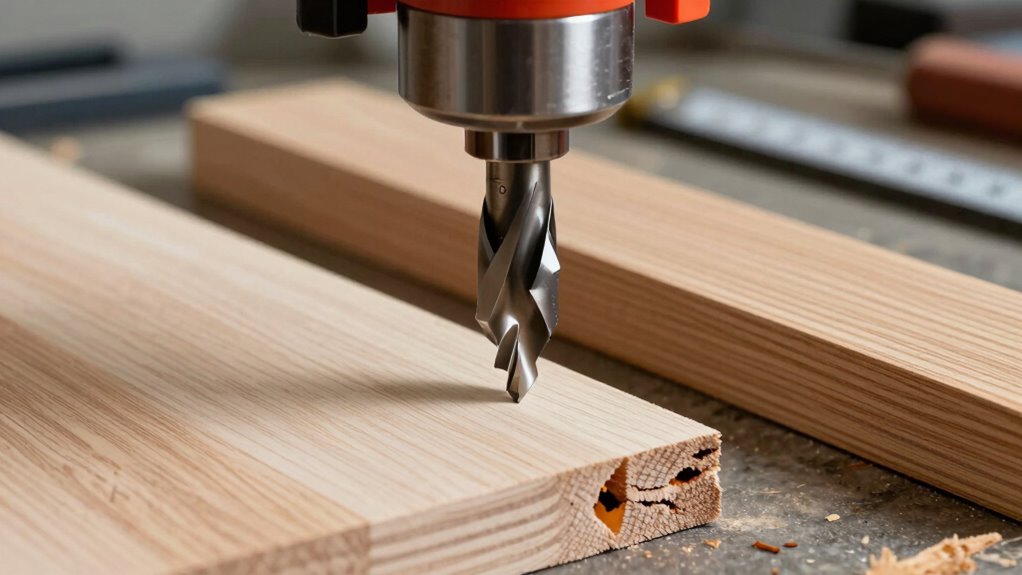
Router bits are precision cutting tools that fit into a router’s collet to create specific profiles, grooves, and decorative edges in wood, plastic, and composite materials.
You’ll use straight bits for dadoes and grooves, while spiral bits excel at edging operations. Core box bits create square-bottomed channels perfect for inlay work. You should select bearing-guided bits when you need consistent edge profiles along board edges.
Pattern bits with top-bearing guides help you follow templates accurately. Chamfer bits add beveled edges that reduce sharpness while enhancing appearance.
You’ll discover that different shank sizes affect cutting stability and precision. Carbide-tipped bits deliver longer life than high-speed steel alternatives.
You must match bit diameter and cutting length to your router’s horsepower capacity. Understanding these fundamentals guarantees you select appropriate bits for professional-quality results.
Match Router Bits to Your Woodworking Project Type
When you’re planning a woodworking project, selecting the appropriate router bits becomes critical to achieving professional results.
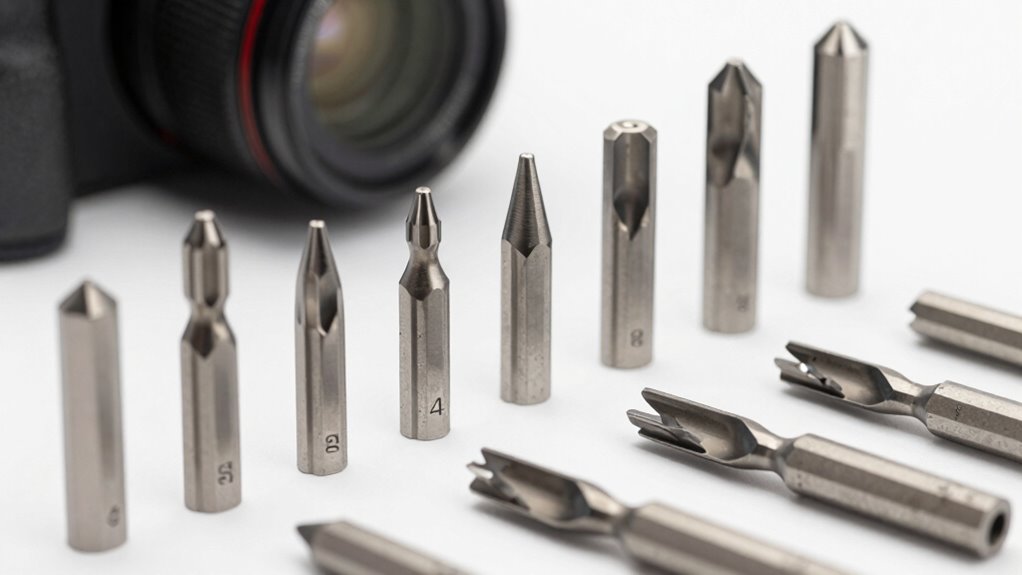
For edge profiling, you’ll want quarter-round or ogee bits that create decorative borders on table edges and cabinet faces. Raised panel doors require core box bits for the center recess and matching profiles for the perimeter.
Cabinetmakers rely on straight bits for precise dados and rabbets, while dovetail bits create strong joints for drawers. Trim work demands small radius bits for delicate moldings.
Sign makers gravitate toward V-groove bits for lettering and decorative inlays. Bowl turning necessitates specialized round-over bits that handle curved surfaces.
Each project type has specific bit geometries that optimize cutting performance and surface finish quality.
Choose Durability: Carbide-Tipped or High-Speed Steel?
Carbide-tipped router bits deliver superior longevity compared to high-speed steel alternatives, making them the preferred choice for demanding woodworking applications.
You’ll appreciate carbide’s hardness rating of 8.5-9 on the Mohs scale versus steel’s 6.5-7. This enhanced hardness resists wear, maintains sharp cutting edges longer, and reduces heat buildup during extended use.
Carbide tips can be brazed onto steel bodies, combining durability with shock absorption. High-speed steel bits work well for softer woods and occasional projects, but they dull faster and require frequent sharpening.
When you’re tackling hardwoods, dense materials, or production work, carbide-tipped bits provide consistent performance. Your investment in carbide pays dividends through reduced downtime and replacement costs.
Professional woodworkers rely on carbide for its proven track record in demanding shop environments.
Straight Bits vs. Profile Bits: Which Fits Your Need?
How do you determine whether straight bits or profile bits better suit your woodworking requirements?
You need straight bits for clean, precise cuts like dadoes, rabbets, and groove work. These bits excel at removing material efficiently while maintaining flat surfaces.
Profile bits create decorative edges, contours, and shaped profiles that add character to your projects. You’ll use them for cabinet doors, decorative moldings, and ornamental woodwork.
Straight bits demand less power and produce smoother finishes on flat cuts. Profile bits require more careful feed rates due to their complex cutting geometry.
You should match bit selection to your router’s horsepower.
Choose straight bits for functional joinery and profile bits when aesthetics matter. Your project’s design dictates which bit type delivers professional results.
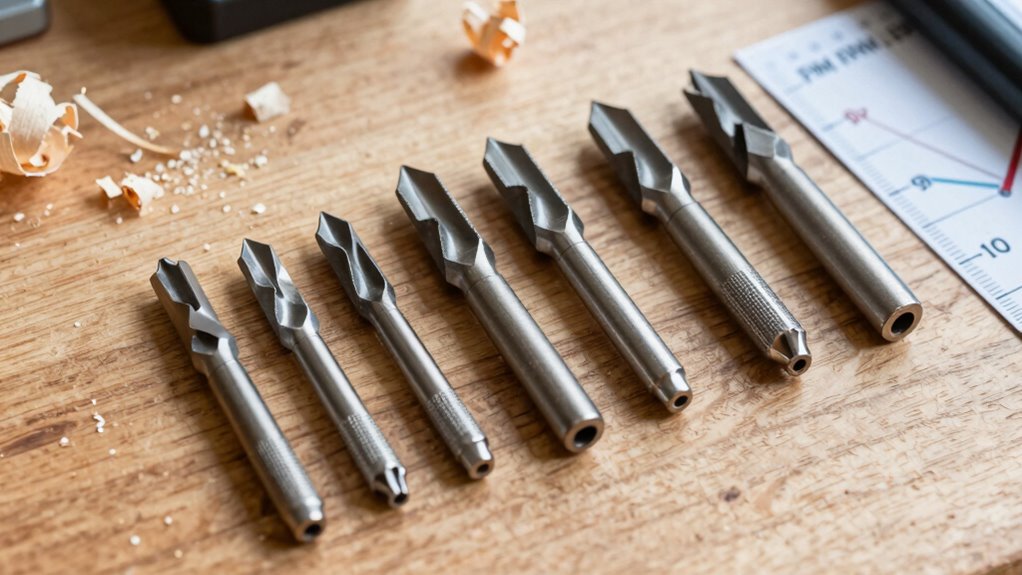
Shank Sizes Explained: Ensuring Tool Fit and Stability
You must understand shank diameter options to guarantee proper router bit compatibility with your tool’s collet system.
Standard shank sizes include 1/4-inch, 1/2-inch, and 3/4-inch, each requiring specific router compatibility for peak performance.
Your router’s collet capacity determines which shank diameters you can effectively use, directly impacting tool stability and cutting precision.
Shank Diameter Options
Two primary shank diameter options dominate the router bit market, each designed to address specific tool compatibility and performance requirements. You’ll encounter 1/4-inch and 1/2-inch shank diameters most frequently.
Smaller routers typically accept 1/4-inch shanks, while larger, more powerful routers accommodate 1/2-inch shanks. You must match your router’s collet size precisely – attempting to use adapters compromises stability and accuracy.
Larger shank diameters provide superior rigidity and reduced vibration, translating to cleaner cuts and extended tool life. You’ll notice significant performance differences when working with hardwoods or demanding profiles.
Professional woodworkers favor 1/2-inch shanks for heavy-duty applications. Your router bit choice directly impacts cut quality, so you shouldn’t overlook shank diameter specifications. Always verify your router’s collet capacity before purchasing bits.
Router Bit Compatibility Guide
While router bit compatibility might seem straightforward, guaranteeing proper shank size matching requires understanding the critical relationship between your router’s collet system and bit specifications.
You must match shank diameter precisely to your router’s collet capacity. Common shank sizes include 1/4-inch and 1/2-inch diameters. Larger shanks provide better stability and reduced vibration during cutting operations.
Check your router’s manual for compatible shank diameters and never force-fit incompatible bits. Collet wear affects grip strength, so replace worn collets promptly.
Verify bit shank length extends adequately into the collet for secure clamping. Proper compatibility prevents dangerous bit slippage and guarantees consistent cutting performance.
Always inspect both collet and shank for damage before installation.
Cutting Diameter Changes Your Workpiece Results
You must understand how cutting diameter directly impacts your workpiece precision and final dimensions.
Larger router bits create wider cuts that can compromise tight tolerances, while smaller diameter bits offer greater control for detailed work.
Selecting the appropriate cutting diameter guarantees you achieve the exact groove width, edge profile, or mortise depth required for your specific project specifications.
Cutting Diameter Affects Precision
Because router bits with larger cutting diameters remove more material in a single pass, they can profoundly impact the dimensional accuracy and surface finish of your workpiece.
You’ll notice that bigger cutters create more vibration and chatter, which directly affects precision.
Smaller diameter bits offer superior control for detailed work and tight tolerances.
When you’re working with hardwoods or need exact measurements, smaller cutters deliver cleaner cuts with less tear-out.
Larger bits generate more heat and stress on your material, potentially causing warping or burning.
You should match cutting diameter to your project’s precision requirements.
Fine joinery demands smaller bits for accurate fits, while rough shaping can handle larger diameters.
Your choice directly determines the quality and accuracy of your finished piece.
Larger Bits Create Wider Cuts
Larger router bits create wider cutting paths that fundamentally alter your workpiece dimensions and surface characteristics.
You’ll notice immediate differences in material removal rates and edge profiles when switching between bit sizes. Larger diameter cutters remove more material per pass, demanding careful feed rate adjustments to prevent burning or tear-out.
Your cutting depth capabilities expand with bigger bits, allowing deeper grooves and wider dados in single passes. Surface finish quality often improves with larger bits due to reduced tool vibration and better chip evacuation.
You’ll achieve smoother results on broad surfaces while maintaining consistent cutting angles.
Remember that larger bits require more powerful motors and rigid setups to maintain accuracy. Your router’s bearing system becomes essential for controlling wider cutting diameters effectively.
Flutes in Router Bits and Why They Matter for Finish
Router bit flutes play a critical role in determining the quality of your wood finish. These spiral grooves control chip evacuation and cutting action, directly affecting surface smoothness.
Single-flute bits create cleaner cuts with less tear-out, ideal for delicate hardwoods. Double-flute bits offer faster material removal but may leave slightly rougher finishes. More flutes typically mean finer finishes, as each cutter makes smaller, more frequent passes.
You should match flute configuration to your wood type and desired outcome. Straight flutes work well for general routing, while up-cut spiral flutes pull chips upward for cleaner bottom surfaces. Down-cut flutes push chips downward, perfect for top surface finishing.
Understanding flute mechanics helps you achieve professional results consistently.
Choose the Right Bit for Perfect Edge Profiles
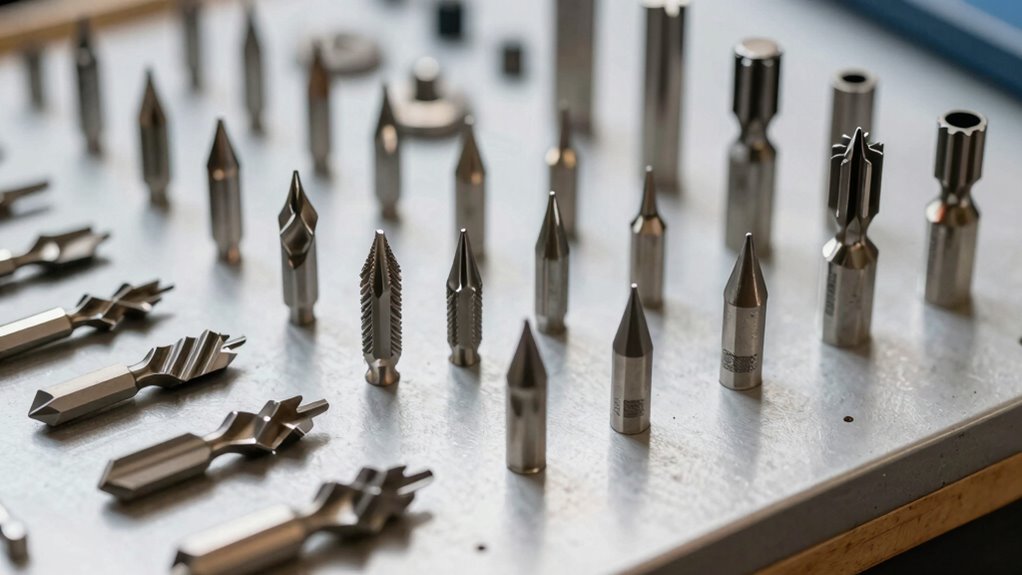
You must carefully select router bits that match your desired edge profile dimensions and design specifications.
Each bit’s cutting geometry directly determines the final shape and quality of your workpiece edges. Proper bit selection guarantees clean, precise profiles without tear-out or unwanted machining marks.
Selecting Bit Profiles
While selecting router bits for edge profiling, matching the bit profile to your specific woodworking project guarantees professional results and prevents costly mistakes. You must understand profile dimensions, cutting angles, and material compatibility before purchasing.
Examine bit specifications carefully – carbide-tipped bits deliver superior edge quality compared to high-speed steel. Consider bearing-guided bits for consistent profiles along curved edges.
Straight bits work excellently for simple edge treatments, while cove bits create elegant curved profiles. You should always test bits on scrap material first to verify profile accuracy.
Pay attention to shank diameter compatibility with your router. High-quality bits may cost more initially but provide cleaner cuts, longer lifespan, and reduced tear-out.
Your project’s success depends on selecting precise bit profiles that match your design requirements and material characteristics.
Matching Edge Designs
When matching router bits to specific edge designs, understanding the relationship between bit geometry and material characteristics guarantees precise profile reproduction.
You must consider how cutting angles, flute configurations, and carbide tip placement interact with wood grain direction and density variations.
- Match bit angle to material hardness – Hardwoods require steeper cutting angles
- Align flute count with chip evacuation needs – More flutes for fine finishes, fewer for aggressive cuts
- Verify bearing diameter matches template requirements – Facilitates consistent profile tracking
- Select shank size appropriate for router collet – Prevents vibration and tool slippage
- Consider carbide grade for material abrasiveness – C2 micrograin for hardwoods, K10 for softwoods
Proper bit selection eliminates tear-out while achieving clean, professional edge profiles.
Prevent Burn and Tear-Out When Using Router Bits

Although router bits can produce clean, precise cuts, improper technique or dull cutters will cause burn marks and tear-out that compromise both aesthetics and functionality. You should maintain sharp cutters since dull edges generate excessive heat and friction.
Apply steady, consistent pressure without forcing the router through material. Use shallow passes rather than attempting deep cuts in single passes. Keep your workpiece properly supported to prevent vibration and chattering. You’ll achieve better results by making multiple light passes instead of aggressive cutting depths.
Confirm your router base remains flat against the work surface throughout each pass. Clean debris from cutters regularly to prevent buildup that causes burning.
You should also consider grain direction when routing, cutting with the grain whenever possible to minimize tear-out and achieve professional-quality results.
Set Correct Speed and Feed Rate Per Bit Type
Proper speed and feed rate settings prevent the burn and tear-out issues discussed previously, directly impacting cut quality and bit longevity.
You must match settings to each bit type for peak performance.
- Solid carbide bits: Use maximum router speeds (24,000 RPM) with moderate feed rates for clean, precise cuts in hardwoods and composites.
- High-speed steel bits: Reduce speed to 18,000-20,000 RPM when working hardwoods, increase feed rate to prevent overheating in softer materials.
- Straight flute bits: Maintain higher speeds with steady, consistent feed rates to avoid chip clogging and burning.
- Spiral flute bits: Operate at maximum speeds while using faster feed rates due to superior chip evacuation design.
- Large diameter bits: Decrease RPM considerably (10,000-15,000) and reduce feed rate to manage cutting forces and prevent bit failure.
Signs of Poor Bit Balance: Watch for Runout Errors
You must monitor your router bits for excessive vibration that indicates imbalance, as this directly affects cut quality and tool life.
Your runout measurements should stay within 0.001 inches total indicator reading to maintain proper bit alignment and prevent dangerous wobbling.
These alignment problems create inconsistent cuts and accelerate bit wear, so you can’t ignore them during operation.
Identifying Vibration Issues
When router bits exhibit excessive vibration during operation, you’ll notice distinct signs that indicate poor balance and potential runout errors.
These vibrations compromise cut quality and tool life while creating safety hazards.
Recognizing vibration issues early prevents costly mistakes and guarantees precision cuts.
You’ll experience these warning signs:
- Chatter marks appearing on workpiece surfaces during cutting
- Audible whining or inconsistent noise patterns from the router
- Visible bit wobble when observing the cutting edge
- Irregular cut depths requiring unexpected router adjustments
- Premature bearing wear causing increased operating temperatures
Understanding these symptoms helps you maintain peak cutting performance.
Address vibration issues immediately to preserve tool integrity and achieve professional results consistently.
Measuring Runout Accuracy
Runout accuracy measurement reveals critical bit balance issues that directly impact cutting precision and tool longevity.
You’ll need a dial indicator or runout gauge to measure lateral movement at the bit’s cutting edge while rotating it slowly. Acceptable runout should remain under 0.001 inches.
Excessive runout creates uneven cutting forces, premature bearing wear, and poor surface finishes. You’ll notice vibration, chattering, or inconsistent cuts when bits exhibit significant runout errors.
Measure multiple points along the cutting edge to identify balance issues. Bits showing consistent runout problems should be replaced immediately.
Regular runout checks prevent costly router damage and guarantee professional-quality results. Your workshop’s precision depends on maintaining tight tolerances.
Don’t overlook runout measurement during routine bit inspections.
Checking Bit Alignment Problems
While measuring runout accuracy provides essential insights into bit performance, identifying alignment problems requires careful observation of operational symptoms that indicate poor bit balance.
You’ll notice distinctive signs when bits aren’t properly aligned, and recognizing these issues prevents costly mistakes and guarantees precision cuts.
Poor bit balance creates measurable runout errors that compromise your work quality.
Stay alert for these critical indicators:
- Excessive vibration during operation
- Irregular cutting patterns or chatter marks
- Premature bit wear or chipping
- Inconsistent depth cuts across materials
- Unusual noise levels or harmonic frequencies
These symptoms signal alignment issues demanding immediate attention.
You belong among skilled craftsmen who understand that proper bit alignment isn’t optional—it’s fundamental to achieving professional results and extending tool lifespan.
Extend Bit Lifespan Through Proper Cleaning and Storage
Proper cleaning and storage practices greatly extend router bit lifespan by preventing corrosion, dulling, and damage that occur when bits are left exposed to contaminants. You should immediately clean bits after use with a soft cloth to remove resin buildup and metal shavings.
Use mineral spirits or specialized carbide cleaners for stubborn residue. Store bits in protective cases or original packaging to prevent scratches and moisture exposure. Keep them in climate-controlled environments away from humidity and temperature fluctuations.
Label storage containers clearly for easy identification. Regular maintenance prevents costly replacements and maintains cutting precision. Clean bits perform better and last longer, ensuring consistent results.
Don’t overlook these simple steps—they make the difference between professional-quality work and frustrating tool failures. Your investment deserves proper care.
Mistakes to Avoid When Selecting Router Bits
When you select router bits without considering the specific material you’re cutting, you risk premature dulling and poor performance.
Matching bit geometry to your workpiece guarantees clean cuts and extended tool life.
Don’t make these critical errors:
- Ignoring shank diameter compatibility – Using bits with incorrect shank sizes causes vibration and poor cut quality
- Overlooking cutting edge material – Carbide-tipped bits handle hardwoods better than high-speed steel alternatives
- Selecting wrong flute configurations – Too few flutes create rough finishes; too many struggle with chip evacuation
- Mismatching bit angles to material – Incorrect rake angles lead to tear-out or burning
- Neglecting bearing quality – Cheap bearings cause inconsistent profiles and premature failure
These mistakes compromise both your project quality and tool investment.
Where to Buy Router Bits That Fit Your Budget
Where should you source router bits that deliver professional performance without breaking your budget?
Start by exploring reputable online retailers like Woodcraft, Rockler, and Amazon’s specialized woodworking sections. These platforms offer competitive pricing and detailed product specifications.
Don’t overlook local woodworking suppliers who often stock quality brands like Freud, Amana, and Whiteside at reasonable prices.
Check garage sales and estate sales for lightly used bits from serious woodworkers upgrading their collections.
Harbor Freight and Home Depot provide budget-friendly options for beginners, though you’ll sacrifice some durability.
Consider buying sets rather than individual bits to maximize value.
Join woodworking forums and Facebook groups where members frequently share deals on premium bits.
Compare prices across multiple vendors before purchasing, and watch for seasonal sales during major holidays.
Troubleshoot Common Router Bit Problems Like a Pro
While you’re working with router bits, you’ll inevitably encounter issues that can compromise your project’s quality and your safety. Developing troubleshooting skills separates experienced woodworkers from beginners.
- Burn Marks: Reduce feed speed and check bit sharpness; dull bits generate excessive heat.
- Tear-out: Use backing boards and climb cutting techniques for cleaner edges.
- Vibration Issues: Inspect collet tightness and guarantee proper bit insertion depth.
- Poor Edge Quality: Examine bit condition and replace worn cutters immediately.
- Bit Slippage: Clean shank and collet thoroughly, tightening according to manufacturer specifications.
Master these troubleshooting techniques and you’ll join the ranks of confident, skilled woodworkers who trust their router work implicitly.
Conclusion
You’ve learned the critical factors in router bit selection. Carbide-tipped bits last 5-10 times longer than high-speed steel, making them cost-effective for frequent use. Match bit types to your project needs, consider shank sizes for stability, and prioritize proper maintenance. Avoid common mistakes like using dull bits or incorrect speeds. Your router bit investment directly impacts cut quality and tool longevity. Choose wisely based on material compatibility and desired finishes.
