

You can fix small pipe leaks temporarily with epoxy putty or pipe wrap tape, but you’ll need to identify the leak type first. Pinhole leaks, joint failures, and corrosion damage each require different approaches. Before you start, turn off the main water supply and dry the area completely. Assess whether this is a quick repair you can handle or if it’s time to call a professional.
How to Identify the Type of Pipe Leak
What exactly are you looking for when identifying pipe leaks? You need to determine whether you’re dealing with a pinhole leak, joint failure, or corrosion-induced damage.
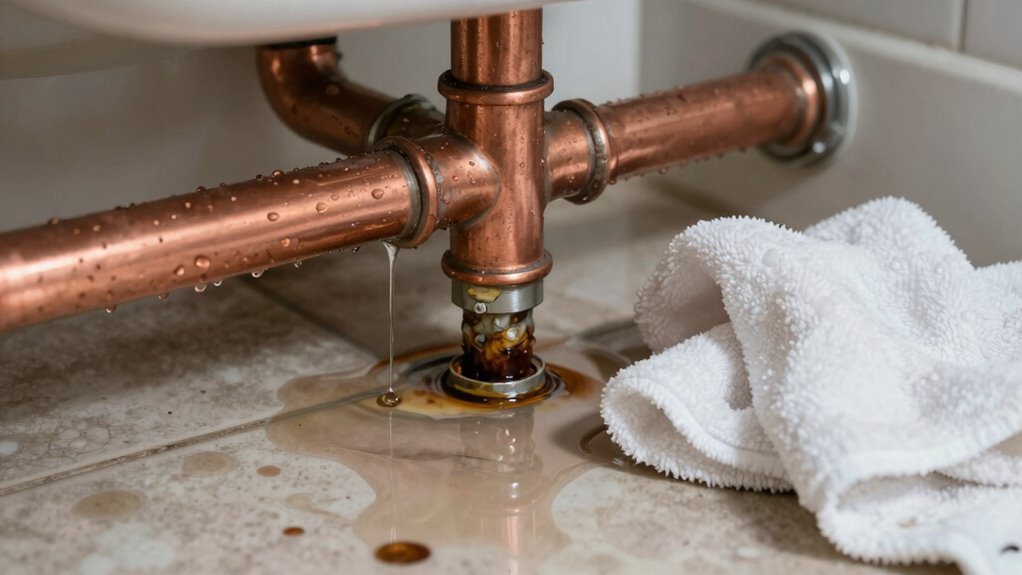
Pinhole leaks appear as small water sprays and often occur in copper pipes due to internal pressure issues. Joint failures happen where pipes connect, showing obvious separation or cracked fittings. Corrosion damage creates multiple small holes along pipe surfaces, typically affecting older galvanized systems.
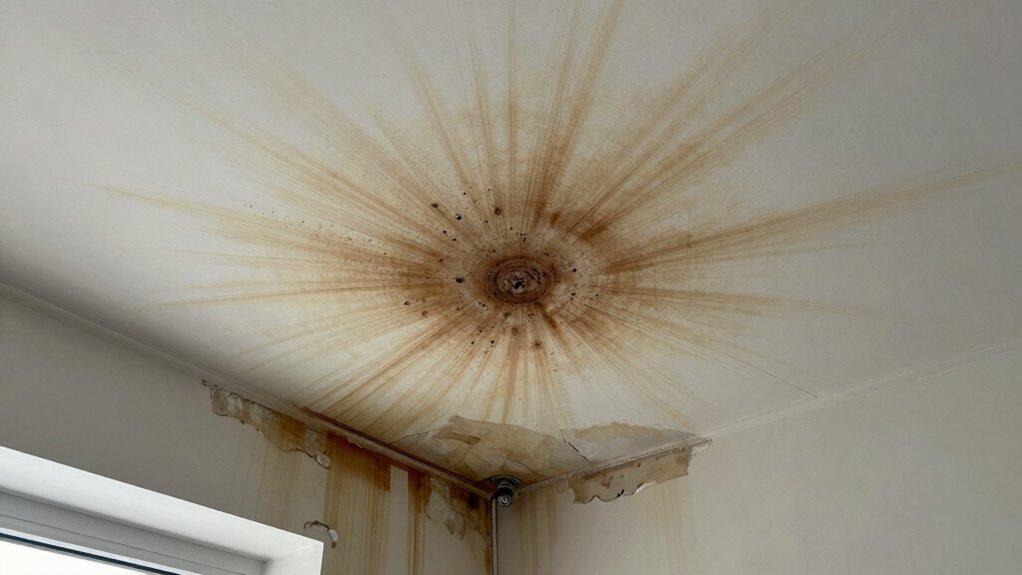
Listen for dripping sounds behind walls and watch for water stains on ceilings or walls. Check water meter readings when all fixtures are off. Feel pipes for moisture and look for mineral deposits indicating past leakage.
Temperature changes around pipes signal hidden problems. Identifying leak type determines your repair approach and materials needed. You’ve got this.
Should You Fix It Yourself or Call a Plumber?
You need to assess the extent of pipe damage quickly since minor leaks might only require simple repairs.
Evaluate whether the repair involves basic tools and techniques you’re comfortable handling without causing more extensive damage.
Call a plumber immediately if you’re dealing with major pipe bursts, hidden leaks behind walls, or situations requiring specialized equipment you don’t have access to.
Assessing Pipe Damage Severity
How badly damaged are your pipes, and can you realistically handle the repair yourself?
Small pinhole leaks or minor cracks you can temporarily fix with epoxy putty or pipe clamps. However, significant corrosion, large gashes, or multiple leak points indicate you should call a professional.
Burst pipes require immediate plumber attention. Check if water pressure remains consistent after initial repairs. Persistent dripping suggests underlying structural issues beyond basic fixes.
Your comfort level with tools and plumbing concepts determines feasibility. Don’t underestimate complexity based solely on visible damage. Internal pipe deterioration isn’t always apparent externally.
When unsure, consult a plumber rather than risking worsening damage.
Evaluating Repair Complexity
When should you tackle pipe repairs yourself versus calling a professional? Evaluate the repair complexity by examining three key factors.
First, consider your skill level and experience with plumbing tools. Simple tasks like tightening connections or replacing washers are manageable DIY projects.
Second, assess the repair location. Pipes in tight spaces or behind walls increase complexity markedly.
Third, examine the damage type. Minor leaks, loose fittings, or dripping faucets you can handle confidently. Complex soldering, major pipe replacements, or repairs requiring specialized equipment exceed basic homeowner capabilities.
If you’re unsure about any aspect, don’t gamble with expensive water damage. Remember, successful DIY plumbing requires proper tools, patience, and realistic self-assessment. When doubt exists, choosing professional help prevents costly mistakes.
Determining When Professional Help Is Necessary
While minor pipe repairs can often be handled by homeowners with basic plumbing skills, certain situations demand professional expertise to prevent costly water damage and guarantee code compliance.
You should call a plumber when dealing with major pipe bursts, sewer line issues, or gas line problems.
Structural damage, recurring leaks, or repairs requiring permits fall outside DIY territory.
If you’re unsure about local building codes or lack proper tools, don’t risk it.
Professional help becomes essential when repairs involve main water lines, underground piping, or connections to municipal systems.
Your safety and property protection depend on recognizing these limits.
Experienced plumbers handle complex diagnostics, pressure testing, and code-required inspections that secure lasting repairs.
Gather Essential Tools and Materials Before Starting
Before you begin any pipe repair work, gathering the right tools and materials will save you time and prevent unnecessary trips to the hardware store.
You’ll need an adjustable wrench, pipe cutter, emery cloth, and Teflon tape for most repairs. Don’t forget pliers, a bucket for water drainage, and rags for cleanup.
For PVC pipes, grab PVC cement and primer. Brass fittings require flux and solder. Always have pipe dope or silicone sealant handy for threaded connections.
Check your existing pipes’ material type beforehand – copper, galvanized steel, or PVC – so you purchase correct replacement parts.
Keep specialty tools like a pipe reamer or tubing bender accessible if you’re working with tight spaces.
Having everything ready guarantees you won’t leave a repair job half-finished while running to the store.
Turn Off Water Supply to Prevent Further Damage

Although you’ve gathered all necessary tools and materials, you must immediately shut off the water supply before proceeding with any pipe repair to prevent additional water damage.
Locate your main water shut-off valve, typically found near the water meter or where the main line enters your home. Turn the valve clockwise until it stops completely. For secondary shut-off valves near the leak, close them too.
Test that water flow has stopped by opening faucets downstream from the leak. Don’t forget to shut off electricity to water heaters if the leak involves hot water lines. Quick action prevents costly water damage and creates a safe working environment.
You’re now ready to properly assess the situation.
Dry the Area and Assess the Leak Severity
You must dry the affected pipes and surrounding area completely before evaluating the leak’s true severity.
Use towels, a wet-dry vacuum, or fans to remove all moisture from the pipes, fittings, and nearby surfaces.
This drying process prevents water damage from spreading and allows you to accurately gauge the leak’s size and location.
Dry Pipes Thoroughly
Turn off the water supply and open faucets to drain remaining water from the affected pipes.
Use towels, rags, or a wet-dry vacuum to remove standing water around the leak site. Pay special attention to water trapped in pipe joints, fixtures, and hard-to-reach areas.
Thoroughly dry all surfaces with clean, absorbent materials. Moisture left behind can interfere with repair materials like epoxy or pipe tape, compromising your fix.
Check surrounding areas for hidden water pockets that could affect your repair work. Confirm complete dryness before proceeding to the next repair step.
Proper drying prevents slippage when applying tools and maintains peak adhesion for sealing compounds.
Work systematically from the leak source outward, double-checking that no moisture remains in your work area.
Assess Leak Severity
With the area completely dry, you can now accurately evaluate the extent of pipe damage.
Examine the leak location carefully, looking for cracks, holes, or corrosion. Small pinhole leaks require different repair approaches than larger splits.
Check surrounding pipes for additional damage or weak spots. Measure the leak’s diameter and depth using appropriate tools. Determine if water pressure affects the leak’s severity.
Look for mineral deposits or rust that indicate long-term damage. Assess whether the pipe material is PVC, copper, or galvanized steel, as this affects your repair options.
Identify if the leak occurs at a joint or along the pipe’s length. Consider accessibility factors that might complicate repairs.
Document your findings clearly. This assessment determines whether you need epoxy repair, pipe replacement, or professional assistance. Your evaluation directly impacts the repair method’s success.
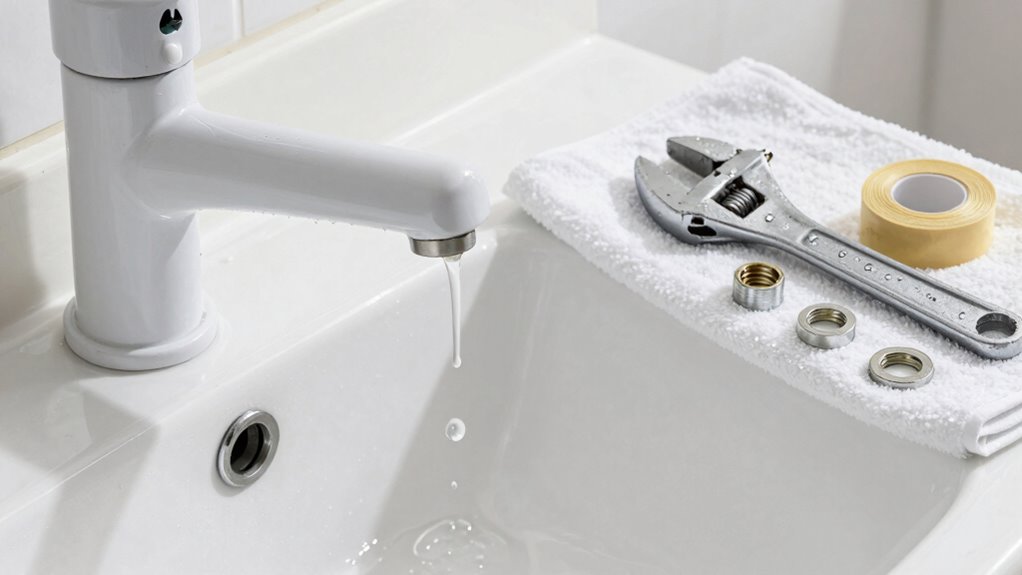
Replace a Leaky Washer in Faucet Pipes

Replacing a leaky washer in faucet pipes requires shutting off the water supply before removing the faucet handle to access the internal components.
You’ll need a screwdriver and adjustable wrench for this repair.
Turn the faucet on after shutting off water to drain remaining pressure.
Remove the handle screw, then pull off the handle.
Unscrew the packing nut and lift out the stem.
Take the old washer to your hardware store for an exact match replacement.
Install the new washer onto the stem, reassemble all components in reverse order, and turn water supply back on.
Test the faucet to confirm the leak stopped.
This common fix saves you from calling a plumber.
Tighten Loose Pipe Connections With a Wrench
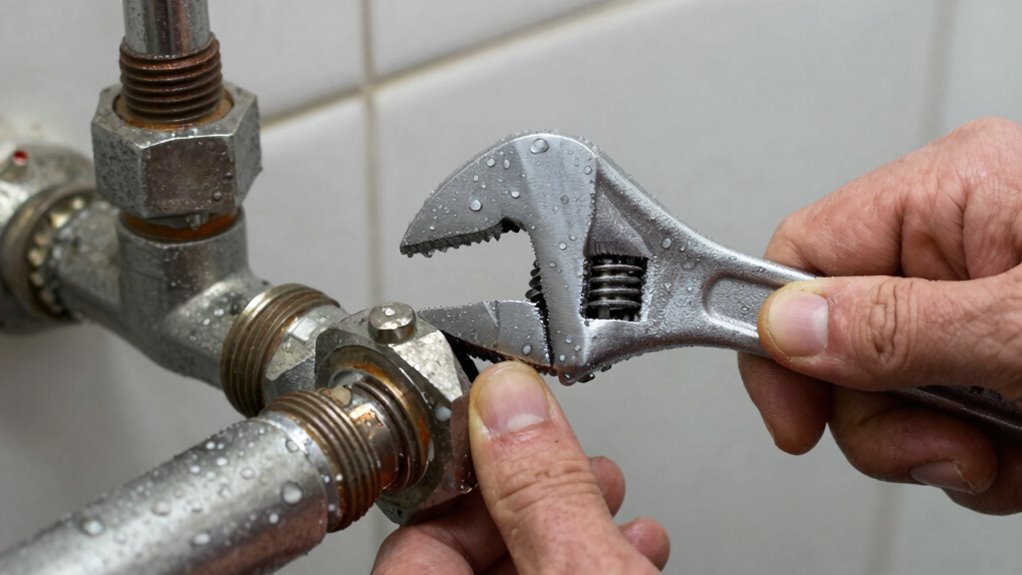
You’ll need to identify loose connections by checking fittings where pipes join together.
Apply proper wrench technique by gripping the fitting firmly and turning clockwise to tighten.
Remember that excessive force can damage threads, so tighten gradually until the leak stops.
Identify Loose Connections
One common cause of pipe leaks is loose connections that have worked themselves loose over time.
You’ll need to systematically inspect each joint where pipes meet fixtures, valves, and other plumbing components.
Look for moisture, water stains, or mineral deposits around connection points. Wiggle joints gently with your hands to test for movement – any play indicates looseness.
Pay special attention to areas where temperature changes occur frequently, as expansion and contraction accelerate loosening. Check both ends of flexible supply lines, compression fittings, and threaded connections.
Don’t overlook shut-off valves or connections behind appliances. Mark problematic areas with tape or notes so you won’t miss them during repairs.
Identifying these loose points early prevents larger leaks and water damage. Your thorough inspection guarantees you address every potential problem area effectively.
Apply Proper Wrench Technique
Tighten loose pipe connections by selecting the appropriate wrench type and applying correct torque techniques. You’ll need the right tool for each specific pipe fitting to avoid stripping threads or damaging components.
- Choose your wrench carefully – Use an adjustable wrench for varied nut sizes, pipe wrenches for rounded pipes, and box-end wrenches for precise hex nuts. Avoid using channel-lock pliers on delicate brass fittings.
- Apply steady, clockwise pressure – Position yourself perpendicular to the pipe and pull the wrench toward your body. You’ll feel resistance increase as the connection tightens properly.
- Test your work incrementally – Tighten in quarter-turn increments, checking for leaks after each adjustment. Over-tightening causes more problems than under-tightening, so stop when you feel solid resistance.
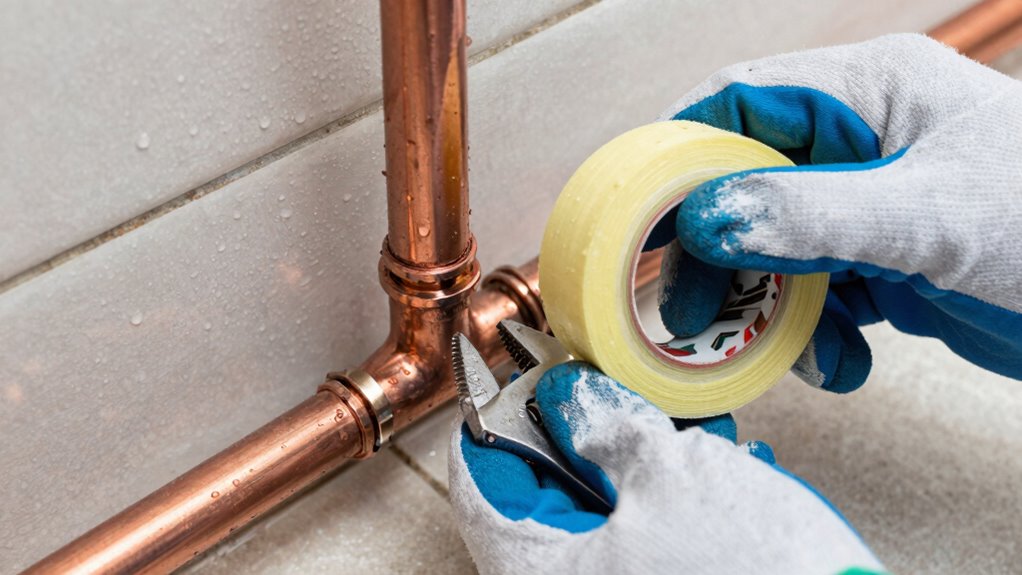
Apply Pipe Wrap Tape for Minor Seepage

When minor leaks appear in threaded pipe connections, applying pipe wrap tape provides a quick temporary fix.
You should shut off the water supply before beginning this repair.
Start by cleaning the threaded area thoroughly, removing any old tape or debris.
Wrap the tape clockwise around the male threads, overlapping each layer by half the tape’s width.
Apply firm pressure as you wrap, ensuring the tape lies flat without wrinkles or gaps.
Complete three to four full wraps, extending slightly beyond the threaded section.
Reassemble the connection by hand, then use your wrench to tighten properly.
Test the repair by slowly turning water supply back on and checking for continued leakage.
Remember this solution works best on minor seepage, not flowing water.
Patch Small Pipe Cracks With Rubber Seals
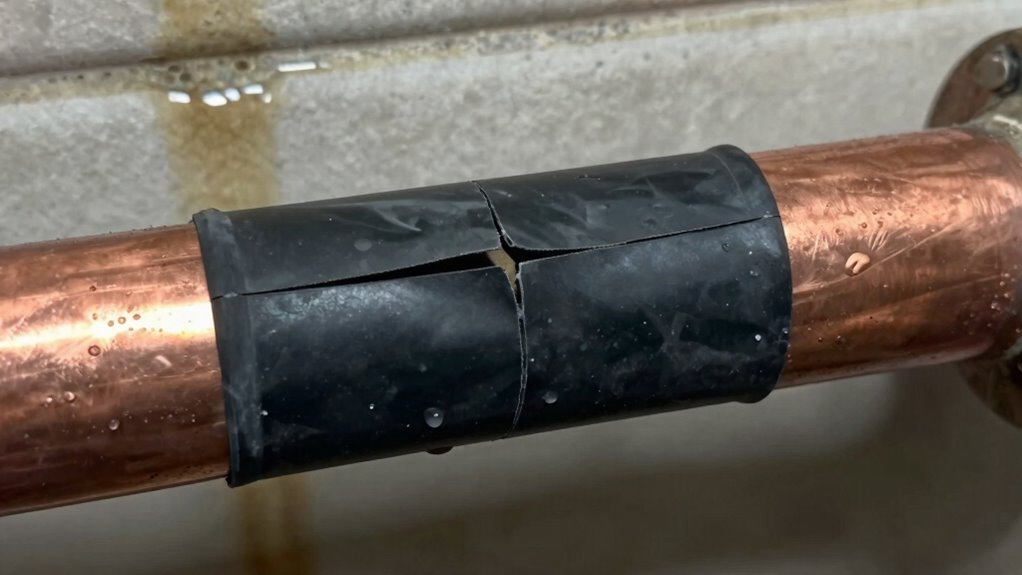
A effective method for addressing small pipe cracks involves using rubber seals to create a watertight barrier. You’ll need to properly prepare the damaged area before applying the seal.
- Clean the cracked area thoroughly with sandpaper or steel wool to remove corrosion, debris, and moisture. This guarantees proper adhesion.
- Select the appropriate rubber seal size and type for your pipe diameter and crack length. EPDM rubber works best for most applications.
- Apply the seal firmly over the crack, pressing edges down securely. Use clamps or strong tape to hold it in place until completely dry.
Rubber seals provide reliable temporary fixes for small cracks. You’re joining a community of DIYers who successfully handle these repairs themselves.
This approach stops leaks quickly while you plan permanent solutions.
Use Epoxy Putty for Emergency Leak Stops
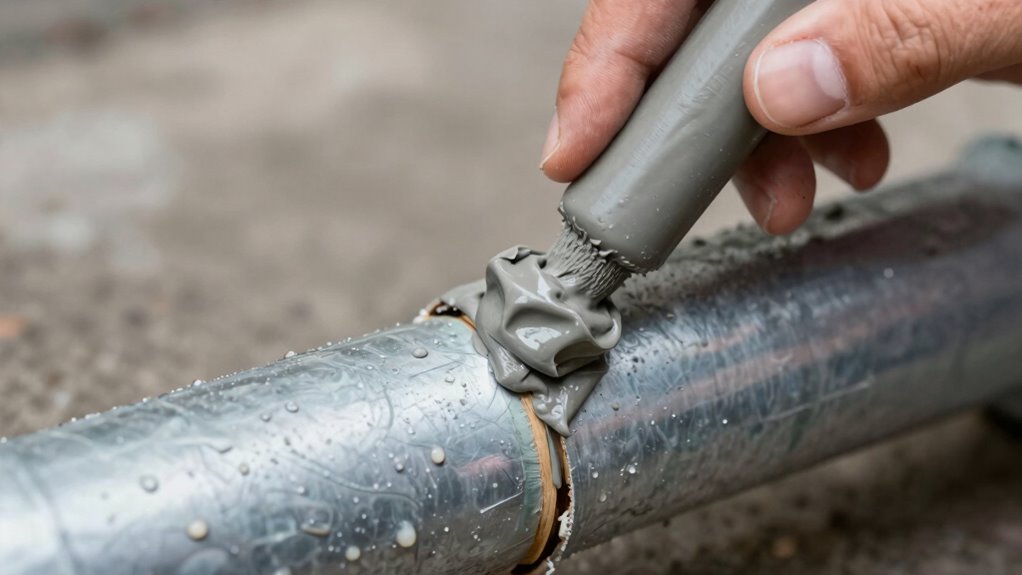
Epoxy putty serves as an effective temporary solution when rubber seals aren’t suitable for your pipe repair.
You’ll need to clean the leak area thoroughly, removing any moisture, debris, or oil. Knead the two-part putty together until you achieve a uniform color, usually within two minutes.
Press the putty firmly around the leak, ensuring complete coverage extending two inches beyond the damaged area. The epoxy creates a durable seal that withstands water pressure while you plan permanent repairs.
This method works best on small leaks where water pressure isn’t excessive. Remember that epoxy putty isn’t a long-term fix, but it’ll stop leaks effectively until you can address the underlying issue properly.
Fix Leaking Joints With Thread Seal Tape
Thread seal tape provides a reliable method for stopping leaks at pipe joints where threaded connections have failed. You’ll need this plumber’s tape when standard tightening won’t stop dripping threads.
- Clean and dry the leaking joint completely before applying new tape. Remove old wrapping and debris from male threads.
- Wrap clockwise around the male threads, overlapping each layer by half the tape width. Apply 3-4 layers maximum for effective sealing.
- Reassemble tightly by hand first, then use wrenches to secure without over-tightening. Test the connection afterward.
This temporary fix works best on small diameter pipes.
Thread seal tape won’t stop cracks or holes in pipe walls. You’re joining the ranks of DIY plumbers who handle basic repairs confidently.
Use a Pipe Clamp Kit for Larger Holes
You’ll need to locate the exact leak position before proceeding with any repair.
Clean and dry the pipe surface thoroughly to guarantee proper adhesion.
Apply the clamp evenly and tighten securely to stop water flow effectively.
Identify Leak Location
When dealing with larger holes in pipes, identifying the exact leak location becomes essential before applying a pipe clamp kit. You can’t effectively seal a leak without knowing precisely where it originates.
- Visual inspection – Examine pipes systematically from top to bottom, looking for water stains, mineral deposits, or active dripping that indicates the source point.
- Pressure testing – Isolate sections of your plumbing system and monitor pressure gauges to pinpoint where pressure drops occur, revealing hidden leaks.
- Thermal imaging – Use infrared cameras or thermal detectors to identify temperature differences around pipes, which often reveal concealed water damage and leak locations.
Accurate leak identification prevents wasted materials and guarantees proper clamp placement for permanent fixes.
Prepare Surface Area
Before applying a pipe clamp kit to larger holes, clean and prepare the surface area around the leak to secure proper adhesion and sealing.
Turn off the water supply first. Use sandpaper or a wire brush to remove rust, corrosion, and debris from the pipe surface. Wipe away any remaining dirt with a clean cloth.
Ascertain the area is completely dry before proceeding. Remove any loose paint or coating that might interfere with the clamp’s seal.
Check that the surface is smooth and free from sharp edges that could puncture the rubber gasket.
This preparation step determines whether your repair succeeds or fails. Proper surface preparation creates the foundation for an effective, long-lasting fix that will hold under pressure.
Apply Clamp Securely
Position the rubber gasket over the prepared hole and align it carefully with the pipe’s circumference.
Make certain the gasket covers the entire damaged area completely. Thread the clamp bolts through the gasket tabs and pipe flanges.
- Tighten bolts gradually, alternating between opposite sides to distribute pressure evenly across the gasket.
- Torque bolts to manufacturer specifications – typically 25-30 foot-pounds for standard clamps.
- Test the repair by slowly pressurizing the system and checking for residual leaks.
Recheck bolt tension after 24 hours, as gaskets may compress slightly.
Don’t overtighten, which can damage the gasket or pipe threads.
You’re joining a community of DIY plumbers who’ve mastered this essential repair technique.
Fix PVC Pipe Leaks With Pipe Cement
Apply pipe cement to clean, dry PVC surfaces immediately after cutting or damaging occurs.
You’ll need to work quickly because PVC cement dissolves the pipe surface, creating a permanent solvent weld.
Sand the pipe ends lightly with fine-grit sandpaper to remove any debris or oxidation.
Apply primer first if your pipe is over one inch diameter – it’s essential for proper adhesion.
Coat both the pipe end and fitting socket generously with cement using the brush applicator.
Push the pipe into the fitting firmly, then twist slightly to distribute the cement evenly.
Hold the connection steady for thirty seconds until the cement sets.
Don’t attempt to reposition the joint once contact is made.
The solvent welding process creates a permanent seal that’s stronger than the original pipe material.
Work in well-ventilated areas and keep cement away from open flames.
Solder Broken Copper Pipes Using Basic Tools
Cut the damaged section of copper pipe using a tubing cutter or hacksaw to create clean, square ends.
Remove any burrs or sharp edges with sandpaper or a file. This guarantees proper fitting when you join the new section.
- Apply flux – Spread plumbing flux inside both pipe ends and fittings. This helps the solder flow smoothly into the joint.
- Heat the joint – Use a propane torch to heat the fitting evenly until it’s hot enough to melt solder instantly.
- Add solder – Touch solder wire to the heated joint opposite the flame. Let capillary action draw melted solder completely around the connection.
Work quickly but carefully.
Wipe excess solder immediately with a clean cloth while it’s still hot. Allow joints to cool naturally before testing water pressure.
Monthly Pipe Inspection Habits That Prevent Future Leaks
While you’re fixing existing pipe issues, you should also develop monthly inspection habits that prevent future leaks from developing.
Check all visible pipes under sinks, around water heaters, and near appliances for moisture, corrosion, or loose connections. Feel along pipe joints with your fingers to detect hidden wet spots. Examine faucet bases and toilet connections for seepage.
Look for pipe insulation wear and replace damaged sections immediately. Tighten loose fittings before they deteriorate further. Document your inspection dates and findings in a plumbing log.
Pay special attention to areas where temperature changes occur, as these spots commonly develop problems. Regular monthly checks help you catch small issues before they become expensive emergencies, keeping your home’s plumbing system reliable and preventing water damage that could affect your living space and belongings.
Recognize Warning Signs That Mean It’s Time to Call a Plumber
Although you can handle many minor pipe issues yourself, certain warning signs indicate when professional intervention becomes necessary. Don’t ignore these critical signals that suggest underlying problems beyond basic repairs.
- Persistent water pressure drops throughout your home signal main line blockages or structural pipe damage requiring expert diagnosis and specialized equipment.
- Visible pipe corrosion, bulging, or cracking indicates material failure that demands immediate professional assessment before catastrophic failure occurs.
- Recurring leaks in multiple locations point to systemic issues like shifting foundations or aging infrastructure that only qualified plumbers can properly evaluate and replace.
Trust your instincts when these warning signs appear.
Professional plumbers possess the diagnostic tools and experience to identify hidden complications that DIY approaches can’t address effectively.
Conclusion
You’ve mastered pipe repair with epoxy putty and pipe wrap tape—congratulations on becoming a weekend warrior plumber. Unfortunately, that pinhole leak you fixed with duct tape will probably explode at 3 AM, drenching your kitchen. But hey, at least you saved $200 on labor costs. Next month, when your temporary fix fails spectacularly, remember this moment fondly while explaining to your insurance adjuster why you thought PVC cement was interchangeable with toothpaste.
