

You need to understand that accurate hinge installation starts with proper preparation. Before touching any tools, you must identify your cabinet hinge type and gather the correct hardware. Most people skip this essential step and end up with misaligned doors or stripped screw holes. Let’s examine the fundamental approach that separates professional results from amateur mistakes.
Start With the Basics: Cabinet Hinge Types Explained
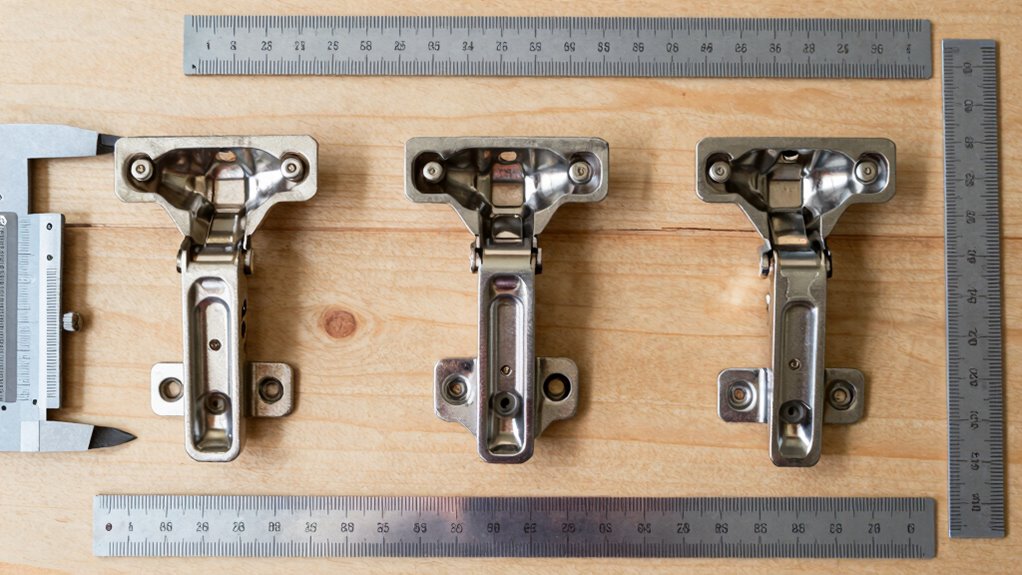
Understanding cabinet hinges is essential before you begin any installation project. You need to identify three main types: butt hinges, which sit on the cabinet edge and door; inset hinges, designed for doors that fit flush within the frame; and overlay hinges, perfect when doors cover the cabinet face entirely. Each type requires specific mounting approaches that you must master.
Butt hinges offer simplicity and strength, making them ideal for heavy doors. Inset hinges provide clean, professional looks but demand precise cutouts. Overlay hinges give you flexibility with various cabinet styles.
You should examine your cabinet design carefully, considering door weight, swing direction, and aesthetic preferences. Choosing the correct hinge type guarantees your installation succeeds and functions properly long-term.
Tools Required for Installing Cabinet Hinges Accurately
Having selected the appropriate hinge type for your cabinet doors, you’ll need to gather specific tools to guarantee accurate installation.
Grab a pencil and measuring tape for marking precise locations. You’ll require a drill with appropriately sized bits for creating clean holes. A screwdriver, either flathead or Phillips depending on your hinge screws, becomes essential.
Don’t forget a level to make sure proper alignment. A chisel might be necessary for recessed hinge installations. Keep a small hammer handy for tapping hinges into position.
Finally, have coarse sandpaper available for smoothing any rough edges. These tools ensure professional results that make your cabinet doors function smoothly.
Each item serves a specific purpose in achieving that satisfying, seamless hinge installation you desire.
Measure Hinge Placement Correctly
You must measure your cabinet door dimensions carefully before marking hinge locations.
Start by determining the exact width and height of your door to guarantee proper alignment.
Mark your hinge positions precisely using a pencil and measuring tape, keeping consistent distances from edges.
Measure Hinge Placement Correctly
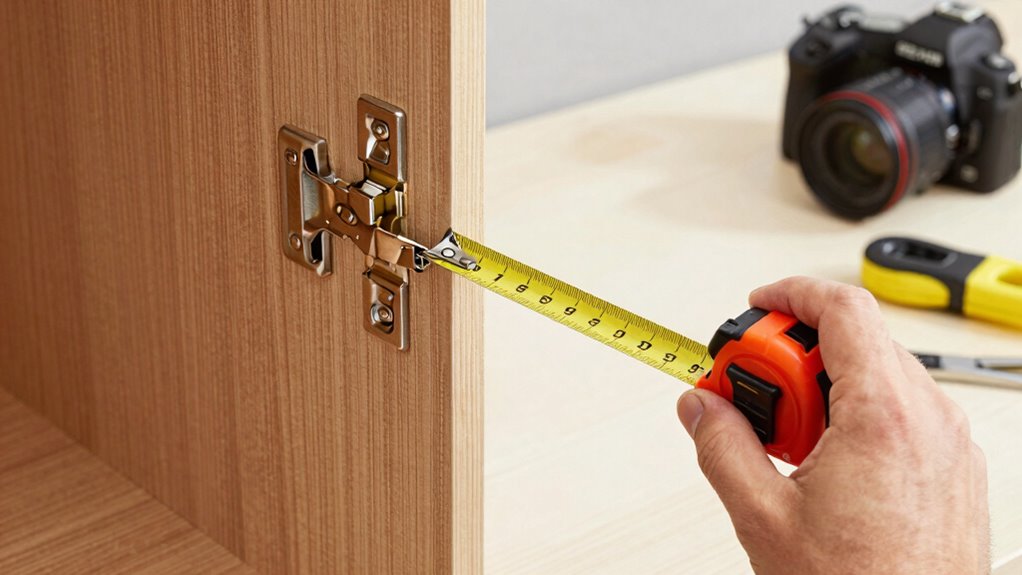
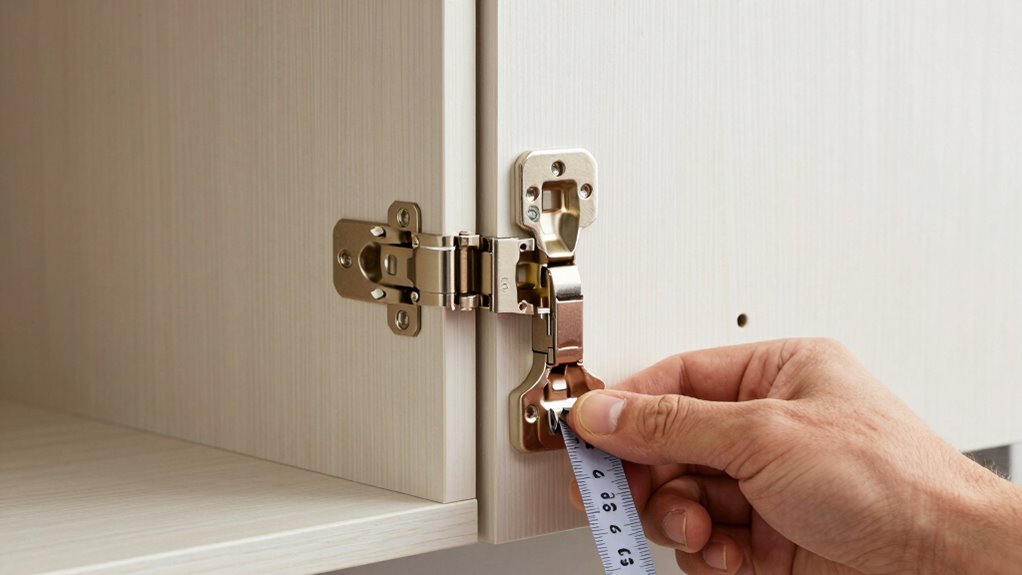
Measure the hinge placement using precise measurements to secure proper alignment and functionality. Accurate placement prevents misalignment and assures smooth door operation.
- Measure from the cabinet edge to mark consistent hinge positions
- Use a tape measure to determine exact distances between hinge mounting points
- Mark measurements clearly with a pencil for visible reference during installation
- Double-check all measurements before drilling to avoid costly mistakes
- Maintain equal spacing between multiple hinges for even weight distribution
Take your time with these measurements because they form the foundation of successful hinge installation. Rushing leads to crooked doors and frustrating adjustments later.
You’re not just installing hinges; you’re creating functional kitchen storage that you’ll use daily. Precise measuring shows you care about the final result and demonstrates your commitment to quality craftsmanship.
Determine Cabinet Door Size
Determining cabinet door size requires careful attention to dimensions before you begin marking hinge-placement locations. You’ll need to measure both height and width accurately using a reliable tape measure.
Start by measuring from the top edge to the bottom edge for height, then measure the widest portion for width. Don’t forget to account for any irregularities or warping that might affect your measurements.
Check existing hinges or hardware that might influence door positioning. Measure twice to guarantee accuracy, because incorrect measurements lead to misaligned doors and frustrated installers.
Consider the door’s swing direction and clearance needed for opening. Write down your measurements clearly so you can reference them when marking hinge locations. Proper measurement prevents costly mistakes and guarantees your cabinet doors fit perfectly.
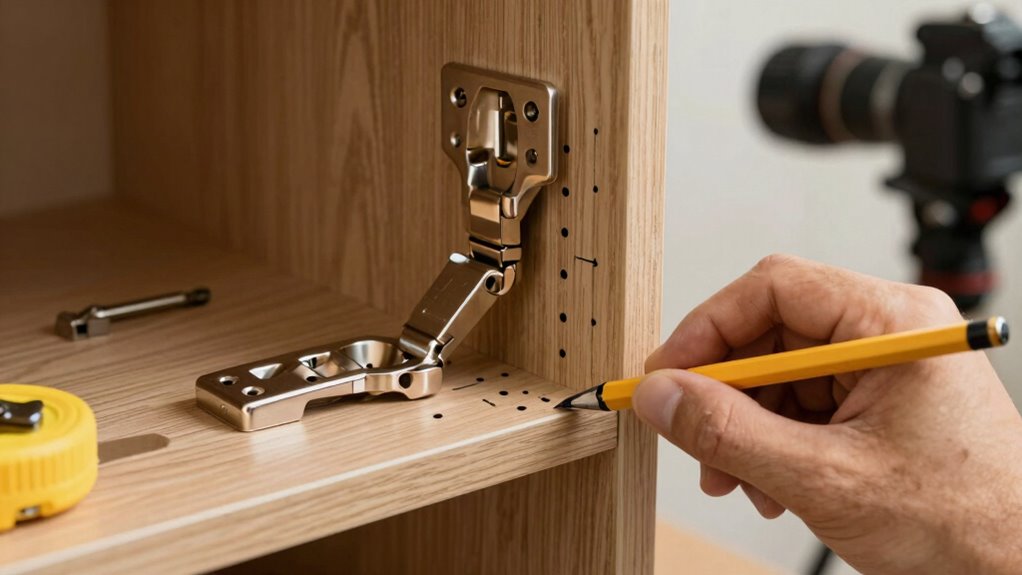
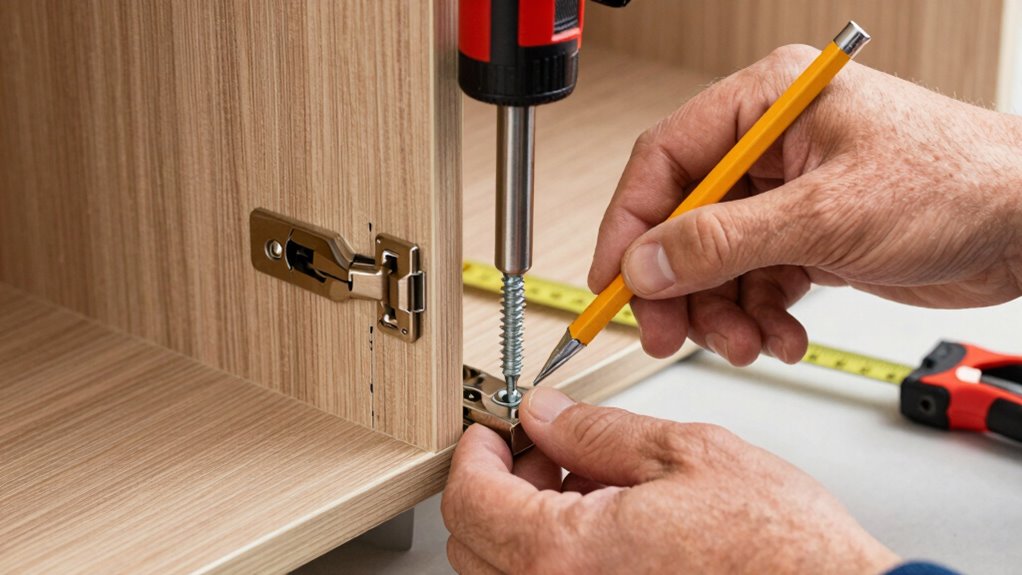
Mark Hinge Locations Precisely
Accurate hinge placement relies on transferring your carefully recorded door dimensions to precise marking locations.
You’ll achieve professional results when you follow these essential steps:
- Measure from the door edge to mark hinge locations consistently
- Use a pencil to make small, clear marks at your measurement points
- Double-check all dimensions before making any permanent marks
- Align your measuring tape parallel to the door edge for accuracy
- Mark both hinge positions simultaneously to maintain proper spacing
Take your time with these measurements because precise marking determines your cabinet doors’ smooth operation.
Measure twice, mark once, and you’ll avoid costly mistakes. Your careful attention to detail guarantees professional-quality hinge installation that you can be proud of.
Mark Hinge Locations Precisely
One essential step guarantees your cabinet doors hang perfectly: marking hinge locations with meticulous precision. You’ll need a pencil, measuring tape, and straightedge for this critical task.
Start by measuring your hinge dimensions accurately. Mark the vertical centerline on your cabinet face frame, ensuring it aligns perfectly with your door’s edge. Measure upward from the bottom corner, typically 10-12 inches for standard cabinet doors.
Use your measuring tape to mark the exact hinge mounting points, double-checking distances between multiple hinges. Don’t forget to account for hinge cup depth and width.
Verify your measurements twice before making any marks permanent. These precise markings become your roadmap for successful hinge installation, ensuring proper door alignment and smooth operation every time.
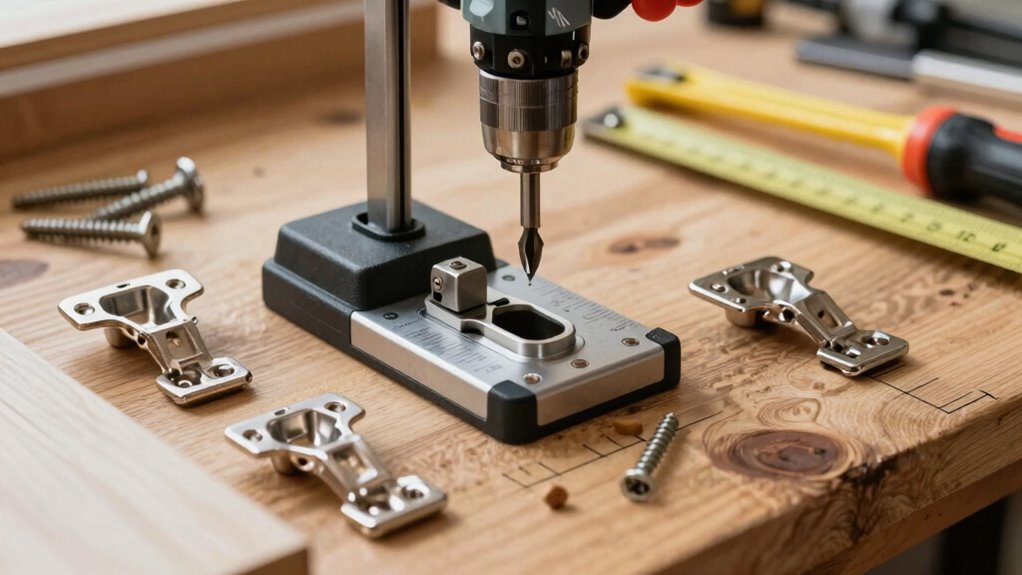
Drill Pilot Holes to the Right Depth
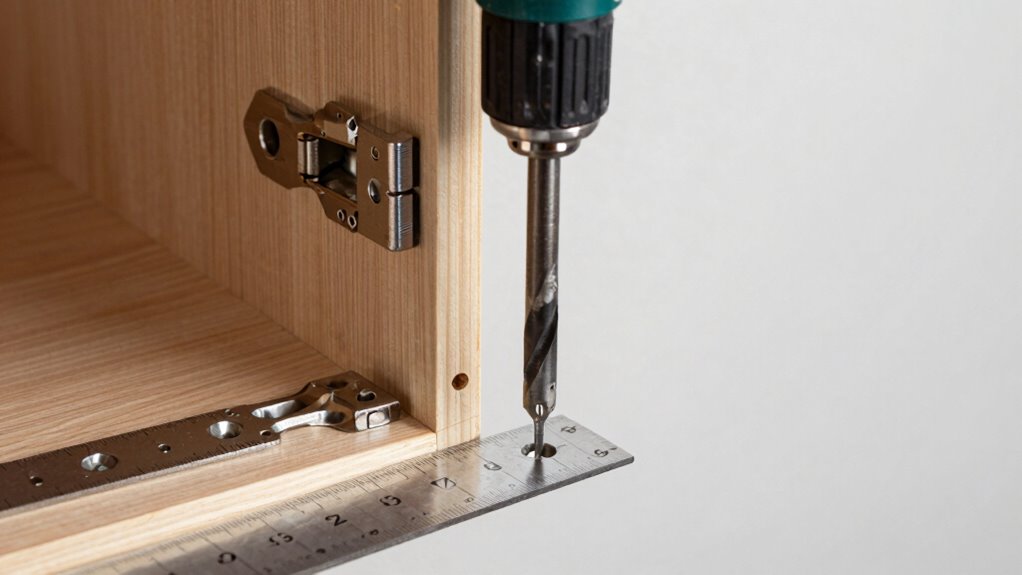
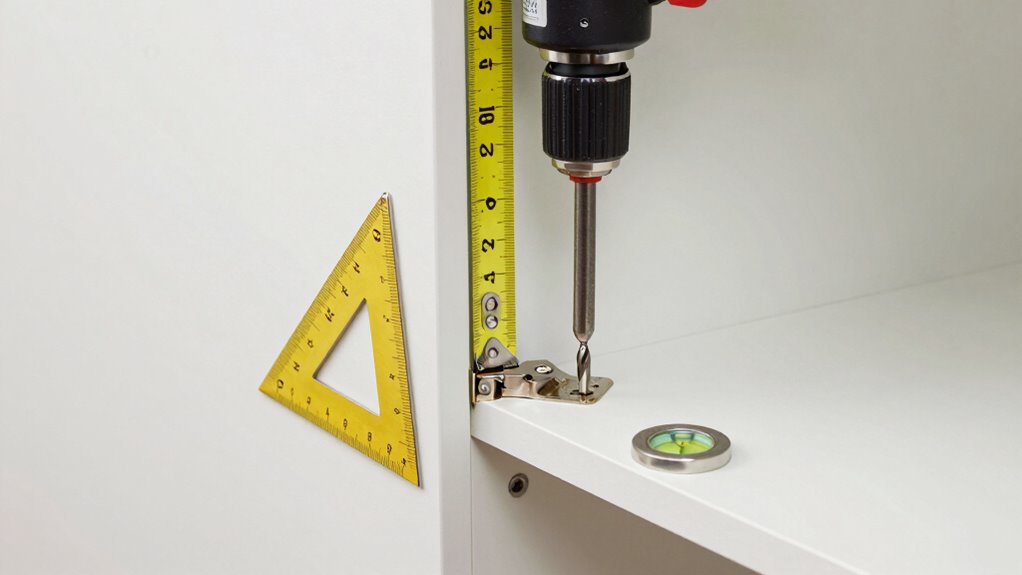
Before you start drilling pilot holes, you’ll want to confirm your hinge locations are marked correctly. Proper pilot holes prevent wood splitting and guarantee screw alignment.
- Select drill bits matching your hinge screws’ diameter
- Measure screw length to determine drilling depth
- Use a drill stop or masking tape as depth guide
- Start with shallow holes, gradually increase depth
- Test-fit screws periodically during drilling process
Hold your drill perpendicular to the wood surface. Apply steady pressure while maintaining control. Let the drill do the work without forcing it. Check hole depth frequently with your screws.
Too deep holes cause loose fittings, while shallow holes strip screw threads. You’re creating precise foundations for secure hinge attachment. These pilot holes determine your installation’s success.
Install Hinges on Face-Frame Cabinets
With your pilot holes drilled to the correct depth, you’re ready to mount hinges on face-frame cabinets.
Position the hinge precisely where your marks indicate, ensuring proper alignment with the cabinet door. Use a sharp screwdriver or drill bit to drive screws through the hinge mounting holes into your pilot holes.
Apply steady, even pressure while driving screws to prevent stripping threads. Check that hinges sit flush against the cabinet face frame without gaps.
Verify door alignment by closing and opening several times. Adjust hinge positioning if binding occurs.
Make certain all screws are fully tightened but don’t overtighten. Double-check that doors hang straight and clear adjacent cabinets properly before proceeding.
Mount Hinges on Frameless Cabinets
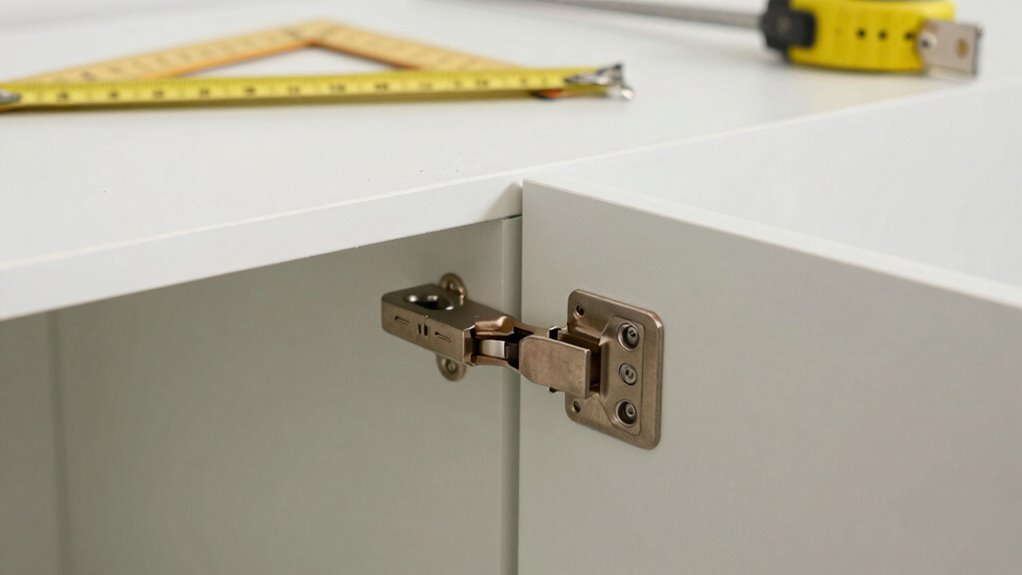
You’ll need to measure hinge placement precisely before marking screw hole locations carefully on your frameless cabinet doors.
Start by positioning the hinges exactly where they’ll align with the cabinet opening, then mark each screw hole location with a pencil.
Once you’ve marked all positions accurately, attach the hinges securely to the doors using the appropriate screws.
Measure Hinge Placement Precisely
Three key measurements determine successful hinge placement on frameless cabinets. You need precise dimensions to guarantee proper door alignment and functionality.
- Measure the distance from the cabinet edge to the hinge cup center point.
- Determine the vertical spacing between multiple hinges on taller doors.
- Check the depth of your hinge cups relative to cabinet thickness.
- Verify door overlay measurements match your hinge specifications exactly.
- Confirm all measurements twice before making any cuts or drilling holes.
Take your time with these critical measurements. Frameless cabinets offer less margin for error than face-frame styles.
Even small miscalculations cause doors to bind, gap improperly, or swing incorrectly. Your cabinet doors deserve precise installation work.
Measure methodically and double-check every dimension. Professional results come from careful attention to measurement details. Rushing leads to costly mistakes requiring corrections later.
Mark Screw Hole Locations Carefully
Once you’ve confirmed all measurements are accurate, mark the screw hole locations on your frameless cabinet doors. Use a pencil to make small, precise marks where each hinge screw will go.
Position your hinge template or use your previous measurements as a guide. Guarantee marks align perfectly with hinge mounting points. Double-check that all door markings match corresponding cabinet side marks.
Take time to verify alignment before drilling. These marks determine how well your doors hang and function. Inaccurate marking causes misaligned doors, gaps, or binding issues.
Keep your pencil sharp for clean, visible marks. Erase any mistakes completely. Remember that these marks become your drilling guide, so precision matters. Your careful attention here guarantees professional results that make your cabinets look built-in rather than amateur-installed.
Attach Hinges Securely to Doors
The next step requires attaching hinges directly to your frameless cabinet doors with precision and care. You’ll want to guarantee secure attachment for lasting functionality.
- Position hinge plates flush against door edges where you marked screw locations.
- Align hinge knuckles perfectly parallel to door faces.
- Drive screws slowly through pre-drilled holes using appropriate screwdriver bits.
- Check that hinges sit flat without gaps between plates and door surfaces.
- Verify screw tightness with firm pressure testing before proceeding.
Take time to double-check alignment before fully tightening screws. Proper hinge attachment guarantees smooth operation and prevents future adjustments.
Your attention to detail now creates professionally installed cabinets that function seamlessly. Frameless cabinet hinges demand accuracy since they bear full door weight without frame support.
Maintain consistent spacing and depth for all hinge installations.
Align Cabinet Doors Perfectly
After you’ve installed your cabinet hinges, achieving perfect alignment requires careful adjustment of each door’s position. Start by checking that all doors sit flush with adjacent faces when closed. Adjust hinge positions incrementally until gaps between doors disappear.
Use a level to verify vertical alignment, ensuring doors don’t tilt inward or outward. Check horizontal alignment by measuring distances from cabinet frames to door edges at multiple points. Make small corrections rather than dramatic shifts.
Stand back periodically to evaluate overall appearance. Proper alignment creates seamless cabinet faces that enhance your kitchen’s professional look. Take time getting this right since misaligned doors immediately signal amateur installation.
Your finished project should reflect craftsmanship you’re proud to show off.
Adjust Hinges for Smooth Operation
You’ll need to master proper alignment techniques to guarantee your cabinet doors swing freely without binding or gaps.
Apply lubrication sparingly to pivot points and hinges using a silicone-based spray or white lithium grease for peak performance.
Regular maintenance prevents wear and keeps your cabinet hinges operating smoothly for years.
Proper Alignment Techniques
Adjusting cabinet hinges requires patience and attention to detail, but once you understand the process, you’ll achieve smooth operation every time. Proper alignment guarantees your cabinets close properly and look professional.
- Check that both hinge plates sit perfectly flush against their mounting surfaces.
- Verify door edges align evenly with cabinet frame when closed.
- Adjust hinge screws incrementally, turning no more than quarter turns at a time.
- Test door swing after each adjustment to gauge improvement.
- Confirm gaps between doors and frames remain consistent around all edges.
Take your time with these steps. Rushing leads to misaligned doors that won’t close properly.
You’re joining a community of DIYers who’ve mastered this skill through careful practice. Trust the process and you’ll belong among those who install perfect hinges every time.
Lubrication and Maintenance Tips
Regular lubrication and maintenance keep your cabinet hinges operating smoothly for years. You should apply a few drops of household oil or silicone lubricant to hinge pins every six months.
Wipe away dirt and debris with a clean cloth before lubricating. Check for loose screws monthly and tighten them immediately. Adjust hinge tension if doors swing unevenly or don’t close properly.
Clean hinges with mild soap and water, then dry thoroughly. Replace worn gaskets or bushings promptly. Inspect hinges for rust or corrosion signs.
Proper maintenance prevents costly repairs and guarantees your cabinets function like new. You’ll feel confident knowing your hinges work reliably. This routine creates a sense of pride in your home’s functionality and appearance.
Fix Misaligned or Gapped Cabinet Doors
When cabinet doors don’t align properly or leave unsightly gaps, fixing these issues requires a systematic approach that addresses both hinge positioning and door alignment. You’ll need to identify the specific problem before making adjustments.
- Check if hinges are loose and tighten screws with appropriate tools.
- Adjust hinge screws incrementally, turning clockwise or counterclockwise in small quarter-turns.
- Measure gaps consistently around door edges to identify misalignment patterns.
- Shims or cardboard pieces can fill minor gaps between door and frame temporarily.
- Sand door edges lightly when rubbing occurs against adjacent surfaces.
Start by closing the door completely, then examine where gaps appear largest.
Loose hinges cause sagging, while improper adjustment creates uneven spacing.
Make small corrections and test door operation frequently.
Remember that patience pays off when achieving perfect alignment.
Avoid Common Hinge Installation Mistakes
You should always measure twice and drill once to prevent costly errors when installing cabinet hinges.
Use screws that match your hinge specifications and cabinet material thickness to guarantee proper fit and function.
Check door alignment frequently during installation to avoid misaligned gaps that require time-consuming corrections.
Measure Twice, Drill Once
Because accurate measurements prevent costly errors, taking time to double-check your hinge placement before drilling saves you from misaligned doors and damaged cabinets.
You’ll avoid frustration and guarantee professional results every time.
- Measure hinge spacing from cabinet edge to hinge center point
- Verify door overlay dimensions match your cabinet style
- Check that hinge cups align perfectly with door bore holes
- Confirm cabinet face frame thickness accommodates hinge mounting
- Test hinge swing clearance before final screw installation
Precision measurement creates clean, functional installations that make you feel confident in your craftsmanship.
These steps prevent common mistakes that plague DIY enthusiasts and guarantee your cabinet doors operate smoothly.
Use Proper Screw Length
One critical mistake that undermines hinge performance lies in using screws that are either too short or excessively long. You must select screws that penetrate deep enough into the cabinet frame without protruding through the back panel. Measure your hinge screw holes precisely and match them to your cabinet’s material thickness.
Short screws won’t provide adequate holding power, causing loose hinges that sag over time. Overly long screws can split wood fibers or damage internal components. Check manufacturer specifications for recommended screw lengths before purchasing.
When in doubt, choose slightly longer screws and trim them appropriately. Proper screw length guarantees secure attachment and prevents premature wear. Your cabinet doors deserve this attention to detail. Take time to get this right from the beginning.
Check Door Alignment
Proper door alignment prevents gaps, binds, and uneven spacing that compromise both functionality and aesthetics. You need to verify alignment before finalizing hinge installation.
- Close the door completely and check that it sits flush with the cabinet frame on all sides.
- Look for consistent gaps around the door perimeter – they should be uniform.
- Confirm the door doesn’t rub against the cabinet when opening or closing.
- Verify the door hangs level without tilting up or down at the edges.
- Test that the door opens smoothly without binding or sticking at any point.
Misaligned doors create frustration and signal amateur installation. You belong among skilled craftsmen who achieve perfect results.
Take time to adjust hinges incrementally until doors move effortlessly. Your cabinet’s appearance and performance depend on this critical step. Don’t rush through alignment checks.
Upgrade Worn-Out Hinges During Installation
When you’re installing new cabinet hinges, you shouldn’t overlook the opportunity to upgrade worn-out hardware that’s causing doors to sag or stick.
Remove old hinges carefully, noting their positioning and screw holes. Clean the hinge areas thoroughly, removing any debris or old lubricant buildup.
Examine door and cabinet frames for damage or wear that might affect new hinge performance. Choose replacement hinges that match your cabinet style and weight requirements.
Position new hinges precisely where old ones were mounted, guaranteeing proper alignment with corresponding door fixtures. Test door swing and clearance before fully tightening screws.
Don’t force misaligned hinges, as this creates binding issues. Check that doors open smoothly without gaps or rubbing.
This upgrade guarantees your cabinets function properly while maintaining their aesthetic appeal and structural integrity throughout your home.
Choose the Correct Screw Length and Type
Selecting appropriate screws for your cabinet hinges directly affects the installation’s success and long-term performance. You need hardware that secures hinges firmly without damaging the cabinet structure.
Consider these essential factors when choosing screws:
- Material compatibility – Match screw type to your cabinet material (wood, metal, or plastic)
- Length requirements – Use screws that penetrate at least 1/2 inch into solid wood
- Head style – Choose flat-head screws for flush mounting or round-head for protruding installation
- Thread type – Opt for coarse threads in soft materials and fine threads in hardwood
- Corrosion resistance – Select stainless steel or coated screws to prevent rust
Wrong screws cause loose hinges, stripped holes, and premature failure.
Measure your hinge screw holes precisely and match them with appropriate fasteners. Your cabinet’s functionality depends on this essential detail.
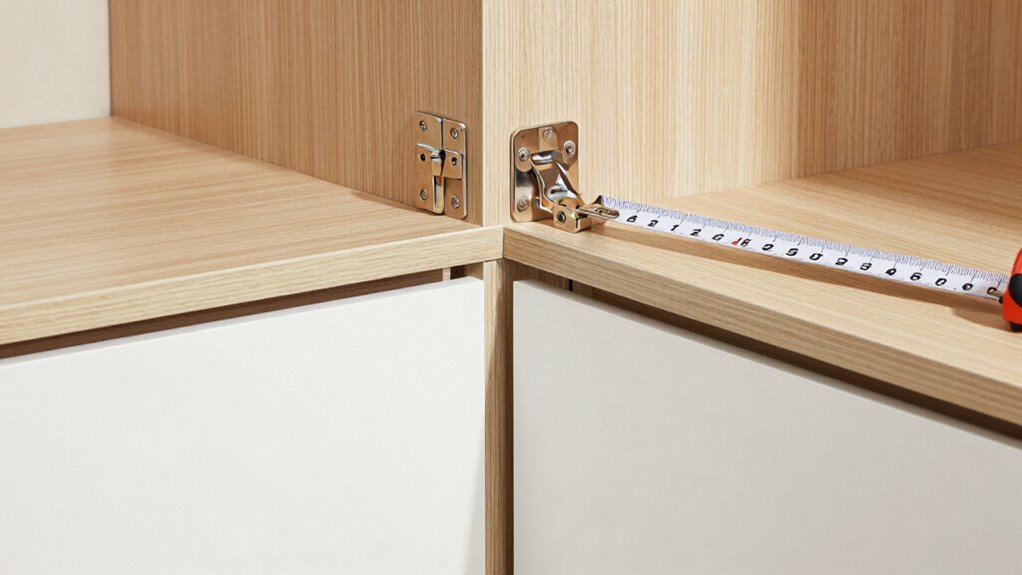
Tips for Installing Hinges Across Multiple Doors
Installing hinges across multiple doors requires careful planning and consistent execution to secure uniform alignment and operation.
You should mark all hinge positions simultaneously using a template or measuring stick to maintain consistency. Work from the same reference point on each door to avoid cumulative errors. Pre-drill all screw holes at identical depths using a drilling jig or depth stop.
Install hinges in sequence, moving systematically from one door to the next. Check that each door swings freely without binding or gaps. Adjust hinges incrementally rather than making dramatic changes. Verify door spacing remains uniform throughout the installation process.
Keep your workspace organized and tools readily accessible. Take time to verify each hinge sits perfectly flush with the door surface before tightening screws completely.
Match Cabinet Style to the Right Hinge Type
Different cabinet styles demand specific hinge types to achieve proper fit and function.
You need to match your cabinet’s design with the appropriate hinge hardware for peak performance.
- Traditional face-frame cabinets require standard butt hinges or decorative strap hinges that sit on the frame surface.
- Modern frameless cabinets work best with concealed hinges like euro-style or inset hinges that hide completely when doors close.
- Shaker-style cabinets pair perfectly with simple, clean-lined hinges that complement their minimalist aesthetic.
- Vintage or antique cabinets deserve ornate brass or wrought iron hinges that enhance their classic character.
- Contemporary sleek cabinets benefit from minimalist hinges with clean geometric lines.
Choose hinges that align with both your cabinet’s construction type and visual style.
The right match guarantees smooth operation while maintaining your kitchen’s cohesive appearance and design integrity.
When to Hire a Professional Installer
When should you consider bringing in a professional installer for your cabinet hinge project?
You should hire help when dealing with expensive custom cabinets, complex inset hinge installations, or when you lack proper tools like hinge jigs and drill presses.
Professional installers guarantee precise measurements, preventing costly mistakes that could ruin cabinet faces or compromise door alignment.
If you’re uncomfortable with drilling into finished surfaces or struggle achieving consistent hinge placement, professionals deliver clean, uniform results.
They understand wood movement, seasonal expansion, and proper clearance requirements.
When time constraints matter or you want guaranteed results that enhance your home’s value, experienced installers provide expertise you can trust.
Don’t risk damaging high-end cabinetry when professional assistance guarantees lasting, beautiful outcomes.
Conclusion
You’ve mastered cabinet hinge installation by following precise measurements and careful drilling techniques. Remember that 85% of cabinet door issues stem from improper hinge alignment, so take your time with pilot holes and screw placement. Match your hinge type to cabinet style for both functionality and aesthetics. With these methodical steps, you’ll achieve professional results that guarantee smooth, lasting door operation.
