

You’ll need to choose rot-resistant wood like cedar or pressure-treated lumber for your outdoor planters. Gather your circular saw, drill, level, and measuring tape before cutting wood to size. Don’t forget to pre-drill drainage holes to prevent splitting. Secure the sides with waterproof glue and screws, then reinforce corners with metal brackets. What’s the best way to protect your wood from moisture damage while keeping it looking natural?
Choose Wood That Lasts Outdoors
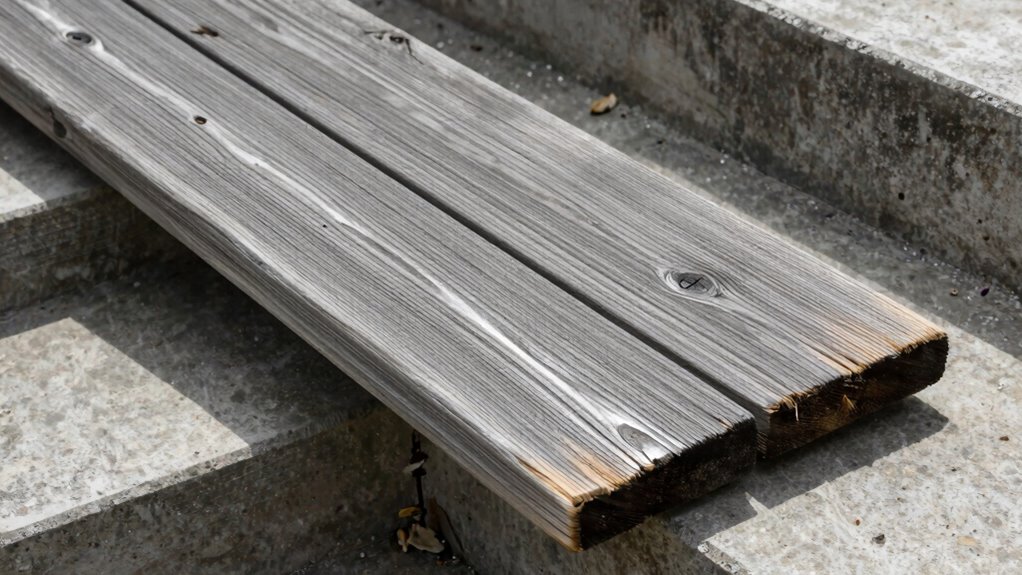
When building outdoor planters, you’ll want to choose wood that can withstand the elements for years to come. Cedar and redwood are excellent choices because they naturally resist rot and insects. Pressure-treated lumber works well too, but avoid types containing harmful chemicals for vegetable gardens. Select wood that’s at least 1×6 inches thick for durability.
Check for straight, knot-free boards without warping. Cedar offers natural weather protection and ages beautifully to silvery gray. Redwood provides similar benefits with exceptional strength. Both materials handle moisture exposure well.
Don’t overlook reclaimed wood options, which add character while being environmentally friendly. Verify any reclaimed material is clean and structurally sound.
Pine works for temporary projects but requires regular sealing. Your planters deserve quality wood that’ll last through seasons of rain, sun, and temperature changes.
Get the Tools You Need
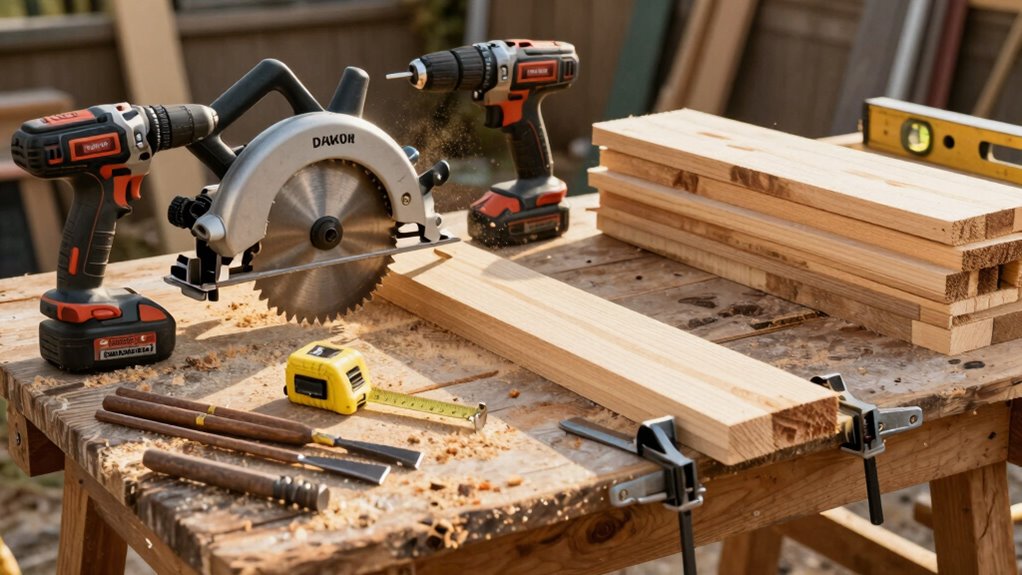
Before you start cutting wood for your outdoor planters, gather all the essential tools to guarantee smooth progress.
You’ll need a miter saw or circular saw for clean cuts, a drill with various bits for pilot holes and assembly, and a level to assure everything lines up properly.
Don’t forget safety gear including safety glasses, work gloves, and a dust mask.
Grab a tape measure for accurate dimensions, a square for precise angles, and clamps to hold pieces steady while you work.
A sander or sanding block helps smooth rough edges, and you’ll need a paintbrush or roller for finishing touches.
Keep basic supplies like screws, wood glue, and wood stain or sealant nearby.
Having these tools ready prevents frustrating interruptions and keeps your workflow consistent.
Cut Wood to Fit Your Space
Measure your available space carefully to determine the exact dimensions needed for your planters.
Choose your wood type based on durability and weather resistance, such as cedar or pressure-treated pine.
Cut your selected wood pieces to match your measured dimensions using a miter saw or circular saw for clean, precise edges.
Measure Space Dimensions
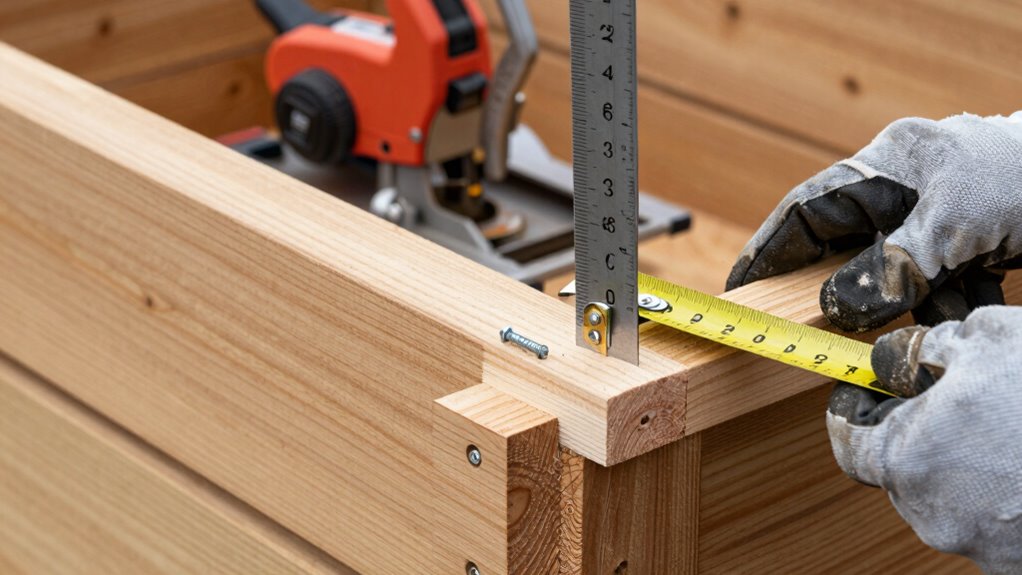
Accurate measurements form the foundation of successful planter construction, so grab your tape measure and carefully record the exact dimensions of your designated space. Measure the length, width, and depth where you plan to position your planter.
Don’t forget to account for clearance needed around the planter for maintenance and access. Write down these measurements clearly, including any obstacles like posts or windows that might affect placement. Check your measurements twice to avoid costly mistakes later.
Consider the planter’s final location carefully, guaranteeing it receives appropriate sunlight for your intended plants. Record measurements in both inches and centimeters if you’re unsure which unit your lumber supplier uses.
Keep these dimensions handy when selecting materials and calculating cuts. Your precise measurements guarantee your planter fits perfectly in its intended space.
Select Wood Type
Once you’ve determined your space requirements, choosing the right wood becomes essential for your planter’s longevity and appearance.
You should select cedar or redwood for natural resistance to moisture and insects. These woods won’t warp or rot quickly when exposed to outdoor elements.
Pine works well if you plan to stain or paint it, but you’ll need to treat it annually. Avoid pressure-treated lumber since chemicals can leach into soil and harm plants.
Measure your space carefully, then purchase wood that’s straight and free from cracks. Check for knots that might weaken joints.
Cedar planks typically come in 1×6 or 1×8 sizes, perfect for planter sides. Always buy extra wood to account for cutting errors.
Your wood choice directly impacts how long your planter will last.
Drill and Install Drainage Holes
Drainage holes are essential for preventing waterlogged soil and root rot in your outdoor planters. Grab your drill and ¼-inch drill bit to create proper drainage.
Position the planter bottom upside down on a stable surface. Mark hole locations every 6-8 inches across the bottom surface. Drill slowly to avoid splitting the wood, especially near edges. Aim for 4-6 holes depending on planter size. Clear away wood chips after each hole.
Larger planters need more drainage holes than smaller ones. Check that holes aren’t blocked by wood grain or debris. Proper drainage keeps your plants healthy and prevents soggy soil issues.
Test drainage by pouring water into the planter. You should see water flow freely through all holes within minutes. Clean any rough edges around holes with sandpaper.
Build and Secure Planter Sides
Now you’ll construct the planter sides by selecting rot-resistant wood like cedar or redwood, cutting your boards to the proper dimensions for your planter’s height and width.
Measure and mark your side panels carefully before cutting them to length, ensuring they fit snugly around the drainage hole openings.
Join the side panels together using waterproof wood glue and galvanized screws or bolts, making sure each corner is square and secure before moving to the next step.
Selecting Wood Type
When building outdoor planters, you’ll want to choose wood that can withstand weather exposure while providing adequate support for your plants’ root systems. Cedar and redwood are excellent choices because they’re naturally rot-resistant and won’t leach harmful chemicals into soil.
Pressure-treated lumber works too, but avoid types containing copper arsenate. Pine is affordable but requires sealing or staining for longevity.
Select boards that are straight and free from major knots or splits. Check lumber dimensions carefully before purchasing. You’ll need enough wood to create sturdy sides that can handle soil weight without bowing.
Consider your planter’s height when choosing board thickness. Thicker boards provide better structural integrity. Don’t forget to factor in wood movement due to moisture changes. Your planters should look professional while lasting years.
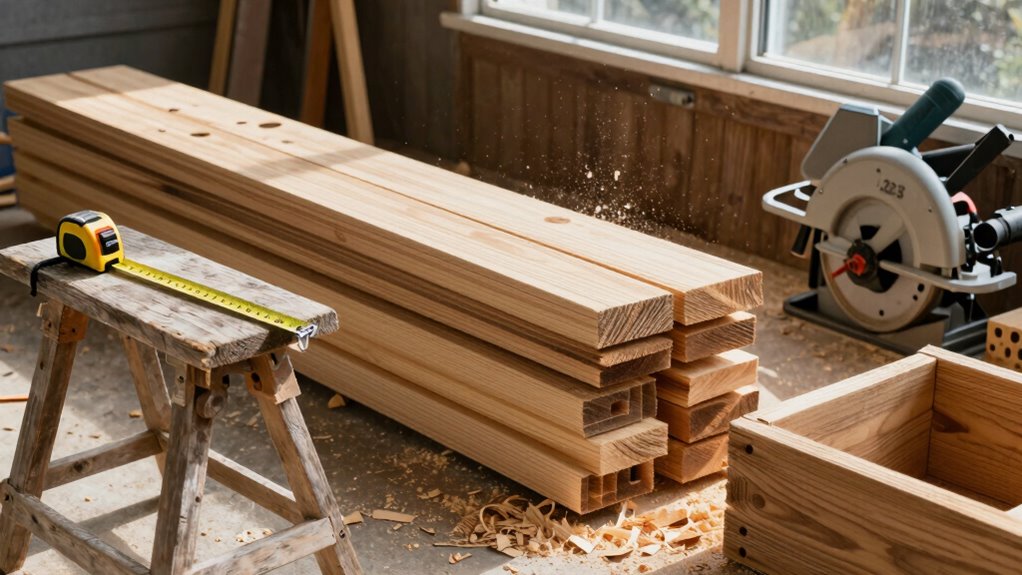
Cutting Board Dimensions
With your wood selection complete, you’ll need to cut the boards to precise dimensions that match your planter’s design specifications. Measure twice and cut once to guarantee accuracy. Your side panels should be identical in length and width according to your planned planter size.
Use a miter saw or circular saw with a straight edge guide for clean, straight cuts. Check each board against your measurements before moving to the next cut. Label each piece as you work to avoid confusion later.
Make certain all boards are square by measuring corner to corner diagonally. Cut your boards slightly longer initially, then trim to final length after verifying measurements. This approach prevents costly mistakes and guarantees your planter sides fit together properly when you’re ready to join them.
Joining Side Panels
One essential step in building your outdoor planter involves joining the side panels together to form the basic structure. Start by laying your cut panels flat and align them precisely at the corners.
Apply wood glue along the joining edges for extra strength. Use 2-inch galvanized screws or deck screws to secure the panels, driving them through the side pieces into the end pieces at 90-degree angles. Pre-drill holes to prevent wood splitting.
Check that all corners are square by measuring diagonally from corner to corner – measurements should match. Tighten all screws firmly but avoid over-tightening. Your planter’s frame should feel solid and stable before proceeding to the next step.
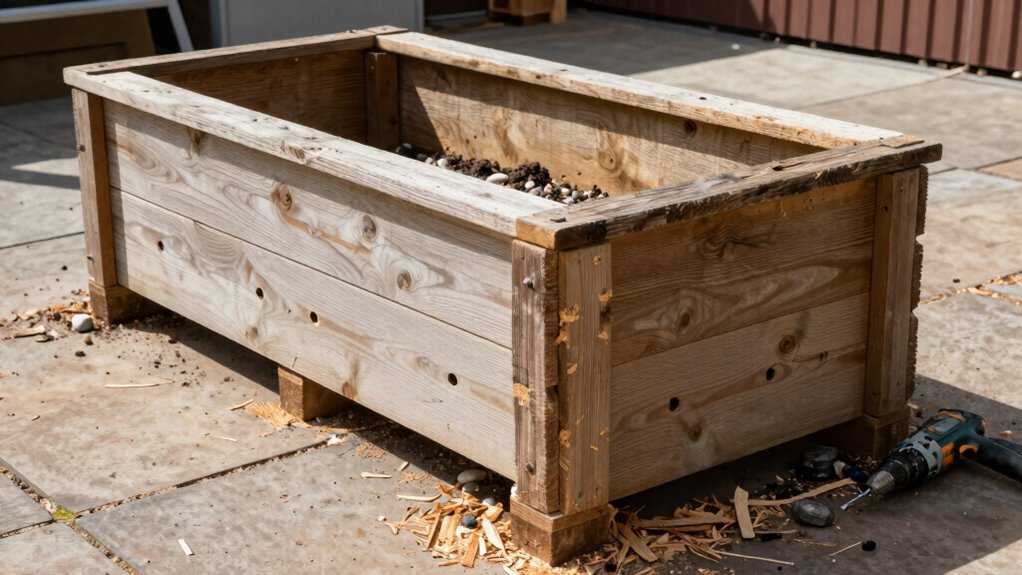
Strengthen Corners With Brackets
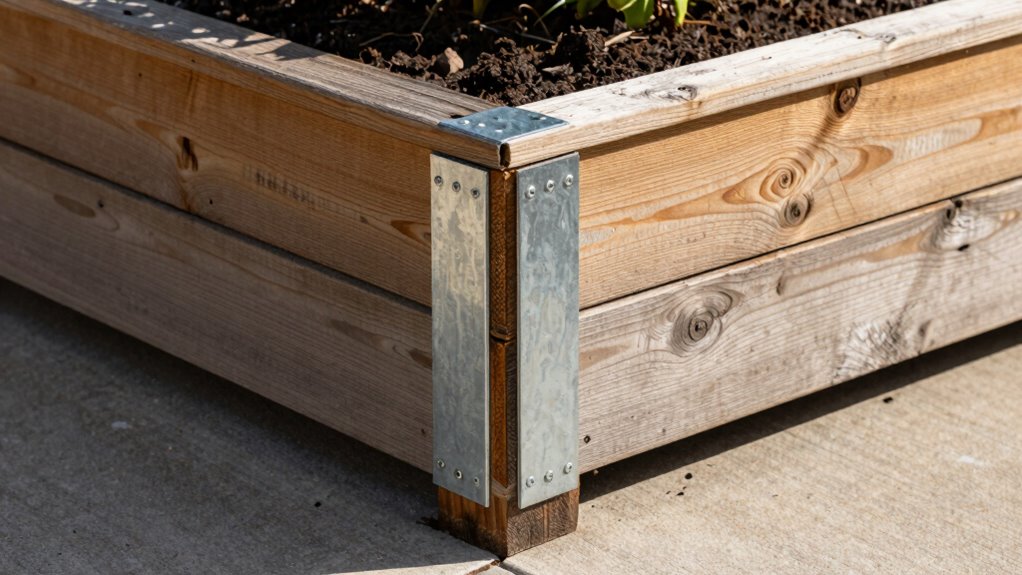
You’ll want to reinforce the joints where your planter boards meet by installing metal corner brackets before the wood expands from moisture exposure. This prevents weak corners that could fail when wet.
Grab your drill and follow these steps:
- Position L-shaped metal brackets at each inside corner where side panels meet.
- Verify brackets sit flush against both adjoining boards.
- Pre-drill holes through bracket holes into the wood to prevent splitting.
- Drive 1¼-inch galvanized screws through all bracket holes.
Install brackets on all four corners, checking that everything remains square.
Tighten screws gradually, alternating between opposite corners to maintain even pressure. These metal reinforcements create strong, durable joints that’ll withstand outdoor conditions and give you confidence in your planter’s longevity.
Line Inside to Prevent Water Damage
Since your planter will hold soil and plants that require regular watering, lining the interior prevents moisture from seeping into the wood and causing rot.
You’ll need landscape fabric or plastic sheeting for this step. Cut your liner material slightly larger than each interior wall measurement.
Start by positioning the liner against one wall, letting excess material extend beyond the planter’s edges. Secure the liner using a staple gun, driving staples every six inches along each edge.
Work your way around all four sides, ensuring tight corners and smooth surfaces. Trim away excess material after securing everything in place.
This barrier protects your wooden planter while allowing proper drainage, keeping your garden project looking great for seasons to come.
Seal Against Weather With Finish
A final protective coating seals your outdoor planter against weather damage and extends its lifespan considerably.
You’ll want to apply finish to all exterior surfaces, including edges and corners where water typically penetrates first. Choose exterior-grade polyurethane, spar urethane, or marine varnish for maximum protection.
- Clean wood surfaces thoroughly before applying finish
- Sand lightly between coats for smooth adhesion
- Apply thin, even coats rather than thick applications
- Allow proper drying time between each coat
Work in a well-ventilated area and follow manufacturer’s instructions carefully.
Two to three coats provide adequate protection. Don’t forget to seal the planter’s interior if you haven’t lined it, though wood expansion and contraction require breathable finishes here.
Let the final coat cure completely before moving to the next step.
Fill Planter With Soil and Start Planting
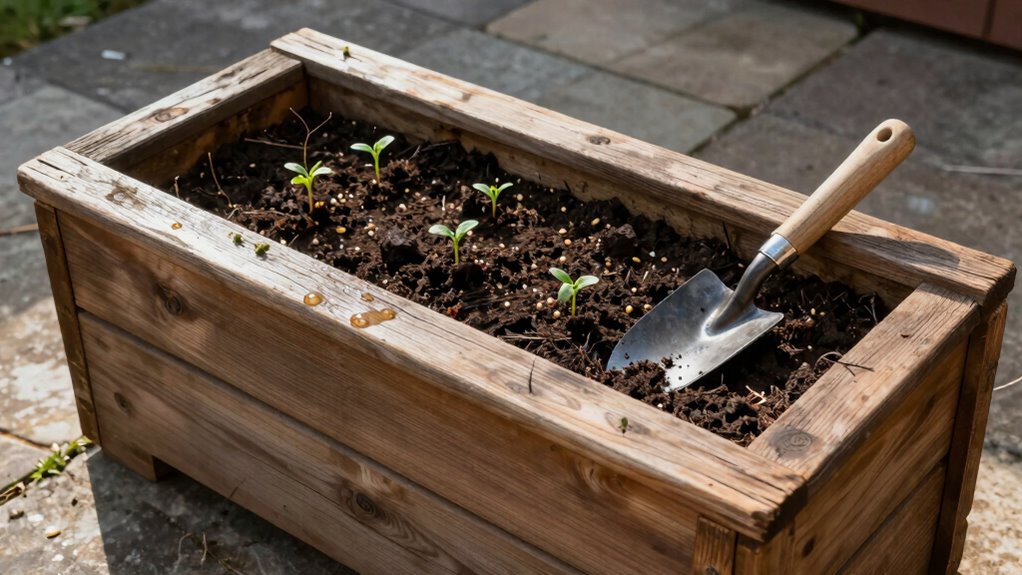
Fill your newly built planter with soil and begin planting by first selecting the right growing medium for your chosen plants. Choose potting mix designed for containers, as it drains better than garden soil. Fill the planter about three-quarters full, leaving space for your plants’ root balls.
Arrange your plants before digging holes, ensuring proper spacing for mature growth. Dig holes slightly larger than each plant’s container, then gently remove plants and loosen root balls.
Place plants at the same depth they grew previously, avoiding burying stems too deep. Backfill around roots with soil, pressing gently to eliminate air pockets.
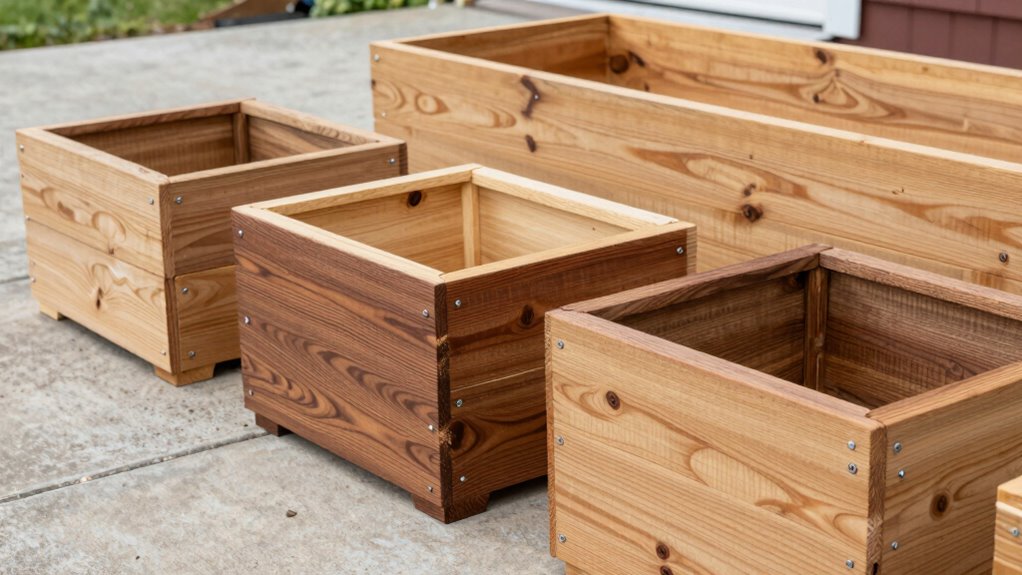
Water thoroughly after planting to settle the soil and eliminate remaining gaps. Step back and admire your completed planter.
Keep Your Planter Looking Great for Years
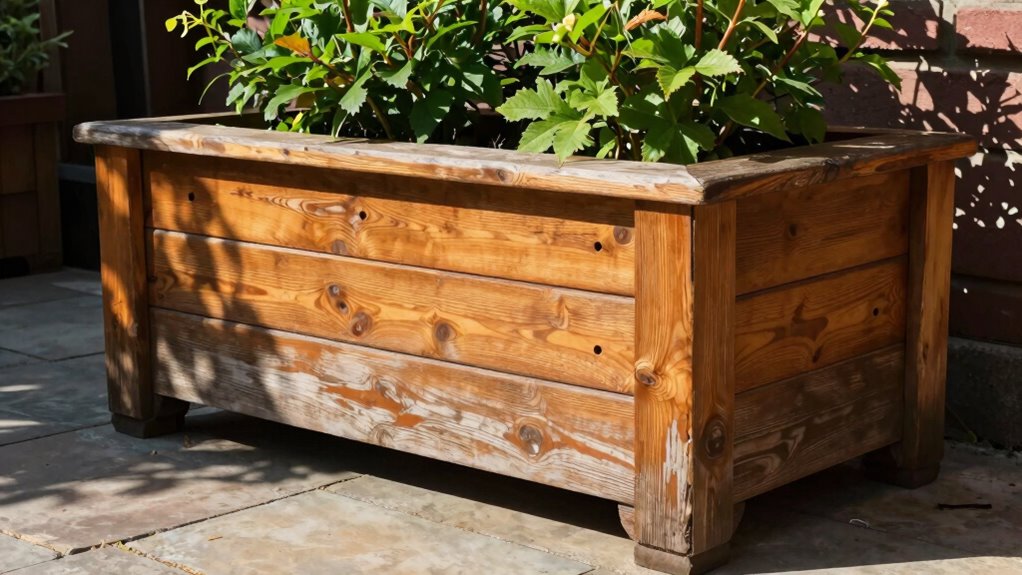
While building your outdoor planter was just the beginning, maintaining its appearance and longevity requires consistent care and attention.
You’ll want to establish a regular maintenance routine that keeps your planter looking fresh season after season.
Follow these essential steps to protect your investment:
- Apply annual weatherproofing treatment to prevent warping and cracking
- Clean debris from drainage holes monthly to prevent waterlogging
- Inspect wood joints regularly for loose screws or rotting sections
- Refresh exterior stain or paint every two to three years
Don’t forget to check soil moisture levels consistently.
Your plants’ health directly impacts your planter’s appearance.
Trim overgrown vegetation promptly and remove dead plant material immediately.
These simple habits prevent staining and deterioration while keeping your outdoor space inviting for everyone in your gardening community.
Conclusion
Ready to build your own outdoor planters? Start by choosing cedar or pressure-treated lumber that resists rot and insects. Cut your wood to size, drill drainage holes, and assemble the sides with waterproof glue and screws. Don’t forget to line the interior and seal the exterior. Fill with soil and plants, then maintain regularly. Why wait when you can create beautiful, long-lasting planters yourself?
