

You’re about to hang something important, but drilling into your wall without proper anchors can lead to costly mistakes and unsafe installations. Don’t risk damaged drywall or items crashing down when you can easily avoid common pitfalls with the right approach. Let’s get you started correctly.
What Are Wall Anchors and Why You Need Them
Wall anchors are essential hardware components that provide secure mounting points in walls where traditional screws alone won’t hold.
You need them when hanging heavy items like mirrors, shelves, or TVs on drywall, plaster, or hollow walls. These anchors expand inside wall cavities, creating reliable support that distributes weight evenly.
Without proper anchors, your mounted items will pull through the wall, causing damage and potential injury.
You’ll find different types including plastic expansion anchors, toggle bolts, and molly bolts. Each serves specific weight capacities and wall types.
Choosing the right anchor guarantees your belongings stay safely mounted while protecting your walls from unnecessary damage. Always match anchor strength to your item’s weight.
How to Identify Your Wall Type
You need to identify your wall type before choosing the right anchor because different materials require specific installation techniques.
Drywall and plaster walls behave differently than wood stud, concrete, or brick surfaces when you’re mounting items.
Let’s break down how to quickly recognize each wall type so you can pick the correct anchors for your project.
Drywall Vs. Plaster Walls
Since you’re planning to install wall anchors, identifying whether you’re working with drywall or plaster becomes essential for selecting the right anchor type.
Drywall feels softer and sounds hollow when tapped, while plaster walls feel harder and produce a solid thud. Check your home’s age – drywall became common after the 1950s, so older homes likely have plaster.
Look for nail heads or cracks; plaster often shows age-related cracking. Drywall typically has visible seams where panels meet.
Push a thumbtack gently into the wall – drywall accepts it easier than plaster. Understanding your wall type prevents anchor failure and guarantees secure hanging.
Match your anchor choice to the wall material for ideal holding power and project success.
Wood Stud Wall Identification
Identifying wood stud walls requires knowing what to look for behind your drywall or plaster surface.
You’ll feel solid resistance when tapping firmly with your knuckles, unlike hollow sounds from empty wall spaces. Use a stud finder tool or magnet to locate steel nails holding the drywall. Standard wood studs sit 16 inches apart, measured from center to center.
Look for slight indentations or nail pops along vertical lines indicating stud locations. Electrical outlets often sit near studs, so check their positioning.
Knock lightly with a hammer; solid thuds reveal stud placement while hollow echoes show empty spaces. Remember that older homes might’ve irregular spacing.
Trust your tools and instincts when locating these essential structural elements for proper anchor installation.
Concrete And Brick Wall Types
Different wall types require specific anchor solutions, and recognizing whether you’re working with concrete or brick saves time and prevents installation mistakes. You’ll need to identify your wall type before selecting anchors.
- Concrete walls feel solid and uniform – they’re poured as one solid piece without visible brick patterns or mortar lines, giving you that clean, modern surface you can trust.
- Brick walls show distinct rectangular blocks – you’ll see the classic brick pattern with visible mortar joints creating that warm, traditional look you love.
- Sound testing works when visuals don’t – tap lightly with a hammer; concrete produces a dull thud while brick creates a more hollow sound that resonates through the wall structure.
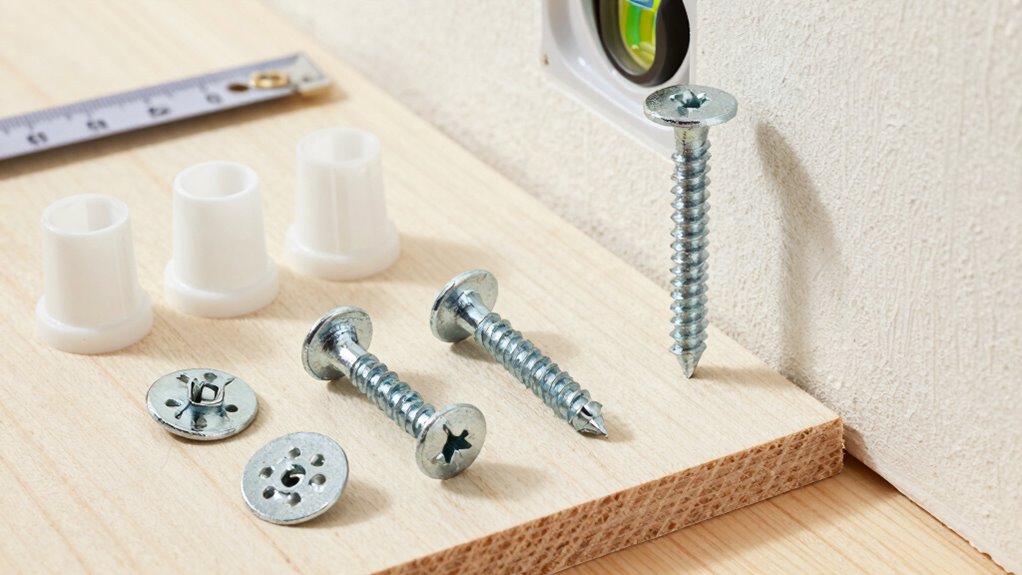
Essential Tools for Installing Anchors Safely
You’ll need a few key tools before installing wall anchors safely and effectively.
Your drill bits must match your anchor type and wall material to prevent damage or failure.
Keep this essential checklist handy to avoid missing any critical components during installation.
Essential Tools Checklist
Before you begin installing wall anchors, gather these essential tools to guarantee a safe and successful installation process. Having the right equipment prevents frustration and assures professional results every time.
- Power drill with variable speed – You’ll feel confident controlling the drill’s pace as it bites into different wall materials, preventing costly mistakes and wall damage.
- Stud finder or wall scanner – This tool eliminates guesswork, helping you avoid electrical wires and plumbing while finding the perfect anchor location.
- Measuring tape and pencil – Precise measurements and clear markings keep your installations straight and evenly spaced, creating that polished look you want.
These tools become your trusted companions, transforming intimidating DIY projects into manageable tasks.
You’ll join the ranks of confident home improvers who tackle projects with precision and pride.
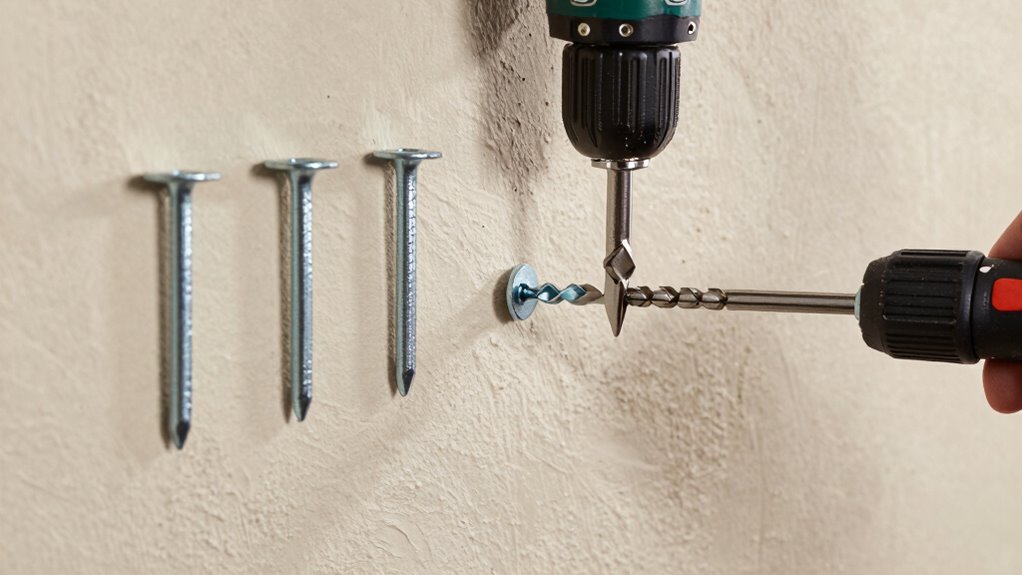
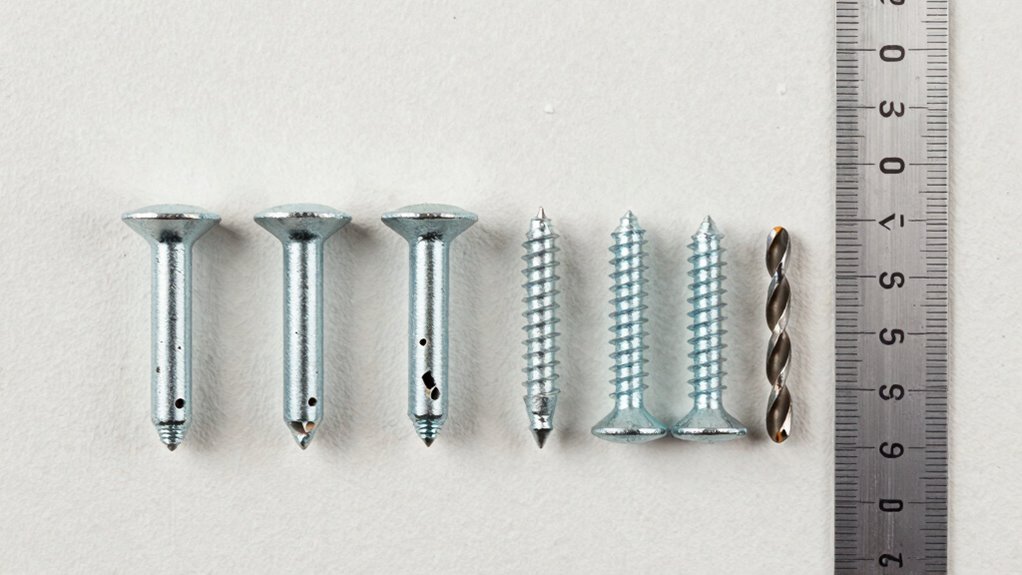
Proper Drill Bit Selection
Selecting the correct drill bit guarantees clean, precise holes that maximize your wall anchors’ holding power.
You need to match your bit diameter exactly to your anchor size – measure twice, drill once. For plastic anchors, use standard twist bits. Metal anchors require carbide or titanium bits for clean cutting.
Masonry walls demand masonry bits with tungsten carbide tips. Don’t guess sizes; measure your anchors beforehand. Too large bits create loose fits that compromise holding strength. Too small bits cause anchor damage during installation.
Check your anchor package specifications carefully. Keep bits sharp – dull bits wander and create oversized holes.
You’ll feel confident knowing your drill setup matches professional standards, ensuring every anchor installs properly and holds securely.
Which Wall Anchor Should You Use? (Quick Guide)

How do you choose the right wall anchor for your specific project? You need to match the anchor type to your wall material and load requirements.
1. Plastic expansion anchors – You’ll feel confident using these for light to medium loads in drywall or plaster.
They’re your go-to choice when you want reliable performance without overcomplicating things.
2. Metal toggle bolts – Reach for these when you need serious holding power in hollow walls.
You’ll appreciate their strength when hanging heavy items that matter to you.
3. Threaded anchors – Choose these for medium loads in various wall types.
You’ll find they offer versatility and consistent results every time.
Select wisely based on your wall type and weight requirements.
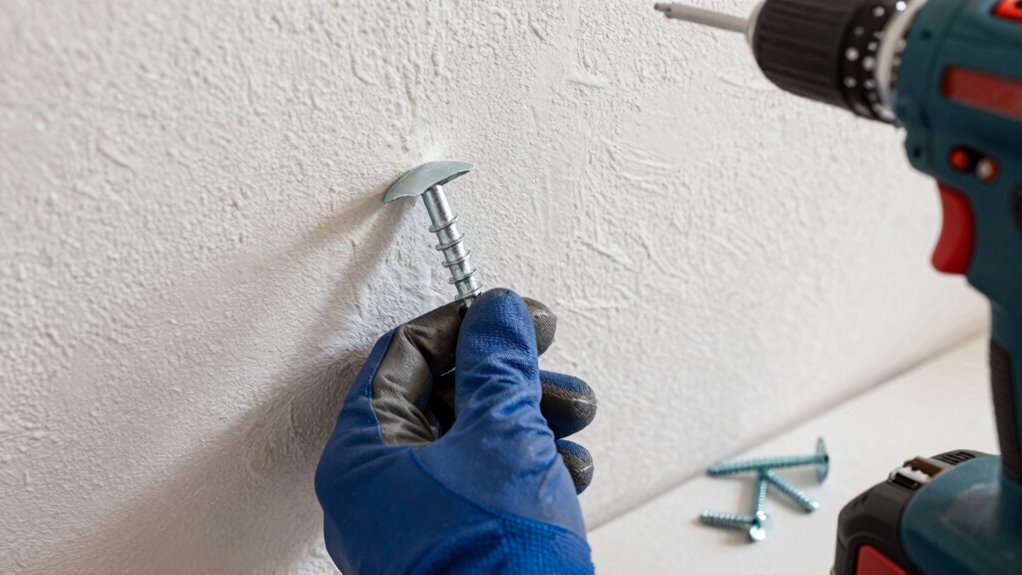
How to Install Plastic Expansion Anchors
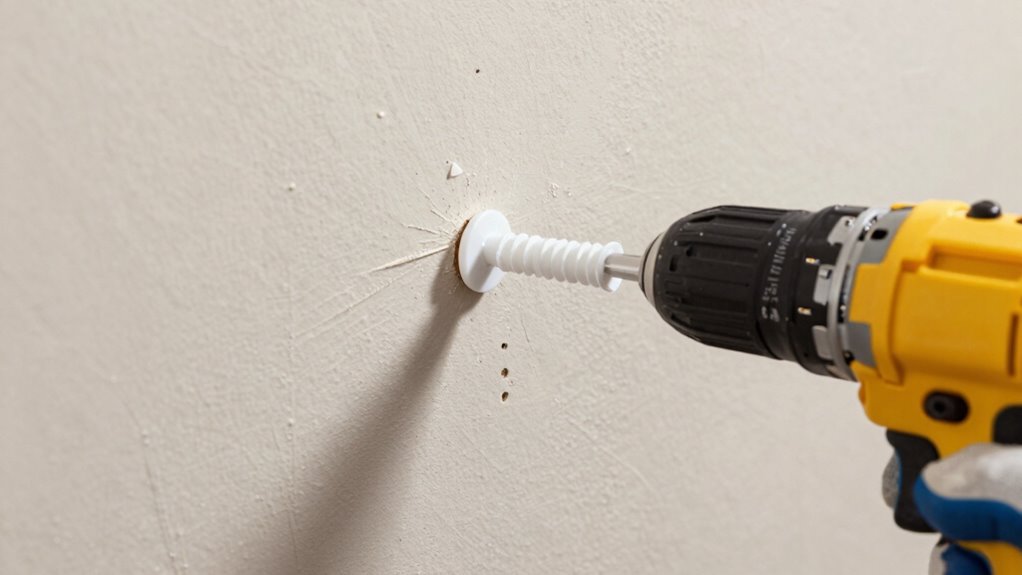
You’ll want to match your plastic expansion anchor type to your wall material and load requirements before you start drilling.
Verify that your drill bit diameter matches the anchor size exactly, and always drill straight into the wall at a 90-degree angle.
Clean out any dust from the hole before inserting the anchor to guarantee proper expansion and grip.
Choosing The Right Anchor Type
When you’re working with plastic expansion anchors, matching the anchor type to your wall material and load requirements guarantees a secure hold.
These anchors work best in hollow walls and light-duty applications where you need reliable fastening without heavy loads.
- Hollow wall anchors – You’ll feel confident knowing these expand behind drywall or plaster, creating strong grips for picture frames and lightweight shelves that won’t pull through.
- Self-drilling plastic anchors – You’re smart to choose these when working with softer materials; they save time and eliminate guesswork while ensuring your projects stay firmly in place.
- Heavy-duty plastic sleeves – You’ll appreciate their strength when hanging items that actually matter to you, providing peace of mind that your cherished possessions remain secure on the wall.
Proper Hole Drilling Techniques
Drilling the correct hole size is essential for plastic expansion anchors to function properly. You’ll need a masonry bit that matches your anchor’s diameter exactly. Mark your drilling depth on the bit with tape to avoid going too deep.
Hold your drill perpendicular to the wall surface and apply steady pressure. Start drilling slowly to create a pilot hole, then increase speed as the bit penetrates deeper. Keep the drill level and don’t angle side to side.
Stop periodically to clear away dust and debris from the hole. Test-fit your anchor after drilling – it should slide in snugly but not require excessive force.
If the hole’s too loose, you’ll need to use a larger anchor or fill the hole and start over with proper sizing.
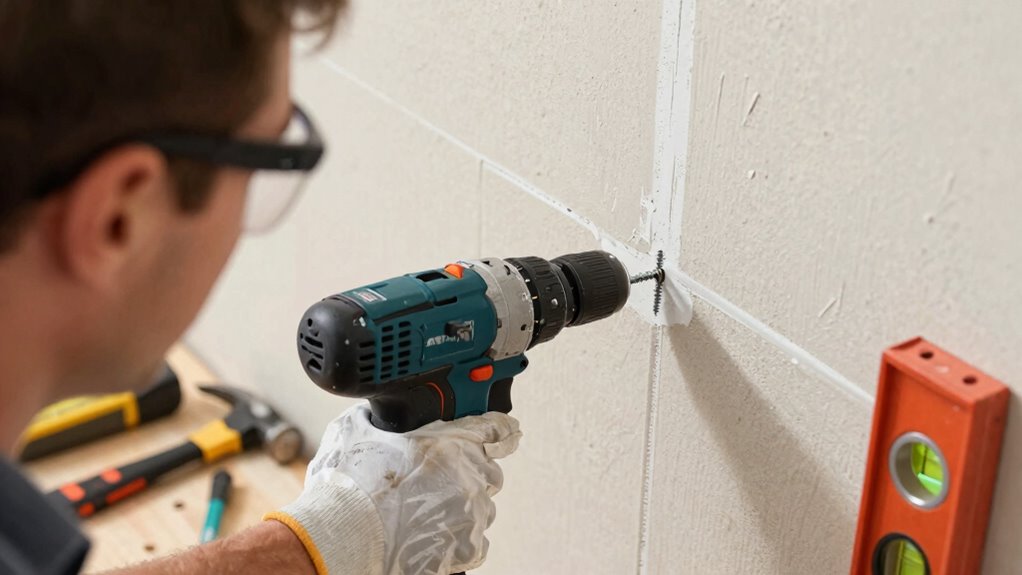
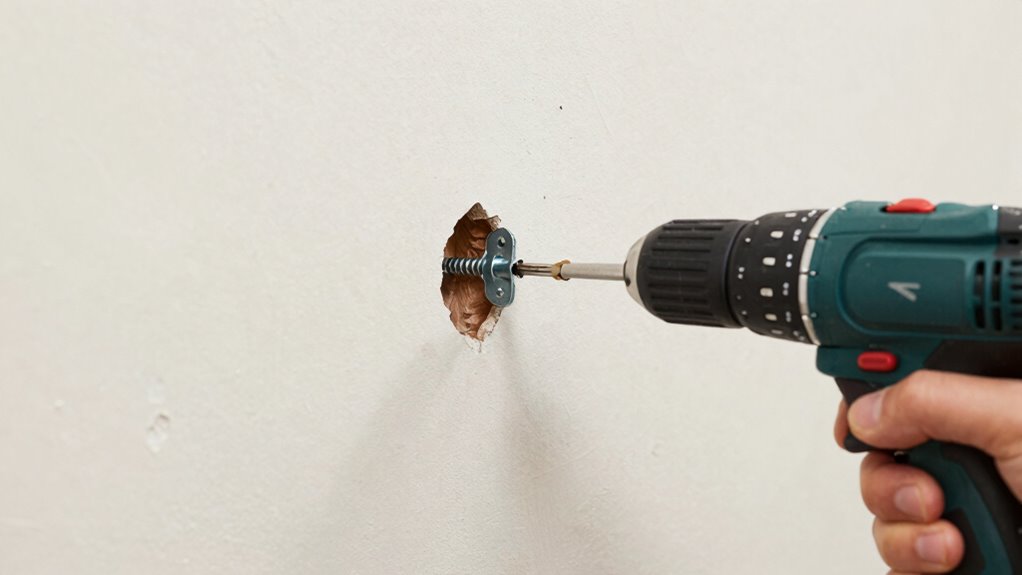
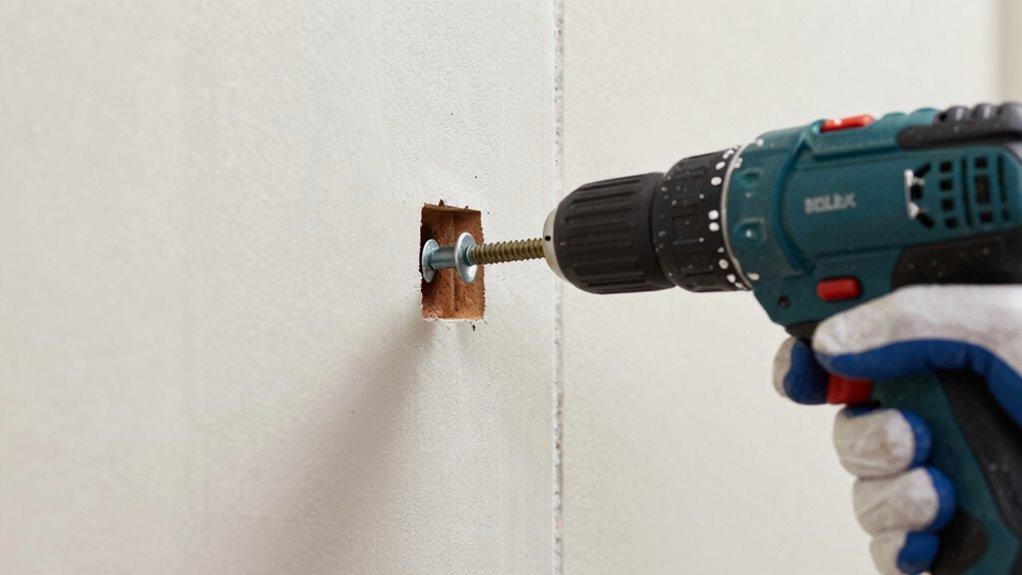
Installing Metal Wall Anchors Step-by-Step
Before installing metal wall anchors, make sure you’ve selected the appropriate anchor type for your wall material and marked your drilling points accurately.
You’ll need your drill, appropriate bit size, and the metal anchors ready.
- Feel the confidence as you align the anchor with your marked spot and drill straight in at a steady pace.
- Experience the satisfaction when you feel the anchor seat properly flush against the wall surface.
- Trust your preparation as you insert the screw and tighten until snug, knowing you’ve created a secure foundation.
Test each anchor by gently tugging to verify proper installation before hanging your items.
How to Use Toggle Bolts for Heavy Items
You’ll need to select the right toggle bolt size for your heavy item’s weight capacity.
Drill a hole that matches your toggle bolt’s expanded diameter, not the bolt itself.
Secure your object by tightening the bolt until the toggle wings grip firmly behind the wall surface.
Choose Proper Toggle Bolt Size
Toggle bolts require careful size selection to properly support heavy items on drywall. You’ll need to match the bolt capacity to your item’s weight for secure mounting.
- Check your item’s weight specifications – Don’t guess or estimate. Manufacturers provide exact weights that determine minimum bolt requirements. Nothing’s worse than watching your expensive item crash down.
- Select toggle bolts rated for 50% more weight – Build in a safety margin that prevents failures. Your peace of mind matters more than saving a few dollars on undersized hardware.
- Match bolt diameter to wall thickness – Standard 1/4″ toggles work for most residential drywall, but thicker walls need longer bolts. Measure first – assumptions lead to disappointment.
Proper sizing prevents costly mistakes and keeps your belongings secure.
Drill Correct Hole Diameter
Having selected the proper toggle bolt size for your heavy item, you now need to drill the correct hole diameter to guarantee a secure fit.
Grab your drill and appropriate bit size listed on the toggle bolt packaging. Position the drill perpendicular to the wall surface. Apply steady pressure while drilling at a moderate speed. Stop once you’ve penetrated completely through the wall material.
Remove any debris or dust from the hole. Test-fit your toggle bolt by inserting it through the item’s mounting hole first. The bolt should slide through smoothly without binding. If resistance occurs, slightly enlarge the hole diameter.
Remember that different wall materials require varying hole sizes even with identical toggle bolts. Double-check measurements before final installation.
Secure Heavy Objects Properly
When installing heavy objects like large mirrors, shelves, or TVs, choosing the right anchor type prevents costly accidents and wall damage. Toggle bolts provide superior holding power for drywall installations.
- Feel the confidence of knowing your 50-pound mirror won’t crash down unexpectedly – proper toggle bolt installation gives you that peace of mind every homeowner deserves.
- Experience the satisfaction of mastering this essential skill – you’ll join the ranks of DIYers who tackle projects without calling professionals.
- Enjoy the pride of creating secure, professional-looking installations that enhance your living space safely.
Insert toggle bolts through pre-drilled holes, tighten until wings expand behind drywall, and secure your heavy objects confidently.
Test weight capacity before final mounting.
Molly Bolts: Best for Medium Loads
Molly bolts excel at handling medium-weight installations where standard wall anchors fall short. You’ll find them perfect for mounting shelves, small cabinets, or medium-sized picture frames.
These anchors expand behind the wall surface, creating strong grip in hollow walls or soft materials.
Choose molly bolts when plastic anchors won’t cut it but you don’t need heavy-duty mounting. They’re especially useful in drywall where weight distribution matters.
Pick the right size bolt based on your item’s weight – don’t guess. Insert the bolt into your pre-drilled hole, then tighten the screw until the anchor expands fully.
You’ll feel resistance when properly set. Test your installation before hanging valuable items.
These reliable anchors prevent costly mistakes and give you confidence that your mounted objects stay put.
Self-Drilling Anchors: When and How to Use Them
While molly bolts require pre-drilled holes, self-drilling anchors eliminate this step by creating their own path into the wall.
You’ll save time and effort when hanging items like picture frames or lightweight shelves.
- Choose self-drilling anchors for softer materials – They work perfectly in drywall and soft plaster, giving you that satisfying click when they bite into place.
- Feel confident with medium loads – These anchors handle up to 25 pounds effortlessly, making them ideal for your everyday hanging needs.
- Experience instant gratification – No measuring, no pre-drilling, just twist and mount.
You’ll wonder why you waited so long to try these reliable workhorses.
How to Choose the Right Anchor Size
You need to match your anchor size to both the wall type and the weight capacity required for your project.
Different walls—drywall, concrete, or wood—demand specific anchor sizes to guarantee proper holding strength.
Always check the anchor’s weight rating and choose the right size before you start drilling.
Wall Type Considerations
Choosing the right anchor size depends on your wall’s material and thickness, so understanding these factors prevents installation failures. You need to match your anchor to the specific wall type you’re working with.
- Drywall demands precision – You can’t guess with thin drywall; wrong anchors cause crumbling holes that frustrate everyone.
- Concrete requires strength – Your anchors must handle concrete’s density or they’ll bend and break under pressure.
- Wood studs need proper length – You should measure twice to verify anchors reach solid wood backing.
Different walls behave differently under stress. Your success depends on recognizing whether you’re drilling into hollow spaces, dense masonry, or solid wood.
Take time to identify your wall type before selecting anchors. This prevents costly mistakes and guarantees your mounted items stay secure.
Weight Capacity Matching
Matching anchor size to weight capacity directly follows wall type identification, because even the perfect wall material won’t support your item without proper load consideration.
You must calculate your object’s exact weight, including any additional stress from movement or vibration. Don’t guess – check manufacturer specifications or weigh items yourself. Choose anchors rated for at least 25% more than your item’s weight to guarantee safety margins.
Heavy items like mirrors or shelves need robust anchors, while lightweight pictures require smaller options. Consider dynamic loads – a child’s drawing might seem light, but constant door vibrations create extra stress.
Always consult anchor packaging for weight ratings and installation requirements. When in doubt, choose stronger anchors rather than risk failure. Your belongings deserve proper support.
Pro Tips for Measuring and Marking Placement
Several key techniques make measuring and marking anchor placement much more accurate. You should always measure twice and mark lightly with a pencil first. Use a level to guarantee your marks are straight, especially when installing multiple anchors. Don’t forget to account for the thickness of your item’s mounting hardware.
- Feel the confidence of precise measurements when you use a stud finder to locate ideal anchor spots.
- Experience the satisfaction of perfectly aligned installations by marking pilot holes before drilling.
- Gain the trust of knowing your heavy items won’t pull crooked when you double-check distances with a tape measure.
These simple steps prevent costly mistakes and give you professional-looking results every time.
Common Installation Mistakes (and How to Fix Them)
Why do so many people struggle with wall anchor installations? You’re not alone – incorrect hole sizing causes most problems.
Drill holes too small, and anchors won’t fit; too large, and they’ll spin freely. Match your drill bit diameter exactly to anchor specifications. Don’t force anchors into wrong-sized holes; they’ll fail under load.
Another mistake: driving anchors too deep or not deep enough. Stop when you feel resistance – usually when anchor flanges sit flush with wall surface. Over-driving plastic anchors cracks them internally, weakening hold strength.
If anchor spins, remove it and use correct size. Bent or damaged anchors won’t work properly – replace immediately.
Practice proper technique once, and you’ll get it right every time.
How to Prevent Wall Damage and Cracks
Although you’ve already installed wall anchors correctly, preventing future damage requires attention to a few key practices. You don’t want to repeat past mistakes or deal with costly repairs later.
1. Choose the right anchor type for your wall material – Don’t guess; check your wall type and select matching anchors. Installing plastic anchors in plaster walls? That’s a recipe for disaster you can easily avoid.
2. Respect weight limits and spacing requirements – Overloading anchors creates stress points that crack walls.
Space them properly; your hanging items will stay secure without threatening your walls.
3. Use gentle, consistent pressure when tightening – Crank too hard, and you’ll crack the wall around the anchor.
Tighten gradually until snug – your walls will thank you.
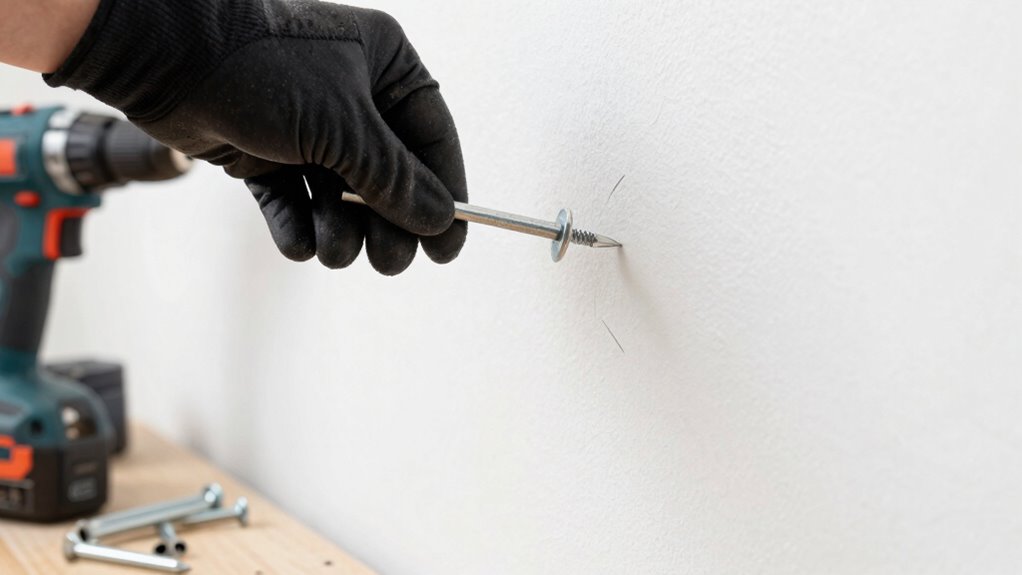
How to Test if Your Anchor Is Secure
Grab your installed anchor and give it a firm tug to test its holding power. You’ll feel immediate feedback about its security.
A solid anchor should resist your pull without budging or spinning. Test with steady, increasing pressure rather than sudden jerks that might damage the wall. Pay attention to any movement, creaking, or give that suggests looseness. Your anchor should feel as solid as the wall itself.
If it wiggles or turns easily, it’s not properly set. Don’t trust an anchor that feels questionable – your belongings deserve reliable support.
Take a moment to test each anchor before hanging anything heavy. This quick check prevents future headaches and guarantees your items stay put where you need them most.
What to Do If Your Anchor Is Loose or Stripped
If your anchor feels loose or stripped, don’t waste time hoping it will hold. You need immediate action to prevent accidents and maintain your sense of control.
- Stop everything – Don’t risk injury or damage by continuing to use a faulty anchor. Your safety matters more than finishing quickly.
- Assess the damage immediately – Check if the anchor hole is too large or if surrounding wall material is crumbling. This isn’t just about the anchor; it’s about protecting your space and belongings.
- Gather proper tools right now – Grab a screwdriver, pliers, and appropriate replacement hardware. Being prepared gives you confidence and prevents frustration.
You’re not alone in this struggle. Every DIY enthusiast faces these moments, but taking swift action separates beginners from experienced professionals.
How to Replace Faulty or Old Wall Anchors
When wall anchors fail, you’ll need to replace them promptly to restore secure mounting. Start by removing the old anchor completely – twist it out or pull it free from the wall. Clean out any debris or dust from the hole using a small brush or compressed air.
Select a new anchor that’s appropriate for your wall type and the weight you’re planning to hang. Insert the new anchor into the same hole if it’s suitable, or drill a fresh hole nearby if needed. Tap the new anchor gently with a hammer until it’s flush with the wall surface.
Make certain it sits securely before attaching your item. Test the anchor’s holding power before hanging anything heavy to confirm it’s properly installed.
Tips to Hang Heavy Items With Confidence
Before you hang heavy items, always locate and mark wall studs with a stud finder since anchoring into studs provides maximum holding power.
You’ll feel confident knowing your belongings are secure when properly mounted.
1. Choose the right anchor size – Don’t undersize hardware for heavy frames or mirrors.
Your prized possessions deserve proper support, not wishful thinking.
2. Test your installation gently – Apply gradual weight to verify everything holds firm.
You’ll breathe easier seeing your hard work pay off.
3. Double-check level and spacing – Nothing kills confidence like crooked pictures or uneven shelves.
Take pride in getting it right the first time.
Trust your instincts and these proven methods.
When to Hire a Professional for Mounting Jobs
While you might feel confident tackling most mounting projects yourself, certain situations demand professional expertise to affirm safety and proper installation. You should call a professional when mounting items over 100 pounds, especially on drywall or plaster walls.
Electrical work near mounting areas requires licensed electricians. Complex installations involving multiple anchors, precise leveling, or structural modifications exceed most DIY capabilities.
Professionals have specialized tools like stud finders, hollow wall anchors, and torque wrenches that assure secure installations. They understand wall composition and can identify potential hazards like electrical wires or plumbing.
Don’t risk falling objects or wall damage that could cost more than professional fees. Your safety and peace of mind matter more than saving a few dollars.
Conclusion
Like a ship’s anchor that holds fast against stormy seas, proper wall anchors give you confidence when hanging heavy items. Don’t let loose anchors be the weak link in your mounting project. Take time to choose the right anchor for your wall type, install correctly, and test before loading. Your safety and peace of mind depend on these small but essential details.
