

Nearly 60% of homeowners struggle with outdoor storage solutions, yet building your own shed remains one of the most cost-effective approaches. You’ll need to assess your specific storage requirements before choosing materials and location. Don’t overlook proper foundation preparation – it’s the difference between a sturdy structure and future headaches. What critical mistake do most DIY builders make when framing their first wall?
Key Reasons to Build a Storage Shed
While you mightn’t realize it yet, building a storage shed can solve several common household problems that you’ve probably been ignoring.
Your garage becomes less cluttered when tools, seasonal items, and outdoor equipment have their own dedicated space. You’ll stop tripping over garden hoses and stepping on forgotten tools scattered around your yard.
A shed keeps valuable items secure and organized, reducing that constant stress of misplaced things. Your family members will appreciate having a clean, designated area for outdoor supplies.
You’re creating a practical solution that brings order to chaos. Everyone in your household benefits when everything has its proper place.
Stop letting storage issues frustrate you any longer.
How to Choose Shed Design and Size
You’ll need to assess your storage needs first before choosing any shed design.
Select dimensions that fit both your current items and allow room for future expansion.
Consider how you’ll use the space and what you might add later to avoid outgrowing your shed too quickly.
Assess Storage Needs
Before you choose a shed design and size, assess what you actually need to store. Take inventory of your tools, equipment, and seasonal items. Consider lawn mowers, snow blowers, gardening supplies, and outdoor furniture.
Don’t forget smaller items like paint cans, fertilizer, or holiday decorations that need protection from weather.
Think about future needs too. Will you acquire more tools or larger equipment? Plan for growth rather than constantly upgrading sheds. Measure bulky items to understand space requirements.
Group similar items together to estimate storage zones.
Consider accessibility needs. Do you require frequent access to certain items? Position frequently used tools near the door. Heavy items need ground-level storage. Tall equipment demands adequate ceiling height.
Your storage habits matter more than you think. Make realistic assessments based on actual usage patterns, not optimistic hopes. This honest evaluation prevents costly mistakes later.
Select Appropriate Dimensions
Now that you’ve inventoried your storage needs, it’s time to match those requirements to actual shed dimensions. Don’t let excitement cloud your judgment—measure twice, decide once.
Consider these emotional triggers when selecting your shed size:
- Cramped frustration: Nothing ruins satisfaction faster than realizing your new shed feels like a storage coffin.
- Wasted potential: Oversizing costs more and leaves unused space that mocks your planning skills.
- Future regret: Choosing poorly means either cramming overflowing items or regretting unnecessary expense.
Standard shed widths range from 6 to 12 feet, while lengths typically span 8 to 20 feet. Base your decision on your actual inventory, not dreams.
Include walking space between items—you’ll need room to move. Remember, sheds look proportional when they match your home’s scale.
Pick dimensions that blend seamlessly into your space while accommodating everything on your list.
Consider Future Expansion
While your current storage needs matter most, smart planning accounts for what comes next. You should think about how your storage requirements might grow over time. Will you acquire more tools, equipment, or seasonal items?
Choose a shed design that allows easy expansion. Consider sheds with modular walls or those that can accommodate additions. Leave extra space around your shed for future construction.
Don’t box yourself into a corner with a design that limits growth. Pick materials and foundation styles that support later expansion. You’ll thank yourself later when you need more space.
Plan for tomorrow’s needs today. Your future self deserves that consideration. Make choices now that won’t restrict you down the road. Think bigger picture.
Where to Place Your Shed
Choosing the right location for your storage shed requires careful consideration of several key factors.
You’ll want to position it where it’s easily accessible yet doesn’t interfere with daily activities. Placement affects both functionality and neighborhood harmony.
- Convenience calls to you when placing tools near your workspace, but avoid blocking windows or walkways that matter to your family’s routine.
- Peace of mind comes from proper distance – position your shed far enough from property lines to satisfy neighbors while staying within your comfort zone for regular access.
- Future-proof your decision by selecting a spot that won’t crowd planned expansions or block scenic views that bring you joy.
Consider drainage, sunlight exposure, and existing landscape features when making your final choice.
How to Prepare a Solid Foundation
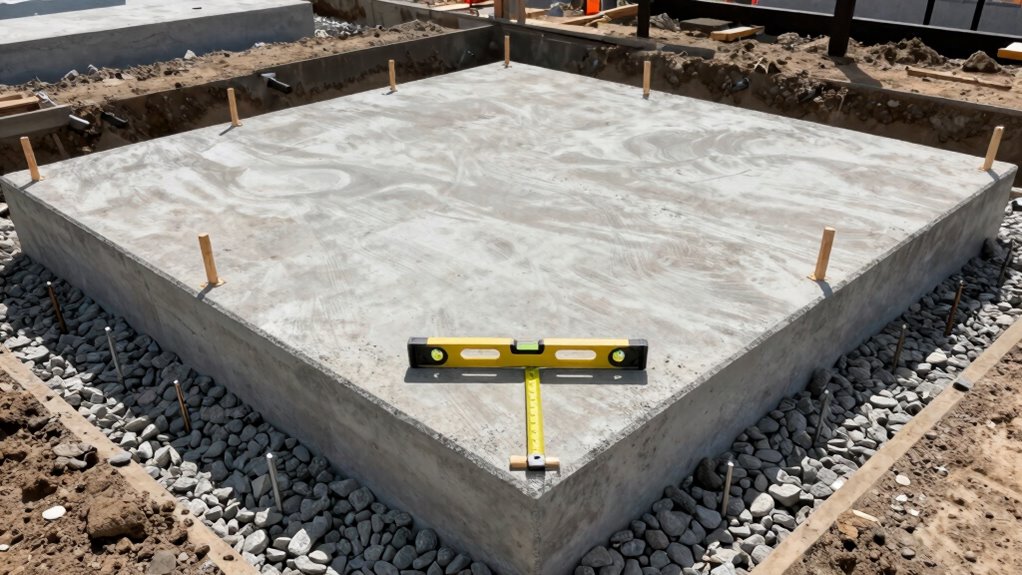
Once you’ve selected the perfect spot for your shed, preparing a solid foundation becomes your next critical step.
You’ll need to clear the area of grass, weeds, and debris completely. Level the ground using a shovel and rake, then tamp it down firmly.
Check that the surface is even by placing a level board across different sections. If you’re building on soil, consider adding gravel for better drainage.
Mark your foundation corners accurately using measuring tape and stakes. Verify proper drainage away from the foundation site.
A solid foundation prevents future shifting, keeps your shed stable, and extends its lifespan considerably.
Take time to get this right.
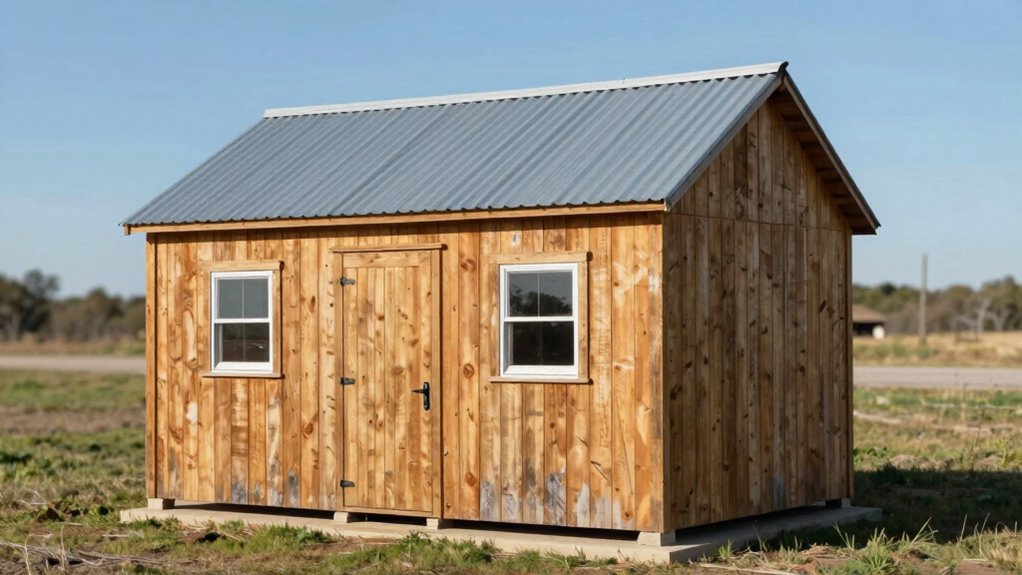
Materials Needed to Build a Shed
Before you start gathering materials, make certain you have a clear understanding of your shed’s dimensions and design requirements.
You’ll need to calculate the exact quantities to avoid waste and guarantee structural integrity.
gathering supplies:
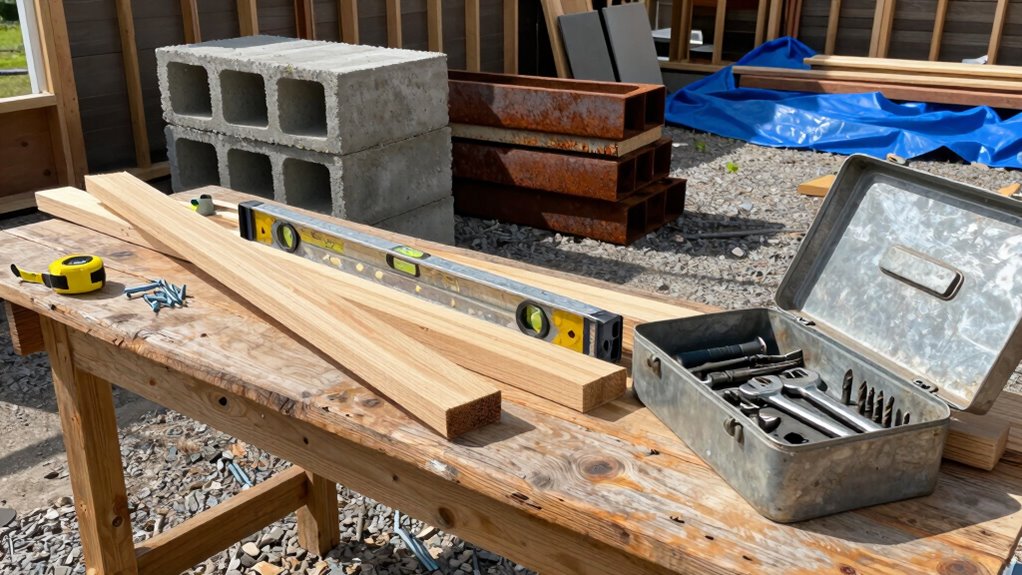
- Lumber: Pressure-treated 2x4s for framing, 2x6s for floor joists, and plywood sheathing create your shed’s skeleton
- Roofing materials: Corrugated metal panels or asphalt shingles protect your investment from weather damage
- Concrete blocks: These provide sturdy support and proper elevation to prevent moisture issues
Don’t forget fasteners, hinges, and weatherproofing materials.
Buy quality materials that match your climate conditions. Your shed should stand strong for years while protecting your belongings effectively.
Tools Required for Shed Construction
You’ll need essential hand tools like hammers, screwdrivers, and measuring tapes to handle basic construction tasks.
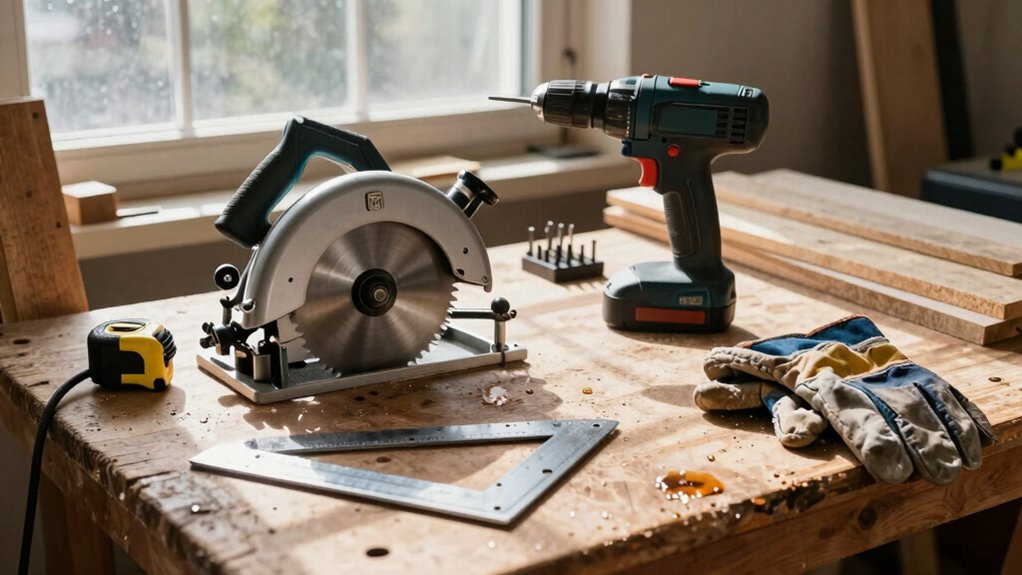
Power tools including a drill, circular saw, and impact driver will make your work faster and more efficient.
Don’t forget safety equipment such as safety glasses, work gloves, and ear protection to keep you safe throughout the building process.
Essential Hand Tools
Hammer, nails, and a reliable set of screwdrivers form the backbone of any shed construction project.
These fundamental tools handle ninety percent of your building needs. Don’t underestimate their importance – they’re what separate dreamers from doers.
- A sturdy hammer – Your constant companion that drives nails straight and removes mistakes cleanly
- Quality screwdrivers – Both flathead and Phillips varieties that won’t strip screws when you need them most
- Tape measure – The tool that keeps your dreams from becoming crooked nightmares
You’ll also need wrenches for bolts, a level to keep walls straight, and a handsaw for cutting lumber to size.
These hand tools cost little but deliver everything. Master them first before moving to power tools. They build character and precision simultaneously.
Power Tool Requirements
While hand tools handle the basics, power tools accelerate your shed building process considerably.
You’ll need a circular saw for cutting lumber to length quickly and accurately. A drill-driver makes driving screws much faster than manual methods. Consider a jigsaw for cutting curves or irregular shapes in plywood. A reciprocating saw helps when you need to cut through nails or make rough cuts.
A random orbital sander speeds up smoothing surfaces considerably. A miter saw guarantees precise angle cuts for framing. Don’t overlook a shop vacuum for keeping your workspace clean.
These tools aren’t just conveniences—they’re investments that make your project more enjoyable and professional-looking. Rent or borrow tools you don’t own frequently to save money while still getting the job done efficiently.
Safety Equipment Needed
Having gathered your power tools, don’t overlook the critical safety equipment that protects you during construction. Your safety gear isn’t optional—it’s essential for completing this project without injury.
- Safety glasses—Flying debris doesn’t discriminate. Protect your eyes from wood chips, metal fragments, and dust that can cause permanent damage in seconds.
- Work gloves—Your hands are your most valuable tools. Heavy-duty gloves prevent cuts, splinters, and blisters while maintaining grip on slippery materials.
- Steel-toed boots—Heavy lumber and tools falling from waist height can crush regular footwear. Steel toes protect your feet from serious injury.
You belong on this job site as much as any professional builder. Don’t compromise your safety—invest in proper equipment before you start cutting, drilling, or hammering.
How to Build a Strong Floor Frame
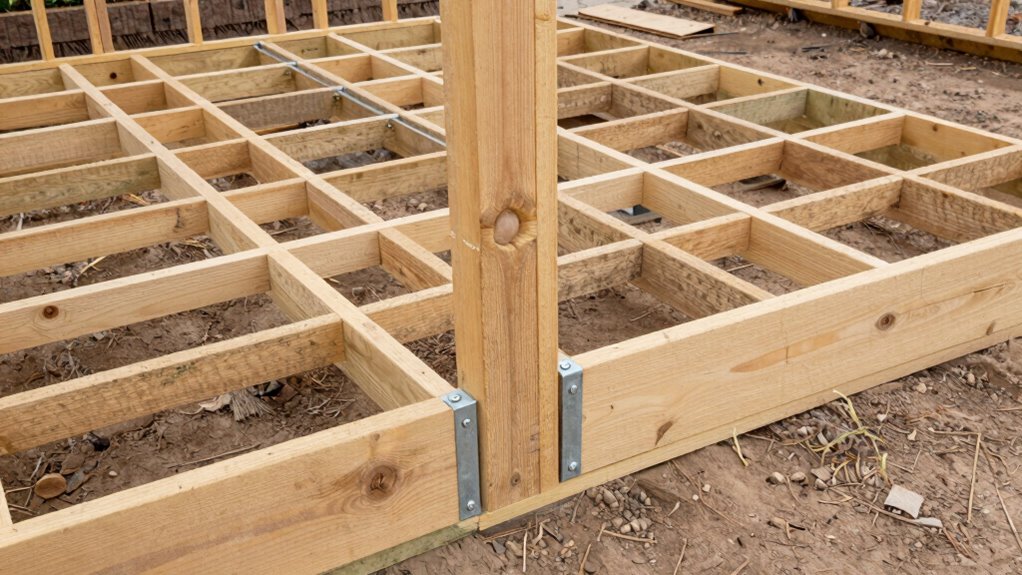
A strong floor frame forms the foundation of any durable storage shed. You’ll need pressure-treated lumber for the frame members since it resists rot and insects.
Start by measuring and cutting your joists to length, typically 2×6 or 2×8 lumber works best. Lay out your frame on a flat surface, ensuring corners are square by measuring diagonally from corner to corner. The measurements should be identical.
Secure the frame together using galvanized metal brackets or toenail the joints with 3-inch nails. Check that your frame sits flat and level before proceeding.
A solid floor frame prevents future sagging and structural problems. Take time to get this right because everything else depends on it. Your shed’s longevity starts with proper framing techniques and quality materials.
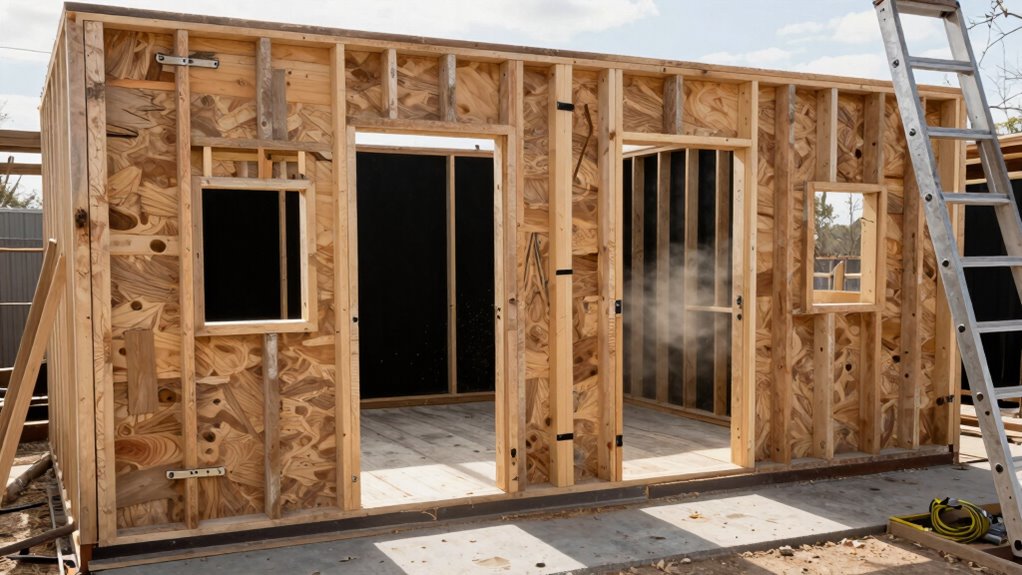
Framing Walls for Your Shed
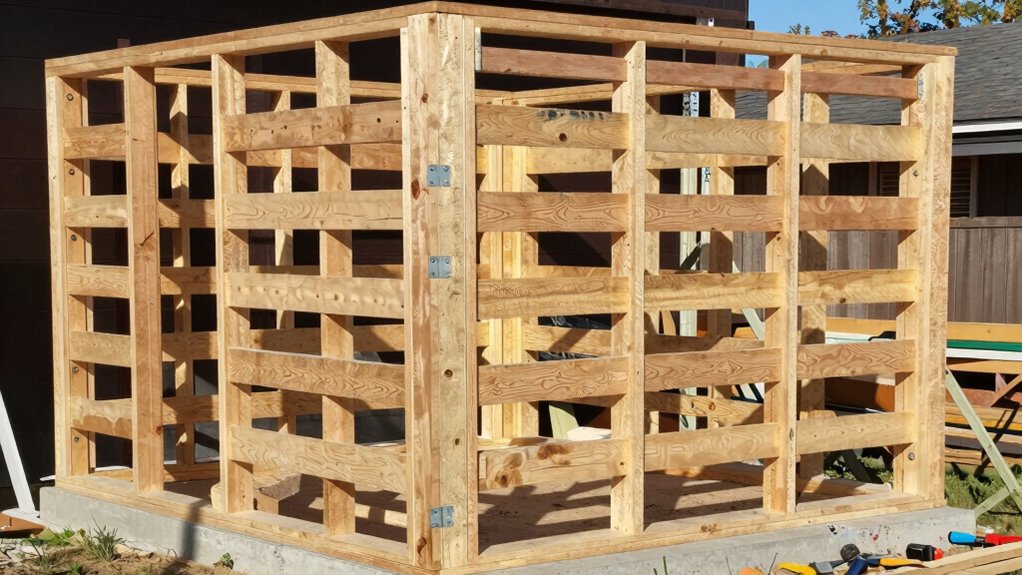
Now that you’ve got your floor frame built, you’ll need to tackle the wall stud layout before moving forward.
You’ll start by marking stud positions every 16 inches on your plates, making sure corners and openings line up perfectly.
Once your layout is marked, you’ll assemble each wall section on a flat surface before standing them up.
Wall Stud Layout Guide
Once you’ve laid out your wall plates accurately, you’ll need to mark stud locations every 16 inches on center. This spacing creates strong, standard framing that’ll make your shed walls solid and reliable. Grab your tape measure and pencil, then start marking from one end.
- Feel the satisfaction as each 16-inch mark falls perfectly in place, knowing you’re building something that’ll last
- Experience the pride of precise measurements that’ll make assembly smooth and professional-looking
- Build confidence with every mark, knowing your careful layout prevents costly mistakes later
Your wall layout determines everything that follows. Measure twice, mark clearly, and keep your pencil sharp.
These marks become your roadmap for cutting and positioning each stud correctly.
Frame Assembly Techniques
With your wall plates marked and stud locations clearly defined, you’re ready to start assembling the wall frames that’ll give your shed its structural backbone.
Lay your top and bottom plates parallel to each other, then position your studs between them according to your markings. Use 16d nails or 2½-inch screws to attach the studs, driving them through the plates at each marked location.
Check that everything’s square before securing the final connections. Don’t rush this step – proper frame assembly prevents costly corrections later.
Keep your stud spacing consistent and guarantee all corners are perfectly square. This framing forms the foundation of your building project, so take time to get it right the first time.
Installing Roof Trusses and Sheathing
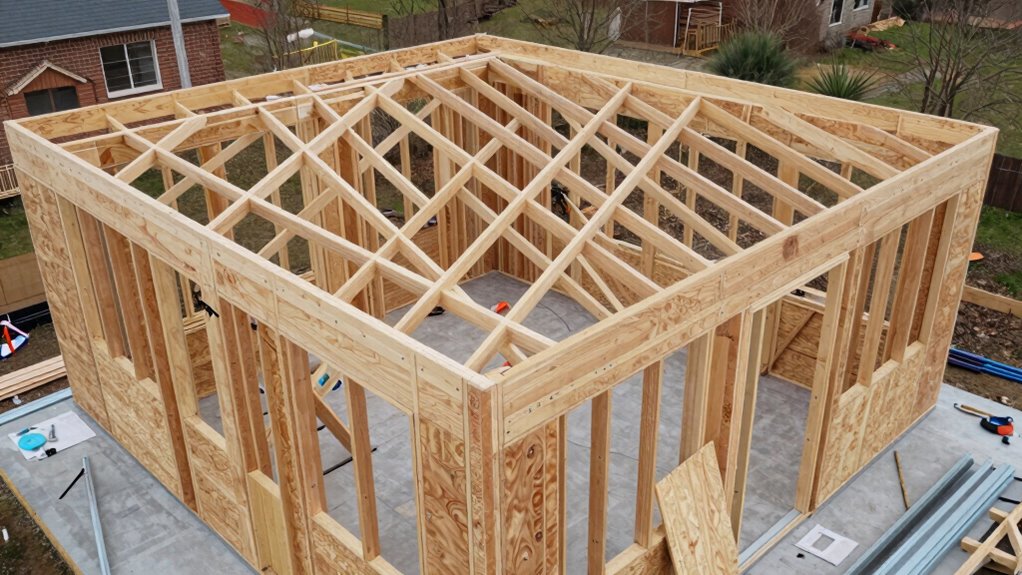
After you’ve properly spaced and secured your wall plates, you’ll begin installing the roof trusses by lifting each one into position and anchoring them with hurricane ties.
Make sure each truss sits flush and aligned with your wall markings.
- You’ll feel that satisfying click when each hurricane tie locks into place
- There’s real pride in seeing your frame take its final shape
- Every secured connection brings you closer to having your own shelter
Once all trusses are installed, you’ll attach the roof sheathing using plywood or OSB panels.
Start at the bottom edge and work your way up, ensuring each sheet overlaps properly. Secure with roofing nails every six inches.
This creates your shed’s weatherproof shell and gives you that solid, completed feeling you’ve been working toward.
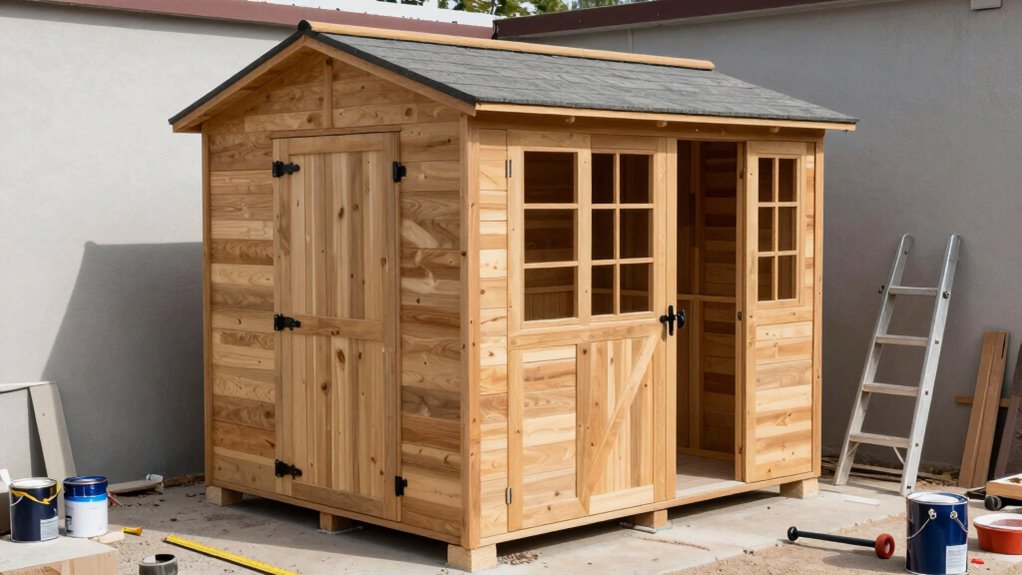
Adding Doors and Windows
You’ll want to install your shed doors first before adding windows, since doors typically require more precise framing and can affect the overall structure.
Measure twice and cut once when positioning your door frame, ensuring it’s perfectly square and level before securing it in place.
Ventilation windows can be added after your doors are installed, focusing on placing them where they won’t interfere with door operation while providing adequate airflow.
Installing Shed Doors
Once you’ve framed the door opening, installing shed doors requires careful measurement and proper hardware selection. Measure twice to verify your doors fit perfectly within the opening. Choose hinges that can support your door’s weight without sagging over time.
- Confidence builds when you use quality hinges and install them level.
- Pride grows as you see your perfectly aligned doors swing smoothly.
- Satisfaction comes from knowing your shed doors will last for years.
Pre-drill holes to prevent splitting, especially near door edges. Attach hinges with appropriate screws, checking that doors hang straight.
Install handles and locks according to manufacturer specifications. Test door operation multiple times during installation. Adjust hinges if needed until doors close properly. Your shed deserves doors that function flawlessly every time you access it.
Adding Ventilation Windows
Why not add some ventilation windows to your shed? You’ll need them to prevent moisture buildup and keep your tools dry.
Start by marking window locations on your walls, typically near the roofline for ideal air circulation. Cut openings using a reciprocating saw or circular saw with a guide.
Install pre-made window frames or build your own using 2×4 lumber and plywood. Make sure they’re positioned away from prevailing winds to avoid drafts.
Consider adding screening to keep pests out while allowing airflow. Don’t forget to seal gaps around window frames with caulk or weatherstripping.
Proper ventilation prevents wood rot and extends your shed’s lifespan. You’ll appreciate the fresh air circulation when working inside.
Step-by-Step Siding Installation
Start by gathering your siding materials and tools before you begin installation. You’ll need your chosen siding panels, nails or screws, a level, measuring tape, and circular saw. Check that all materials are ready before you start working.
Install siding from bottom to top, ensuring each row overlaps properly. Keep these key points in mind:
- Feel the satisfaction of each perfectly aligned panel as you work your way up the walls
- Experience the pride of creating straight, even rows that look professionally done
- Enjoy the accomplishment of transforming raw materials into protective walls
Work methodically, checking measurements twice before cutting. Secure each panel tightly against the previous one.
Your shed’s siding should fit snugly around windows and corners. Take your time with this step – it’s what separates a good builder from a great one.
How to Weatherproof Your Shed
You’ll need to seal all roofing materials thoroughly to prevent leaks and water damage.
Apply weather-resistant siding that can withstand harsh conditions and temperature changes.
Install proper drainage systems around your shed to direct water away from the foundation and walls.
Seal Roofing Materials
Before installing your roofing materials, you’ll want to properly seal all seams and joints to prevent water infiltration. This step guarantees your shed stays dry and protects your belongings from moisture damage.
Apply roofing cement or sealant along all roof panel connections. Don’t skip corners or edges where water typically seeps through. Use a putty knife to spread sealant evenly, creating smooth waterproof barriers.
- Peace of mind knowing rain won’t ruin your tools and equipment
- Confidence that your shed will withstand harsh weather conditions
- Satisfaction from doing the job right the first time
Check that all fasteners sit flush and seal around any protrusions like vents or pipes. Press sealant firmly into gaps, eliminating potential leak points.
Work methodically across the entire roof surface, guaranteeing complete coverage. Proper sealing now prevents costly repairs later.
Apply Weather-Resistant Siding
With your roof sealed and watertight, it’s time to focus on protecting the walls of your shed.
Choose siding that matches your climate conditions. Vinyl siding works well for most areas, while metal siding handles heavy rain better. Start at the bottom corner and work your way up, overlapping each piece according to manufacturer specifications.
Apply house wrap beneath the siding for extra moisture protection. This creates a secondary barrier against wind-driven rain.
Fasten siding securely, but don’t overtighten screws. Leave slight gaps for expansion and contraction. Check that all seams align properly and corners fit snugly. Your siding should create a continuous protective shell around your shed’s exterior walls.
Install Proper Drainage Systems
Proper drainage prevents water from pooling around your shed’s foundation and causing damage. You’ll protect your investment and avoid costly repairs down the road.
- Save money – Prevent foundation erosion and structural issues that cost hundreds to fix
- Sleep better – Know your tools and belongings stay dry during heavy rains
- Feel proud – Join the community of DIYers who built sheds that last decades
Install French drains or gravel trenches around your shed’s perimeter. Grade soil away from the foundation at 2 inches per foot for six feet.
Use perforated pipes wrapped in landscape fabric for effective water diversion. Check local building codes before starting work.
Test your drainage system after installation by simulating rainfall with a garden hose.
Painting or Staining for Longevity
Painting or staining your storage shed isn’t just about appearance—it’s your best defense against weather damage and wood deterioration.
You’ll want to choose exterior-grade paint or stain specifically designed for outdoor structures. Clean the wood surface thoroughly and let it dry completely before applying your first coat.
Apply thin, even coats rather than thick ones that might peel later. Don’t forget to paint all sides, including the roof and floor joists. Primer helps with adhesion and coverage, especially on new wood.
You should reapply every few years depending on weather conditions in your area. Stain penetrates deeper than paint, offering good protection while letting wood grain show through.
Both options will help your shed last longer and look great.
Basic Electrical and Lighting Setup
Adding electrical power and lighting to your storage shed makes it much more functional for evening use and power tool operation.
You’ll want to run electrical wire from your home’s circuit breaker to the shed, ideally using underground conduit for safety and aesthetics.
- Feel the satisfaction of working in a well-lit space where you can actually see what you’re doing
- Experience the pride of having a professional-looking setup that neighbors will admire
- Enjoy the convenience of powering tools and chargers without extension cord complications
Install a simple electrical box with outlets and a light switch. Use weatherproof covers and GFCI outlets for safety.
Run romex wire through the walls and install a basic light fixture.
Don’t forget to turn off power at the main breaker before starting any electrical work.
How to Add Interior Shelves and Storage
Several key considerations will help you maximize your shed’s interior storage potential.
You’ll want to measure your space carefully before purchasing materials. Standard plywood sheets work well for shelving, and you can cut them to fit your specific dimensions.
Don’t forget to account for wall studs when planning shelf placement. Use sturdy brackets or cleats to support your shelves properly.
Consider installing vertical storage options like pegboards for smaller tools. Adjustable shelving lets you customize spacing based on your changing needs.
Make sure heavier items go on lower shelves for safety. Labeling your storage areas helps you stay organized and find things quickly.
You’ll feel more confident when everything has its place. Proper storage makes your shed functional and welcoming.
Take time to plan strategically. Your future self will appreciate the effort you put in now.
Smart storage solutions transform any basic shed into an efficient workspace.
Common Shed Building Mistakes to Avoid
One critical mistake many people make when building a storage shed is skipping proper foundation preparation.
You’ll regret this shortcut when your shed sags or shifts within months. Don’t let poor planning sabotage your hard work.
- Ignoring local building codes – You’ll face expensive fines and forced demolition when inspectors find your shed violates regulations
- Using inadequate materials – Cheap lumber and hardware will fail quickly, leaving you to rebuild and waste money twice
- Rushing through measurements – Crooked walls and misaligned doors happen when you don’t double-check every cut and angle
These mistakes turn exciting DIY projects into frustrating nightmares.
Take time to plan properly and you’ll join the community of proud shed builders who got it right the first time.
Your future self will thank you.
How to Cut Costs on Shed Materials
While you don’t need to break the bank on expensive materials, cutting costs wisely on your shed project requires strategic planning and smart shopping.
You should comparison shop between lumber yards and home improvement stores, looking for sales and bulk pricing. Consider recycled or reclaimed materials when possible – they’re often cheaper and add character. Choose standard dimensions to avoid expensive custom cuts.
Opt for pressure-treated lumber only where necessary, like floor joists touching concrete. Buy materials during off-season sales when retailers clear inventory. Check Craigslist and Facebook Marketplace for leftover building materials from other projects.
Don’t overlook salvage yards for doors, windows, or hardware. Plan your material list carefully to avoid impulse purchases. Stick to your shopping list and resist upgrading to premium grades unless absolutely necessary for your specific situation.
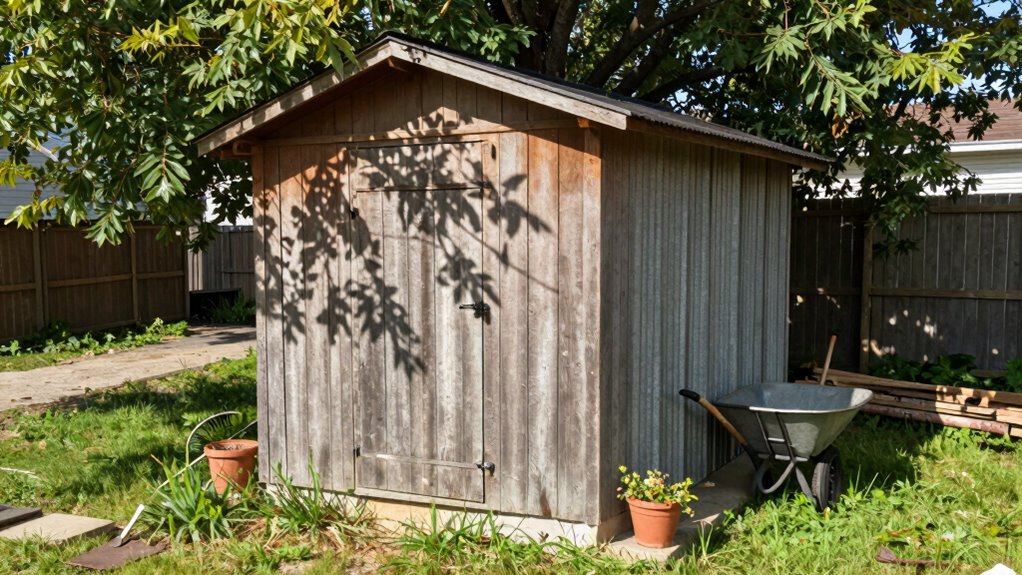
Shed Maintenance Tips for Longevity
Even though sheds seem like simple structures, they need regular maintenance to last decades rather than just a few years. You’ll save money and avoid costly repairs by staying proactive.
- Clean gutters and check roof seals – Prevent water damage that can destroy your shed’s foundation and make you feel helpless watching your investment crumble.
- Inspect and repaint exposed wood – Protect against rot and pests that could turn your storage space into a disaster zone.
- Check door hinges and locks regularly – Make certain your belongings stay secure and you don’t come home to broken entry points.
You’ve built your shed with care – don’t let it fall apart due to neglect.
Regular maintenance keeps your shed functioning properly while giving you peace of mind.
Should You Hire a Pro to Build Your Shed?
Why hire a professional for your shed project? You should consider it when you lack time, experience, or proper tools.
Professionals handle permits, ensuring your shed meets local codes. They avoid costly mistakes that novices make, like improper foundation preparation or framing errors. Your weekend might be better spent elsewhere if you’re not confident with measurements, cuts, and assembly.
However, hiring pros costs more. You’ll pay for their expertise, equipment, and labor.
DIY builds save money but require your time and learning curve. If you value precision and durability over saving dollars, professionals deliver quality results faster. They troubleshoot problems you mightn’t anticipate.
Evaluate your skills honestly. Can you follow detailed plans?
Do you own necessary tools? Are you comfortable with basic carpentry? If not, hire someone who is. Your shed will thank you later.
Conclusion
You’ve learned how to plan, build, and maintain your shed. You’ve seen how to choose materials, avoid mistakes, and save money. Now you’re ready to create a durable storage solution that’ll serve you well for years. Keep your tools organized, your space protected, and your investment secure. Build smart, build strong, build lasting.
