

You’re probably wasting more water than you realize with traditional sprinklers or hose watering. Drip irrigation systems deliver water directly to plant roots through precisely engineered tubing and emitters, operating at low pressure to minimize evaporation and runoff. This targeted approach achieves over 90% water efficiency while reducing your monthly bills. Before you start saving money and resources, you need to understand the critical components and common mistakes that can sabotage your installation.
What Is a Drip Irrigation System & How Does It Save Water?
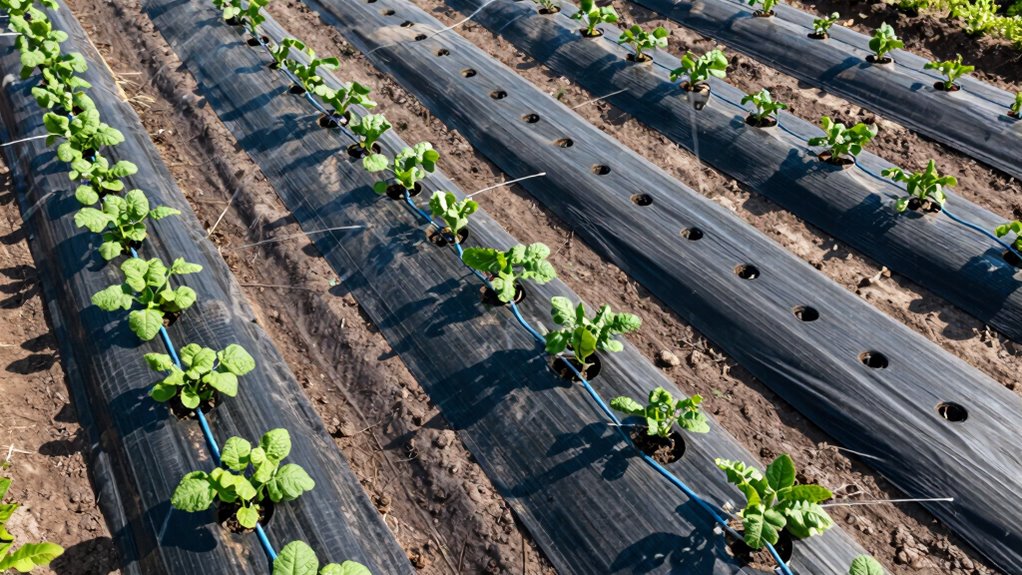
A drip irrigation system delivers water directly to plant roots through a network of tubes, pipes, and emitters that release water slowly and precisely where it’s needed most.
You control water flow rates typically between 0.5 to 2.0 gallons per hour, minimizing waste. The system operates at low pressure, reducing energy costs while maintaining consistent moisture levels.
You’ll install mainlines, submains, laterals, and emitters strategically placed near root zones. Pressure regulators guarantee uniform distribution throughout your garden.
Filtration systems prevent clogging from sediment and debris. You can automate timing with programmable controllers, delivering water during ideal absorption periods.
Mulching complements the system by retaining soil moisture and suppressing weeds.
Installation requires careful planning of tubing layouts, emitter spacing, and pressure requirements.
Maintenance involves regular filter cleaning, system flushing, and monitoring for leaks or blockages.
Why Choose Drip Systems Over Sprinklers or Hose Watering

Drip irrigation systems outperform traditional sprinklers and hose watering by delivering water directly to root zones with minimal evaporation or runoff.
You’ll achieve 90%+ water efficiency compared to 70% for sprinklers.
Drip systems eliminate wind drift and overspray onto non-target areas.
You’ll reduce disease pressure on foliage while maintaining consistent soil moisture.
Traditional methods waste water through surface evaporation and deep percolation beyond root zones.
Drip emitters operate at low pressure, reducing energy costs.
You’ll minimize weed growth between plants since water targets specific root areas.
Uniform water distribution prevents overwatering some zones while underwatering others.
Drip systems reduce labor through automated timing and precise application rates.
You’ll decrease fertilizer leaching while improving nutrient uptake efficiency.
Traditional overhead watering creates uneven distribution patterns requiring manual adjustments.
Drip irrigation provides measurable water savings while optimizing plant health through targeted delivery.
Which Drip Irrigation Systems Fit Your Project?
How do you determine which drip irrigation system best suits your specific project requirements?
You must evaluate three primary system types: surface drip, sub-surface drip, and micro-sprinkler systems. Surface drip systems deliver water directly to plant root zones through emitters placed on soil surfaces.
Sub-surface systems bury tubing deeper, reducing evaporation losses. Micro-sprinklers provide targeted overhead watering for larger areas.
Your crop type determines ideal emitter spacing and flow rates. Permanent installations require pressure-compensating emitters for uniform water distribution. Temporary setups use simpler inline emitters.
Calculate your area’s water pressure and volume capacity before selecting components. Match emitter flow rates to soil infiltration speeds. Clay soils need slower emission rates than sandy soils.
You should factor plant water requirements, local climate conditions, and maintenance accessibility into your final system selection decision.
What Parts Make Up a Drip System?
You’ll need to understand the main components that make up a drip irrigation system before installation.
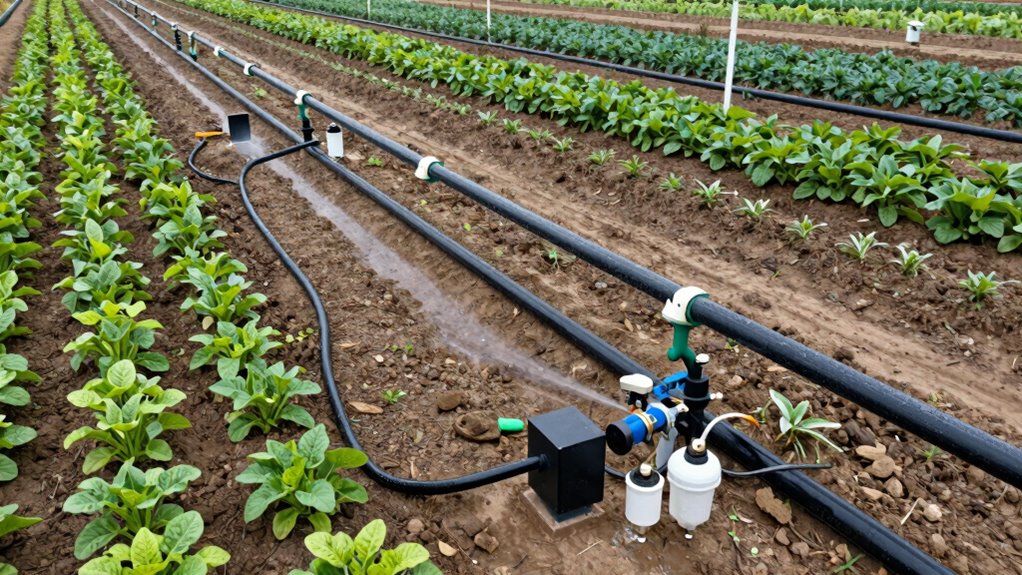
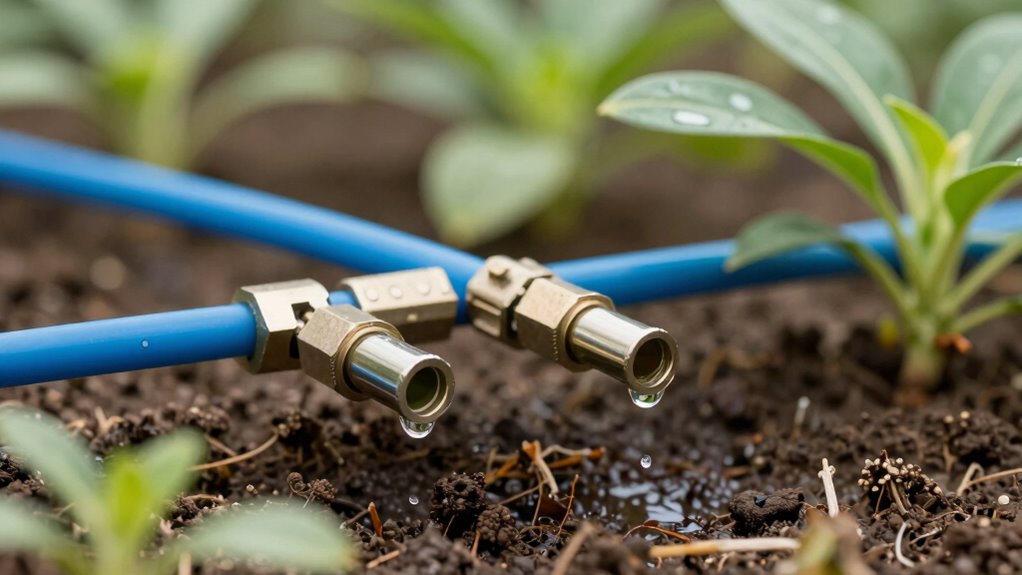
A typical drip system consists of a water source, control valves, a pressure regulator, filtration system, mainline tubing, emitters, and end caps.
These components work together to deliver precise water amounts directly to plant root zones while you follow proper installation techniques.
Main Components Explained
A drip irrigation system consists of several essential components that work together to deliver water efficiently to plant roots.
You’ll need a water source, control valve, filter to remove debris, pressure regulator, and distribution tubing. Emitters or drippers release water at controlled rates directly to root zones.
Mainline tubing connects your water source to individual plant lines. Timer controls automate watering schedules. Backflow preventer stops contaminated water from returning to your supply.
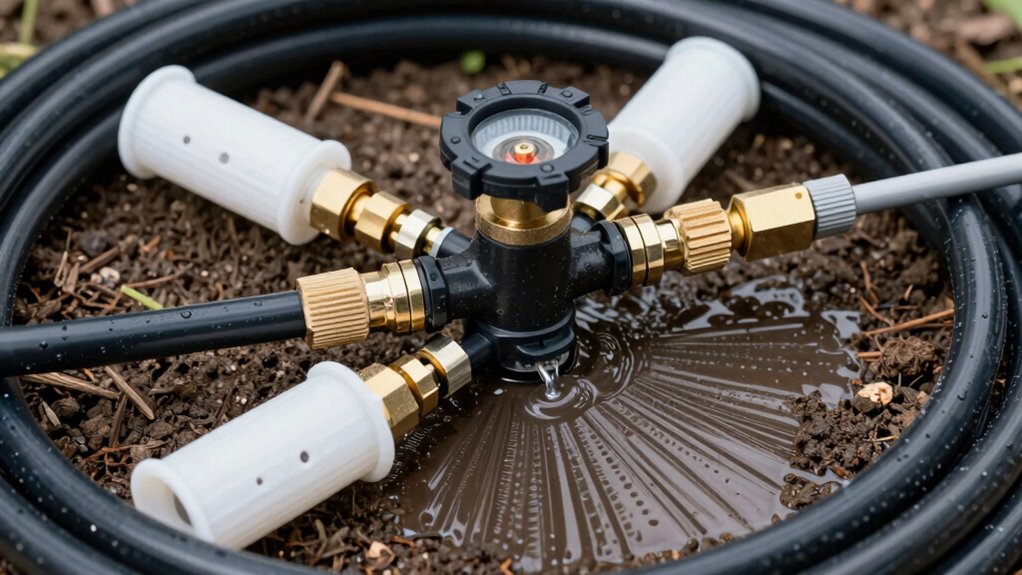
Pressure gauges monitor system performance. You should also include end caps and flush valves for maintenance. Each component must match your system’s specifications.
Choose tubing diameter based on water volume requirements. Select emitter flow rates according to soil type and plant needs.
Proper component selection guarantees your drip system operates efficiently while conserving water effectively.
Installation Tips Provided
Several key components form the foundation of an effective drip irrigation system, and understanding their roles guarantees proper installation and water conservation.
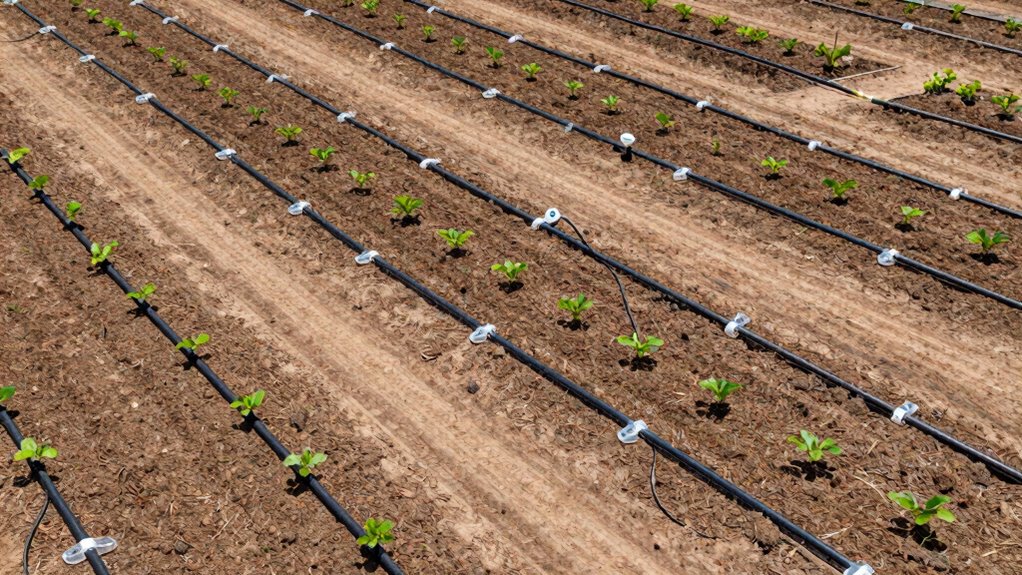
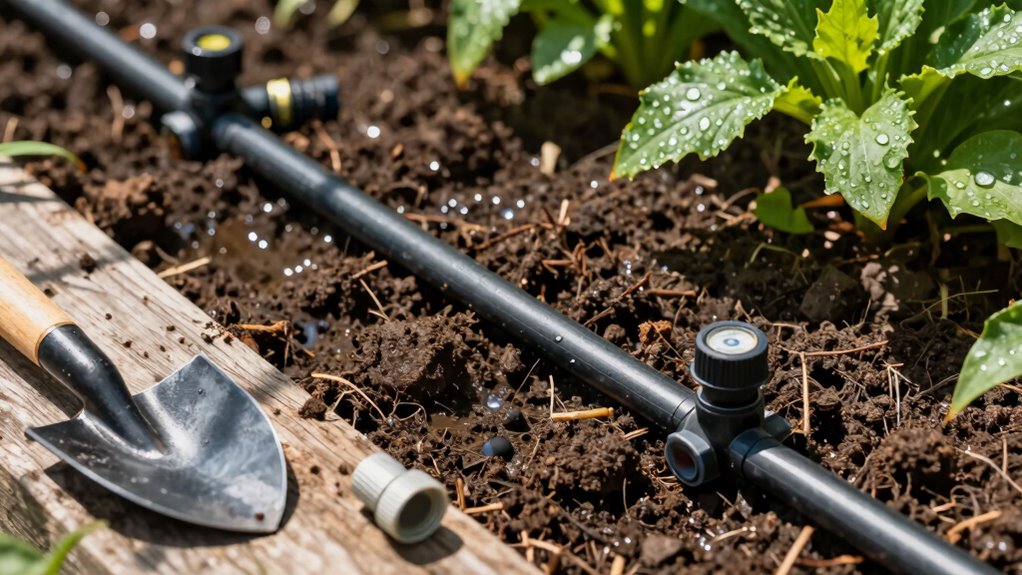
You’ll need a pressure regulator to control water flow, followed by a filter to prevent clogging. Connect your mainline tubing to a timer or controller for automated operation. Install pressure-compensating emitters every 12-18 inches along distribution tubing.
Use stakes to secure emitters and prevent movement. Don’t forget end caps to seal tubing terminations. Check connections tightly before burying components. Position emitters 6-12 inches from plant bases.
Monitor system pressure regularly. Clean filters monthly. Replace worn emitters promptly.
These installation practices assure your drip system operates efficiently while maximizing water savings and plant health.
Plan Your Layout and Pick the Right Parts
When planning your drip irrigation system, careful layout design and component selection determine both efficiency and longevity.
You must map out plant locations, calculate water requirements, and determine ideal tubing runs. Measure distances precisely and account for elevation changes that affect pressure.
Select mainlines rated for your water source pressure and flow rates. Choose distribution tubing compatible with your emitter spacing needs.
Don’t overlook quality control valves, pressure regulators, and filters essential for consistent operation.
Your local climate and soil type influence part specifications. Calculate total system capacity before purchasing components.
Consider expansion possibilities during initial design. Proper planning prevents costly modifications later.
You’ll achieve better water distribution uniformity through thoughtful layout preparation. Quality components withstand environmental stresses longer.
Take time evaluating manufacturer specifications and compatibility ratings before making purchases.
Choose the Best Emitters for Each Plant Type
Emitter selection directly impacts watering efficiency and plant health once you’ve mapped your system layout and chosen compatible tubing.
You’ll need to match emitter flow rates to specific plant requirements. Trees and shrubs require higher flow emitters, typically 1-4 gallons per hour, while vegetables and flowers thrive with 0.5-1 gallon per hour rates.
Consider pressure-compensating emitters for slopes or areas with varying elevations. Micro-sprays work well for groundcovers, delivering wider coverage patterns.
You should select inline emitters for uniform plant spacing, or point-source emitters for irregular layouts. Don’t overlook adjustable flow emitters that let you fine-tune delivery rates seasonally.
Match emitter type to soil infiltration rates—clay soils need slower delivery than sandy soils.
You’re ensuring ideal moisture levels while preventing runoff and deep percolation losses.
Install a Basic Drip System Step-by-Step
You’ll need to select components that match your water pressure and plant requirements before beginning installation.
Start by connecting your mainline tubing to the water source using appropriate fittings and a pressure regulator.
Then, you’ll install emitters at precise intervals along the tubing to deliver water directly to each plant’s root zone.
Choose The Right Components
Although selecting components for drip irrigation systems requires careful consideration, choosing the right parts secures ideal water delivery and system longevity.
You’ll need to evaluate your water source pressure and flow rate first. Select tubing with appropriate diameter – 1/2 inch for small gardens, 3/4 inch for larger areas. Choose emitters based on plant water requirements: 0.5 GPH for shallow-rooted plants, 1-2 GPH for vegetables and shrubs.
Don’t overlook pressure regulators; they prevent emitter clogging and guarantee uniform flow. Pick filters rated at 150-200 mesh to remove debris effectively.
Consider timer compatibility with your existing water supply. Quality fittings prevent leaks and system failure. Match component materials – polyethylene tubing works best with barbed fittings, while PVC requires solvent welding.
Your system’s efficiency depends entirely on these initial component choices.
Connect Tubing And Emitters
Installing a basic drip irrigation system requires careful connection of tubing and emitters to guarantee ideal water delivery.
You’ll need to cut tubing at precise intervals using sharp scissors or tubing cutters. Insert barbed fittings into holes, ensuring they’re fully seated. Push emitters onto tubing until they click into place. Space emitters according to plant needs, typically twelve to eighteen inches apart.
Connect mainline tubing to your water source using appropriate fittings. Attach poly tubing to mainline with punch tools. Test connections by running water through the system. Check for leaks at all joints.
Tighten loose connections immediately. Verify emitter flow rates match your plants’ requirements. Proper assembly prevents future maintenance issues.
Maximize Water Efficiency With Smart Settings
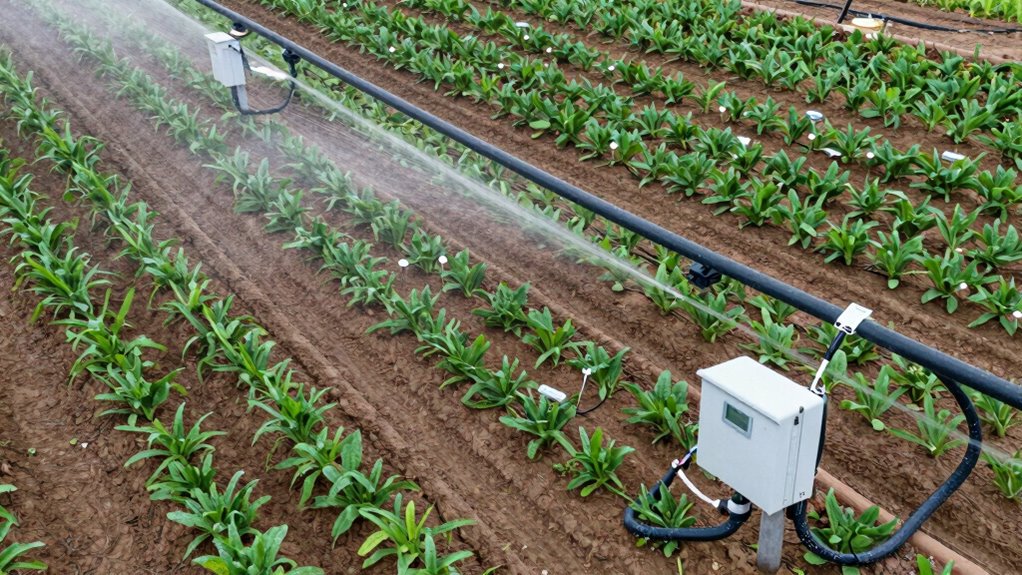
Smart drip irrigation controllers automatically adjust watering schedules based on real-time soil moisture data, ensuring plants receive exactly what they need when they need it.
You’ll enhance water usage while maintaining plant health through precise automation.
Configure your system’s smart settings to match specific plant zones and soil types. Fine-tune emission rates and timing intervals based on seasonal weather patterns and plant growth stages.
- Soil Moisture Sensors: Install sensors at root depth to trigger watering only when moisture drops below ideal thresholds
- Weather Integration: Connect controllers to local weather stations for automatic adjustments during rainfall or temperature fluctuations
- Plant-Specific Programming: Set individualized watering volumes and frequencies for different plant species within your landscape zones
You’re joining a community of water-conscious gardeners who rely on technology for sustainable landscaping practices.
Avoid These Common Setup Mistakes
While drip irrigation systems offer superior water efficiency, incorrect installation practices can undermine their effectiveness and lead to wasted resources.
You must avoid placing emitters too close to plant stems, which causes waterlogging and root rot.
Don’t install lines without proper pressure regulation, as this leads to uneven water distribution.
You should never bury drip tubing deeply, since roots will grow into the moist soil and block emitters.
Avoid connecting incompatible materials that create leaks.
Don’t 忽视 zone planning – mixing plants with different water needs wastes water.
You mustn’t skip filtration, which prevents clogging.
Finally, avoid improper slope installation without pressure-compensating emitters, causing uneven watering patterns.
These mistakes transform your efficient system into a water-wasting nightmare.
Fix Common Problems or Keep Your System Running

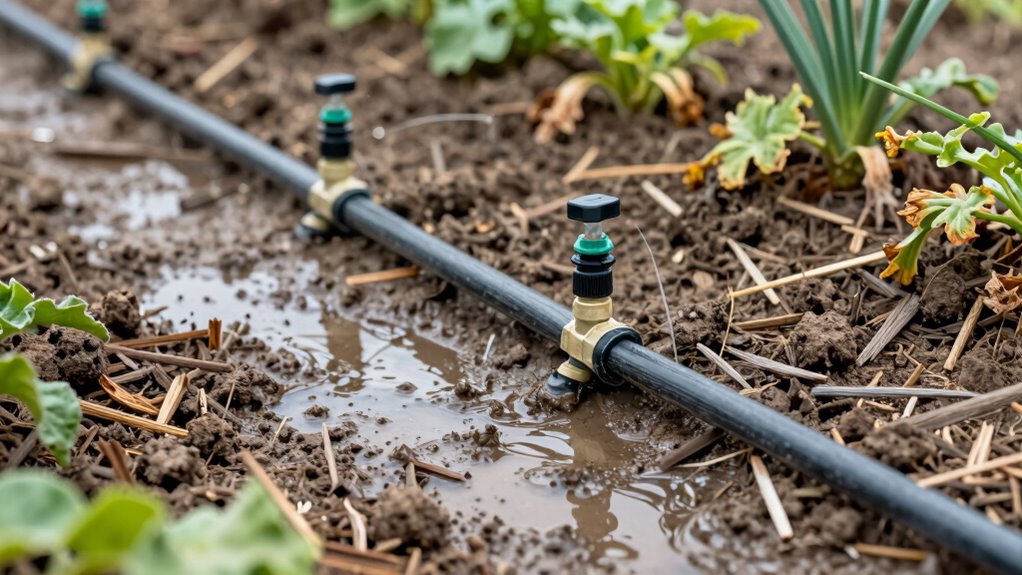
You’ll need to troubleshoot low water pressure by checking your system’s inlet pressure and adjusting the pressure regulator if it’s below 25 PSI.
Clean clogged emitters regularly using a small brush or compressed air to remove debris, algae, and mineral deposits that block water flow.
Maintain timer settings properly by programming consistent watering schedules and adjusting duration based on seasonal plant water requirements.
Troubleshoot Low Water Pressure
Low water pressure in drip irrigation systems often stems from clogged emitters, damaged tubing, or inadequate main line sizing. You’ll need to systematically identify the root cause to restore ideal performance.
Check these critical components:
- Filter assembly: Dirty filters restrict flow considerably
- Pressure regulator: Malfunctioning regulators cause inconsistent downstream pressure
- Main line diameter: Undersized tubing creates excessive friction loss
Start by examining your system’s inlet pressure using a gauge. Compare readings against manufacturer specifications.
Inspect tubing for kinks, punctures, or collapsed sections that restrict water flow. Verify your filter’s condition and verify proper installation.
Test the pressure regulator’s output pressure. If it’s faulty, replace it immediately.
Calculate your system’s total gallons per minute requirement and confirm your main line diameter meets specifications. Undersized mains cause pressure drops across multiple zones.
Clean Clogged Emitters Regularly
Clogged emitters are among the most common issues that compromise drip irrigation system efficiency, reducing water delivery and potentially damaging your entire setup. You should disassemble emitters monthly to remove debris, algae, and mineral deposits.
Use a small brush or compressed air to clear blockages. Soak severely clogged emitters in vinegar solution for calcium buildup. Inspect filter screens regularly and replace when necessary.
Check water quality before installation to prevent future clogging. You must maintain consistent water pressure between 15-30 PSI. Examine emitter performance visually during operation.
Replace worn emitters showing reduced flow rates. Keep spare emitters handy for quick repairs. Document maintenance schedules to track system performance.
Proper emitter cleaning prevents costly system failures and maintains ideal water distribution throughout your irrigation zones.
Maintain Timer Settings Properly
Why does your drip irrigation system fail to activate at scheduled times?
You’ve probably checked your emitters and water pressure, but timer malfunctions silently sabotage your water-saving efforts. Proper timer maintenance guarantees your system delivers precisely measured water when your plants need it most.
Your irrigation timer requires regular attention to maintain peak performance:
- Battery replacement – Install fresh batteries every six months to prevent unexpected shutdowns during critical watering periods.
- Program verification – Cross-check your seasonal watering schedules monthly, adjusting duration and frequency as plant needs change throughout growing cycles.
- Connection inspection – Examine all wire connections and terminals quarterly for corrosion or loose fittings that interrupt electrical signals.
Don’t let timer failures waste precious water or stress your plants.
You’re part of a community that values sustainable gardening practices. Keep your system running efficiently.
Calculate Your Potential Water and Cost Savings
How much money and water can you actually save by switching to drip irrigation?
You’ll typically reduce water usage by 30-50% compared to sprinkler systems. Calculate your current water consumption by multiplying your irrigation area by your current system’s application rate.
Drip systems deliver water directly to plant roots at 0.5-2.0 gallons per hour, eliminating evaporation losses of 20-30% common with overhead sprinklers.
Your cost savings depend on local water rates and system efficiency. Expect to save $50-$200 annually on water bills for residential properties. Factor in reduced fertilizer costs since drip systems minimize nutrient runoff by 40-60%.
You’ll also cut electricity costs for water pumping. Calculate payback periods by comparing system installation costs against monthly savings. Most homeowners see return on investment within 2-3 years through combined water, energy, and fertilizer savings.
Conclusion
Drip irrigation systems deliver water directly to plant roots through emitters, minimizing evaporation and runoff while achieving over 90% efficiency. You’ll reduce water waste considerably compared to sprinklers or hose watering. Smart controllers and proper installation maximize savings. Calculate your potential water and cost reductions before investing. Common setup mistakes can undermine efficiency, so plan carefully. Regular maintenance prevents clogs and pressure issues. Your system’s success depends on selecting appropriate components and precise installation techniques.
