

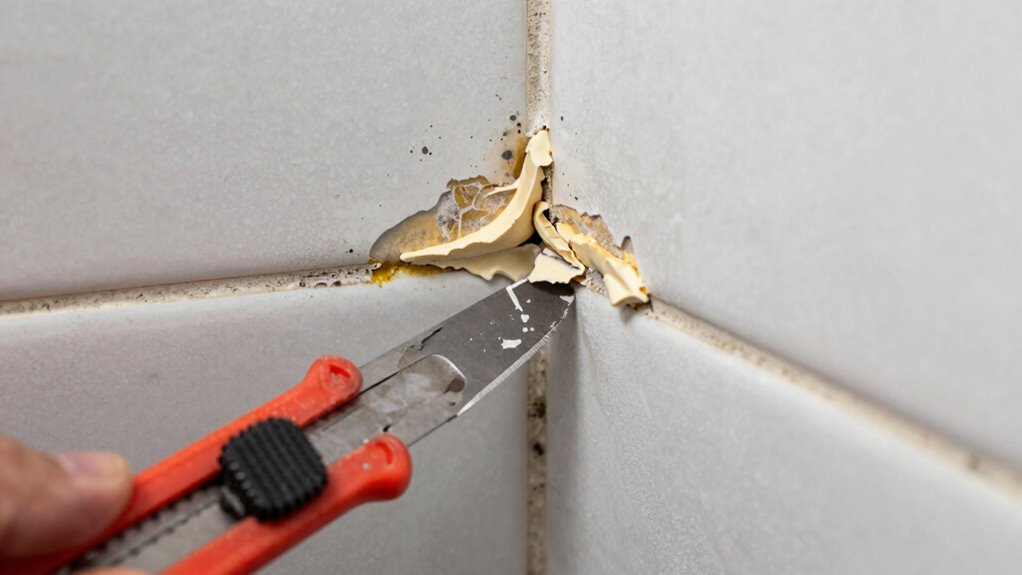
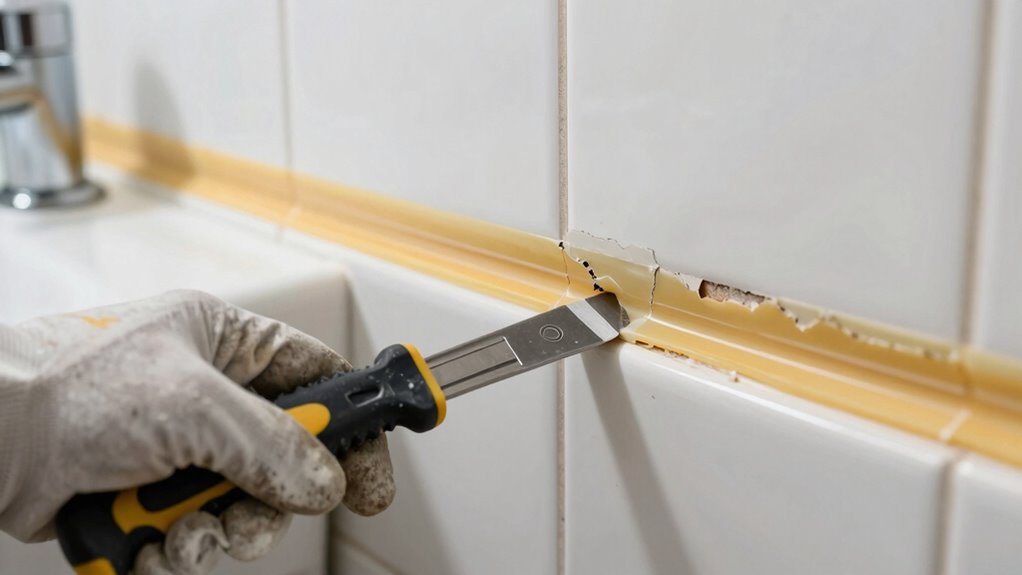
Like peeling an old bandage, removing caulk requires patience and the right approach. You’ll need sharp tools and strategic techniques to avoid damaging surfaces underneath. Start by cutting away loose sections with a utility knife, but don’t stop there – the real challenge lies in what comes next. Proper caulk removal isn’t just about pulling it off; it’s about preparing a clean surface for what follows.
Why Proper Caulk Removal Matters
While you might think that removing old caulk is just about making your surfaces look clean, proper caulk removal actually prevents moisture damage and guarantees new caulk adheres correctly.
You need to understand that deteriorating caulk creates gaps where water seeps behind tiles, windows, or fixtures, leading to costly repairs. Removing old caulk completely eliminates these hidden moisture pathways that cause mold, rot, and structural issues.
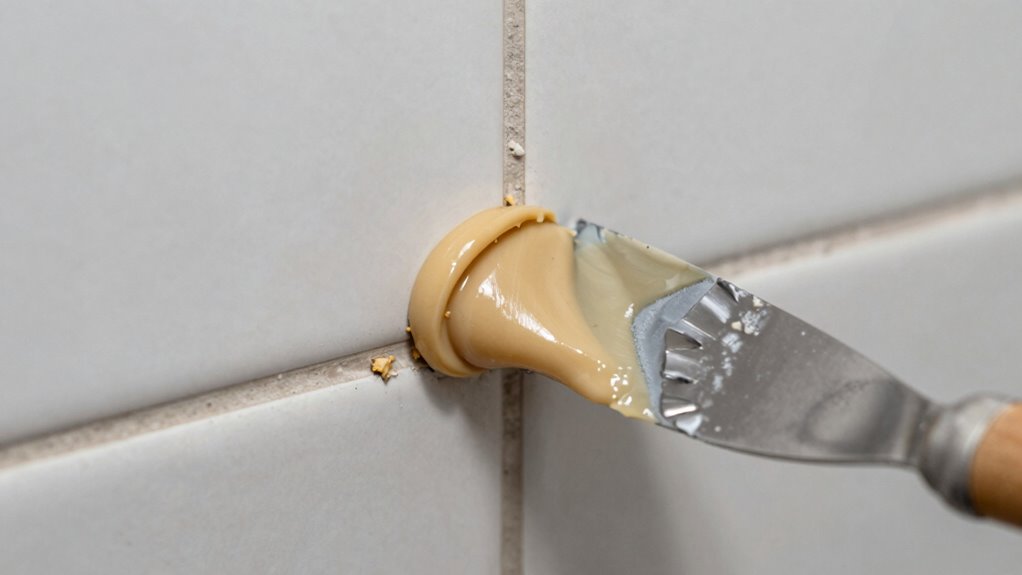
When you prepare surfaces properly, new caulk bonds effectively, creating lasting seals. You’re not just improving appearances—you’re protecting your home’s integrity.
Proper removal means cutting away all loose, cracked, or peeling caulk until you reach clean, dry substrate. This thorough approach maintains that your repair work lasts years, preventing future headaches and giving you confidence that your home remains secure and watertight.
Tools You’ll Need for Caulk Removal
You’ll need specific tools and safety gear before starting caulk removal.
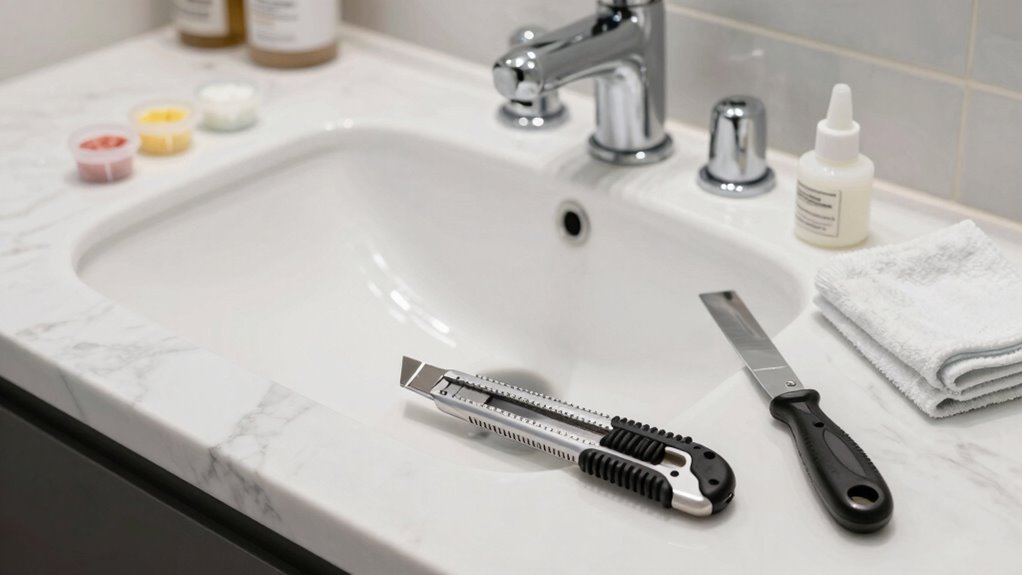
Essential removal tools include a utility knife, caulk removal tool or putty knife, and a heat gun for stubborn sections.
Don’t forget safety equipment like work gloves, safety glasses, and a dust mask to protect yourself during the process.
Essential Removal Tools
Having the right tools makes quick work of even the toughest caulk removal jobs.
You’ll need a utility knife or caulk removal tool to slice through old caulk beads. A putty knife or scraper helps pry away stubborn sections. For adhesive caulk, grab a plastic scraper to avoid surface damage.
Heat gun or hair dryer softens tough caulk for easier removal. Sandpaper or a sanding block smooths remaining residue. Clean lint-free cloths wipe away debris. Isopropyl alcohol removes leftover adhesive perfectly.
Keep a vacuum handy for quick cleanup. These essentials handle most caulk types effectively.
Safety Equipment Needed
Several key safety items protect you during caulk removal projects.
You’ll want to gear up properly before starting this messy work.
- Safety glasses shield your eyes from flying debris and chemical splatter.
- Work gloves protect your hands from sharp tools and irritating substances.
- Dust mask or respirator prevents inhaling harmful particles and fumes.
- Protective clothing covers your skin from chemical contact and mess.
These basics keep you safe while removing old caulk.
Don’t skip gear preparation – it’s essential for everyone tackling this job.
Your safety matters, and proper equipment makes the difference between a successful project and an accident.
Gear up completely before you start cutting or scraping caulk.
How to Soften Caulk Before Removal
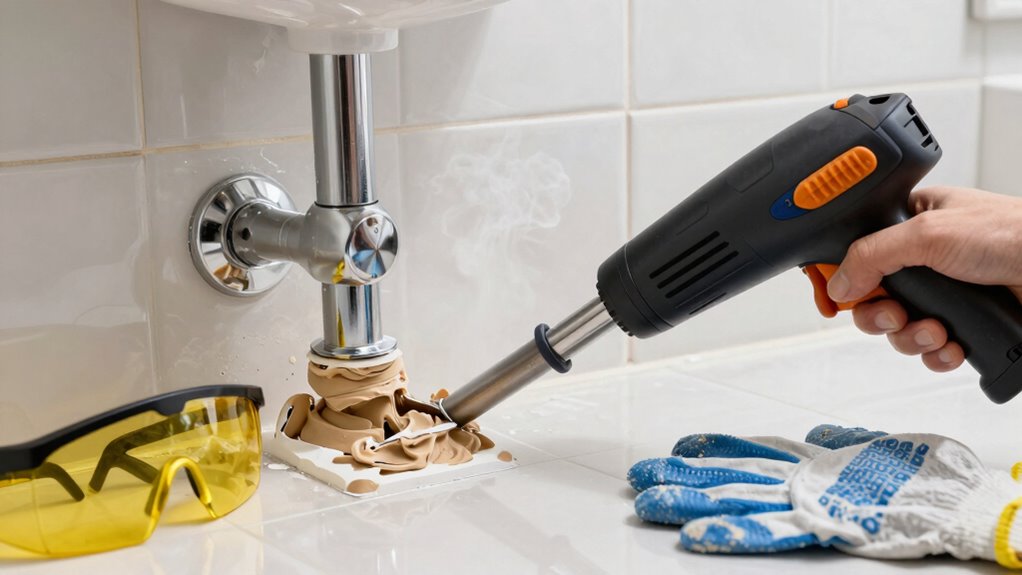
One effective method for softening old caulk involves applying heat directly to the sealant. You should use a hair dryer or heat gun set to medium temperature, holding it six inches from the caulk line.
Move the heat source back and forth continuously to prevent surface damage. Test the caulk’s softness by gently poking it with a plastic scraper.
Another approach uses chemical solvents like acetone or mineral spirits. Apply these directly to the caulk using a brush, letting them penetrate for several minutes.
You’ll notice the caulk begins curling at the edges when properly softened.
For water-based caulk, warm water works effectively. Soak old towels in hot water and lay them over the caulk for ten minutes.
This method requires patience but avoids harsh chemicals entirely.
Techniques to Remove Silicone Caulk
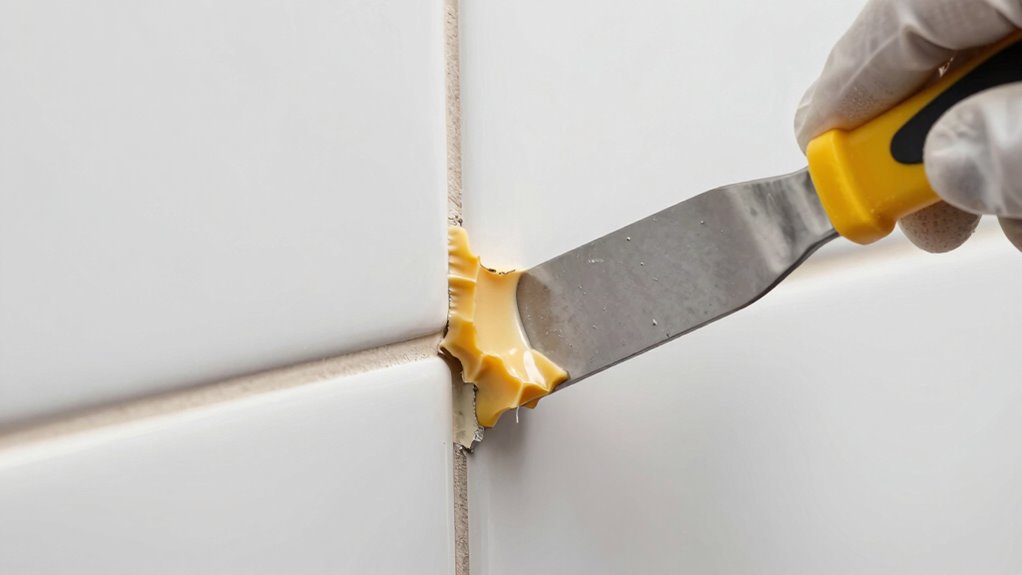
Start by cutting away any loose or crumbling silicone caulk with a utility knife or razor blade. This initial step makes the remaining caulk easier to grip and pull.
- Use a caulk removal tool – These specialized scrapers fit perfectly into joints and cleanly lift silicone without damaging surrounding surfaces.
- Apply steady, consistent pressure – Pull the caulk at a shallow angle while maintaining even force to avoid tearing or leaving residue behind.
- Work in small sections – Tackle manageable areas to guarantee thorough removal and prevent the caulk from re-hardening as you work.
- Clean immediately – Wipe away debris and remaining silicone bits right away with mineral spirits or rubbing alcohol for a pristine surface.
How to Remove Painted or Layered Caulk
You’ll need to identify painted caulk layers before softening those old painted seals with heat or solvent.
Multiple caulk applications require careful scraping to remove each layer without damaging the underlying surface.
Start by testing a small area to determine the best removal method for your specific painted caulk situation.
Identify Painted Caulk Layers
Before attempting removal, identify whether your caulk has been painted over or layered with additional applications. Recognizing these conditions saves you time and prevents damage to surrounding surfaces.
- Visual inspection reveals painted caulk through uniform color covering joint lines, while natural caulk shows aging discoloration.
- Physical testing involves gently scraping small areas with a putty knife – painted layers chip away cleanly, while unpainted caulk tears irregularly.
- Layer counting requires examining cross-sections at corner edges where you can see distinct material boundaries between applications.
- Texture analysis helps differentiate smooth painted surfaces from rough, weathered caulk that hasn’t been covered.
Accurate identification prevents you from using incorrect removal techniques that could damage substrates or leave residue behind.
Soften Old Painted Seals
Once you’ve identified painted or layered caulk through visual and physical inspection, the next step involves softening these hardened seals to make removal manageable.
Apply heat using a hair dryer or heat gun, moving steadily along the caulk line at medium heat settings. Don’t overheat or you’ll damage surrounding materials.
For stubborn seals, use a caulk softener or solvent specifically designed for painted caulk removal. Apply it directly onto the caulk and let it penetrate for several minutes. You’ll notice the caulk beginning to swell and become more pliable.
Work in small sections, reapplying heat or solvent as needed. Test your chosen method on an inconspicuous area first to verify compatibility with your surface materials.
Scrape Multiple Caulk Applications
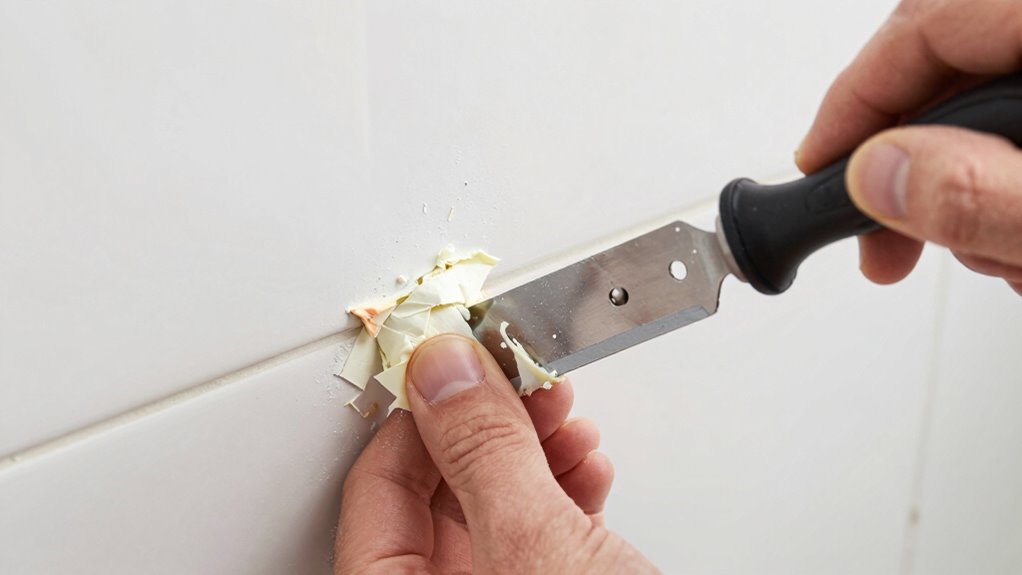
When dealing with multiple layers of caulk, scraping becomes essential after softening the material. You’ll need patience and the right technique to remove stubborn layered applications effectively.
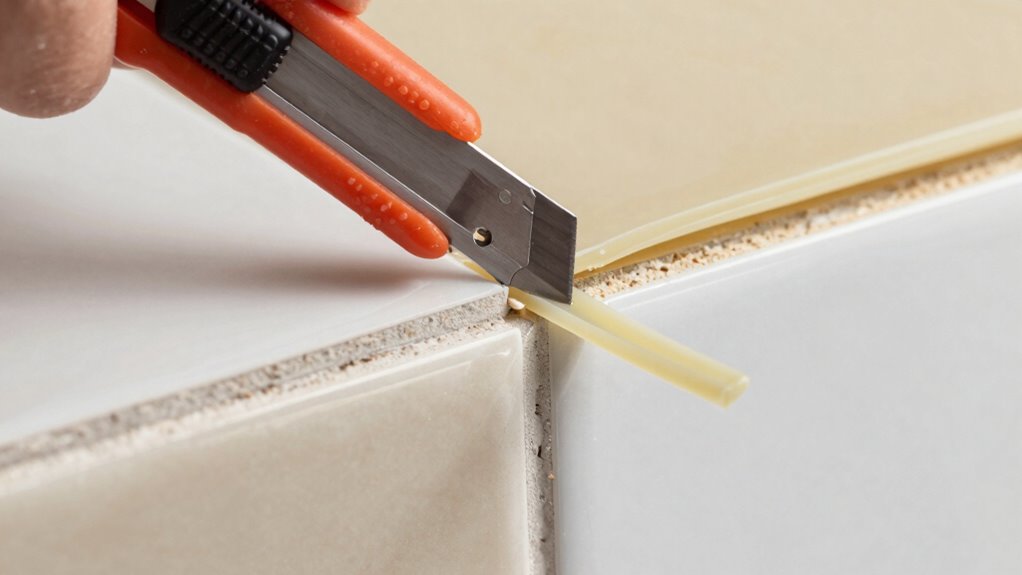
- Use a sharp utility knife at a 45-degree angle to carefully slice through painted caulk layers without damaging surrounding surfaces.
- Apply steady pressure while scraping with a plastic putty knife or caulk removal tool, working systematically from thick areas toward thinner sections.
- Work in small sections to prevent the softened caulk from hardening again, guaranteeing complete removal before moving forward.
- Clean residue immediately with mineral spirits or adhesive remover, then wipe dry to prepare the surface for new caulk application.
Multiple layers require persistence, but proper technique guarantees clean results every time.
When to Use Caulk Remover Chemicals
You should consider caulk remover chemicals whenever standard methods like scraping or cutting prove ineffective.
When old caulk stubbornly refuses to budge, especially silicone varieties, chemical removers become your best option. These products soften hardened caulk, making removal considerably easier.
Choose chemical removers specifically designed for your caulk type. Acrylic caulk responds well to standard removers, while silicone requires specialized formulations.
Apply the chemical according to manufacturer instructions, allowing adequate dwell time for penetration.
Work in well-ventilated areas and wear protective gear. Chemical removers work faster on fresh applications but effectively tackle aged caulk too.
Test products on hidden areas first to verify compatibility with underlying surfaces. You’ll achieve cleaner results faster compared to mechanical methods alone.
How to Scrape Off Residue Safely
You’ll need to choose the right scraping tools for your surface type to avoid damage.
Protect surrounding areas with tape or plastic sheeting before you begin.
Proper technique prevents gouging and guarantees complete residue removal.
Safe Removal Techniques
Although scraping old caulk residue can be tedious, using proper techniques prevents damage to underlying surfaces. You’ll achieve cleaner results while protecting your materials.
- Work in small sections – tackle manageable areas to maintain control and avoid slipping.
- Keep your blade angled low – hold scraper at 30-45 degrees to prevent gouging delicate surfaces.
- Apply steady, even pressure – let the tool do the work instead of forcing it aggressively.
- Move systematically – follow consistent patterns like side-to-side motions to catch all residue.
These methods guarantee you remove caulk completely without marring surrounding areas.
Your careful approach protects both porous and non-porous surfaces while achieving professional-looking results that’ll make any homeowner proud.
Proper Tool Selection
Choosing the right tools makes all the difference after you’ve mastered safe removal techniques.
You’ll need a sharp utility knife or caulk removal tool for precision work. A plastic scraper works best for delicate surfaces, while metal scrapers handle tougher jobs.
Select putty knives in various widths—narrow ones for tight corners, wider ones for flat areas. Heat guns or hair dryers soften stubborn caulk effectively. Grab a stiff-bristled brush for cleaning residue from porous materials.
Don’t forget safety gear: gloves protect your hands, and safety glasses shield your eyes from flying debris. Quality tools prevent damage and make cleanup easier.
Invest in durable options that’ll serve you well beyond this project. Your results depend heavily on tool selection.
Surface Protection Methods
Protecting surfaces during caulk removal prevents costly damage that’s often irreversible. You need reliable protection strategies before scraping residue.
- Mask adjacent areas with painter’s tape to shield surfaces from accidental scratches or chemical contact.
- Lay down drop cloths or plastic sheeting to catch debris and prevent flooring damage during cleanup.
- Apply petroleum jelly along caulk lines to help release stubborn sections while protecting underlying materials.
- Use proper cutting angles when scraping – hold tools at shallow angles to avoid gouging surfaces while removing residue effectively.
These methods guarantee clean caulk removal without compromising surrounding areas, giving you professional results every time.
How to Loosen Stubborn Caulk
When caulk has been in place for years, it often bonds tenaciously to surfaces, making removal a significant challenge. You’ll need patience and the right techniques to break this stubborn adhesion.
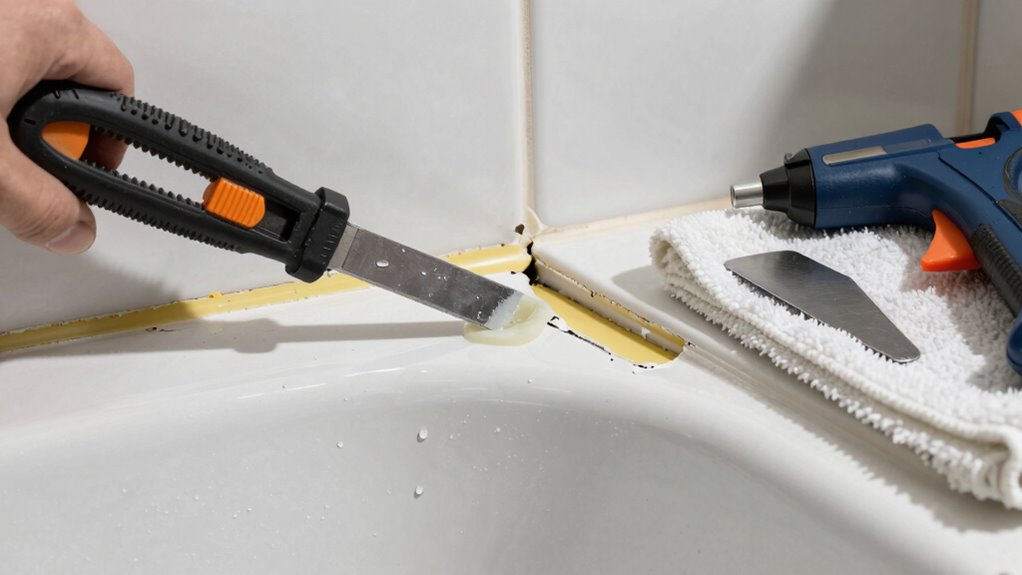
Start by cutting along the caulk bead with a utility knife at a shallow angle. Work in small sections, scoring deeply without gouging underlying materials.
Apply heat using a hair dryer or heat gun to soften the caulk gradually. Hold the heat source six inches away, moving continuously to prevent surface damage.
For particularly resistant areas, use a plastic putty knife or specialized caulk removal tool. Insert the blade under loosened edges and work systematically along the joint.
Chemical caulk removers can help break down old silicone, but always test in inconspicuous areas first. Work methodically, applying steady pressure rather than forcing tools deeper.
How to Clean and Prep Surfaces After
After you’ve successfully removed the old caulk, thoroughly clean the exposed surfaces to confirm proper adhesion for the new sealant. Residue and debris left behind will compromise your new caulk’s effectiveness.
- Scrub with isopropyl alcohol – Use a cloth or brush to remove any remaining adhesive or silicone particles.
- Wipe down with warm soapy water – This removes dust and prepares surfaces for primer application.
- Apply surface primer – This step assures maximum bonding strength between old materials and new sealant.
- Let everything dry completely – Moisture trapped underneath causes premature failure and mold growth.
You’re not just cleaning surfaces; you’re creating the foundation for a lasting seal that protects your home.
Take pride in this step – it’s what separates good DIYers from great ones. Your finished project will thank you.
Avoid These 5 Caulk Removal Mistakes

While removing old caulk might seem straightforward, mistakes during this process can compromise your entire project. You shouldn’t rush through cutting, as hasty moves create uneven surfaces others will notice.
Don’t skip scoring the caulk line completely, thinking it’ll save time. You’ll end up tearing surrounding materials.
Avoid using metal tools aggressively, which gouge surfaces and create repair headaches. Never ignore manufacturer’s removal instructions for specialty caulk types.
You’re not saving effort by skipping prep work. Don’t forget protecting adjacent areas from chemical solvents.
Finally, you shouldn’t attempt removal when caulk is wet or improperly cured. These shortcuts seem efficient but create visible flaws others will see.
Take time doing it correctly. Your finished project deserves proper attention to detail.
When to Call a Professional for Help
Although you might feel confident tackling caulk removal yourself, certain situations demand professional expertise to avoid costly mistakes.
You shouldn’t hesitate to call experts when faced with challenging circumstances that could damage your property or create safety hazards.
- Extensive mold growth – When black mold spreads beyond caulk lines, professionals use proper containment and removal techniques to protect your health.
- Multiple failed attempts – If you’ve damaged surfaces or left residue after several tries, experts have specialized tools and chemicals for clean removal.
- Large commercial projects – Extensive caulking jobs in offices or retail spaces require professional efficiency and equipment you don’t possess.
- Structural concerns – When caulk removal involves windows, doors, or areas affecting building integrity, professionals guarantee proper sealing and weatherproofing.
Conclusion
Like a surgeon wielding precise instruments, you must approach caulk removal with methodical care. Each tool serves as your scalpel—utility knife, removal tool, heat gun. Don’t rush the process; stubborn caulk yields only to patience and proper technique. Clean thoroughly afterward, ensuring surfaces are pristine for new applications. Remember, haste makes waste, and sloppy removal creates future problems. Master this craft, and your caulking projects will endure like well-built foundations.
