

You need to carefully plan your shade netting installation to protect crops effectively. Start by measuring your growing area and selecting high-density polyethylene netting with UV protection. Choose a durable support frame that allows 18-24 inches of clearance above plants. Proper tension and secure fastening prevent sagging and guarantee consistent coverage. What critical mistake could undermine your entire setup?
Choose the Right Shade Percentage for Plant Health
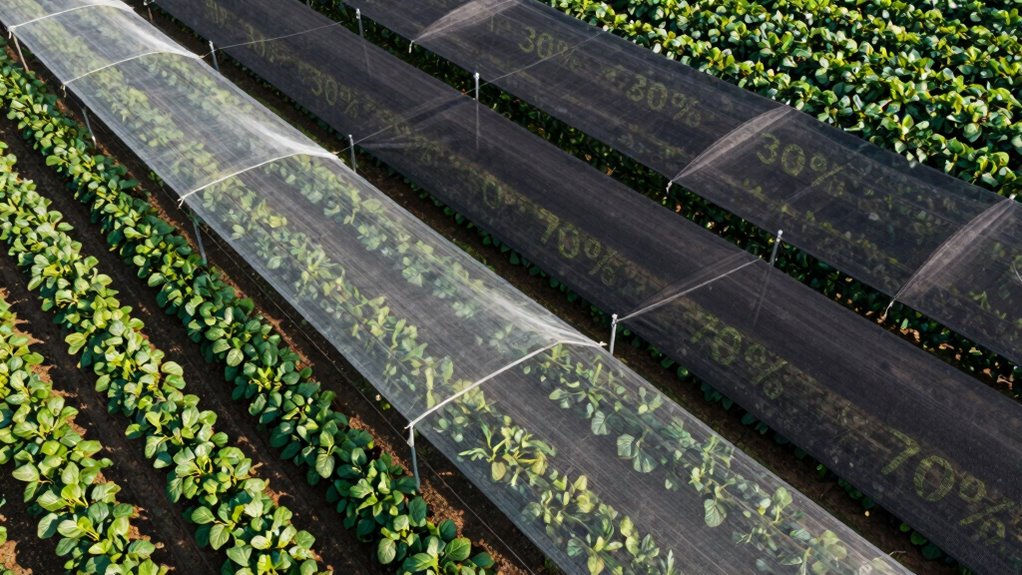
When selecting shade netting, you must consider the specific light requirements of your plants to guarantee ideal growth and health. Different crops demand varying shade percentages ranging from 30% to 90%.
You’ll need to match the shading level to each plant’s photosynthetic needs. Leafy greens typically require 50-70% shade, while tomatoes need 30-50%.
Measure your growing area’s existing light intensity first. Calculate the required shade percentage by evaluating your plants’ tolerance levels. Don’t guess – research each crop’s specific requirements.
Too much shade reduces yields and causes weak growth. Insufficient shading leads to sunburn and heat stress.
You’re part of a community that values precision farming. Make data-driven decisions based on plant physiology. Test different shade percentages in small sections before full installation.
Monitor plant responses closely during the first growing cycle.
Pick Durable Materials for Long-Lasting Shade Netting
While selecting shade netting materials, you must prioritize durability to guarantee long-term performance and cost-effectiveness.
Choose high-density polyethylene with UV-stabilized additives that resist degradation from sunlight exposure. Look for knitted mesh construction rather than woven types, as knitted materials maintain structural integrity longer.
Select netting with reinforced edges and grommets that won’t tear under tension. Avoid cheap alternatives that deteriorate quickly, causing frequent replacements. Invest in commercial-grade materials rated for agricultural use, ensuring they withstand weather conditions and mechanical stress.
Check manufacturer specifications for tensile strength and UV resistance ratings. Quality materials may cost more initially but provide better value through extended lifespan.
Your crop protection depends on reliable netting that maintains shading effectiveness season after season.
Measure Your Growing Area for Accurate Netting Size
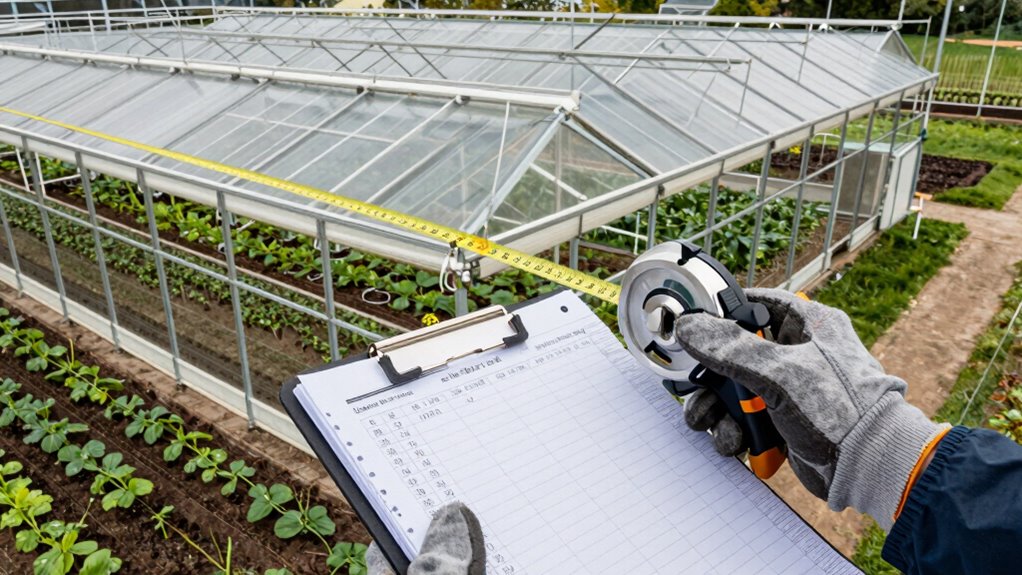
You’ll need to measure your growing area’s length and width accurately to calculate the total square footage.
Next, determine your netting coverage needs based on the specific dimensions and layout of your space.
These precise measurements guarantee you purchase the correct amount of shade netting for ideal coverage.
Measure Length And Width
Accurate measurement of your growing area’s length and width forms the foundation for proper shade netting installation. You’ll need a reliable measuring tape or laser measure for this task.
Start by identifying your growing area’s longest side, then measure from one end to the other. Record this measurement as your length. Next, measure the perpendicular distance across the shortest side, recording this as your width.
Take measurements at multiple points along each side, especially for irregularly shaped areas. Don’t forget to account for any obstacles like posts, trees, or structures that might affect netting placement.
Write down both measurements clearly. Double-check your work to prevent ordering incorrect netting sizes. These precise measurements guarantee your shade netting fits properly and provides the best crop protection.
Calculate Total Square Footage
Calculating your growing area’s total square footage requires multiplying your previously recorded length and width measurements.
Take your longest dimension and multiply it by the widest dimension to determine the total area needing coverage. For irregularly shaped growing spaces, break the area into smaller rectangular sections and calculate each separately before adding them together.
Record this square footage carefully since it directly impacts your shade netting purchase decisions.
Accurate calculations prevent ordering insufficient netting that leaves crops exposed or purchasing excess material that wastes money. Double-check your measurements before moving forward with netting selection.
Precision in this step guarantees your shade installation fits properly and functions effectively across your entire growing area.
Determine Netting Coverage Needs
Determining your shade netting coverage needs begins with systematically measuring your growing area’s dimensions.
Grab a measuring tape and record the length and width of your crop space. Don’t forget to account for any irregular shapes or obstacles like trees, structures, or pathways that might affect coverage requirements. Measure twice to verify accuracy before purchasing materials.
Consider adding extra footage around perimeter edges for securing the netting properly. Your total area measurement directly correlates to the netting size you’ll need. Factor in overlap requirements where sections connect.
Remember that insufficient coverage leaves crops vulnerable while excess material creates waste. Calculate your exact square footage based on these precise measurements.
This systematic approach guarantees you purchase the correct amount of shade netting for ideal crop protection.
Select Support Frames That Hold Up Over Time

When selecting support frames for shade netting, you should prioritize materials and construction methods that withstand environmental stresses over extended periods.
Your frame choice directly impacts crop protection and system longevity, so don’t compromise on quality.
Consider these critical factors:
- Material durability – Choose galvanized steel or aluminum over untreated metals to resist corrosion and rust.
- Structural integrity – Ascertain joints and connections use reinforced welding or heavy-duty hardware that won’t loosen.
- Load-bearing capacity – Calculate maximum wind loads and snow accumulation your area experiences.
You’ll want frames that maintain their strength through seasonal temperature fluctuations and UV exposure.
Proper frame selection prevents costly replacements and guarantees consistent crop shading.
Remember that investing in robust support structures pays dividends through years of reliable service life.
Gather Tools for Easy Installation

Having selected durable support frames that withstand environmental stresses, you’ll now need to gather the right tools for efficient installation.
Start with a power drill and appropriate bits for securing frame connections. Grab a tape measure to verify dimensions and spacing accuracy. You’ll need wire cutters for trimming excess material and a utility knife for precise cuts.
Don’t forget pliers for adjusting tension cables and a level to guarantee proper alignment. A ladder or step stool provides necessary height access. Collect zip ties or cable clamps for securing netting to frames.
Have a hammer ready for stake installation if needed. Keep a wrench set handy for tightening bolts. Finally, grab work gloves to protect your hands during the installation process.
These tools streamline your setup efficiently.
Prepare Your Ground for Shade Netting Setup
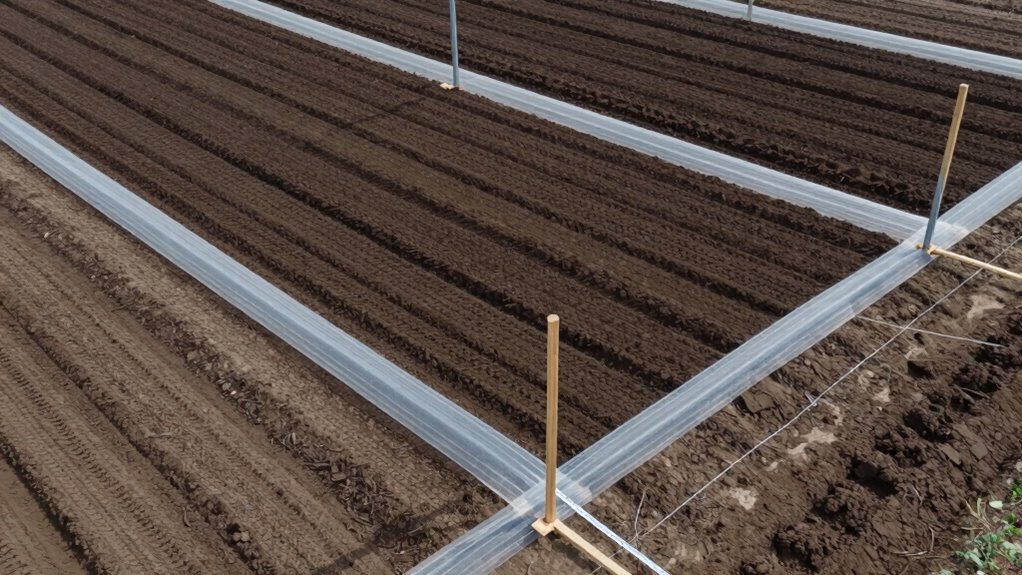
You must clear and level your soil surface before installing shade netting.
Remove all debris, rocks, and obstacles that could interfere with proper netting placement.
This preparation guarantees your shade structure will have a stable, even foundation.
Clear And Level Soil Surface
Prepare the soil surface by removing all vegetation, debris, and obstacles that could interfere with shade netting installation. You’ll create a smooth, even foundation that guarantees proper netting tension and coverage.
Use a rake or hoe to break up compacted areas and remove stones, roots, and uneven mounds.
- Grade the surface – Use a shovel or garden rake to eliminate low spots and high areas, creating uniform elevation across your designated growing area.
- Check soil moisture – Work with slightly moist soil that’s neither muddy nor completely dry, allowing preferable leveling conditions.
- Verify measurements – Confirm your cleared area matches planned shade netting dimensions, accounting for frame structure placement and anchor points.
Remove Debris And Obstacles
Before installing shade netting, clear the designated area of any debris and obstacles that could interfere with proper setup. Remove rocks, sticks, weeds, and leftover plant material completely. Clear away any trash or manufacturing waste that might’ve accumulated.
Eliminate existing structures like old stakes, broken irrigation lines, or abandoned trellising systems. Check for holes, uneven ground, or soil variations that could affect stability. Remove animal burrows or tunnels near your intended installation zone.
Clear vegetation that extends beyond your planned coverage area. Verify pathways remain unobstructed for future maintenance access. Check neighboring areas for overhanging branches or structures that might compromise your setup.
Create a clean slate for your shade netting framework. This thorough preparation prevents installation complications and guarantees your crop protection system functions effectively long-term.
Install Shade Netting Over Raised Beds Efficiently
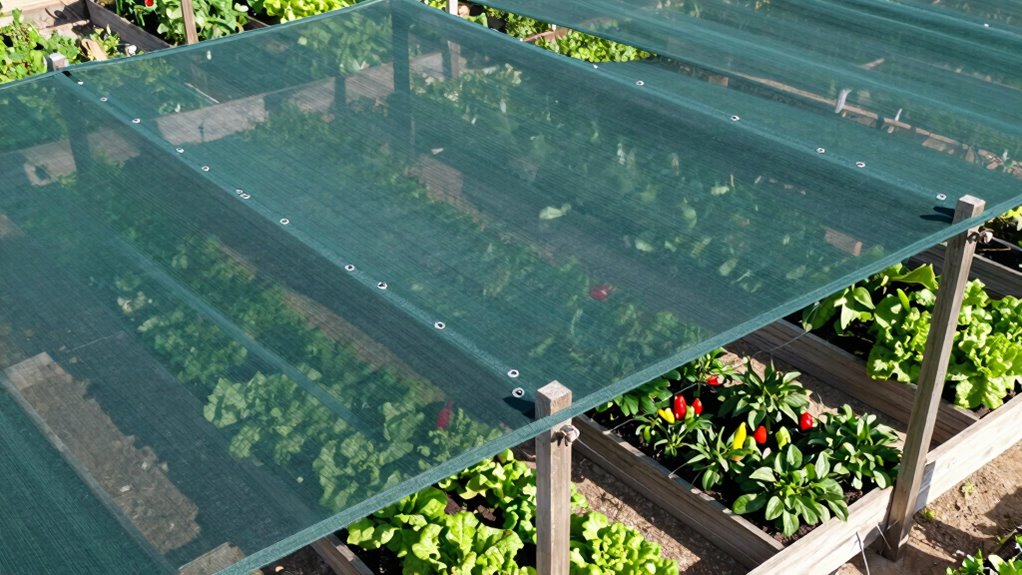
When installing shade netting over raised beds, positioning the framework correctly guarantees maximum coverage and accessibility.
You’ll want to measure your bed dimensions precisely before cutting any materials. Start by securing corner posts firmly into the ground around your raised bed perimeter.
- Frame Height: Maintain 18-24 inches clearance above tallest crops for adequate air circulation
- Support Spacing: Position intermediate supports every 3-4 feet to prevent netting sag
- Overlap Technique: Create 6-inch overlaps at connection points for seamless coverage
Construct your overhead frame using lightweight PVC pipes or metal conduit. Verify crossbars run perpendicular to bed length for ideal stability.
Thread the shade cloth through your framework systematically, working from one end to the other. Keep tension consistent while avoiding overstretching the material.
Double-check all connections remain secure after installation.
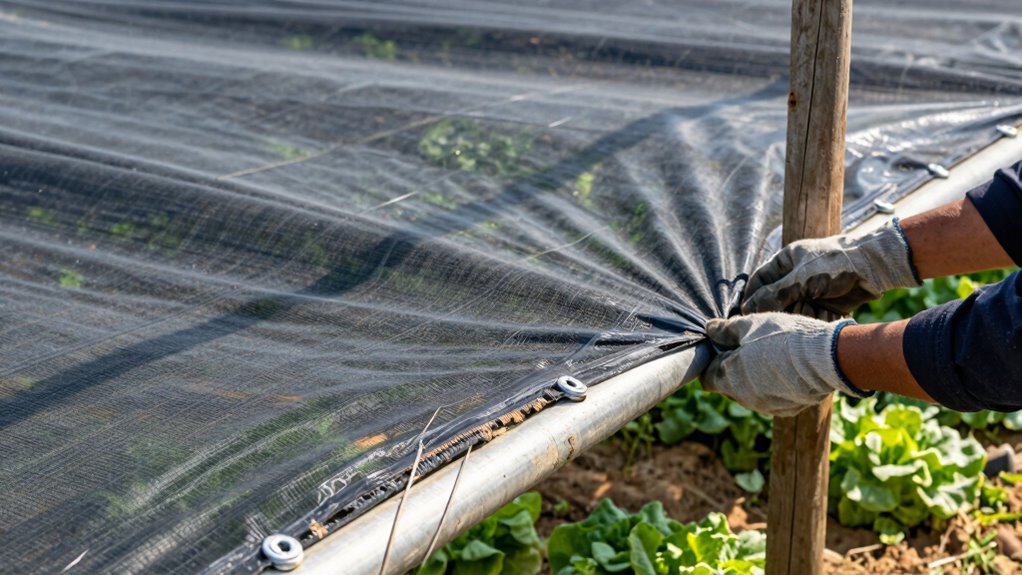
Attach Netting Securely to Greenhouse Structures
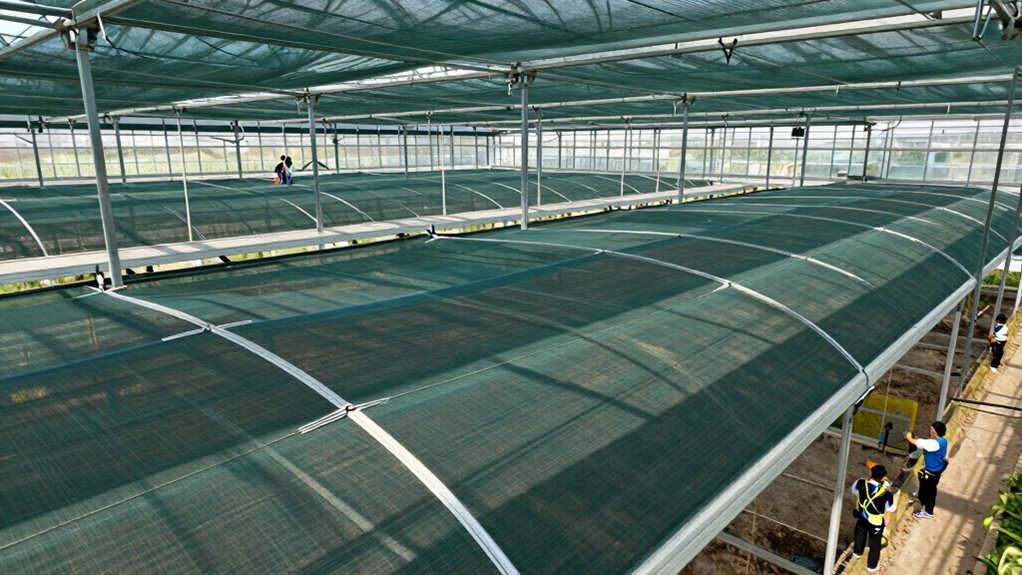
Although greenhouse structures provide excellent growing conditions, securing shade netting properly requires attention to structural integrity and attachment methods.
You must evaluate your greenhouse frame material before selecting fasteners. Metal frames accept screws or bolts, while PVC frames need specialized clamps. Position attachment points every 2-3 feet along the structure’s perimeter. Use stainless steel hardware to prevent corrosion. Don’t overlook corner reinforcements where stress concentrates.
Thread cable ties through grommets when your netting lacks built-in attachment loops. Make sure fasteners penetrate deeply enough into frame members. Check manufacturer specifications for load-bearing capacities.
Your attachment system must withstand wind loads and tension forces. Proper installation prevents costly repairs and maintains ideal growing environments. Secure connections protect your investment while maximizing crop yields through consistent shading.
Adjust Tension to Prevent Sagging and Wear
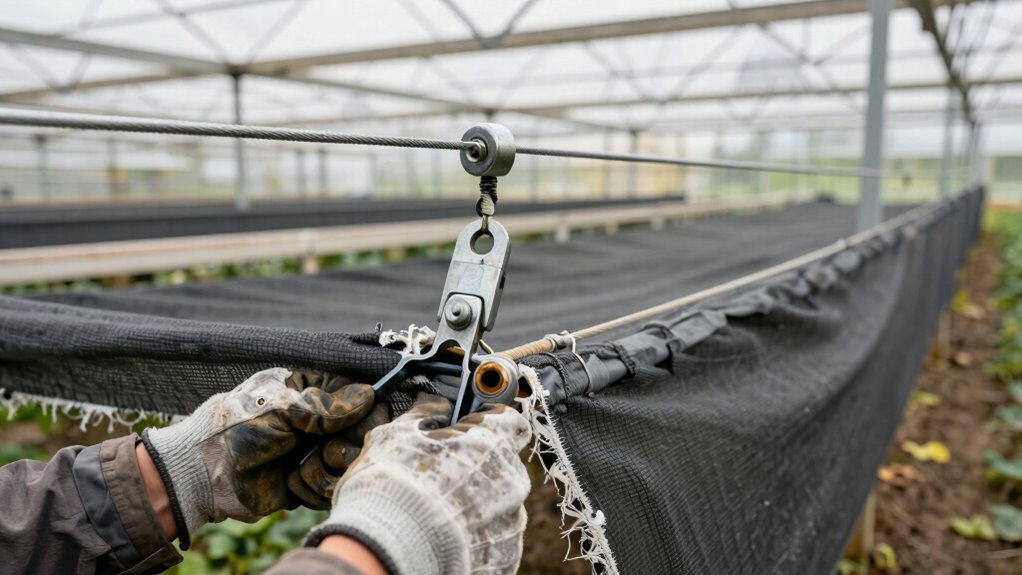
Proper tension adjustment becomes critical once you’ve secured the shade netting to your greenhouse structure.
You must maintain consistent tension across the entire netting surface to prevent sagging that compromises crop protection and creates wear points. Inspect the netting regularly for loose sections that create pockets where debris accumulates.
- Check tension every two weeks during growing season, especially after weather events
- Use tensioning devices like turnbuckles or ratchet straps at mounting points
- Maintain 1-2 inches of slack elimination while avoiding over-tightening that stresses materials
You should feel confident that proper tension prevents excessive movement.
Systematic adjustments guarantee longevity and peak performance throughout your growing operations.
Reinforce Edges to Resist Wind Damage
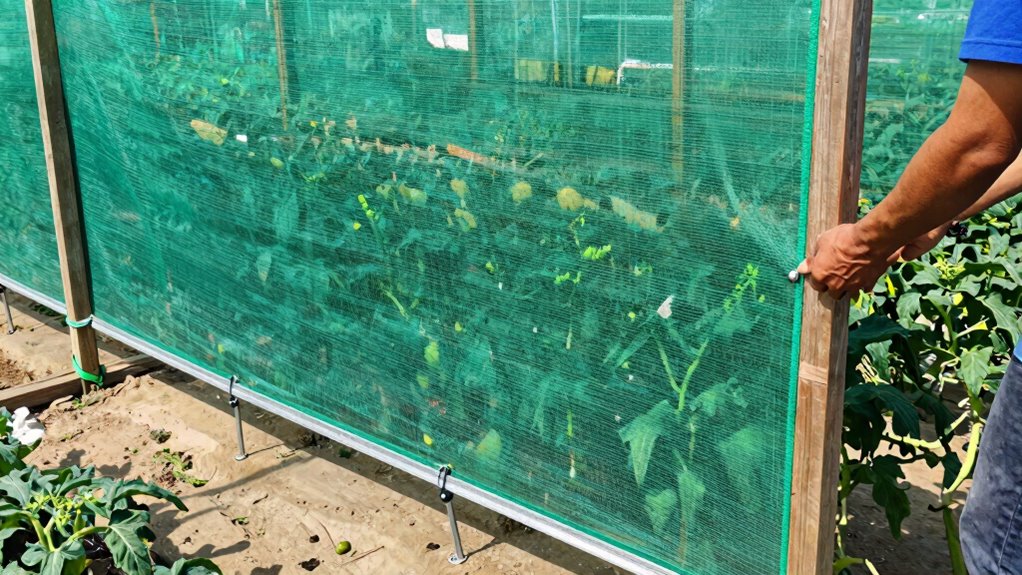
While securing shade netting properly prevents many issues, reinforcing edges becomes essential for withstanding wind forces that can cause tearing or detachment.
You should install grommets or reinforced corners at all four corners and along edges every three to four feet. Use metal or heavy-duty plastic reinforcement patches to strengthen vulnerable areas.
Sew or staple edges with UV-resistant thread or wire ties designed for agricultural applications. Create additional attachment points by folding edges over and securing with zip ties or agricultural clips.
Don’t overlook corners where stress concentration occurs during high winds. Check manufacturer specifications for recommended edge reinforcement materials compatible with your specific netting type.
Proper edge reinforcement distributes wind loads evenly across the entire structure, preventing catastrophic failure during storms.
Inspect for Gaps That Let in Excess Light
You should systematically check for tears or holes that compromise your shade netting’s effectiveness.
Examine all netting edges where light might seep through gaps or loose connections.
Look underneath plants to guarantee no areas receive unwanted direct sunlight exposure.
Check For Tears Or Holes
Inspecting shade netting for tears or holes requires careful attention to detail since even small gaps can compromise the entire system’s effectiveness. You must systematically examine every section methodically, looking for irregularities that permit unwanted light penetration. Small perforations often result from UV degradation, mechanical damage, or improper handling during installation.
- Check for linear tears along stress points where tension concentrates during high winds.
- Identify pinhole-sized perforations that appear as tiny bright spots when backlit by direct sunlight.
- Look for frayed areas where individual strands separate, creating micro-openings that gradually expand.
Document damaged sections immediately with photographs and measurements. Mark problematic areas using colored tape or flags for quick identification during repairs.
Don’t overlook corners and overlap zones where material fatigue commonly occurs. Regular inspection prevents minor issues from becoming major failures.
Examine Netting Edges
Examine netting edges carefully to identify gaps that permit excess light penetration, as these compromised areas can greatly reduce the shade system’s effectiveness.
Run your hand along all perimeter edges where netting meets supports, checking for loose connections or separated fabric.
Look for areas where wind has lifted edges upward, creating light gaps underneath. Pay special attention to corners and attachment points where stress causes fabric separation.
Check if edge cables or ropes remain taut and properly secured. Identify any sections where netting doesn’t lay flat against mounting structures.
These light leaks undermine your shading purpose and create uneven coverage patterns. Mark problematic areas immediately for correction.
Proper edge maintenance guarantees complete shade coverage and maximizes your investment’s protective benefits.
Look Underneath Plants
Gaps beneath plants compromise shade netting effectiveness by allowing unwanted light penetration that undermines your protective coverage. You must systematically inspect the entire perimeter where netting meets soil or mulch to identify light leaks.
Check underneath all plant specimens methodically, ensuring complete shade coverage. Small openings can greatly reduce your crop’s protection from excessive solar radiation.
- Soil contact verification – Confirm netting extends fully to ground level without lifting or curling at edges
- Plant stem clearance – Maintain adequate space around plant bases while preventing light infiltration through gaps
- Mulch integration – Position netting edges beneath mulch layer to eliminate visible light entry points
Regular inspection prevents crop stress and maintains ideal growing conditions throughout your cultivation area.
Ensure Good Air Circulation Under Shade Netting
When installing shade netting, you must guarantee adequate airflow beneath the structure to prevent heat buildup and maintain ideal growing conditions.
Position supports strategically to create gaps allowing air movement. Don’t install netting too close to plant surfaces. Maintain a minimum four-inch clearance between crops and shading material.
Check that prevailing winds can circulate freely through your setup. You should verify air pathways aren’t blocked by dense plantings or structural elements.
Proper spacing between netting sections prevents stagnant air pockets. Monitor temperature regularly underneath your shade structure. You’ll notice when airflow becomes restricted because temperatures rise rapidly.
Install supports at regular intervals rather than spanning large distances without breaks. Consider using multiple smaller shade sections instead of one continuous cover. This approach promotes better air circulation while maintaining necessary light reduction for your crops’ best growth conditions.
Make Seasonal Adjustments for Changing Light
Seasonal light variations demand corresponding modifications to your shade netting setup for ideal crop performance.
You’ll need to adjust shade density based on changing solar intensity throughout the year. Monitor your crops’ light requirements as they shift from summer’s harsh glare to winter’s gentler rays.
- Spring adjustments: Reduce shade coverage by 20-30% to accommodate increasing daylight hours and prevent overheating during peak growing season.
- Summer optimization: Deploy maximum shade density during solstice months when UV radiation peaks, ensuring crops receive diffused rather than direct sunlight.
- Fall/winter modifications: Gradually decrease shade levels as daylight diminishes, allowing more solar radiation to reach plants during shorter growing periods.
Track photoperiod changes systematically using light meters. Document adjustments monthly for consistent crop yields.
Fix Common Shade Netting Installation Errors
You must address incorrect tension settings by recalibrating your netting system when sags or excessive tightness occur.
Poor anchor point selection requires you to evaluate structural integrity and reposition mounting hardware for ideal load distribution.
These adjustments prevent premature wear and guarantee your shade installation maintains proper functionality.
Incorrect Tension Settings
One critical factor that compromises shade netting performance is improper tension during installation.
You must maintain consistent tension to guarantee ideal crop protection and system longevity. Too loose, and the netting sags, creating uneven shade distribution. Too tight, and you risk material damage from excessive stress.
- Tension measurement tools help you achieve precise settings, preventing both sagging and overstretching.
- Environmental conditions like wind and temperature changes require tension adjustments to maintain system integrity.
- Material specifications dictate appropriate tension ranges, so always consult manufacturer guidelines before installation.
You should check tension regularly after installation, especially following weather events.
Proper tension guarantees uniform shade coverage, prevents premature wear, and maintains structural stability throughout growing seasons.
Poor Anchor Point Selection
While installing shade netting, selecting inadequate anchor points undermines the entire system’s structural integrity and performance. You must choose anchor points that can withstand wind loads and tension forces. Avoid soft soil, loose framing, or temporary structures that can’t support sustained pressure.
Instead, use concrete footings, structural steel, or properly braced wooden posts.
Check that anchor points are spaced correctly to prevent sagging. You should install eye bolts or cable anchors at regular intervals, guaranteeing they’re rated for the netting’s load requirements.
Don’t rely on existing structures unless you verify their capacity. Test anchor points before final installation. You need secure attachment points that won’t fail under stress.
Proper anchor selection prevents costly repairs and guarantees your crops receive consistent protection.
Boost Crop Yields With Proper Shade Coverage
Proper shade coverage greatly increases crop yields by regulating light intensity and temperature stress that can otherwise reduce photosynthetic efficiency.
You’ll enhance growing conditions when you implement systematic shade management strategies.
- Light Penetration Ratios: You must calculate suitable shade percentages (30-50%) based on crop-specific light requirements and growth stages to maximize photosynthetic activity.
- Microclimate Control: You’ll monitor and adjust temperature differentials by positioning shade nets at precise heights and orientations to create ideal growing zones.
- Crop-Specific Applications: You should customize shade duration and intensity according to plant physiology, flowering cycles, and fruit development patterns for maximum yield potential.
You’re implementing scientific growing practices that fellow agricultural professionals recognize and respect.
Conclusion
You’ve measured twice, cut once, and secured your shade netting with precision. Picture your crops thriving beneath the protective mesh, leaves dancing in filtered sunlight while roots drink deeply from well-drained soil. The frame stands sturdy against wind, netting taut and properly tensioned. Regular inspections reveal no wear, edges reinforced, UV protection intact. Your systematic approach guarantees peak plant health, maximizing yields through controlled light exposure and improved air circulation.
