

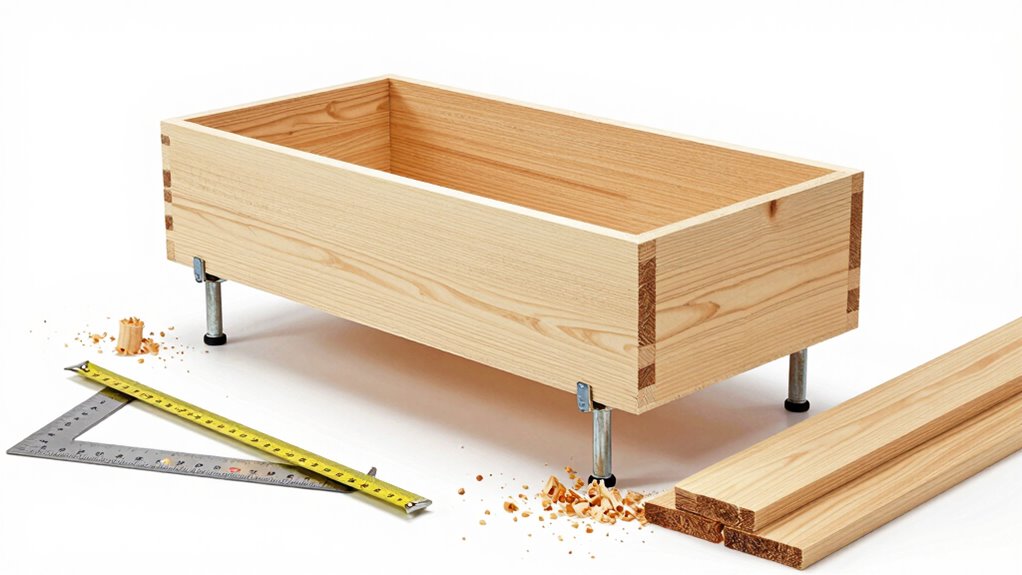
You’ll need to choose durable materials like cedar or treated pine for your raised planter frame. Cut the lumber to size, ensuring adequate depth with at least two-by-six inch boards. Assemble the frame using wood glue and galvanized screws, then reinforce corners with metal braces. Before attaching legs, consider how elevation affects stability and drainage requirements for ideal plant growth.
Why Build a Raised Planter With Legs
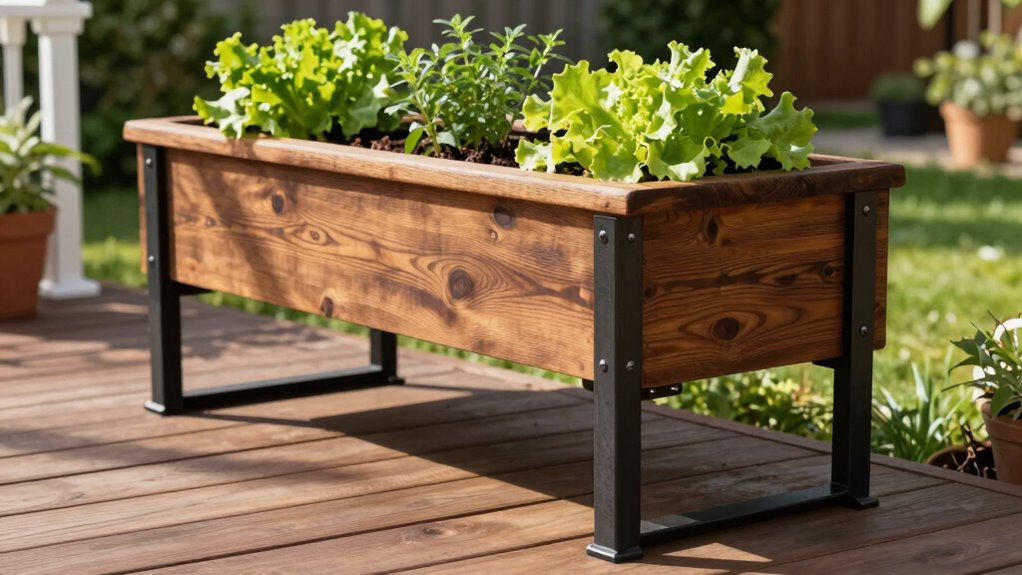
While building a raised planter with legs requires more materials and effort than a traditional ground-level bed, the elevated design provides significant advantages for serious gardeners. You gain better soil drainage and aeration since water flows freely underneath the planter.
The legs create essential space for root development while preventing soil compaction from foot traffic. You’ll achieve improved accessibility for planting, weeding, and harvesting without bending or kneeling. The elevated structure also deters ground-dwelling pests and reduces soil erosion.
Construction involves selecting appropriate lumber, calculating proper leg height for your needs, and ensuring adequate spacing between supports. You must consider weight distribution and stability factors during assembly.
Professional-grade planters utilize weather-resistant materials and precise joinery techniques. The initial investment in materials and labor pays dividends through extended growing seasons, better plant health, and reduced maintenance requirements that serious gardeners demand.
Benefits of Elevated Garden Planters
Elevated garden planters deliver measurable improvements in soil conditions and plant health that justify their construction costs.
You’ll experience better growing conditions through enhanced drainage and aeration.
- Improved Soil Drainage – Gravity pulls excess water away from plant roots, preventing waterlogging that causes root rot and nutrient deficiencies.
- Enhanced Soil Temperature Regulation – Elevated planters warm up faster in spring and maintain consistent temperatures, extending your growing season by weeks.
- Reduced Soil Compaction – Your feet never compress the growing medium, preserving soil structure and allowing roots to penetrate freely.
- Optimized Pest Control – Slugs, snails, and soil-borne pathogens struggle to reach your plants, reducing crop damage considerably.
These advantages create superior growing conditions that produce healthier plants and higher yields.
Essential Materials for Building Your Planter
You’ll frequently encounter various material options when constructing your raised planter, but selecting the right components guarantees structural integrity and longevity.
Wood remains the most popular choice, with cedar and redwood offering natural rot resistance. Pine works for budget-conscious builders but requires treatment or liners. Composite materials provide durability without wood’s maintenance demands. Metal planters, particularly galvanized steel, resist weathering effectively. Plastic options exist for lightweight, modular systems.
Your frame lumber should be at least two-by-six inches for adequate soil depth. Corrugated metal panels work well for sides when paired with wooden corner posts. Stainless steel hardware prevents rust stains and maintains structural stability.
Consider food-safe liners when using treated lumber near edibles. Drainage materials like gravel or landscape fabric prevent waterlogging.
Select materials that match your climate conditions and aesthetic preferences while ensuring proper ventilation and moisture management.
Tools You’ll Need to Get Started

You’ll need sharp cutting tools like a circular saw or miter saw to make precise cuts through your lumber materials.
Your measuring devices should include a tape measure, combination square, and marking gauge to guarantee accurate dimensions and proper alignment.
Don’t forget essential fastening equipment such as a drill-driver, socket set, and appropriate screws or bolts for securing your planter frame together.
Essential Cutting Tools
When building a raised planter, having the right cutting tools guarantees clean, precise cuts that will make assembly much easier. Your cutting toolkit determines the quality of your project’s foundation.
- Circular saw – Cuts lumber quickly and accurately for frame pieces
- Miter saw – Creates precise angled cuts for corner joints and leg attachments
- Hand saw – Provides control for detailed work and tight spaces
- Utility knife – Trims excess material and scoring for cleaner breaks
Each tool serves a specific purpose in achieving professional results.
You’ll appreciate investing in quality blades that resist dulling. Sharp blades prevent wood splintering and guarantee smooth edges.
These cutting tools become extensions of your craftsmanship, helping you create a planter that reflects your dedication to precision and quality work.
Required Measuring Devices
Three essential measuring devices form the foundation of accurate raised planter construction.
You’ll need a tape measure for determining board lengths and spacing dimensions precisely. A combination square proves invaluable when marking cut lines and checking corner angles for squareness. A level guarantees your planter sits evenly and maintains proper drainage slopes.
These tools eliminate guesswork and prevent costly mistakes during assembly. Your tape measure should extend at least twenty-four inches for convenient long measurements. Choose a combination square with a solid base that won’t slip during marking. A two-foot level works perfectly for checking your planter’s alignment.
Master these measuring devices before cutting any lumber. Proper measurement technique guarantees professional results and structural integrity. You’ll gain confidence knowing your planter dimensions are exact.
Necessary Fastening Equipment
Several critical fastening tools determine the success of your raised planter assembly.
You’ll need reliable equipment that guarantees structural integrity and longevity for your garden project.
- Cordless drill with variable speed – Essential for driving screws efficiently while controlling torque to prevent wood splitting during assembly.
- Stainless steel screws (2½-3 inches) – Choose corrosion-resistant fasteners that won’t rust when exposed to moisture and soil conditions.
- Wood glue applicator – Provides extra bonding strength between joints, creating more durable connections than screws alone.
- Clamps (4-6 inch) – Hold pieces securely in place during fastening, guaranteeing tight joints and preventing movement while you work.
These tools form your foundation for professional-quality planter construction.
Choose the Best Wood for Durability
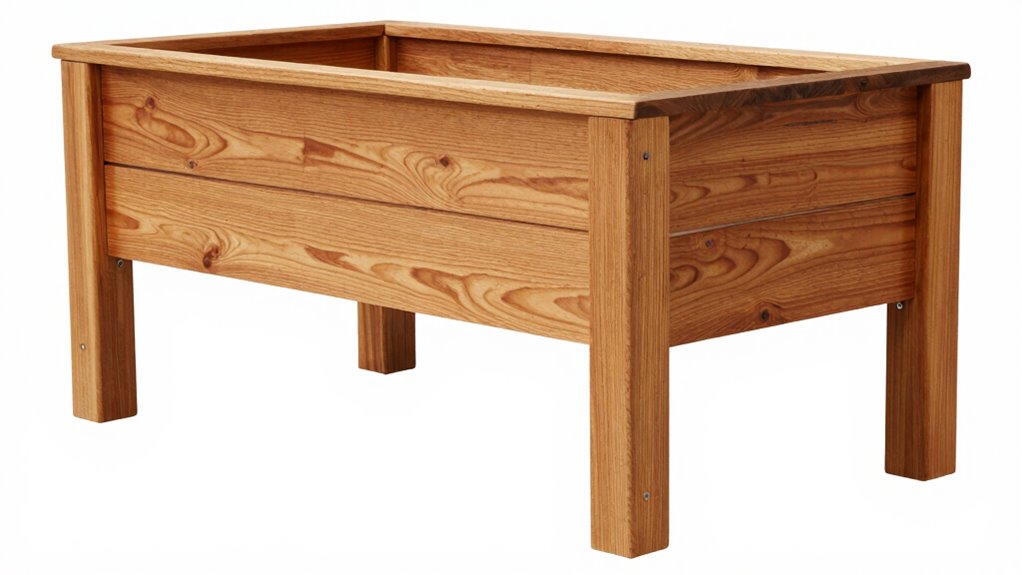
Durability determines your raised planter’s longevity and structural integrity. You should select wood species that resist moisture, insects, and decay effectively. Cedar and redwood are excellent choices due to their natural oils that repel pests and prevent rot.
Pressure-treated lumber offers affordable durability but may contain chemicals unsuitable for vegetable gardens. Composite materials provide long-lasting performance without organic concerns.
Avoid softwoods like pine or fir unless you plan annual replacements. Hardwoods including oak or maple deliver exceptional strength but cost more initially.
Consider your climate’s humidity levels and freeze-thaw cycles when selecting materials. Tropical hardwoods like teak offer superior water resistance but come at premium prices.
Your wood choice directly impacts maintenance requirements and replacement frequency. Make selections based on intended use, budget constraints, and environmental factors affecting your specific geographic location.
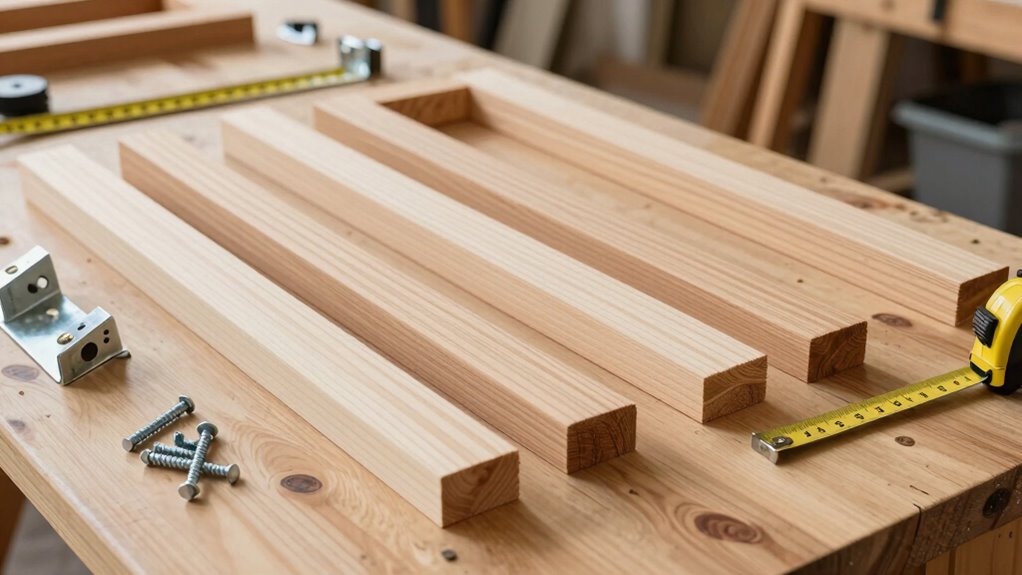
Measure and Cut All Parts Accurately
You must employ precise measurement techniques using a quality tape measure and marking gauge to guarantee all lumber dimensions match your raised planter specifications exactly.
Your cutting methods should utilize a miter saw or circular saw with a straight edge guide to achieve clean, square cuts at the correct angles.
Accurate measurements and cuts prevent gaps, misalignment, and material waste during assembly.
Precise Measurement Techniques
Accurate measurement forms the foundation of successful raised planter construction. You must master these fundamental techniques to guarantee all components fit together seamlessly and create a structurally sound planting bed.
- Use a quality tape measure – Select a steel tape measure with clear markings and a locking mechanism to prevent measurement drift during repeated cuts.
- Establish consistent reference points – Always measure from the same edge or corner to maintain uniformity across all pieces and avoid cumulative errors.
- Account for material thickness – Factor in wood dimensions when calculating final lengths to guarantee proper corner joints and alignment.
- Double-check every measurement – Verify dimensions twice before marking cuts to prevent costly mistakes that compromise structural integrity.
Cutting Methods For Accuracy
With precise measurements established through proper technique, attention turns to executing clean, accurate cuts that maintain those critical dimensions.
You’ll achieve最佳 results using a miter saw or circular saw with a guide fence for straight cuts. Set your blade depth slightly deeper than material thickness to prevent binding. Mark cut lines clearly with a pencil and square, then position your cutting guide precisely.
Maintain steady pressure and let the blade do the work—don’t force cuts. For angled cuts on legs, use a compound miter saw set to exact angles. Always cut slightly oversized pieces initially, then trim to final dimensions.
Check each cut against your measurements before proceeding. Sharp blades prevent tear-out and guarantee clean edges.
You’re building something worthwhile, so take time for accuracy now—it saves frustration later.
Building the Raised Planter Frame
Constructing the raised planter frame requires careful measurement and precise assembly to guarantee structural integrity and proper drainage.
You’ll create a sturdy rectangular structure that serves as your planter’s foundation.
- Lay out your cut lumber on a flat surface, ensuring all pieces are properly measured and squared according to your design specifications.
- Apply wood glue to all joint connections before assembling, which strengthens the bond between mating surfaces and prevents future separation.
- Attach corner joints using galvanized screws or corrosion-resistant fasteners, driving them through pre-drilled pilot holes to prevent wood splitting.
- Check frame alignment with a carpenter’s square, ensuring all corners form perfect 90-degree angles before securing final fasteners permanently.
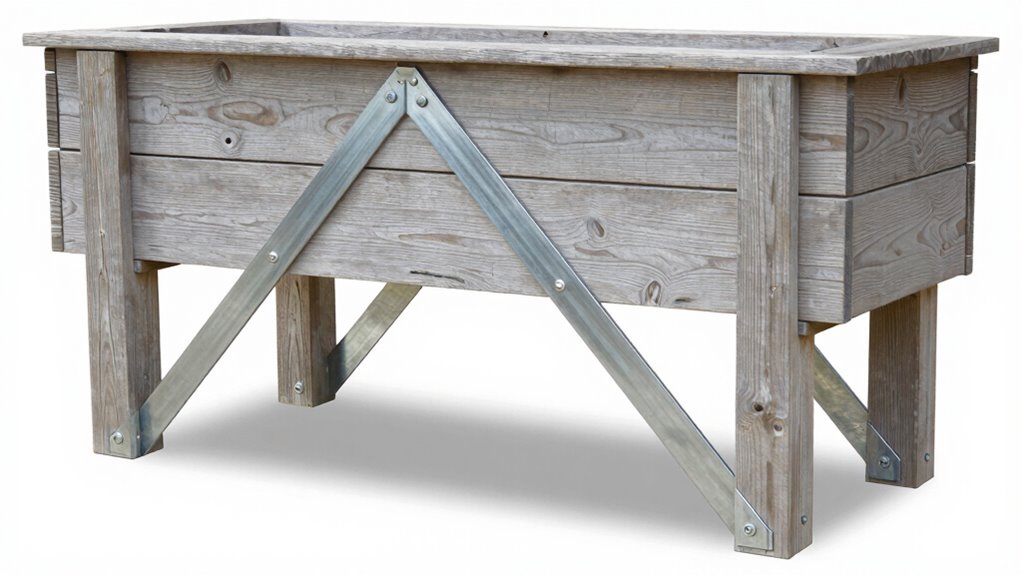
Adding Support Braces for Stability
You’ll need to select hardwood species like cedar or redwood that resist rot and provide structural integrity for your support braces.
Install corner brace systems using metal brackets or wood cleats positioned at 45-degree angles to distribute weight evenly across the frame joints.
Secure all frame connections with galvanized screws or bolts that can withstand outdoor moisture conditions.
Choosing The Right Wood Types
When selecting wood types for your raised planter, consider that cedar and redwood offer natural rot resistance that extends the structure’s lifespan considerably. These hardwoods maintain structural integrity even when exposed to moisture and soil contact.
- Cedar provides excellent insect resistance and dimensional stability, making it ideal for outdoor planters.
- Redwood offers superior durability with minimal maintenance requirements throughout seasonal weather changes.
- Pressure-treated lumber delivers cost-effective longevity when properly sealed and maintained annually.
- Composite materials eliminate rot concerns entirely while providing consistent performance across temperature fluctuations.
Select lumber that’s been properly dried to prevent warping.
Avoid softwoods like pine for structural components, as they’re prone to premature deterioration. Your choice directly impacts both aesthetics and functional longevity.
Installing Corner Brace Systems
Install corner braces to reinforce joint connections and prevent racking forces that could compromise structural integrity over time.
Cut metal or wood braces to fit snugly between frame members at each corner joint. Position braces so they span both horizontal and vertical elements, creating triangular support patterns that distribute stress evenly.
Use galvanized screws or bolts to attach braces, ensuring fasteners penetrate at least 1.5 inches into each framing member. Angle braces should measure 45 degrees for ideal load transfer.
Check that all brace installations maintain consistent spacing and alignment throughout the structure.
These triangular reinforcements will greatly increase your planter’s stability and longevity while you enjoy gardening success.
Securing Frame Connections
Several key methods exist for securing frame connections that will greatly enhance your raised planter’s structural stability.
Proper connection reinforcement prevents wobbling and guarantees your planter maintains integrity under soil weight and environmental stress.
- Lag bolt installation – Drive 3/8-inch lag bolts through corner joints at 45-degree angles, guaranteeing minimum 2-inch penetration into adjoining frame members for maximum holding power.
- Metal corner brackets – Attach heavy-duty galvanized brackets at each corner intersection using structural screws, creating rigid junction points that resist racking forces.
- Cross-bracing installation – Position diagonal braces between opposing corners, securing with construction adhesive and mechanical fasteners for enhanced torsional stability.
- Horizontal support rails – Install continuous 2×4 rails along interior frame walls, anchored with pocket screws every 16 inches to distribute loads evenly.
Double-Check Your Frame Before Leg Attachment
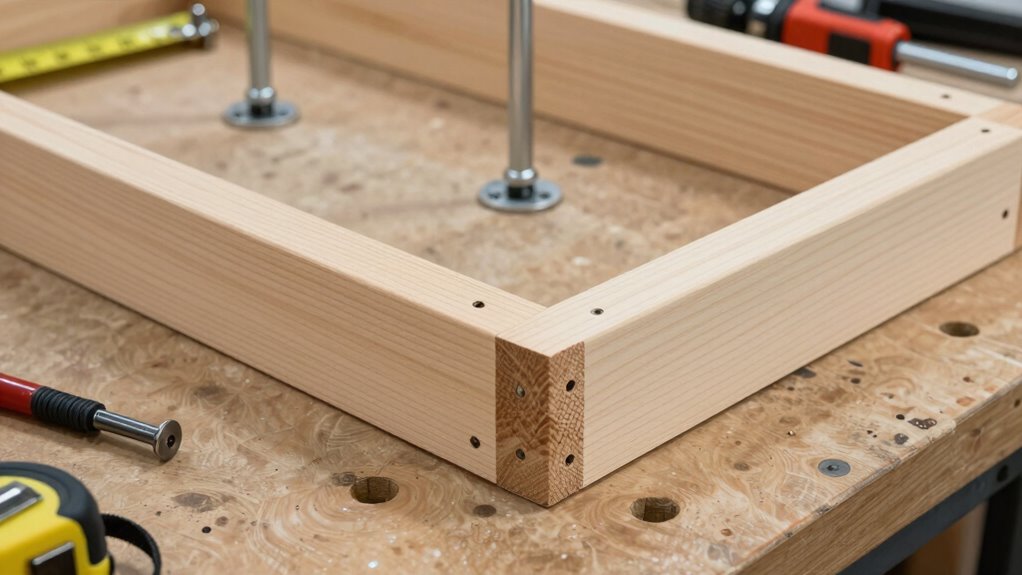
Before attaching legs to your raised planter frame, conduct a thorough inspection to confirm all components are properly aligned and secure. Check each corner joint carefully, verifying screws are fully tightened and wood pieces fit flush against each other.
Verify that your frame dimensions match specifications exactly, with no gaps exceeding one-sixteenth inch. Examine all surfaces for splinters, rough edges, or misaligned boards that could compromise structural integrity.
Confirm your frame sits perfectly level on its base before proceeding. Any discrepancies discovered now will become considerably more difficult to correct once leg assembly begins.
Take time to address loose connections, warped boards, or measurement errors immediately. This preventive approach guarantees your raised planter maintains stability and withstands seasonal weather conditions effectively while providing years of reliable garden support.
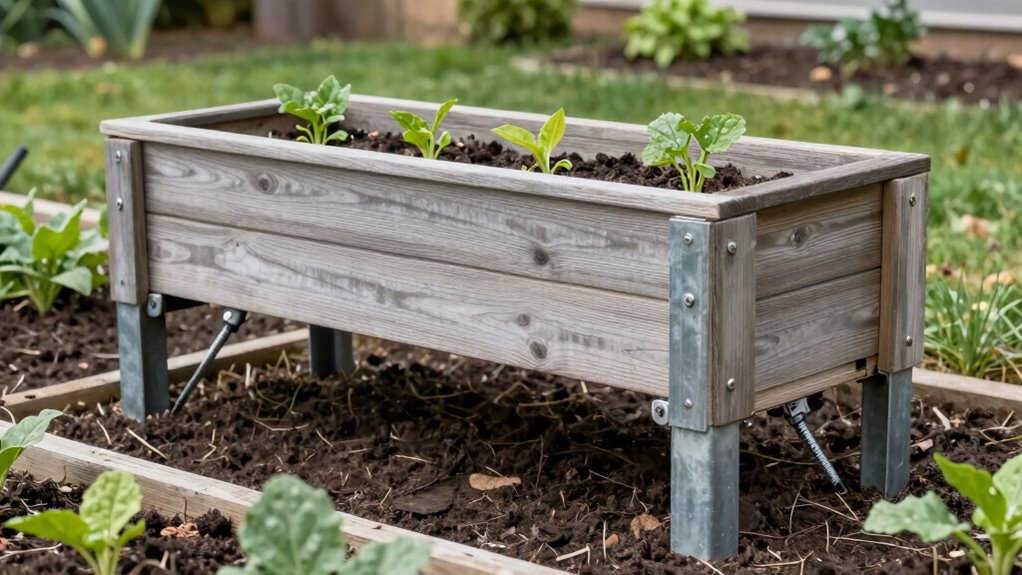
Constructing the Leg Assembly

With your frame thoroughly inspected and confirmed structurally sound, you’re ready to begin constructing the leg assembly that will elevate your raised planter to the desired height.
- Cut four leg pieces from pressure-treated lumber, ensuring each measures exactly the same length for stability.
- Sand all leg surfaces smooth, removing any rough spots that could compromise structural integrity.
- Pre-drill holes at precise intervals where legs will connect to the frame, preventing wood splitting during assembly.
- Apply weatherproof wood glue to all connection points before final assembly, creating lasting joints that resist moisture damage.
These steps create professional-grade leg assemblies that integrate seamlessly with your planter’s design while providing reliable support.
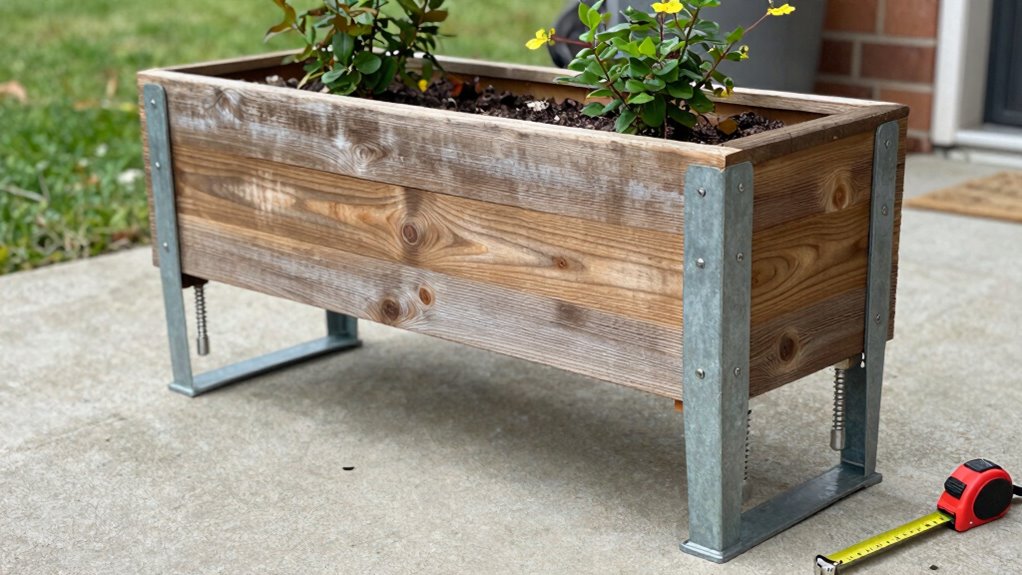
Attaching Legs to the Planter Base
The next phase involves securing the prepared legs to your planter’s base frame with precision and care.
Position each leg at the designated corner marks, ensuring they align perfectly with the pre-drilled holes. Use 2½-inch galvanized lag screws to fasten legs securely, driving them through the frame’s vertical supports into each leg’s top bracket.
Tighten connections firmly but avoid over-torquing, which could split the wood. Check that all four legs sit flush against the frame’s underside, creating stable contact points.
Verify leg alignment remains consistent across all corners, maintaining the planter’s structural integrity.
Apply wood glue to joint intersections before final tightening, enhancing durability and preventing loosening over time.
Double-check each connection’s security before proceeding.
Ensure Proper Drainage in Your Planter
Proper drainage forms the foundation of a healthy raised planter system once you’ve established your structural base.
Without adequate drainage, your plants will suffer from root rot and nutrient deficiencies.
- Drill drainage holes – Create ½-inch diameter holes every 6-8 inches across the bottom surface using a drill press for precision.
- Install hole covers – Place small pieces of landscape fabric or coffee filters over each hole to prevent soil loss while maintaining water flow.
- Add coarse material – Layer 2-3 inches of gravel or broken pottery shards at the bottom to create a drainage reservoir.
- Use well-draining soil – Mix perlite or coarse sand into your potting soil at 25% ratio to improve overall porosity.
Line Your Box to Prevent Soil Loss
You should line your raised planter box with appropriate materials like landscape fabric or perforated plastic to prevent soil erosion while maintaining drainage.
Select lining materials that resist degradation from moisture and UV exposure, ensuring long-term structural integrity.
Install the liner by securing it tightly against the box walls and overlapping seams by at least six inches to prevent soil particles from escaping through gaps.
Lining Materials And Benefits
While constructing your raised planter box, consider that lining materials play a crucial role in maintaining soil integrity and preventing nutrient loss.
You’ll want to select the right lining to maximize your planter’s effectiveness and longevity.
- Landscape fabric – Permits drainage while blocking soil erosion and root penetration into gaps.
- Plastic sheeting – Creates impermeable barrier preventing moisture loss and soil leakage.
- Metal flashing – Offers durable protection against wood-boring insects and moisture damage.
- Burlap sacks – Provide biodegradable option that decomposes gradually while supporting root development.
Each material serves specific functional purposes.
You should match your selection to your planter’s intended lifespan, drainage requirements, and environmental conditions.
Proper lining guarantees your investment protects both soil and plant health effectively.
Installation Tips For Durability
Although landscape fabric remains the most popular choice for lining raised planters, selecting the appropriate installation method guarantees your box maintains structural integrity and prevents soil loss over time.
You should staple the fabric tightly across the bottom and sides, preventing no gaps exist where soil might escape. Overlap seams by at least six inches and secure them with additional staples.
Avoid pulling the material too taut, as this creates stress points that tear easily. Cut precise holes for drainage, then fold excess fabric upward along the interior walls. Secure these flaps with landscape pins or small nails.
This method prevents root penetration while maintaining proper drainage. Your installation should create a seamless barrier that protects your investment and guarantees long-term performance.
Filling With Soil and Compost
Once the raised planter frame is securely assembled and positioned, filling it with the proper soil mixture becomes the next critical step. You’ll want to create an ideal growing environment that supports healthy root development and nutrient absorption.
- Calculate volume requirements – Measure your planter’s interior dimensions to determine how much soil you need, adding 10% extra for settling.
- Layer drainage materials – Place coarse gravel or broken pottery at the bottom 2-3 inches to prevent waterlogging while maintaining adequate drainage.
- Mix quality components – Combine equal parts high-grade potting soil, well-aged compost, and coarse sand for optimal texture and nutrition.
- Fill gradually – Add soil in 4-inch layers, lightly compacting each section to eliminate air pockets while avoiding over-compression that restricts root growth.
Selecting Plants Suited for Elevated Planters
When selecting plants for your elevated planter, you should consider both the growing conditions and the structural requirements of the chosen species.
Evaluate root depth requirements, as elevated planters typically offer 12-18 inches of soil depth. Choose plants with fibrous root systems rather than deep taproots for ideal growth.
Consider mature plant size and spacing requirements to prevent overcrowding. Select species that thrive in container-like conditions, including herbs like basil and thyme, leafy greens such as lettuce and spinach, or compact vegetables like cherry tomatoes and peppers.
Confirm plants have similar water and nutrient needs for successful companion planting. Avoid plants requiring extensive root space or those prone to becoming top-heavy without adequate support structures.
Positioning Your Planter for Maximum Sun
After selecting appropriate plants for your elevated planter, you must strategically position the structure to maximize solar exposure and promote optimal growth. Proper placement guarantees your plants receive adequate sunlight for photosynthesis and healthy development.
- Identify sun patterns – Observe your yard’s sunlight duration and intensity throughout different seasons to determine prime placement.
- Orient planter length – Position the planter’s longest side running east-to-west, allowing maximum sun exposure during morning and afternoon hours.
- Maintain appropriate distance – Place your structure at least three feet away from buildings, fences, or large vegetation that could create shadows.
- Consider seasonal adjustments – Account for changing sun angles by positioning the planter where it receives consistent light year-round, avoiding areas shaded by deciduous trees during winter months.
How to Maintain and Inspect Your Planter Annually
You should examine your planter’s wood stability annually by checking for loose joints, cracked boards, or compromised corner connections that could affect structural integrity.
Inspect drainage holes regularly to guarantee they remain unobstructed and functional, removing any debris that might impede proper water flow.
Clean accumulated debris from the planter surface and interior to prevent pest harborage and maintain ideal growing conditions.
Check Wood Stability
Annual inspection of your raised planter’s wood stability guarantees structural integrity and longevity. You should examine all wooden components systematically to identify potential issues before they compromise your planter’s performance.
- Check corner joints – Look for loose connections, gaps, or wobbly sections where boards meet. Tighten any loose screws or bolts immediately.
- Inspect wood surface – Scan for cracks, splits, or warping that could weaken structural support. Pay attention to end grains and joint areas.
- Test leg stability – Apply gentle pressure to each leg to detect movement or instability. Replace any compromised support structures promptly.
- Examine moisture damage – Check for soft spots, discoloration, or sponginess indicating water damage. Sand and reseal affected areas thoroughly.
Inspect Drainage Holes
Proper drainage system maintenance directly follows structural wood inspection to guarantee your raised planter functions at its finest throughout the growing season.
You’ll need to examine each drainage hole thoroughly, checking for blockages caused by soil compaction, root intrusion, or mineral buildup. Use a flashlight to illuminate dark corners and identify potential issues. Clear any obstructions with a wire brush or small plumbing snake.
Verify holes remain adequately spaced and properly sized for ideal water flow. Check that drill hole edges haven’t deteriorated or become jagged, which could compromise the wood’s integrity. Document any damaged areas requiring repair or replacement.
Test drainage effectiveness by pouring water into the planter and observing flow rate. Address clogged or inadequate drainage immediately to prevent root rot and plant health issues.
Clean Debris Regularly
Regular debris removal guarantees perfect planter performance and extends the lifespan of your raised bed structure. You must actively maintain cleanliness to prevent structural deterioration and guarantee proper drainage function.
- Remove fallen leaves and plant matter – Clear organic debris from surface areas and corners where moisture accumulates to prevent mold growth.
- Scrub interior surfaces – Use appropriate cleaning solutions to eliminate mineral buildup and soil residue that compromises wood integrity.
- Check corner joints – Remove trapped debris from connection points where legs meet frame to maintain structural stability.
- Clean drainage holes thoroughly – Dislodge blockages using wire tools or compressed air to restore ideal water flow.
Consistent cleaning prevents costly repairs while maximizing your planter’s productivity and longevity.
Staining or Painting for Weather Protection
A protective finish applied to your raised planter serves as the primary defense against moisture infiltration and UV degradation. You should choose between oil-based stains or acrylic paints specifically rated for outdoor use.
Apply your selected finish with a quality brush or roller, working in long, smooth strokes along the wood grain. Allow proper drying time between coats—typically 24 hours—before applying additional layers. Two coats provide ideal protection, though three coats work better for woods like pine or cedar that absorb finishes quickly.
Wipe away any drips immediately with a clean cloth, as they create visible imperfections once cured. Maintain your planter’s appearance and longevity by reapplying finish every two to three years, depending on weather exposure and wear patterns you observe during regular maintenance checks.
Fixing Common Mistakes During Assembly
While assembling your raised planter, you might encounter several common errors that compromise the structure’s integrity and appearance.
Addressing these issues promptly guarantees your project meets professional standards and functions properly in your garden space.
1. Misaligned corner joints occur when boards don’t fit flush.
Disassemble the section and check your measurements against the cutting list to verify accurate dimensions.
2. Wobbly legs result from uneven mounting or poor attachment.
Verify each leg sits flat against the frame and use a level to confirm proper alignment before securing with additional screws.
3. Gaps between boards happen due to warped lumber or incorrect spacing.
Apply wood glue to joints and clamp pieces tightly while the adhesive sets for seamless connections.
4. Incorrect screw placement weakens structural integrity.
Pre-drill pilot holes at consistent depths and maintain uniform spacing to prevent splitting and assure maximum holding strength.
Conclusion
You’ve got the skills and materials to build a durable raised planter with legs that’ll last years. Don’t worry about drainage issues—drill those holes and line with landscape fabric. Your elevated garden will provide better soil control, easier maintenance, and improved accessibility. Position it in full sun, stain for weather protection, and enjoy superior plant growth. Annual inspections keep your investment solid.
