

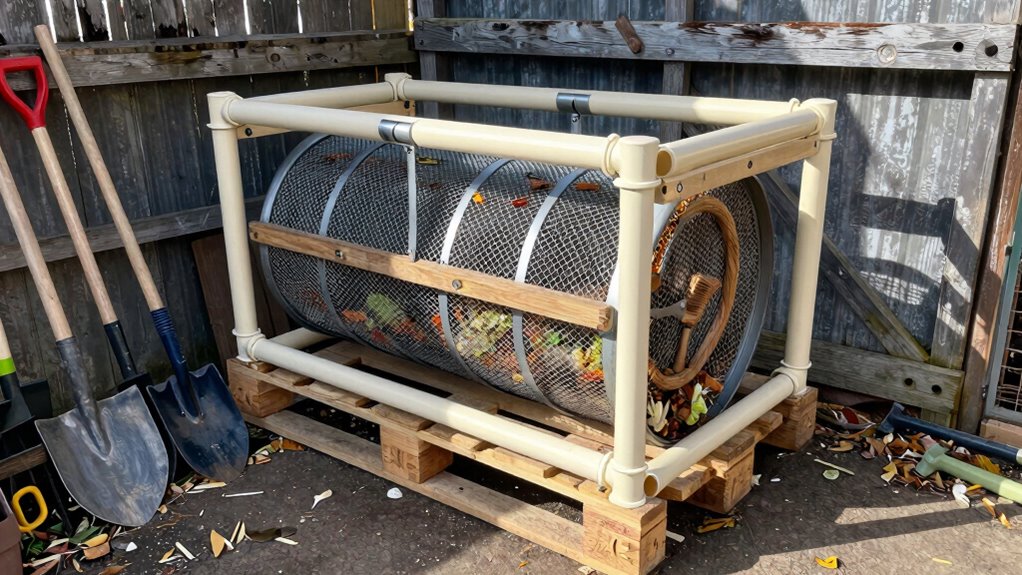
You’re ready to turn kitchen scraps into garden gold, but store-bought tumblers cost a fortune. Building your own makes sense – you’ll save money while getting a perfectly sized unit for your space. Before you start cutting wood or drilling holes, you need to choose the right barrel and gather essential tools. What size works best, and which materials won’t rot quickly? Let’s break down the critical first steps.
Why Build a Compost Tumbler Yourself?
Building a compost tumbler yourself offers significant advantages over purchasing pre-made models, particularly when you consider the customization options and cost savings.
You control every aspect of construction, selecting materials that match your garden’s specific needs and your aesthetic preferences. Custom sizing guarantees the best fit for your available space while accommodating your household’s organic waste production.
You’ll save hundreds of dollars compared to commercial alternatives, investing instead in quality components that you source directly. Building it yourself creates a deeper connection to sustainable living practices, giving you intimate knowledge of your system’s functionality.
You become part of an environmentally conscious community that values self-sufficiency and resourcefulness. This hands-on approach develops problem-solving skills while reducing dependency on manufactured products.
You’re not just purchasing another garden accessory; you’re crafting a personalized solution that reflects your commitment to ecological responsibility and smart resource management.
Gather the Right Barrel and Tools
You’ll need a robust barrel that can withstand constant rotation and outdoor conditions, so choose materials like high-density polyethylene or food-grade plastic that won’t crack or degrade over time.
Select your tools systematically, focusing on essentials like a drill with various bit sizes, measuring tape, level, and safety equipment to guarantee precise construction.
These foundational components determine your compost tumbler’s longevity and effectiveness, so invest in quality materials from the start.
Choose Durable Barrel Material
A durable barrel forms the foundation of your compost tumbler, so selecting the right material matters. You should choose food-grade plastic barrels that resist UV degradation and won’t leach harmful chemicals into your compost.
Look for barrels made from high-density polyethylene (HDPE) with thick walls that withstand outdoor conditions. Avoid thin-walled containers that crack easily. Steel drums work well but require drainage holes to prevent rusting.
Check barrel dimensions carefully – you need adequate space for compost materials while maintaining manageable weight when tumbling. Inspect potential barrels for cracks, holes, or previous chemical contamination. Your barrel should have a secure lid to contain odors and pests.
Consider barrel color too; dark colors absorb heat better, accelerating decomposition. Make sure the barrel material handles temperature fluctuations without warping.
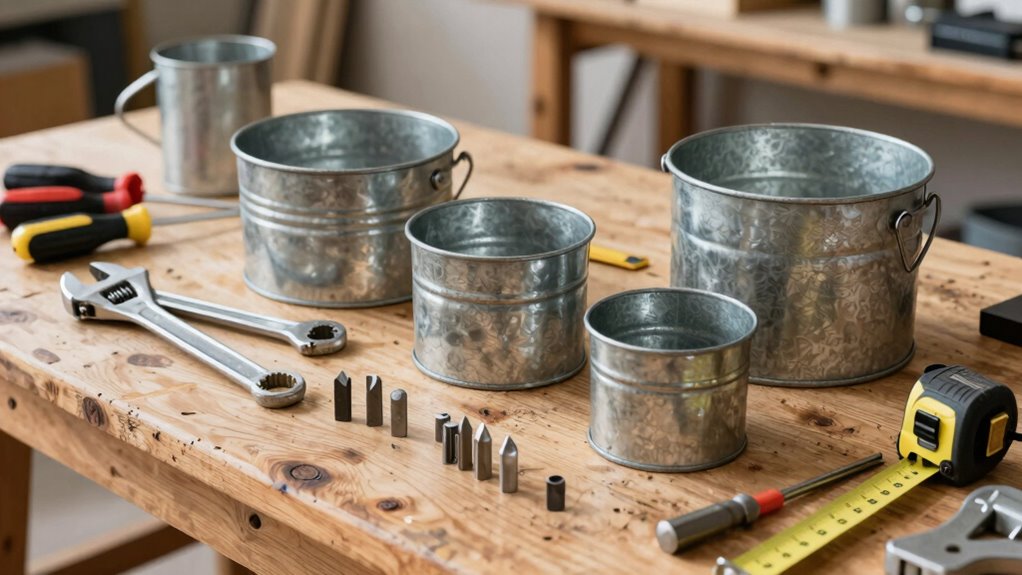
Select Essential Tools Carefully
While gathering materials for your compost tumbler project, focus on selecting essential tools that will streamline construction and ascertain durability.
You’ll need a drill with various bit sizes, a jigsaw for cutting barrel openings, and a reciprocating saw for precise modifications. Choose high-quality screws and bolts that resist corrosion, along with washers and nuts for secure assembly.
A measuring tape, level, and marking chalk help ascertain accurate drilling and mounting. Don’t overlook safety equipment: wear safety glasses, work gloves, and a dust mask during construction.
Invest in a sturdy workbench or sawhorses for stable assembly. Select weather-resistant materials for outdoor components, and ascertain all metal parts are galvanized or stainless steel to prevent rust.
These tools create professional results.
What Size Barrel Works Best?
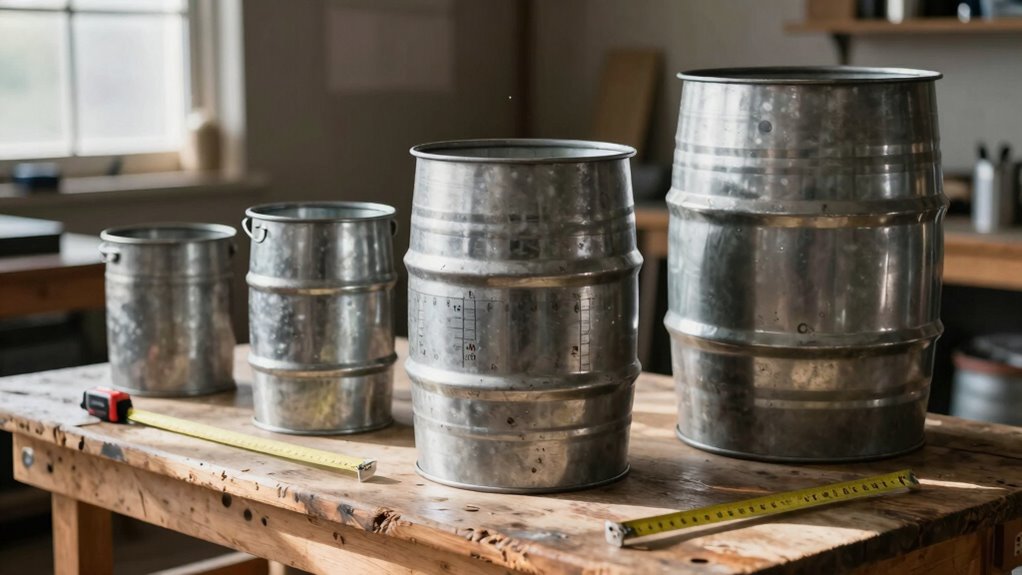
You’ll want to choose a barrel that’s between 30-55 gallons for ideal composting efficiency, as smaller sizes don’t generate enough heat while larger ones become difficult to turn.
Consider that 18-20 inch diameter barrels work best because they’re wide enough for proper aeration yet narrow enough to maintain structural integrity during rotation.
Your space constraints and material volume will ultimately determine whether you need a compact 30-gallon unit or a larger 55-gallon system.
Optimal Barrel Dimensions
When building your compost tumbler, selecting the proper barrel dimensions directly impacts your system’s efficiency and usability. You’ll want a barrel that’s neither too large nor too small for effective decomposition.
A diameter of 18-24 inches works best because it allows adequate airflow while maintaining sufficient mass for heat generation. Your barrel’s length should span 36-48 inches to accommodate reasonable volume without becoming unwieldy. These dimensions guarantee proper carbon-to-nitrogen ratios and moisture retention.
You’ll achieve the best tumbling action with this size range, making turning easier and more effective. Smaller barrels cool too quickly, while larger ones become difficult to rotate and may develop anaerobic pockets.
Consider your household’s organic waste production when choosing within these parameters. Your neighbors will appreciate the efficient, well-sized system that produces rich compost consistently.
Material Thickness Considerations
Steel drums with 18-24 inch diameters provide ideal structural integrity for compost tumblers.
You’ll want material thickness between 16-20 gauge steel for durability. Thicker steel prevents warping under weight and repeated turning. Your barrel must withstand months of decomposition pressure while maintaining shape.
Consider 18-gauge steel as your minimum standard – it offers excellent strength without excessive weight. Thinner materials risk structural failure, while thicker steel becomes unnecessarily heavy. The sweet spot lies at 18-20 gauge, giving you robust construction that won’t fatigue during regular use.
Check drum specifications carefully before purchasing, since actual thickness varies between manufacturers. Don’t overlook lid thickness either; it needs matching durability for secure sealing.
Your investment in proper material thickness pays dividends through years of reliable composting performance.
Space Requirements Analysis
Barrel size directly impacts composting efficiency and usability within your available space.
You’ll want to match your barrel diameter to your household waste production. A 55-gallon drum works perfectly for most families, handling kitchen scraps and yard waste without overwhelming your setup.
Measure your designated area before choosing dimensions – you need clearance for rotating and accessing the tumbler. Consider height restrictions too, especially under eaves or near fences.
Smaller households can manage with 30-gallon barrels, while larger families might need 75-gallon options.
Don’t forget about width requirements for turning mechanisms. Your barrel should rotate freely without hitting walls or obstacles. Proper spacing guarantees you can comfortably load materials and empty finished compost.
Calculate your space carefully before committing to specific dimensions.
Essential Tools and Supplies List
Building a compost tumbler requires gathering specific materials and tools before you start construction.
You’ll need a large plastic drum or barrel, ideally fifty-five gallons, along with sturdy PVC pipes for aeration.
Collect galvanized steel for the frame, including angle iron and metal brackets.
Essential tools include a drill with various bits, reciprocating saw, measuring tape, level, and wrench set.
Don’t forget concrete mix for securing the base, hinges for access doors, and weatherproof screws.
You’ll also require wire mesh for pest prevention, rope or chain for rotation mechanisms, and scrap wood for temporary supports.
Grab safety equipment like gloves, goggles, and dust masks.
Having these supplies ready guarantees you won’t interrupt your workflow halfway through building.
Build the Tumbler Base Frame
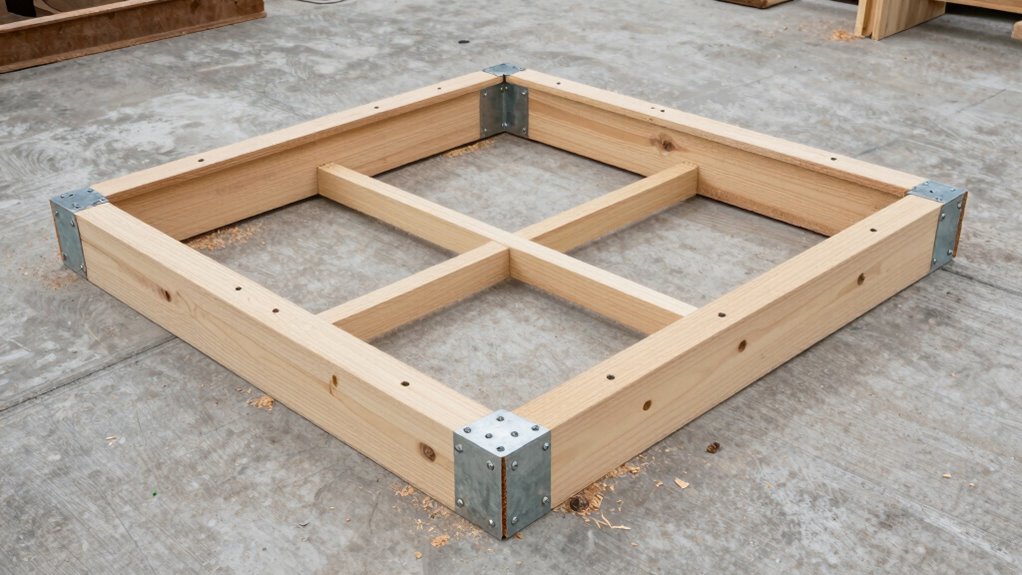
You’ll start by selecting durable frame materials like pressure-treated lumber or metal that can withstand outdoor conditions and support the tumbler’s weight.
Next, you’ll assemble the base frame systematically using precise measurements and proper joining techniques to guarantee stability.
Finally, you’ll secure the mounting hardware with appropriate fasteners and consider adding adjustable feet for leveling the entire structure.
Frame Material Selection
When selecting materials for your tumbler base frame, consider both durability and cost-effectiveness since this foundation must support the entire composting system’s weight and movement.
You should choose pressure-treated lumber or cedar for outdoor use, as these resist rot and insects. Metal frames using galvanized steel or aluminum tubing work well for longevity.
Avoid untreated pine since it deteriorates quickly when exposed to moisture and compost acids. Your frame needs to handle constant rotation stress plus varying weather conditions.
Consider recycled plastic lumber if you want maintenance-free construction. Steel offers superior strength but requires proper rust protection. Wood provides easier modifications and repairs.
Whatever material you select, make certain it can support at least 200 pounds of compost plus the tumbler’s own weight during rotation cycles.
Assembly Step-by-Step
Now that you’ve selected your frame materials, it’s time to construct the base that will support your entire composting system. Start by cutting your lumber to specified lengths for the rectangular frame.
Lay out two longer pieces parallel to each other, then position the shorter pieces between them to form a rectangle. Pre-drill holes at each corner joint to prevent splitting. Secure connections using galvanized screws or bolts, guaranteeing everything remains square.
Check diagonal measurements to confirm accuracy. Attach cross-bracing pieces underneath for additional stability. Your base frame should sit level and sturdy.
This foundation determines your tumbler’s stability and longevity, so take time to get it right. Proper assembly prevents wobbling and guarantees smooth rotation during use.
Mounting Hardware Tips
Installation of mounting hardware requires careful attention to bolt patterns and bearing alignment. You’ll want to verify everything fits perfectly to avoid wobbling or structural issues later.
- Choose the right bolts: Use grade 5 or higher bolts with locking nuts. Stainless steel resists corrosion from compost materials and weather exposure better than regular steel.
- Pre-drill holes: Always pre-drill pilot holes slightly smaller than your bolts. This prevents wood splitting and verifies clean, precise mounting points for your tumbler frame.
- Check bearing alignment: Install bearings flush with the frame surface. Misaligned bearings cause unnecessary friction and premature wear on your rotating drum mechanism.
Double-check all connections before final tightening. Proper hardware installation creates a sturdy, long-lasting composting system you’ll be proud to use.
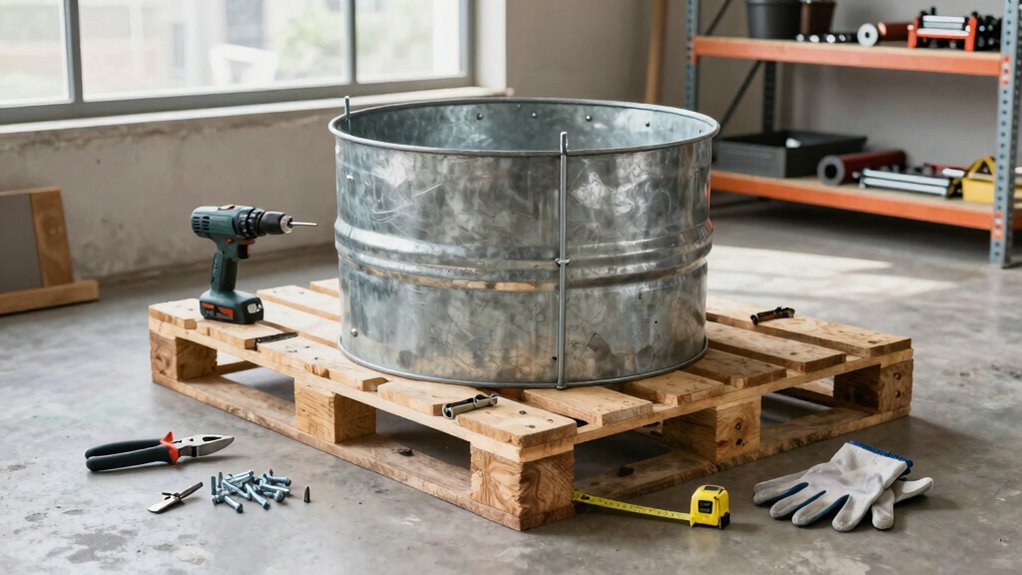
Install the Rotating Drum System
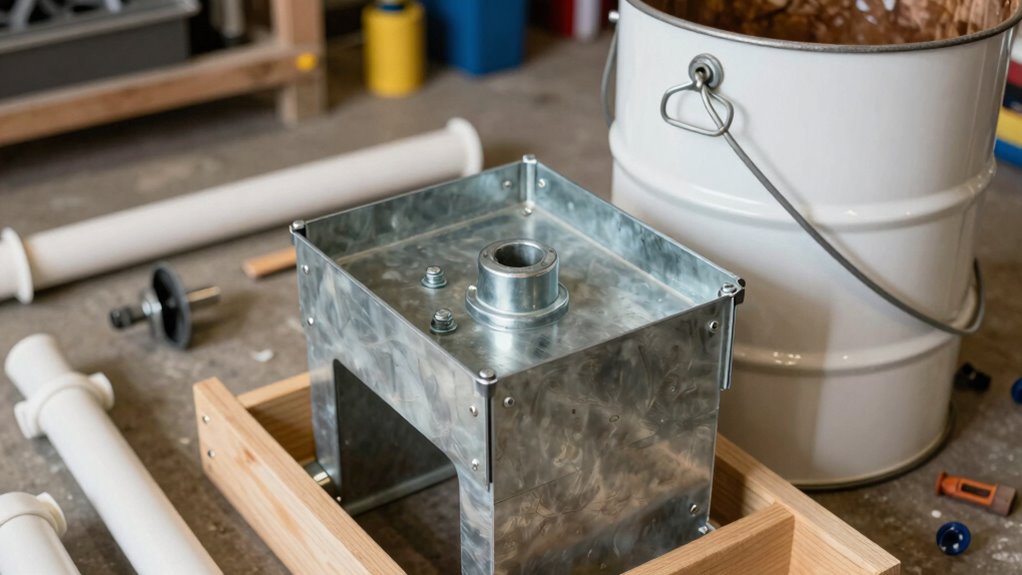
Once you’ve assembled the base frame and mounting posts, you’ll need to secure the rotating drum mechanism by aligning the axle holes and inserting the steel rod through the center of the barrel.
Position the drum between the mounting posts, ensuring the axle holes line up perfectly. Slide the steel rod through one side, through the drum’s center, and out the other side.
Leave equal spacing on both ends for smooth rotation. Secure the rod with locking pins or cotter pins to prevent slippage.
Test the rotation by turning the drum manually, checking for binding or misalignment. The drum should spin freely without wobbling.
Tighten all mounting bolts securely. Verify the drum clearance from the ground and frame components.
Double-check that rotation feels smooth before proceeding.
Add Aeration Holes to Your Tumbler
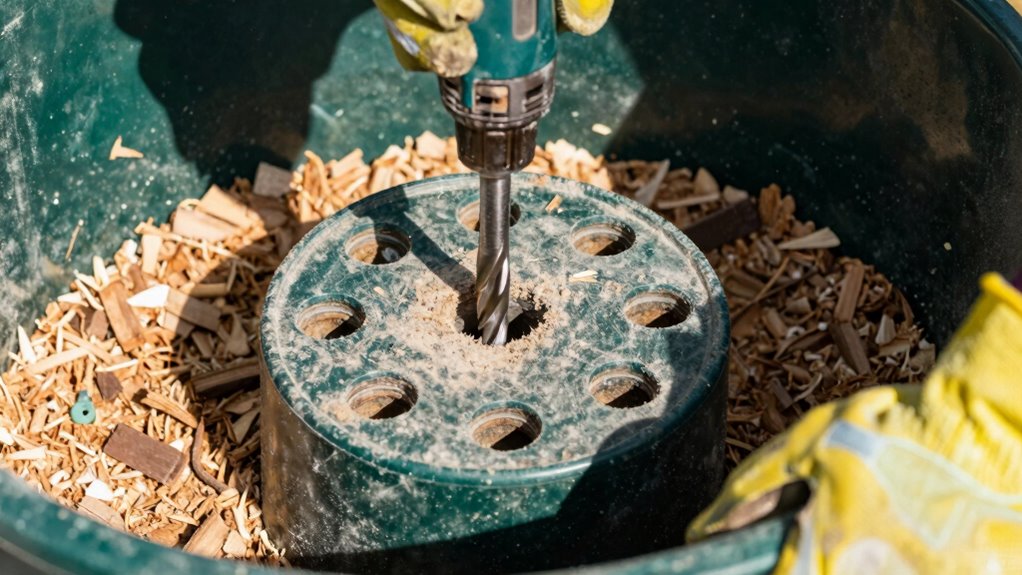
While the rotating drum system provides the mechanical foundation for your compost tumbler, proper aeration holes are essential for creating the oxygen-rich environment that decomposing organic matter requires. You’ll need to strategically place holes throughout the drum to guarantee adequate airflow.
- Drill holes every 6 inches around the drum’s circumference using a ¼-inch drill bit, creating staggered rows for maximum effectiveness.
- Angle holes slightly downward to prevent water accumulation while maintaining airflow during rotation.
- Create variable hole sizes – use smaller holes near the bottom and larger ones toward the top to optimize air circulation patterns.
These ventilation points will transform your tumbler into a high-performance composting machine.
Proper aeration prevents anaerobic conditions that cause unpleasant odors and slow decomposition. Your future self will thank you for taking time to get this step right.
Build a Secure, Easy-Use Lid
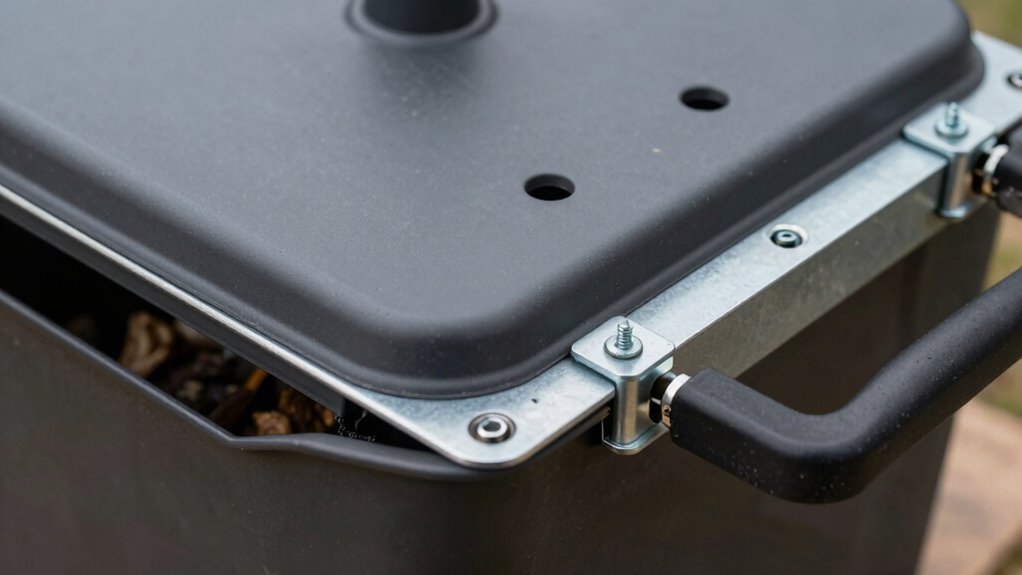
You’ll want to choose between screw-on caps or snap-lock mechanisms for secure attachment that won’t accidentally open during tumbling.
Consider installing a piano hinge or removable pins that let you swing the lid open wide for easy loading and unloading.
These attachment methods prevent material spillage while giving you quick access to add scraps and turn the compost.
Secure Lid Attachment Methods
Three key mechanisms guarantee your compost tumbler lid stays firmly attached while remaining user-friendly. You need reliable attachment methods that won’t fail during regular use.
- Bolt-on clamps provide maximum security using heavy-duty wing nuts or quick-release pins that you can tighten by hand without tools.
- Magnetic catches offer convenient one-handed operation while maintaining strong hold through neodymium magnets rated for your tumbler’s weight.
- Adjustable bungee cords work excellently for lightweight lids, using shock cords with plastic-coated hooks that won’t damage your container.
Each method requires proper positioning and secure anchoring points.
You should test your chosen attachment system under load before regular use. These mechanisms prevent spills while allowing easy access for adding materials or turning compost.
Easy-Access Hinge Design
Why settle for complicated lid designs when simple hinge mechanisms can deliver both security and effortless access?
You’ll want to choose butt hinges or continuous hinges that pivot smoothly. Position them parallel to your tumbler’s rotation axis so they won’t bind during turning. Attach hinges using stainless steel screws that resist corrosion from compost moisture.
Pre-drill holes to prevent wood splitting if you’re working with wooden frames. Ascertain hinge pins are removable for maintenance access.
Consider adding a latch mechanism opposite the hinges for extra security. This setup allows you to open the lid wide for easy loading while keeping it firmly attached.
Test the hinge movement after installation to confirm smooth operation.
How Often to Turn Your Tumbler?
Turning your compost tumbler every two to three days accelerates decomposition considerably. This frequent rotation introduces oxygen that microorganisms need to break down organic matter efficiently.
You’ll notice your pile heating up and breaking down faster when you maintain this schedule.
- Monitor temperature – Turn more frequently when the tumbler feels hot, as this indicates active decomposition requiring fresh oxygen.
- Adjust for moisture – Wet ingredients need more frequent turning to prevent anaerobic conditions that slow breakdown and create odors.
- Seasonal timing – Turn more often in summer when decomposition speeds up, and reduce frequency during cooler months when microbial activity slows naturally.
Consistent turning creates ideal conditions for fast, odor-free composting.
How to Load and Empty Your Tumbler?
Loading and emptying your compost tumbler requires a strategic approach to maintain efficient decomposition cycles. You should add materials in layers, alternating between greens and browns for ideal balance. Fill your tumbler three-quarters full initially, leaving space for aeration and material expansion during decomposition.
When loading, chop larger items into smaller pieces to accelerate breakdown.
Empty finished compost through the bottom door once it’s dark, crumbly, and earthy-smelling. Don’t wait too long, as over-composted material loses nutrients. Remove any undecomposed chunks and return them to the tumbler for another cycle.
Clean the tumbler drum periodically by hosing down interior surfaces, removing residue buildup that could slow future batches. This maintains proper airflow and prevents unwanted bacterial growth, ensuring your composting community thrives.
Fix Slow Decomposition or Odors
Slow decomposition or foul odors in your compost tumbler typically indicate an imbalance in moisture, aeration, or carbon-to-nitrogen ratios.
You need to diagnose and correct these issues systematically to restore proper composting conditions.
- Adjust moisture levels – Your compost should feel like a damp sponge. If it’s too wet, add dry carbon materials like leaves or paper. If too dry, sprinkle water while tumbling to distribute evenly.
- Improve aeration – Turn your tumbler every 2-3 days to introduce oxygen. Compacted materials create anaerobic conditions that produce odors. Break up clumps with a garden fork during turning.
- Balance carbon-to-nitrogen ratio – Maintain a 30:1 ratio by volume. Add carbon-rich “brown” materials (straw, cardboard) if you have too much nitrogen-heavy “green” materials (food scraps, grass).
Make Your Tumbler Decompose Faster
Once you’ve resolved issues with slow decomposition or odors, you can focus on optimizing your compost tumbler for maximum breakdown speed.
Maintain consistent moisture levels by adding water when materials feel dry. Turn your tumbler every two to three days to aerate contents and accelerate microbial activity.
Shred larger materials into smaller pieces before adding them. Balance green materials like vegetable scraps with brown materials such as dried leaves or paper.
Keep your pile at least half full but don’t overpack it. Monitor temperature regularly; hot composting speeds breakdown considerably.
Add finished compost as inoculant to introduce beneficial microorganisms. Cover new additions with existing compost to maintain heat.
Granular additives like lime or fertilizer aren’t necessary if you maintain proper balance and aeration throughout the process.
How to Tell Your Compost Is Ready?
How do you know when your compost has fully matured and is ready for use? You’ll notice three key indicators that signal completion.
- Visual transformation: Your finished compost should resemble dark, crumbly soil rather than recognizable food scraps or yard waste. The material becomes uniform and chocolate-brown.
- Smell test: Ready compost emits an earthy, pleasant odor similar to forest soil. If it smells sour, ammoniacal, or rotting, it needs more time to decompose properly.
- Texture examination: Mature compost feels moist but not wet, with a spongy consistency. You shouldn’t detect heat when you touch it, indicating microbial activity has slowed considerably.
Maintain Your Tumbler for Years
Proper maintenance keeps your compost tumbler functioning efficiently for many seasons. You should clean the drum monthly with a stiff brush to remove built-up residue and prevent odors.
Check all hinges, latches, and bearings regularly for wear, tightening loose screws immediately. Lubricate moving parts with marine-grade grease twice per year.
Inspect the base and support structure for rust or damage, touching up paint as needed. Rotate your tumbler’s position occasionally to prevent ground erosion beneath it.
Replace worn seals or gaskets promptly to uphold proper aeration. During winter, guarantee drainage holes stay clear of ice buildup.
Store your tumbler properly when not in use, covering it to protect from weather. These systematic maintenance steps will keep your tumbler operating smoothly.
Conclusion
You’ve built your compost tumbler, but don’t just walk away. While decomposition happens naturally, your attention accelerates results dramatically. Turn the drum regularly, monitor moisture levels, and balance greens with browns. Neglect invites odors and slow breakdown; consistent care yields rich, dark compost. Your homemade tumbler transforms kitchen scraps into garden gold faster than traditional piles ever could.
