

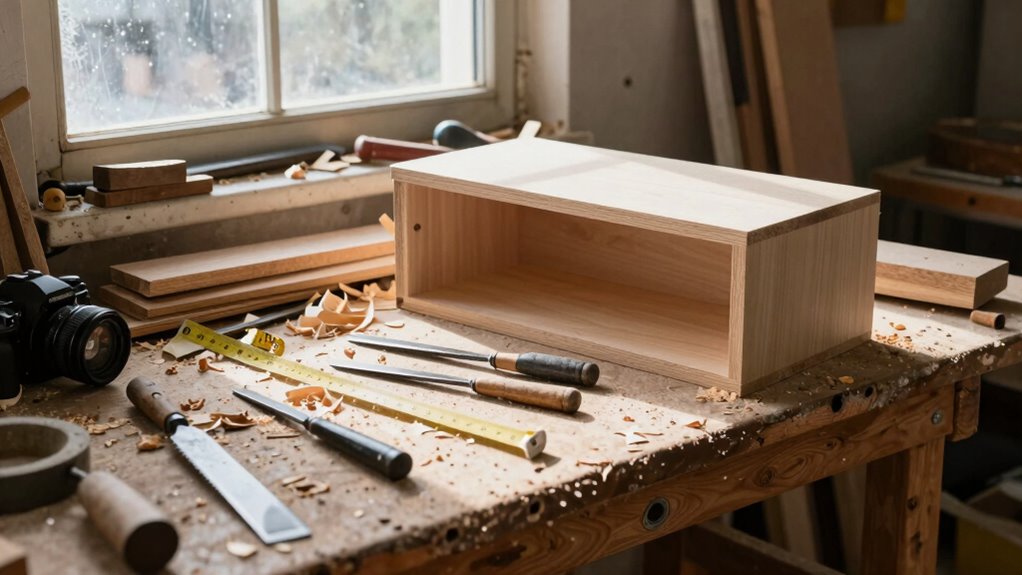
You’ve probably made your share of woodworking mistakes – crooked cuts, warped boards, or drill bits that wander off course. These errors don’t have to define your projects. With proper planning, accurate measuring, and attention to tool maintenance, you can sidestep the most common pitfalls that trip up both beginners and experienced woodworkers alike. Let’s explore how to keep your workpieces straight, your joints strong, and your safety record clean.
Why Do Woodworkers Keep Repeating the Same Mistakes?
Why do you keep making the same woodworking mistakes over and over again? You’re not alone in this frustration. Every woodworker faces this challenge because learning curves are steep and perfection takes practice.
You repeat mistakes when you rush through projects without proper planning. Measuring twice seems simple, but you skip it when you’re enthusiastic to cut. Your eagerness to finish overshadows accuracy.
Impatience causes most errors. You want immediate results instead of taking time to set up tools correctly. Sharp blades become dull because you forget regular maintenance. Poor preparation leads to poor outcomes.
Breaking bad habits requires conscious effort. Slow down. Check measurements. Maintain your equipment.
Accept that mistakes happen, but don’t let them define your journey. Each project teaches something new when you approach it mindfully.
What Are the Most Common Beginner Errors?
You probably think measuring twice and cutting once is just a saying, but beginners forget this simple rule all the time.
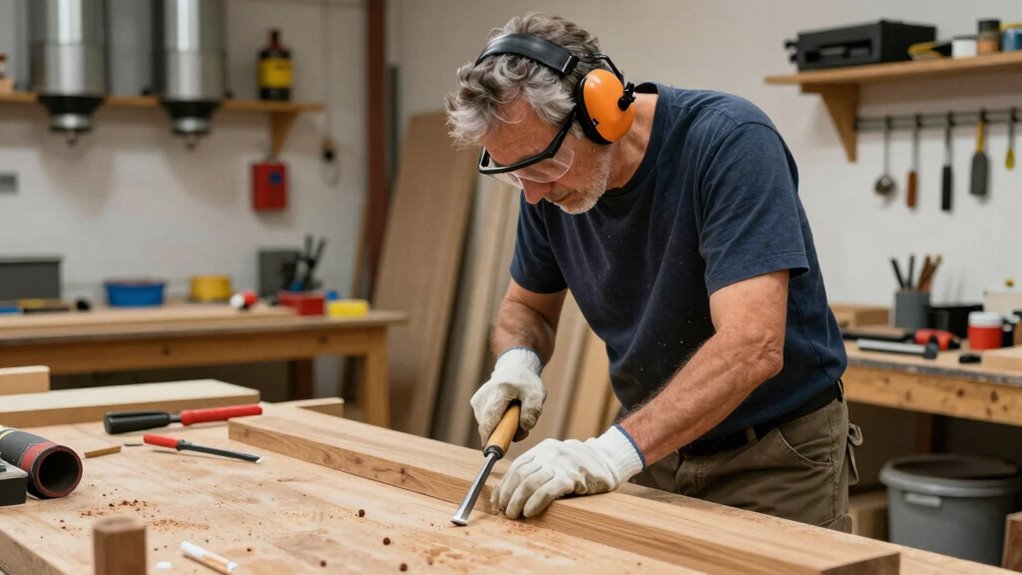
You might skip safety gear when you feel confident, only to realize later that protection matters even on easy cuts.
Rushing through your projects leads to crooked cuts and misaligned joints that could have been avoided with a bit more patience.
Measuring Twice, Cutting Once
When you’re starting out in woodworking, measuring twice and cutting once becomes essential because common beginner errors often stem from rushing through measurements or misreading the tape measure.
You’ll find yourself making costly mistakes when you don’t double-check your numbers. Many newcomers measure from the wrong end of their tape measure or misread fractional markings.
Take your time to verify measurements before making any cuts. Mark your cut lines clearly and confirm them again. Use a combination square or measuring tape consistently from the same reference point.
Remember that even experienced woodworkers occasionally make measurement errors, so don’t feel discouraged when you catch yourself rushing. Developing this habit early saves materials, time, and frustration while building your confidence in the workshop.
Skipping Safety Gear
Many beginners plunge into woodworking without properly equipping themselves with essential safety gear, often learning the hard way that protection from flying debris, sharp tools, and loud machinery is non-negotiable.
You might feel like safety equipment slows you down, but investing in proper gear prevents costly accidents and permanent injuries.
Start with safety glasses to shield your eyes from wood chips and dust. Ear protection becomes vital when using power tools that generate excessive noise. Don’t overlook a dust mask or respirator when sanding or cutting materials that create fine particles. Steel-toed boots protect your feet from dropped tools or heavy materials.
Your workshop should feel like a safe space where you belong, not a hazardous environment. Taking safety seriously shows respect for your craft and yourself.
Remember that experienced woodworkers always prioritize protection over convenience.
Rushing Through Projects
Keen hands often lead to costly mistakes, and rushing through projects ranks among the most frequent errors beginners make. You might feel enthusiastic to finish, but haste causes misaligned joints, uneven cuts, and poor finishing.
Take time to measure twice, cut once, and check your work frequently. Don’t skip marking your cuts clearly or double-checking angles. Your project deserves patience, not speed.
Rushing creates frustration when you must fix mistakes, potentially ruining good wood. Experienced woodworkers know that slowing down actually saves time.
You’re not behind schedule – you’re building skills. Embrace the process, not just the outcome. Quality work takes time, and you’ll feel proud knowing you did it right the first time.
When Should You Let Wood Acclimate First?
You should always let wood acclimate before starting your project, but knowing when you’ve waited long enough depends on understanding moisture content levels.
Most wood needs 2-4 weeks to properly adjust to your workshop’s humidity, though dense hardwoods might require longer.
Check the moisture content with a reliable meter rather than guessing, since wood that hasn’t acclimated properly will warp, crack, or shrink after you’ve finished building.
Proper Moisture Content Levels
Wood movement causes most woodworking problems, so understanding moisture content is essential. You need to measure moisture levels before starting any project.
Wood expands and contracts based on its environment, creating cracks, warping, or joint failures if you don’t account for this. Use a moisture meter to check readings consistently.
Most lumber yards sell wood at eight to twelve percent moisture content, which works for many projects. However, your local climate affects what’s appropriate.
Interior projects need wood acclimated to your shop’s conditions. Exterior work requires different considerations. Don’t assume wood reaches equilibrium immediately after delivery.
Check multiple boards since moisture varies throughout the pile. Pay attention to end grain readings, which often show higher moisture levels. Understanding these basics prevents costly mistakes later.
Ideal Acclimation Time Frames
While proper moisture content is essential, timing your project around adequate acclimation prevents the most frustrating woodworking failures. You should let wood acclimate for at least one week per inch of thickness in your workshop’s ambient conditions. Thin stock needs roughly three to five days, while thicker pieces require two weeks or more.
Don’t rush this process—your project’s success depends on it.
Monitor moisture content regularly using a reliable meter. Wood moves moisture gradually, so expect gradual changes. Ideal workshop conditions range between 35-50% humidity with temperatures around 70°F. If your wood feels cool or damp, it needs more time.
Seasoned wood still benefits from acclimation periods. Even kiln-dried lumber adjusts to your specific environment.
Patience here prevents cracked joints, warped panels, and finishing disasters later.
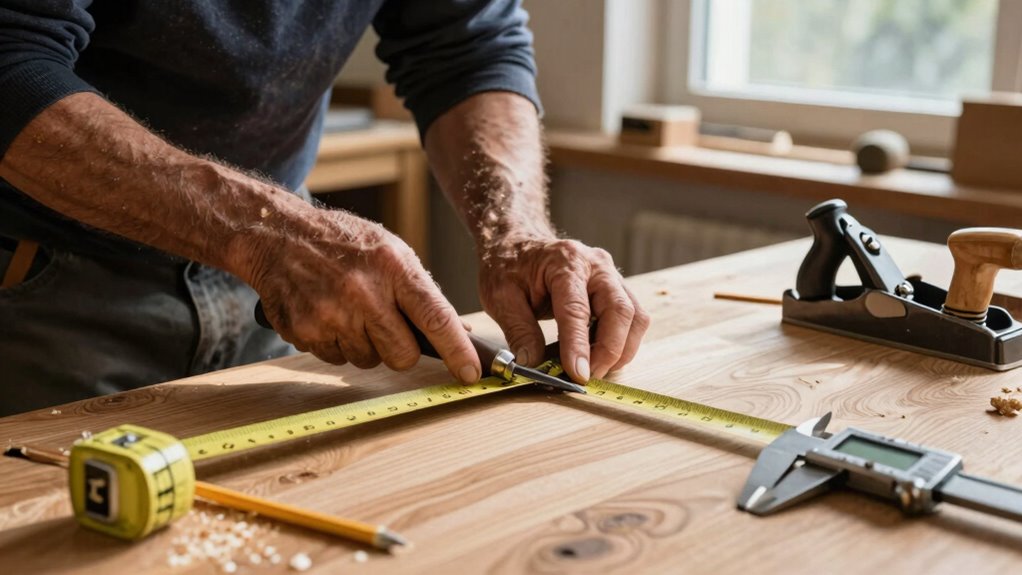
How to Measure and Mark Wood Accurately
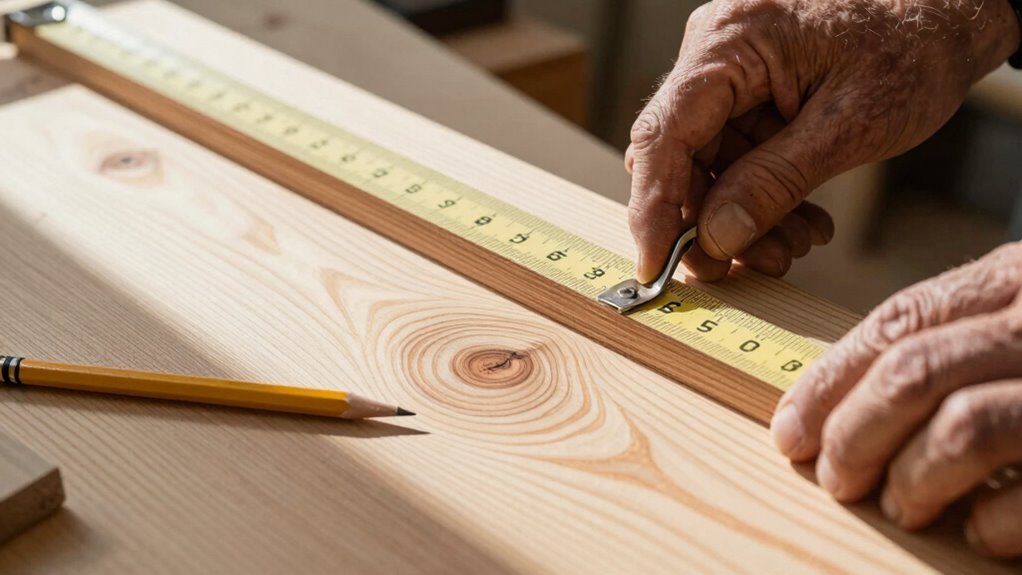
Accurate measurements form the foundation of successful woodworking projects, and mastering this skill will save you from costly mistakes down the line.
You should always measure twice, cut once, but don’t stop there. Use a reliable tape measure and guarantee it’s flush against the wood. Mark your measurements clearly with a sharp pencil, making tiny dashes rather than heavy lines that can throw off cuts.
Double-check your work by measuring from both ends of the board. When marking, place your pencil directly on the measurement line and draw away from yourself. Don’t rush this process – take your time to verify each measurement.
Consider using a combination square for precise angles and straight lines. These habits become second nature with practice, and soon you’ll join the ranks of woodworkers who rarely make measuring errors.
Which Safety Mistakes Lead to Accidents?
Why do so many woodworkers end up injured despite having access to safety equipment and guidelines?
You might be rushing through projects, skipping safety checks, or becoming overconfident after initial success.
Common mistakes include removing guards from power tools, wearing loose clothing near machinery, and failing to secure workpieces properly.
You might also neglect proper lighting, use damaged equipment, or work while tired or distracted.
Even experienced woodworkers sometimes bypass safety protocols when they feel pressed for time.
Remember that workshop safety isn’t optional – it’s what keeps you part of the woodworking community.
Take time to inspect tools before each use, maintain proper stance, and never force materials through machines.
Your future self will thank you.
What Tools Do You Really Need to Start?
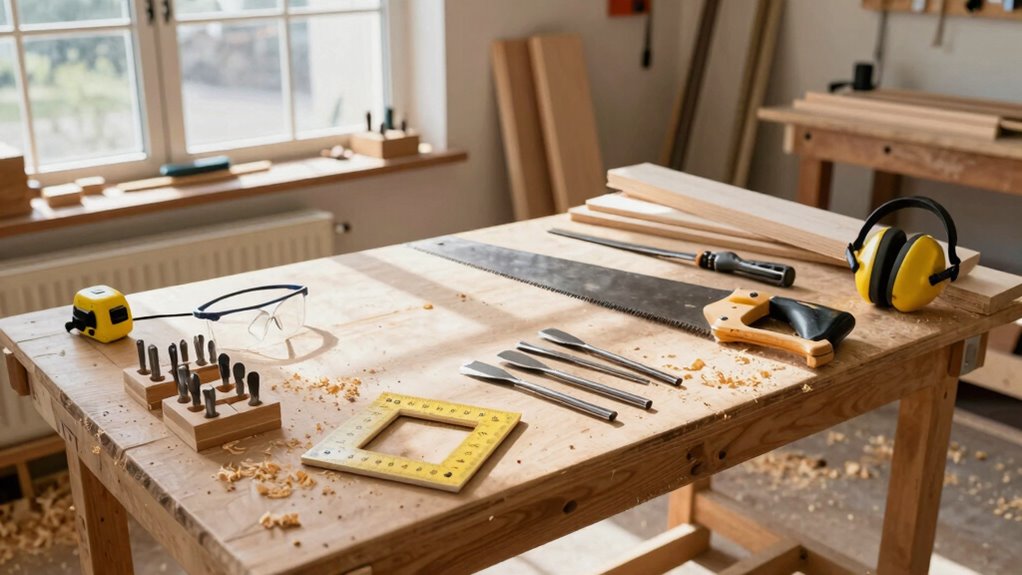
Since you’re just starting out, you might wonder what tools are essential versus what you can pick up later.
Focus on basics that handle most beginner projects. You need a tape measure, combination square, and marking gauge for accurate measurements. A hand saw or circular saw works for cuts. Start with a block plane and sandpaper for smoothing surfaces. A drill with basic bits handles holes and driving screws. Chisels help with 精细调整. A workbench or sturdy table gives you stable working space.
Don’t buy everything at once. These core tools let you complete simple projects while you learn. As you gain experience, you’ll understand which specialized tools fit your working style.
How to Cut Without Splintering or Waste
When you’re cutting wood, splintering and waste can quickly ruin your project and frustrate your efforts. You’ll want to score your cut line first with a utility knife, which prevents tear-out on the surface.
Always cut with the good side up, letting any splintering happen on the waste side. Support your workpiece properly underneath to avoid tear-out. Use sharp blades – dull ones cause more problems than they solve.
Make slower, steady cuts rather than rushing through. For crosscuts, try a miter saw or handsaw with proper technique.
Remember that practice makes perfect, and every mistake teaches you something new about your materials.
Why Do Wood Joints Keep Failing?
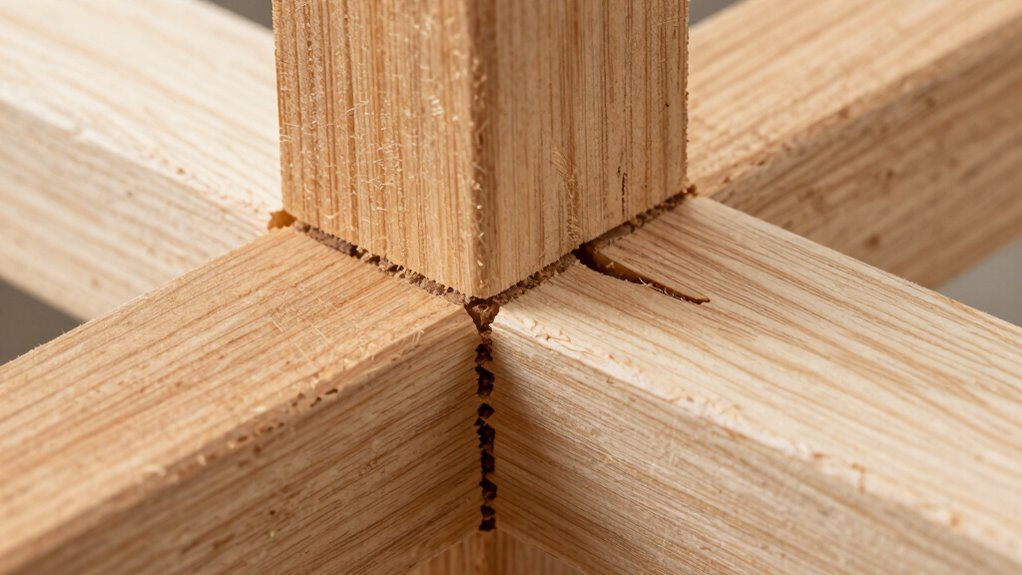
How often do you find yourself re-gluing loose joints or starting over because your connections won’t hold?
Poor joint failure usually stems from technique errors rather than material flaws. You’re not alone in facing this frustration – every woodworker encounters these challenges.
- Insufficient surface preparation – You skip proper cleaning or roughening smooth surfaces before gluing.
- Wrong joint design – You choose connectors that don’t match your wood’s grain direction or thickness.
- Inadequate clamping pressure – You either over-tighten or fail to apply consistent pressure across joint surfaces.
- Rushing the curing process – You move pieces too early before glue fully sets.
- Misaligned drilling – Your pilot holes don’t match perfectly, creating stress points that fail under normal use.
Master these fundamentals and watch your joints transform from weak points into strong connections.
What Type of Glue Works Best for Each Project?
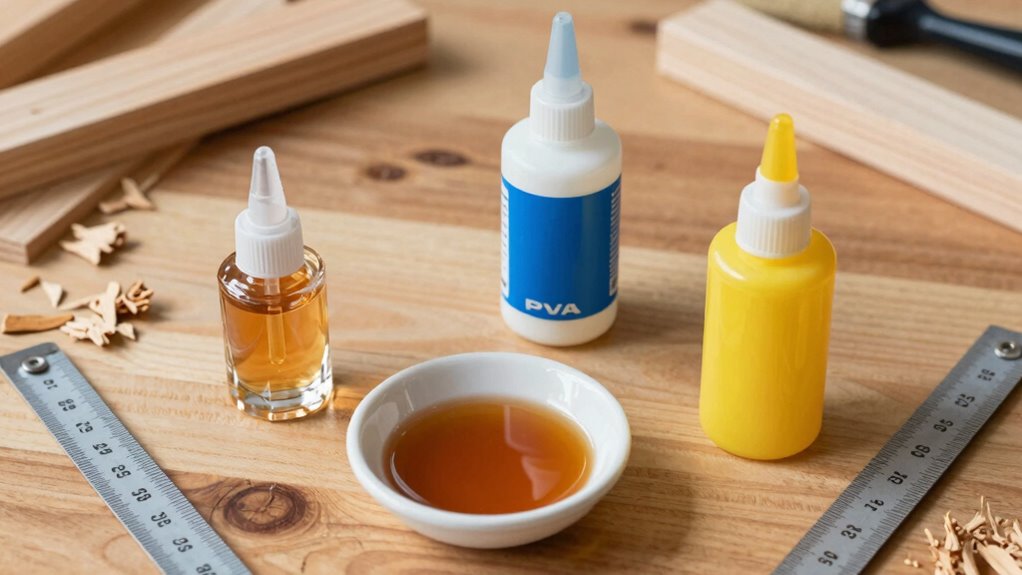
You need to understand that not all wood glues are created equal, and choosing the right adhesive makes or breaks your project’s success.
Different glue types work best with specific wood species and joint designs, so you’ll want to match your adhesive to your material and application.
Let’s break down the main categories of wood glue and explore which ones work best for your specific materials.
Wood Glue Types Explained
Several wood glue types exist, each designed for specific applications and project requirements.
You need to understand these differences to make your projects successful and avoid costly mistakes.
PVA glue works best for interior projects and offers excellent bonding strength on porous surfaces.
Hide glue provides traditional craftsmanship appeal and allows easy disassembly when needed.
Epoxy glue handles gap-filling situations perfectly while creating incredibly strong joints.
Polyurethane glue expands slightly during curing, making it ideal for joints with minor gaps.
CA glue (cyanoacrylate) sets rapidly and works excellently for small repairs or delicate work.
Choose your glue type based on your project’s specific demands rather than grabbing whatever’s convenient.
Matching adhesive properties to application needs prevents joint failures and guarantees professional results every time you build something worthwhile.
Best Adhesives for Specific Materials
Now that you understand the different types of wood glue available, it’s time to match those adhesives to your specific materials and projects.
PVA glue works perfectly for most woodworking joints and interior projects. Use polyurethane glue when you need maximum strength for outdoor furniture or structural components.
Hide glue is your best friend for antique repairs and traditional joinery. For metal-to-wood connections, epoxy provides the strongest bond.
Don’t forget about CA glue for small repairs and tight-fitting joints. Each material demands specific adhesive properties.
Softwoods accept most glues readily, while hardwoods sometimes require special formulations. Always consider environmental factors like moisture and temperature.
Test your glue choice on scrap material first. Match the adhesive strength to your project’s requirements.
How to Sand Wood Smooth Without Scratches
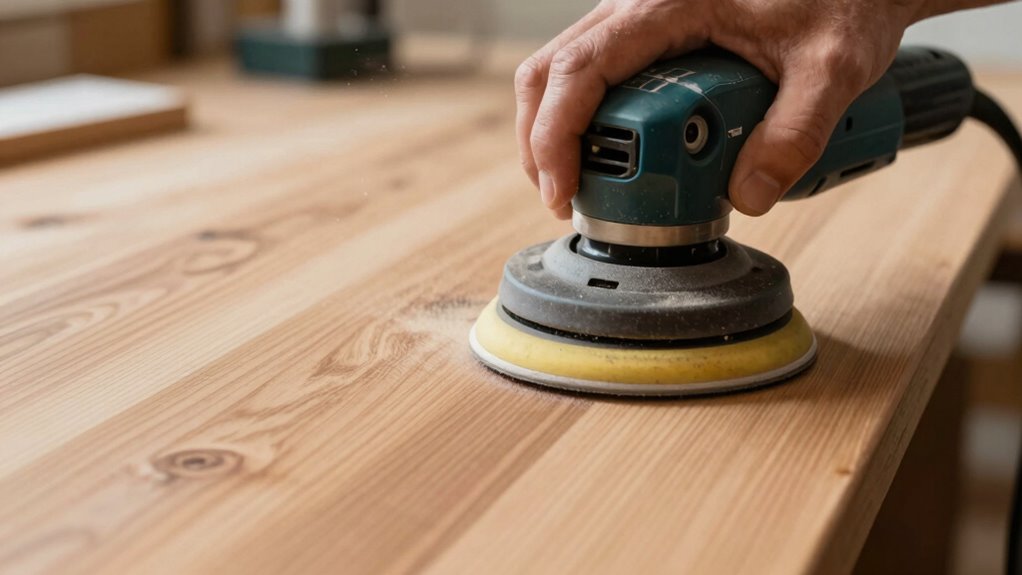
Why do some woodworkers end up with gouges and scratches despite their best efforts? You’re not alone in this frustrating experience. Sanding smoothly requires technique, not just elbow grease.
Start with coarse grits and work systematically upward, never skipping more than one grit level. Keep your sandpaper clean and flat against the wood surface. Apply even pressure while moving in consistent patterns. Replace worn sandpaper promptly – it tears easier and creates scratches. Always sand with the grain direction after initial shaping.
- Begin with 80-120 grit for rough shaping and stock removal
- Progress through grits systematically – 120 to 150 to 180 minimum
- Use proper hand pressure – firm but not aggressive, let the paper work
- Keep sandpaper clean – tap off debris frequently, prevent clogging
- Finish with fine grits – 220-320 for glass-smooth results
Which Finishing Techniques Cause Blotches?
You mightn’t realize that your staining technique directly affects whether your wood develops unsightly blotches. Blotchy stain application happens when you don’t account for inconsistent wood absorption across different grain patterns and densities.
Poor surface preparation before finishing almost always leads to these frustrating results that ruin otherwise beautiful projects.
Blotchy Stain Application
Blotchy stain application often occurs when you don’t properly prepare the wood surface before finishing. You might rush through sanding or skip essential steps, leading to uneven absorption.
Understanding what causes these frustrating blotches helps you achieve professional results every time.
- Skipping pre-stain conditioning leaves end grain and dense areas absorbing stain differently
- Using wrong sandpaper grits creates inconsistent surface textures that absorb stain unevenly
- Applying stain over dirty or oily surfaces prevents proper penetration and bonding
- Choosing inappropriate stain types for your wood species causes unpredictable results
- Rushing the application process without testing on scrap wood first leads to costly mistakes
Take time to prepare properly. Your finished projects will show the difference.
Inconsistent Wood Absorption
When you don’t account for wood’s natural tendency to absorb finishes unevenly, blotches become almost inevitable.
You’re working against the grain when you apply finishes without considering density variations. Soft woods absorb more finish than hard areas, creating ugly dark spots. Dense grain patterns soak up stain differently than open pores, leading to inconsistent coloration.
Pre-test your finish on scrap wood first. Apply thin, even coats rather than heavy applications.
You’ll achieve better results by building up layers gradually. Wet sanding between coats helps create uniform absorption.
Don’t rush the process – let each layer dry completely before adding the next. Wood behaves differently based on humidity and temperature, so adjust your technique accordingly.
Your patience pays off with professional-looking results.
Poor Surface Preparation
Surface preparation mistakes are the primary culprit behind blotchy finishes that ruin otherwise beautiful woodworking projects.
You’ll achieve consistent results when you properly prepare your wood surface before applying finish.
Skipping sanding steps creates uneven absorption patterns that show through your finish. You must remove all dust and debris before staining or painting.
Inconsistent sanding grit progression leaves scratches that telegraph through thin finishes.
Cleaning chemicals or oils from your wood’s surface prevents adhesion problems. Moisture trapped in wood causes finishing failures.
- Sand with proper grit progression: 120, 150, then 220
- Remove all sanding dust completely
- Clean surface with tack cloth
- Test finish compatibility first
- Check wood moisture content before finishing
These steps guarantee professional results every time.
How to Prevent Delicate Wood From Tear-Out
One effective method for preventing tear-out in delicate woods involves supporting the grain structure properly during cutting operations. You should always cut with the grain direction whenever possible, as this minimizes fiber separation.
When working against the grain becomes necessary, place a sacrificial backing board beneath your workpiece to provide additional support.
Keep your blades sharp and make shallow cuts rather than forcing through thick sections. Dull tools actually increase tear-out by crushing fibers instead of cleanly severing them. You’ll find that lighter passes require less pressure and produce cleaner results.
Consider using a zero-clearance insert on your table saw or router table to eliminate unsupported wood fibers. This simple addition prevents delicate areas from splintering during cutting.
Finally, practice proper feeding techniques by maintaining consistent speed and pressure throughout each cut.
When Are Pocket Holes Better Than Dadoes?
Why wouldn’t you reach for pocket holes instead of dadoes in certain situations?
You’re not missing anything by choosing simplicity over complexity when your project demands it.
Pocket holes work better when you’re joining pieces that don’t need maximum strength, working with thinner stock, or building projects where you want hidden fasteners.
They’re perfect for face frames, cabinet assembly, and situations where you can’t cut deep dadoes.
- Quick setup saves your valuable time
- No need for special cutting tools or jigs
- Ideal for beginner woodworkers learning joinery
- Works great on plywood and manufactured boards
- Creates strong enough joints for most household projects
You don’t need dadoes when pocket holes get the job done cleanly.
Trust your instincts.
What Causes Boards to Warp or Cup?
Wood moves constantly throughout its lifespan, responding to changes in humidity and temperature that cause it to expand and contract.
You’ll notice boards cupping when one face dries faster than the other, creating uneven stress. Kiln-dried lumber that wasn’t properly acclimated before use often warps because internal moisture content remains unbalanced.
You should understand that wood movement occurs across the grain more dramatically than along it.
Wide boards are more prone to cupping than narrow ones. Poor storage conditions accelerate these problems. Keep lumber flat, stickered, and covered during seasoning.
Don’t rush the acclimation process. Let materials adjust gradually to your workshop’s environment before cutting joinery or applying finishes. Proper preparation prevents most warping issues entirely.
Why Do Drill Bits Wander: and How to Stop It?
How often have you started drilling a hole only to watch your bit wander off course, leaving you with an uneven, misaligned result?
This frustrating problem happens when your drill bit can’t find purchase or encounters wood grain resistance.
You can prevent wandering by using these proven techniques:
- Start with a center punch or small dimple to guide your bit
- Use a backing board to prevent tear-out and provide stability
- Choose the right bit type for your material and hole size
- Maintain steady, consistent pressure without forcing the drill
- Keep your drill perpendicular to the work surface
These simple adjustments will help you achieve clean, accurate holes every time.
How to Use Every Scrap and Reduce Waste
Ever wonder what to do with those leftover wood pieces that pile up in your workshop? You’re not alone.
Start by sorting scraps by wood type and size – keep small pieces in labeled containers. Thin scraps work perfectly for cabinet backs, drawer bottoms, or shelving. Short pieces become picture frames, small boxes, or decorative trim.
Don’t throw away cutoffs less than six inches – they’re ideal for practice cuts or tiny projects.
Reclaimed wood adds character to new projects while saving money. Cut odd pieces into uniform sizes for future use. Remember that every scrap has potential.
Your fellow woodworkers understand the satisfaction of turning “waste” into something beautiful. Join online communities sharing scrap wood ideas. You’ll discover hundreds of creative uses and connect with others who value resourcefulness.
Conclusion
You’ll make mistakes—that’s inevitable. But here’s the irony: those same errors that frustrate you now will become your greatest teachers. Don’t rush perfection; embrace patience. Your tools won’t betray you, but your haste will. Measure twice, cut once, and remember—every master was once a disaster waiting to happen. Woodworking isn’t about avoiding mistakes entirely; it’s about learning which ones are worth making.
