

You’ll need hardwood like oak or maple for durable drawers that last. Start by measuring your cabinet opening precisely, then cut the front, back, and side pieces to size. Don’t skip the groove cuts for bottom panels – they’re essential for proper assembly. Once you’ve got all pieces ready, you’ll discover how critical accurate measurements really are when things don’t line up perfectly.
Choose Strong Wood for Sturdy Drawers
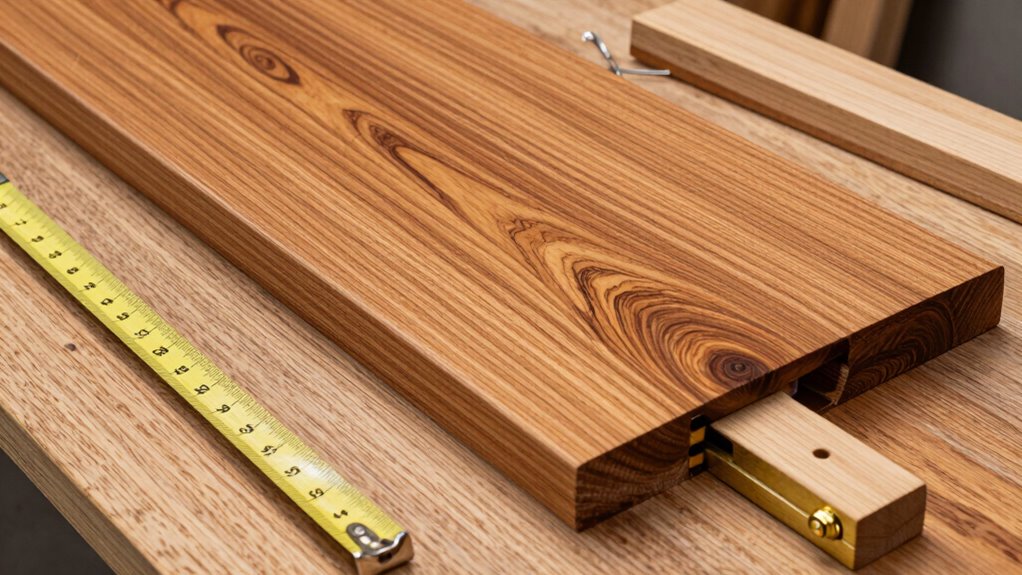
When you select wood for drawer construction, focus on hardwood species that offer superior strength and durability.
Oak, maple, and cherry provide excellent structural integrity for drawer sides, fronts, and backs. These hardwoods resist warping and can support heavy loads without sagging.
Avoid softwoods like pine or cedar, which lack the necessary density for long-lasting drawers. Check lumber quality carefully, looking for straight grain patterns and minimal knots.
Measure twice before cutting any wood pieces. Select boards that are flat and free from cupping or twisting.
Hardwood plywood works well for drawer bottoms, offering stability and smooth sliding action. Your choice of wood determines drawer longevity and performance. Quality hardwood guarantees your craftsmanship stands the test of time.
Gather Tools and Materials Before Cutting
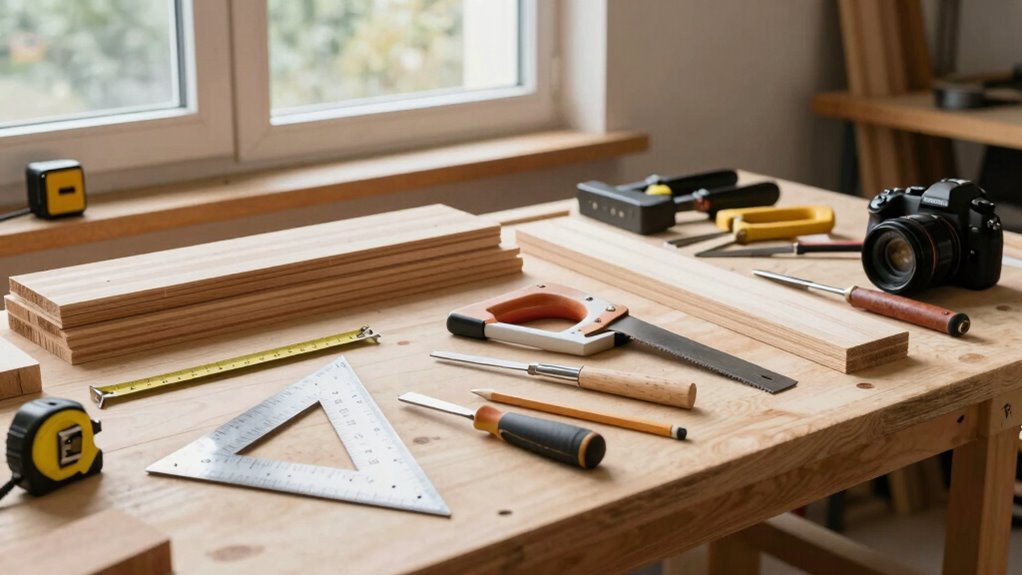
You’ll need specific tools and materials before making any cuts for your wooden drawers. Start by gathering essential items like a miter saw, drill, chisels, and measuring tools.
Then select your wood based on durability and grain pattern. Prepare your workspace by organizing materials and double-checking measurements to avoid costly mistakes during cutting.
Essential Tools Required
Three essential categories of tools form the foundation for successful drawer construction.
Measuring and marking tools include a combination square, tape measure, and sharp pencil for accurate layout work.
Cutting tools comprise a miter saw or hand saw for clean cuts, plus chisels for fine-tuning joints. You’ll need drilling equipment like a power drill with bits, and a block plane for smoothing surfaces.
Assembly requires clamps in various sizes, wood glue, and a rubber mallet for gentle adjustments. Sanding blocks or an orbital sander help achieve smooth finishes.
Don’t overlook safety gear including safety glasses and dust mask. Having these tools ready guarantees you’ll master drawer building techniques alongside fellow woodworkers who share your dedication to quality craftsmanship.
Material Selection Guide
Having assembled your toolkit, you’re ready to select the right materials for your wooden drawers. Choose hardwood plywood for drawer sides and backs; it’s stable and durable.
Select matching hardwood for drawer fronts if you want solid wood appearance. Measure your drawer openings precisely before purchasing materials.
Consider cabinet-grade plywood for smooth surfaces that accept finishes well. Birch or maple plywood works excellently for most projects.
For drawer bottoms, quarter-inch plywood suffices. Purchase wood that’s straight and free from warping.
Check dimensions carefully—materials should match your planned drawer sizes exactly. Don’t forget wood glue, finishing nails, and sandpaper for assembly.
Select materials that complement your existing furniture for seamless integration into your home.
Pre-Cut Preparation Steps
Before cutting any wood, gather all necessary tools and materials to confirm a smooth workflow. You’ll need a miter saw or circular saw, measuring tape, pencil, combination square, and safety equipment. Collect your wood pieces, wood glue, drawer slides, and mounting hardware. Organize everything within easy reach of your workspace.
Check that your measuring tools are accurate and your blades are sharp. Lay out your cut list from the previous material selection step. Verify you have adequate clamps for assembly. Don’t forget sandpaper for smoothing surfaces after cutting.
Keep your work area clean and well-lit. Having everything ready prevents interruptions during cutting phases. This preparation confirms accurate measurements and reduces waste while building confidence in your craftsmanship abilities throughout the project.
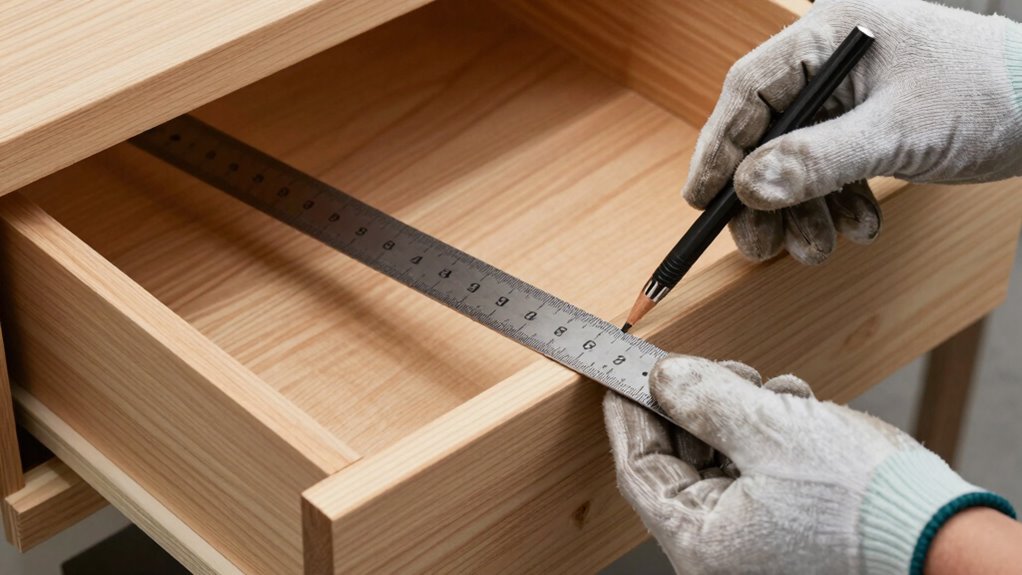
Measure Accurately for Snug Drawer Fit
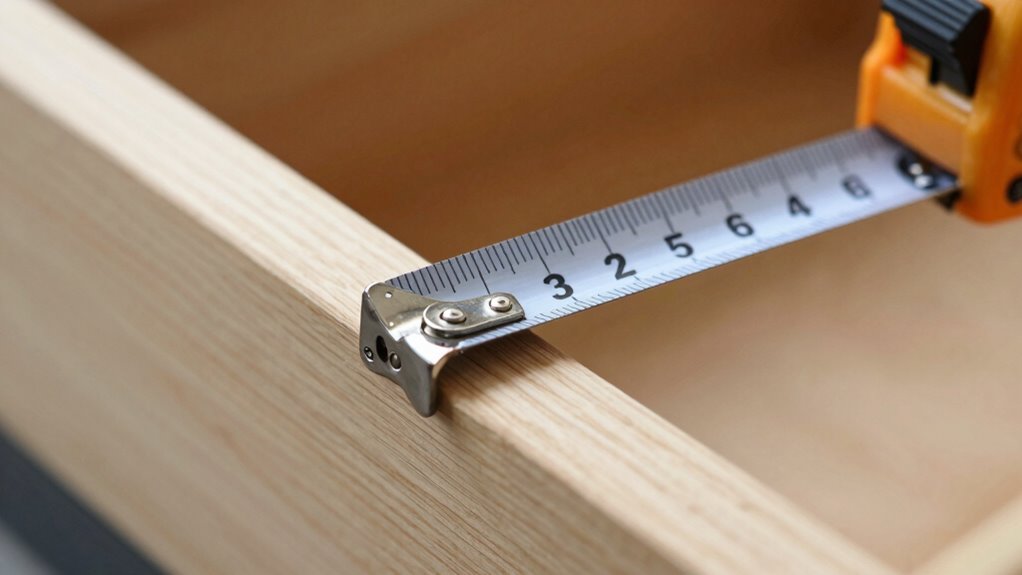
When you measure drawer openings, accuracy determines whether your drawers slide smoothly or bind frustratingly.
Precise measurements prevent gaps or tight fits that compromise functionality.
- Measure opening width – Take three measurements across the opening’s width: top, middle, and bottom. Use the smallest measurement minus 1/16 inch for proper clearance.
- Check opening height – Measure from the bottom of the opening to the top at multiple points. Account for any irregularities by using the smallest dimension.
- Verify opening depth – Measure from front to back at several locations. Drawer depth should be 1/8 inch less than the opening depth for smooth operation.
- Record all dimensions – Write measurements immediately to avoid forgetting essential details during cutting.
Cut Drawer Fronts, Backs, and Sides
Because accurate measurements form the foundation of successful drawer construction, you’ll now cut the drawer fronts, backs, and sides to size.
Set your table saw blade to match your planned dimensions exactly. Cut the front piece first, ensuring smooth edges. The back piece requires identical length but may need slight height adjustments based on your cabinet layout.
Measure twice before cutting each side panel, maintaining consistent width throughout. Use a sharp blade to prevent tear-out on visible faces. Check that all pieces fit together properly before proceeding.
Sand any rough edges lightly with fine-grit paper. Your precisely-cut components should feel satisfyingly accurate, creating that snug fit you’ve measured for.
These carefully prepared pieces will soon become functional drawers that reflect your craftsmanship.
Cut Grooves for Drawer Bottom Panels
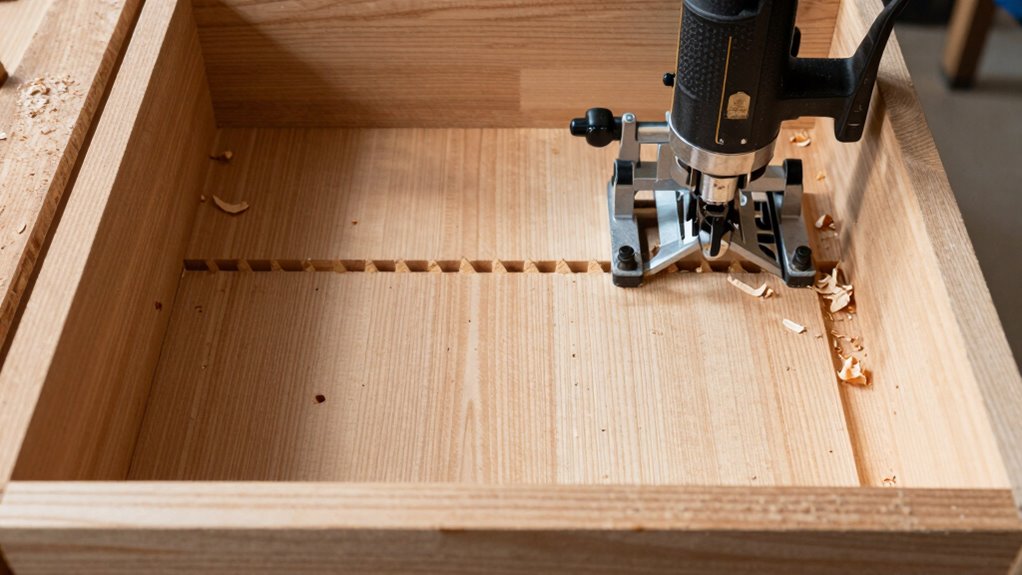
Cut grooves along the interior edges of your drawer fronts, backs, and sides to accommodate the bottom panels. These grooves create secure channels that hold your drawer bottoms firmly in place.
- Set your router bit depth to match your planned bottom panel thickness, typically 1/4 inch deep.
- Adjust the router fence so grooves cut exactly 1/4 inch from the inside edge of each panel.
- Route consistent grooves along the full length of both side panels and the back panel.
- Check that all grooves align perfectly when you assemble the drawer components.
Make certain your grooves run parallel and meet precisely at corners. This step guarantees your drawer bottoms slide in smoothly while maintaining structural integrity.
Take your time with setup because accurate grooves prevent wobbly drawers later.
Prepare Thin Plywood or MDF Bottoms
You’ll need to select plywood or MDF that’s 1/4-inch thick for your drawer bottoms.
Cut these panels to fit snugly within the grooves you’ve already routed, guaranteeing accurate measurements using your drawer dimensions.
Sand all edges smooth with fine-grit paper to prevent splinters and guarantee clean installation.
Choose Material Thickness
When building wooden drawers, selecting the appropriate material thickness for your drawer bottoms is essential for achieving proper support and durability.
You’ll want to choose materials that won’t sag under normal use while fitting properly within your drawer frames.
- 1/4-inch plywood works well for lightweight drawers holding clothes or linens.
- 1/2-inch plywood provides excellent support for heavier items like tools or dishes.
- 3/8-inch MDF offers smooth surfaces and good strength at affordable prices.
- 1/4-inch hardwood plywood gives you the best combination of strength and thin profile.
Consider your drawer’s intended use and the weight it’ll carry. Kitchen drawers need thicker bottoms than bedroom dresser drawers.
Your choice directly impacts how long your drawers will function properly.
Cut Bottom Panels
Preparing the bottom panels requires precise measurements and careful cuts to confirm proper fit within your drawer frames.
You’ll need thin plywood or MDF sheets measuring ¼-inch thick. Measure each drawer opening’s length and width, then subtract ⅛-inch from both dimensions to allow for expansion. Mark these measurements clearly on your material.
Use a circular saw or table saw with a fine-tooth blade for clean edges. Cut slowly along your marked lines, keeping your guide firmly positioned.
Check each panel against its corresponding drawer frame immediately after cutting. Make test fits to verify accuracy before proceeding.
Properly cut bottom panels confirm your drawers slide smoothly and remain structurally sound throughout their lifespan.
Sand Smooth Edges
With your bottom panels cut to size, attention turns to smoothing rough edges that could interfere with drawer operation.
Sharp or splintered edges will catch on drawer slides and create binding issues during use.
- Start with 120-grit sandpaper to remove major imperfections and sharp corners from all panel edges.
- Progress to 220-grit sandpaper for fine smoothing, guaranteeing edges feel smooth to touch.
- Sand in long, consistent strokes following wood grain direction to avoid cross-grain scratches.
- Wipe away dust with tack cloth before installation to prevent debris buildup in drawer mechanism.
Focus on corners and edges that contact drawer sides during operation.
Properly sanded panels guarantee smooth gliding action and prevent premature wear of wooden drawer components during daily use.
Glue Up Drawer Box Corners Firmly
Drawer assembly demands meticulous attention to corner joinery, where glue-up techniques make or break structural integrity.
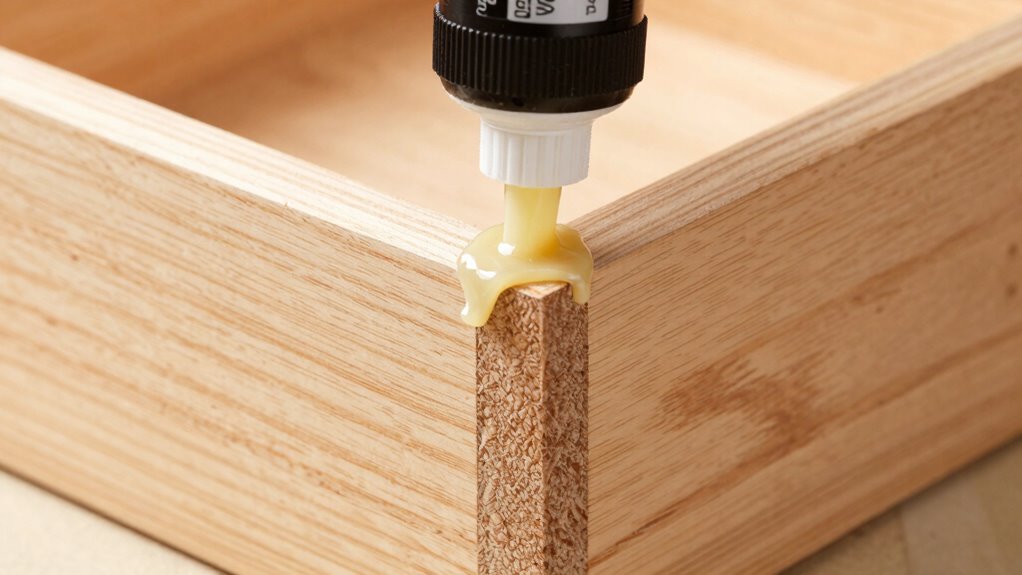
You’ll achieve maximum strength by applying yellow wood glue to all mating surfaces before assembly. Spread thin, even layers with a brush, ensuring complete coverage without excessive buildup.
Clamp each corner immediately, using bar clamps or corner clamps to pull joints tight. Wipe away squeeze-out glue with a damp cloth before it dries, working quickly but deliberately.
Maintain consistent pressure for at least thirty minutes, allowing glue to begin curing properly. Check corner alignment frequently during clamping, adjusting as needed.
You’re creating lasting furniture that’ll withstand daily use. Proper glue-up eliminates future wobbling or joint failure.
Work systematically through each corner, ensuring every joint receives equal attention. Your drawers deserve this precision.
Strengthen Joints With Screws or Dowels
You’ll reinforce your glued joints by driving screws through pre-drilled pilot holes at strategic angles, ensuring maximum holding power without splitting the wood.
Install wooden dowels into precisely aligned holes, applying glue before insertion to create seamless connections that won’t loosen over time.
Test each joint’s strength by applying steady pressure in multiple directions, checking for any movement or weakness before proceeding to the next assembly step.
Sturdy Screw Joint Assembly
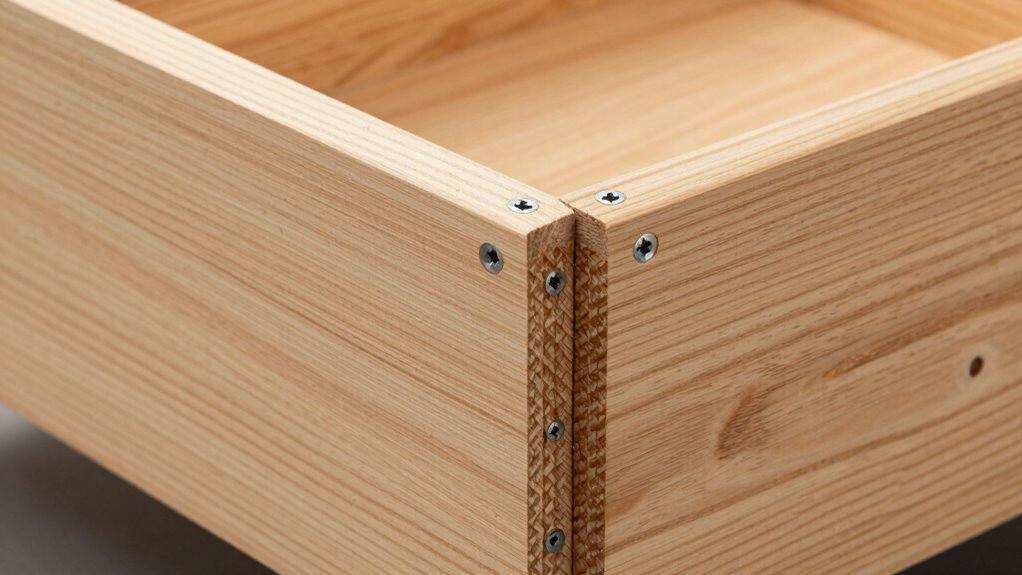
Strengthen your drawer joints by driving screws through pre-drilled holes at strategic angles. This method creates durable connections that’ll last for years.
- Pre-drill pilot holes at 45-degree angles through side panels into drawer bottoms. This prevents wood splitting and guarantees clean screw entry.
- Use #8 cabinet screws measuring 1½ inches long. These provide superior holding power without over-penetrating through your workpiece.
- Countersink screw heads slightly below surface level. This creates flush joints and prevents snagging when drawers slide in and out.
- Apply wood glue before assembly for maximum joint strength. Wipe away excess glue immediately with a damp cloth before it dries.
These techniques guarantee professional-quality drawer construction that you can trust.
Dowel Reinforcement Techniques
One effective method for reinforcing drawer joints involves using wooden dowels alongside screws to create exceptionally strong connections.
You’ll need hardwood dowels, typically 1/4-inch diameter, and precise drilling equipment. Start by marking dowel locations 1 inch from joint edges. Drill 1/4-inch holes completely through both mating pieces at slightly angled trajectories.
Apply wood glue inside holes before inserting dowels. Drive screws through pre-drilled pilot holes adjacent to dowel positions. This combination prevents joint racking while screws handle shear forces.
Dowels provide excellent alignment during assembly and create multiple load paths. Choose dowel length equal to combined material thickness minus 1/8 inch.
You’re creating professional-grade drawers that’ll withstand years of use. The dual reinforcement system guarantees your joints won’t fail under normal stress conditions.
Joint Strength Testing Methods
After reinforcing your drawer joints with dowels and screws, verifying their strength becomes essential before final assembly. You need confidence that your craftsmanship will last.
- Apply steady pressure – Grip opposite corners and twist forcefully to simulate daily use stress.
- Check for movement – Run your fingers along joint seams while applying gentle side-to-side pressure.
- Test weight capacity – Place increasing weights inside the drawer box, working up to expected load limits.
- Inspect screw tightness – Verify all fasteners remain secure after pressure testing.
These methods guarantee your joints won’t fail prematurely.
Proper testing gives you peace of mind that your drawers will function reliably for years.
Don’t skip this essential step – it separates amateur work from professional-quality craftsmanship that you can trust.
Smooth All Drawer Parts by Sanding

Sanding all drawer parts requires careful attention to detail and systematic progression through different grit levels.
Start with 80-grit sandpaper to remove any rough spots or imperfections from your wood. Work systematically across all surfaces, following wood grain direction. Progress to 120-grit paper to eliminate scratches left by coarser grits. Maintain even pressure and consistent motion patterns.
Switch to 220-grit sandpaper for final smoothing. This grit removes remaining scratches while creating silky surface texture essential for proper finish adhesion.
Sand all drawer components thoroughly – sides, bottom, front, and back panels. Don’t forget corners and edges where hands might catch.
Wipe away dust frequently using tack cloth between grit changes. Proper sanding guarantees professional results that’ll make you proud of your craftsmanship.
Drill Holes for Your Drawer Pulls
You’ll need to mark precise pilot holes before drilling for your drawer pulls.
Position your handle where you want it and use a pencil to mark the screw locations through the mounting holes.
Once you’ve marked both holes, you’re ready to install the handle screws.
Marking Pilot Holes
Choose your drawer pull placement carefully, then mark the exact spots where you’ll drill pilot holes. Proper marking guarantees your handles align perfectly and function smoothly.
- Measure twice from drawer edge to maintain consistent spacing across all drawers.
- Use a pencil to mark small, clear dots – not large smudges that confuse positioning.
- Check that marks align with your drawer pull’s screw holes by holding it up to the marks.
- Double-check measurements against your drawer face dimensions to prevent costly mistakes.
Take time with these marks. They’re your roadmap for successful installation. Rushing leads to crooked pulls and frustrated adjustments later.
Your future self will appreciate precise, thoughtful marking now.
Installing Handle Screws
Before you drill the holes for your drawer pull screws, verify your pilot hole marks are perfectly aligned with the handle’s mounting points.
Position your drill perpendicular to the wood surface. Start drilling slowly to prevent tear-out. Maintain steady pressure as you create clean, precise holes.
Check that your drill bit depth matches your screw length. Don’t drill too deep or you’ll compromise the wood’s integrity.
Once holes are complete, test-fit your drawer pulls. The screws should thread smoothly without binding. If resistance occurs, slightly enlarge the holes.
Proper alignment verifies your handles function correctly and look professional. This attention to detail transforms raw wood into quality drawers that belong in any well-crafted piece of furniture.
Mount Handles or Knobs Securely
Installing handles or knobs securely requires careful attention to screw placement and tightening torque. You want hardware that stays put through daily use.
- Position handles evenly – Measure from drawer edges to guarantee consistent placement that looks professional and feels right to users.
- Use appropriate screw length – Select screws that penetrate deep enough into drawer fronts without protruding through the back surface.
- Pre-drill pilot holes – This prevents wood splitting and guarantees screws thread smoothly into place.
- Tighten screws firmly – Use a screwdriver or drill with controlled torque to avoid over-tightening that strips holes or under-tightening that leaves hardware loose.
Check handle alignment before final tightening.
Loose hardware frustrates users and damages drawers quickly.
Attach Drawer Slides to Both Sides
You’ll need to measure slide positions accurately before securing mounting screws tightly to guarantee proper alignment.
Test slide movement smoothly after installation to verify drawers operate without binding or gaps.
These steps require careful attention to detail for successful drawer slide attachment.
Measure Slide Positions Accurately
Accurate measurement confirms proper slide alignment and smooth drawer operation. You’ll achieve precise results by following these essential steps:
- Measure drawer height – Determine exact clearance between cabinet sides and drawer front height. This affirms slides won’t bind or stick during operation.
- Mark mounting points – Use a pencil to mark screw hole positions on both cabinet sides simultaneously. Keep measurements consistent from top to bottom.
- Check slide specifications – Verify manufacturer’s recommended spacing and mounting dimensions before marking. Don’t assume standard measurements work for every slide type.
- Double-check all measurements – Measure twice, mark once. Verify identical positioning on both sides before drilling begins.
Inconsistent measurements cause binding and misalignment issues.
Precision at this stage prevents frustrating adjustments later.
Secure Mounting Screws Tightly
Once you’ve marked all mounting points precisely, secure the drawer slides to both cabinet sides using the manufacturer’s specified screws.
Position each slide flush against the marked locations, guaranteeing perfect alignment before driving any fasteners.
Drive screws through the slide’s mounting holes into the cabinet face, maintaining consistent spacing between fasteners.
Tighten each screw firmly but avoid over-tightening, which can strip threads or damage the slide mechanism.
Check that both slides sit perfectly level and parallel to each other.
Verify all screws remain securely fastened before proceeding.
Properly mounted slides form the foundation for smooth drawer operation.
Take time to confirm every connection feels solid and secure.
Loose screws create wobbling drawers that bind or stick during use.
Your attention to detail here directly impacts the drawer’s long-term performance and reliability.
Test Slide Movement Smoothly
Installation demands careful attention to slide alignment before fully securing any fasteners.
You’ll want to guarantee smooth operation from the start.
- Check parallel alignment – Make sure both slides run perfectly parallel to each other before tightening screws completely.
- Test glide motion – Gently slide the drawer back and forth several times to feel for any binding or sticking points.
- Adjust height positioning – If movement feels rough, loosen screws slightly and reposition the slide assembly up or down as needed.
- Verify full extension – Confirm the drawer extends completely without catching or requiring excessive force.
Don’t rush this step.
Taking time to test slide movement now prevents frustrating adjustments later.
Your future self will thank you for guaranteeing everything moves smoothly before final assembly.
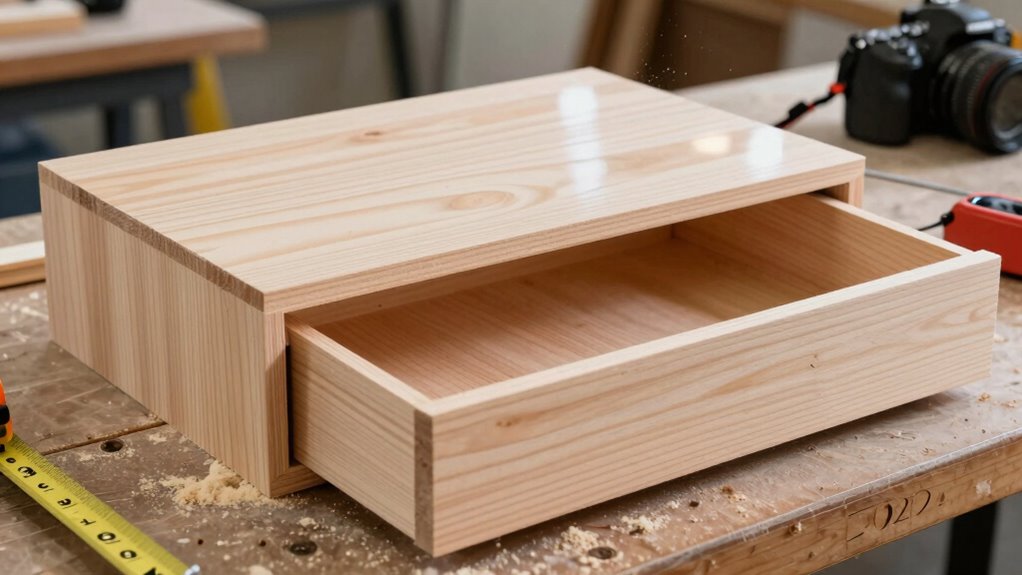
Try-Fit Drawer in Frame or Cabinet
Before you finalize your drawer construction, one critical step guarantees everything functions properly: testing your drawer’s fit within the frame or cabinet opening.
Slide your completed drawer into the designated space, confirming it sits level and aligned. Check that the drawer fronts align flush with surrounding cabinet faces.
Verify the drawer moves freely without binding or scraping against sides, bottom, or face frame. Examine gaps around all edges – they should be consistent and even.
Pay attention to how the drawer sits when fully extended versus partially pulled out. This test fitting reveals any construction issues before you commit to final assembly.
If problems exist, you can identify them now rather than after installation. Proper fit guarantees your drawers operate smoothly and look professional.
Adjust Gaps for Smooth In-and-Out Motion
While your drawer slides smoothly during the initial test fit, you’ll need to fine-tune the gaps to confirm consistent, friction-free movement throughout the entire range of motion. Proper gap adjustment confirms your drawer operates smoothly every time.
- Check side gaps between drawer sides and cabinet openings, aiming for 1/16-inch clearance on each side.
- Examine the front-to-back gap beneath the drawer bottom, maintaining 1/8-inch space for smooth gliding.
- Verify top and bottom clearances between drawer fronts and adjacent surfaces, keeping consistent 1/16-inch gaps.
- Test-slide the drawer repeatedly, marking any tight spots with pencil marks for targeted sanding or trimming.
Precision gap adjustment separates amateur builds from professional-quality drawers that operate seamlessly.
Stain or Paint Your Drawer Surfaces
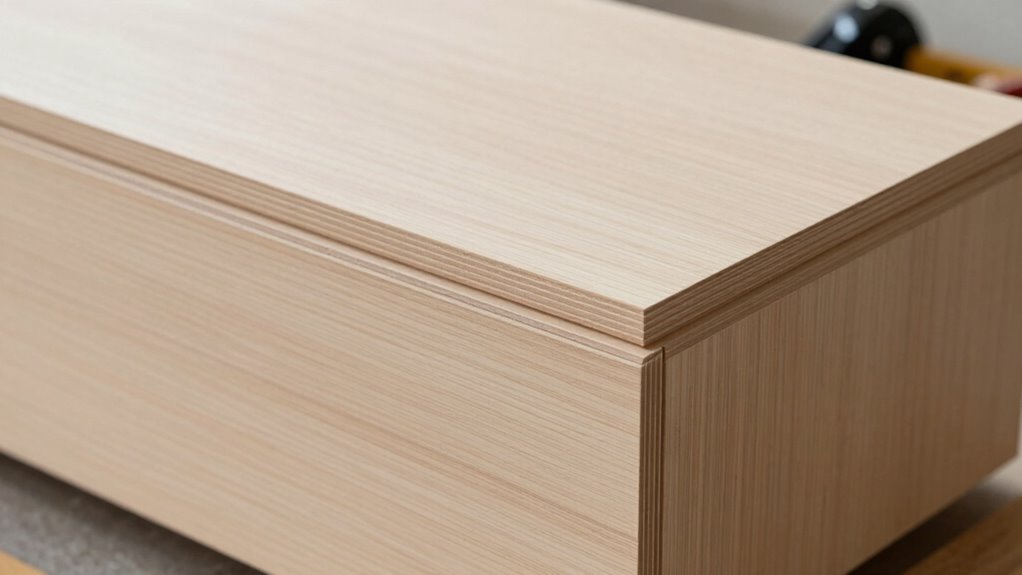
Finishing your drawer surfaces with stain or paint protects the wood while enhancing its appearance.
You should sand all surfaces smooth before applying finish, removing any dust with a tack cloth. Apply stain with a brush or cloth, following wood grain direction. Wipe off excess stain immediately for even color. Allow stain to dry completely between coats.
Paint requires primer first, then thin, even coats. Don’t overload your brush to prevent drips. Work in a well-ventilated area and maintain consistent temperature. Lightly sand between paint coats with fine-grit sandpaper.
Choose finishes that match your project’s intended use and aesthetic. Test colors on scrap wood first.
Your drawer surfaces deserve careful attention to detail.
Seal Wood for Durability and Looks
Sealing your wood drawers properly guarantees they’ll withstand daily use while maintaining their attractive appearance for years to come.
You’ll protect your craftsmanship investment by applying the right sealer correctly.
- Choose your sealer wisely – Polyurethane offers excellent durability, while Danish oil provides a more natural feel that you’ll appreciate during daily use.
- Sand lightly between coats – Use 220-grit sandpaper to create smooth surfaces that’ll make you proud of your finished work.
- Apply thin, even coats – Work systematically from back to front, letting each layer dry completely before adding the next.
- Finish with light sanding – Buff the final coat gently to achieve that professional look you’ve been aiming for.
Test Full Extension of Slide Tracks
Before your drawers can function properly, you’ll need to verify that each slide track extends fully from front to back. Grab the drawer front and pull it completely out until it stops naturally.
The tracks should glide smoothly without catching or jerking. Check both sides simultaneously to ascertain even extension. Push the drawer back in completely, feeling for any resistance or misalignment. Repeat this process several times to confirm consistent operation.
Examine the track connections where they meet cabinet sides and drawer boxes. Tighten any loose screws immediately. Listen for grinding or scraping sounds during movement.
Properly extending slides guarantee your drawers fit perfectly within their intended space, functioning seamlessly every time you open or close them.
Fix Binding, Sticking, or Misaligned Drawers
When drawers bind, stick, or sit crooked in their openings, you’ll need to identify and correct the underlying issues promptly. These problems typically stem from alignment issues, debris, or hardware malfunctions that prevent smooth operation.
- Check drawer alignment – Examine whether the drawer sits level in its opening. Adjust the slides or reposition the drawer guides if you notice gaps or binding points.
- Clean sliding mechanisms – Remove dirt, dust, and wood shavings from tracks and rollers. Use a vacuum or compressed air to eliminate debris that causes sticking.
- Lubricate metal components – Apply dry lubricant to slide tracks and rollers. Avoid oil-based products that attract more dirt and create additional binding.
- Adjust or replace damaged hardware – Tighten loose screws, realign bent tracks, or install new slide mechanisms when components wear out.
Add a Soft-Close Drawer Mechanism (Optional)
A soft-close mechanism eliminates the annoying sound of drawers slamming shut while protecting your fingers from pinching.
You’ll need soft-close drawer slides or retrofit kits designed for existing drawers. Measure your drawer’s weight capacity and extension length before purchasing.
Remove existing hardware carefully, then install new soft-close slides following manufacturer’s instructions. Align mounting holes precisely using a drill guide.
Test mechanism repeatedly, adjusting tension screws until smooth operation occurs. These mechanisms automatically slow drawer movement during closing, preventing damage to contents and cabinetry.
Quality soft-close systems integrate seamlessly with wooden drawer construction, becoming virtually invisible once installed.
Keep Drawers Running Smooth Over Time
While soft-close mechanisms provide smooth operation initially, maintaining that performance requires regular attention to drawer components.
You’ll want to keep these moving parts functioning properly through routine maintenance.
- Clean drawer channels monthly using a dry cloth to remove dust and debris that accumulate in tracks and interfere with slider movement.
- Lubricate mechanical components every three months with a silicone-based lubricant, avoiding over-application that attracts dirt.
- Check mounting screws biannually for tightness, as loosened hardware causes wobbling and premature wear on drawer mechanisms.
- Inspect soft-close mechanisms regularly for damage or wear, replacing worn parts immediately to prevent further degradation.
Conclusion
You’ve conquered the chaos of carpentry and built drawers that’ll outlast your great-grandchildren’s complaints about old-fashioned furniture. Don’t let all that hard work slide into oblivion—keep those drawers gliding smoother than a buttered penguin on ice. A quick wax job now prevents future frustrations that could drive you absolutely bonkers.
