

It’s remarkable how quickly a toolbox turns into chaos—almost as if tools multiply when you’re not looking. You probably have wrenches scattered around and screwdrivers hidden in impossible places. What if you could find exactly what you need in seconds instead of minutes? Start by dumping everything out and sorting tools into clear categories.
Why Organizing Your Toolbox Saves Time and Sanity
When you organize your toolbox systematically, you immediately eliminate the frustration of searching through cluttered drawers and bins. You’ll find exactly what you need when you need it, reducing project delays and stress.
Your workspace becomes more efficient as everything has its designated place. You’ll spend less time hunting for tools and more time actually using them.
A well-organized toolbox prevents duplicate purchases since you can see what you already own. You’ll feel more confident tackling projects knowing your tools are readily accessible.
This systematic approach creates a sense of control and mastery over your workspace. Organization transforms chaos into order, making your tool collection work for you instead of against you.
Take Stock of What You Already Own
Taking stock of your current tools is the essential first step toward organizing your toolbox effectively.
Start by emptying your toolbox completely onto a clean surface. Sort everything into categories: screwdrivers, wrenches, pliers, and specialty tools. Check each item’s condition—discard broken or severely worn tools that won’t serve you well.
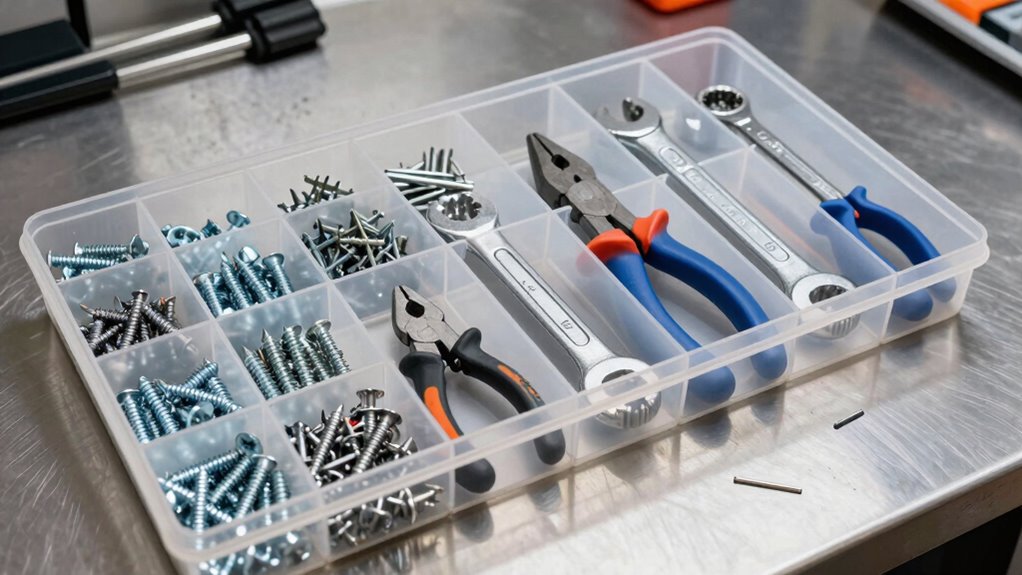
Count multiples of commonly used items like screwdrivers or drill bits. Group similar tools together regardless of their current location. Don’t forget small accessories like nuts, bolts, and washers.
Create a simple inventory list on paper or your phone. This process helps you understand what you actually own versus what you think you have. You’ll identify gaps in your collection and recognize duplicates you can declutter.
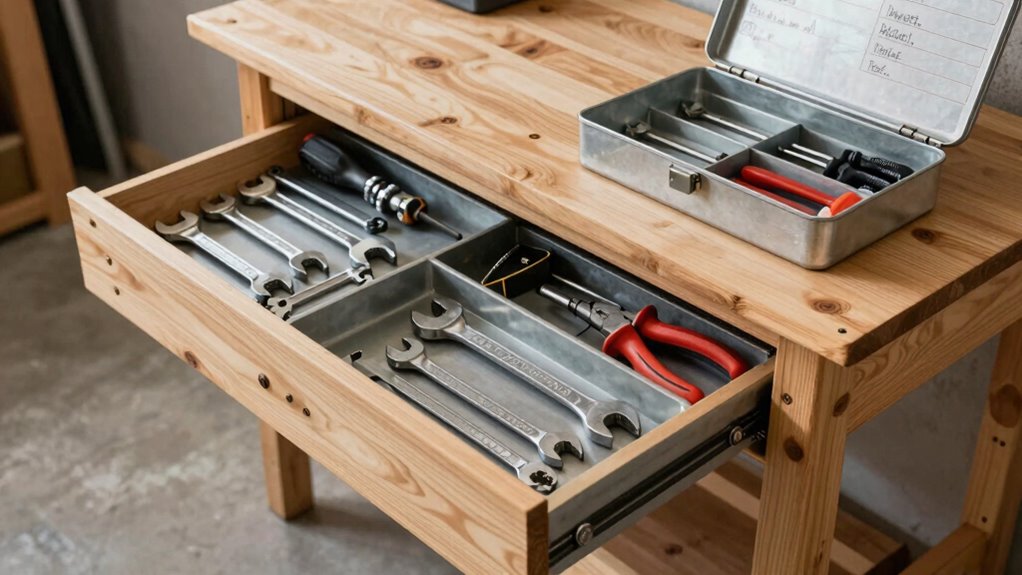
Match Storage Types to Your Workspace and Tools
Now that you’ve inventoried your tools, consider how your workspace and tool collection influence your storage needs. Your garage demands different solutions than a job site or workshop.
Assess your available space first – measure shelves, drawers, and workbench areas. Match large tools to robust storage like pegboards or rolling carts. Smaller items need compartmentalized containers or drawer organizers.
Consider your work environment too. Outdoor spaces require weather-resistant storage. Tight quarters call for vertical solutions.
Your tool collection’s size and variety determine whether you need modular systems or simple dividers. Don’t force square pegs into round holes – let your actual workspace dictate storage choices.
Proper matching prevents frustration and maximizes efficiency. Your tools deserve storage that fits both their function and your working habits.
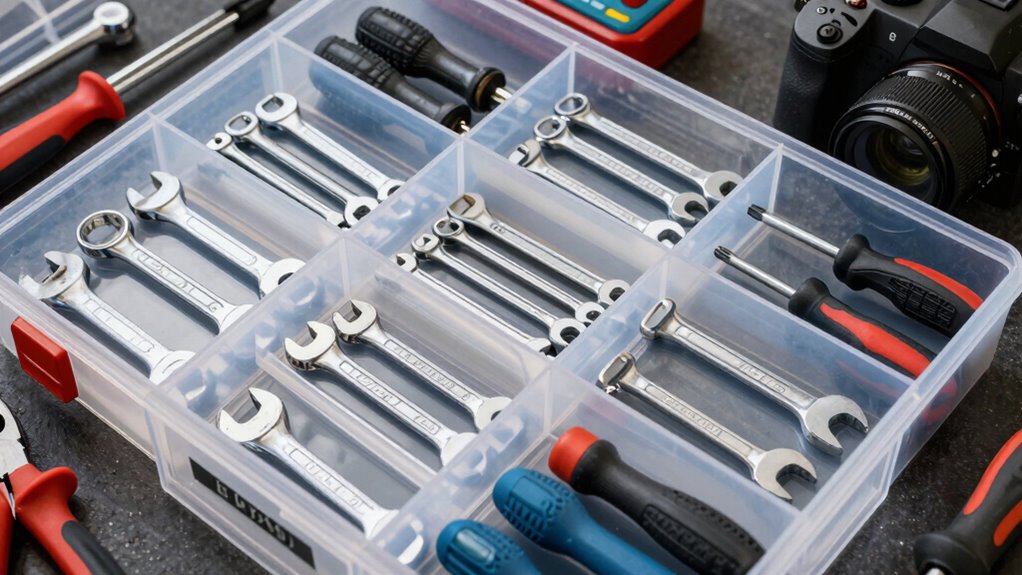
Sort Tools by Job Type and How Often You Use Them
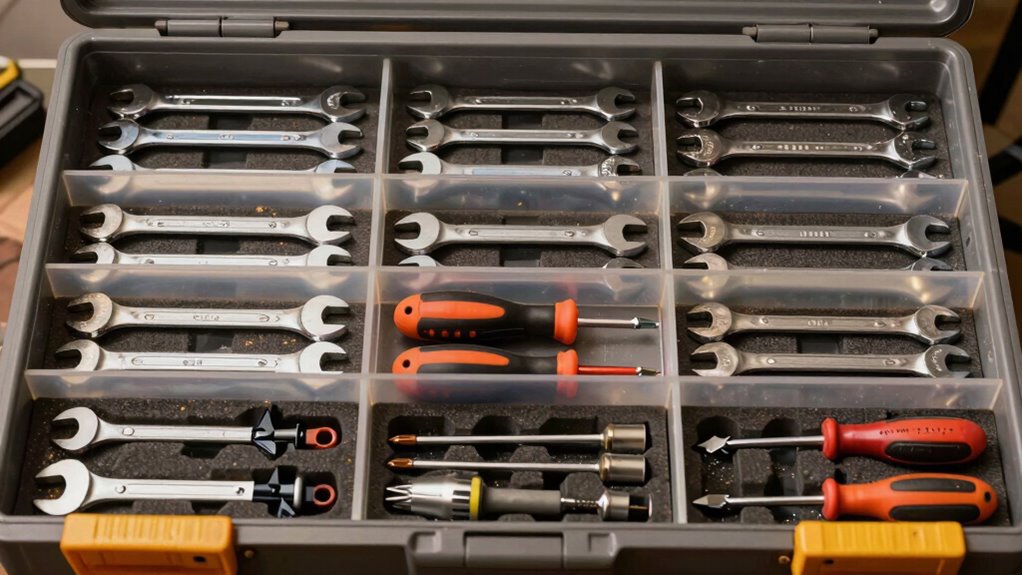
While you’re organizing your toolbox, sorting tools by job type and frequency of use makes finding what you need much faster. This approach helps you work more efficiently while reducing frustration.
- Place frequently used tools like screwdrivers and pliers in easily accessible front compartments where you can grab them quickly.
- Group similar tools together – keep all your wrenches in one section, hammers near other striking tools, and electrical tools clustered together.
- Store specialized tools separately in designated areas since you won’t need them as often and don’t want them cluttering your main workspace.
- Arrange tools by project type – automotive tools together, household repair tools grouped, and gardening tools in their own section.
This systematic approach creates a logical flow that feels natural to your work habits.
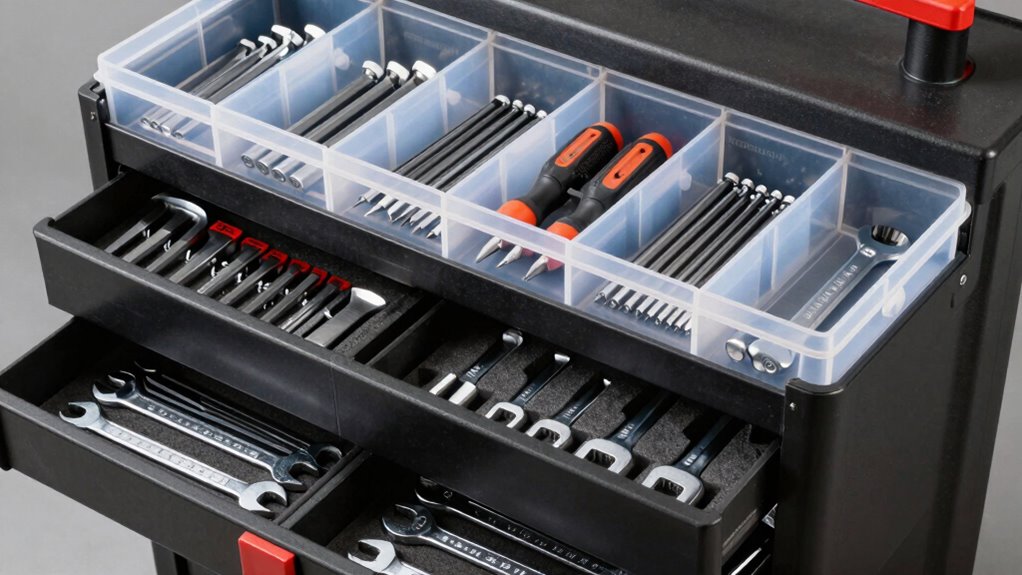
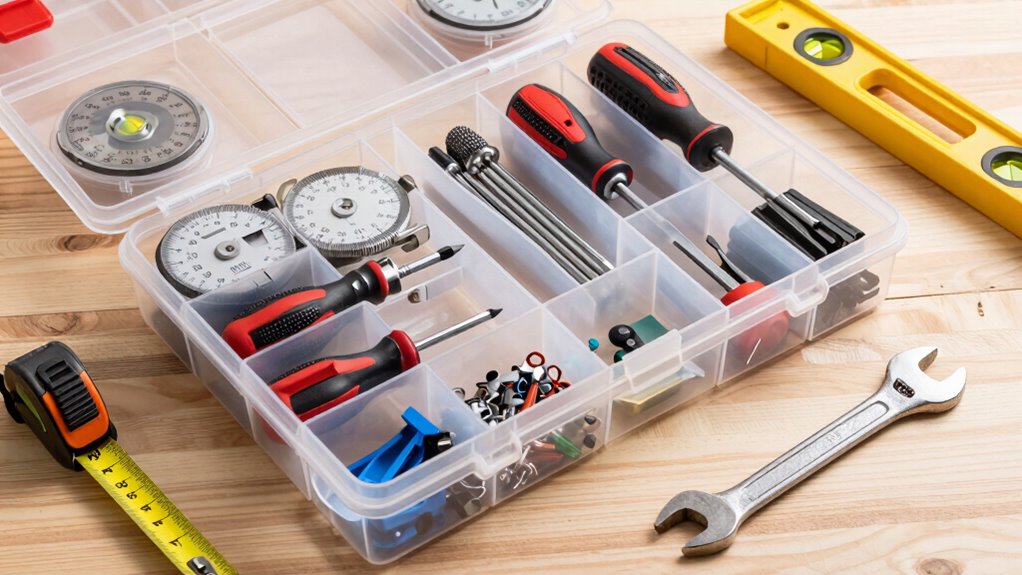
Organize Drawers Using Dividers and Inserts
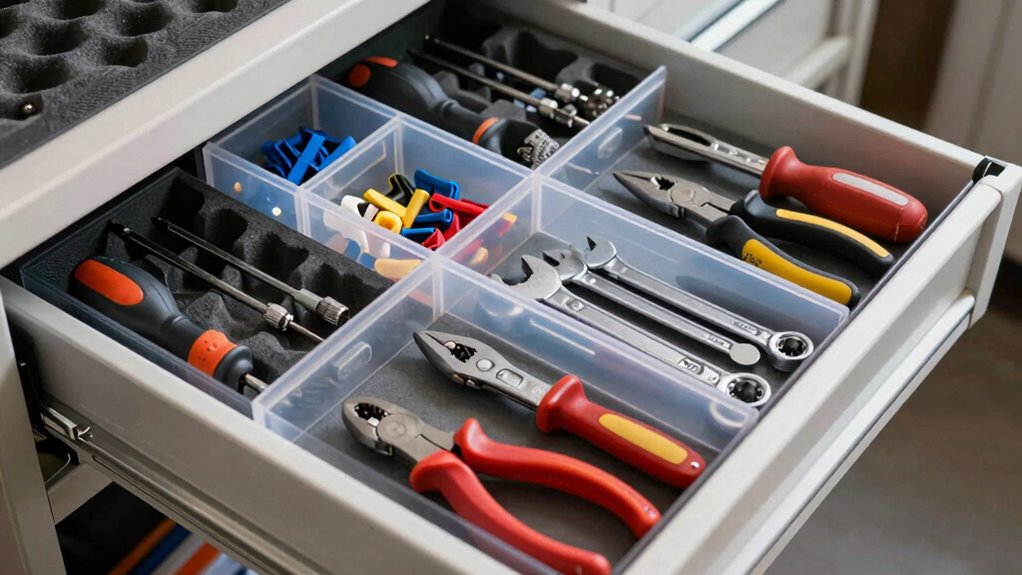
You’ll want to choose divider types that match your tool shapes and sizes.
Measure your drawer dimensions carefully before purchasing inserts to guarantee proper fit.
Install your chosen dividers and inserts securely so they won’t shift around when you open and close the drawers.
Choose Appropriate Divider Types
Several divider types exist, each designed for specific organizational needs within your tool box drawers.
You’ll want to select the right fit for your tools and usage patterns.
- Adjustable plastic dividers let you create custom compartments that move based on your changing tool collection needs.
- Foam inserts cradle delicate instruments perfectly, preventing movement and protecting edges during transport or storage.
- Wooden slat dividers offer sturdy separation for heavier tools, creating permanent sections that won’t shift under pressure.
- Magnetic strip dividers work wonders for metal tools, allowing quick access while keeping similar items grouped together naturally.
Choose dividers that match both your tool types and how frequently you access them.
Measure Drawer Dimensions Accurately
Accurate measurements form the foundation of effective drawer organization. You need precise dimensions before selecting dividers or inserts. Start by measuring drawer length, width, and depth using a tape measure.
Measure twice to avoid costly mistakes. Don’t forget to account for existing drawer slides or hardware that might reduce available space. Write down all measurements clearly.
Check for any irregularities like bowed sides or uneven bottoms that could affect fit. Measure at multiple points since drawers aren’t always perfectly square. Include lip overhangs and corner radius details.
These measurements guarantee your dividers fit snugly without gaps or binding. Proper measurement prevents frustration later when components don’t fit properly. You’ll achieve professional results that make your tool organization system function smoothly.
Install Inserts Securely
Having measured your drawer dimensions carefully, you can now proceed with installing dividers and inserts that fit properly. Secure installation keeps your tools organized and prevents damage during movement.
- Position divider strips along marked lines, ensuring they’re perfectly straight and flush against drawer sides.
- Apply adhesive backing or screw mounting hardware according to manufacturer specifications, pressing firmly for maximum grip.
- Insert plastic or wooden dividers into pre-cut slots, snapping them into place with satisfying clicks.
- Test stability by gently shaking the drawer, confirming everything stays put during toolbox transport.
You’re creating a professional-grade organization system that’ll serve you reliably for years.
Label Everything Clearly for Fast Identification
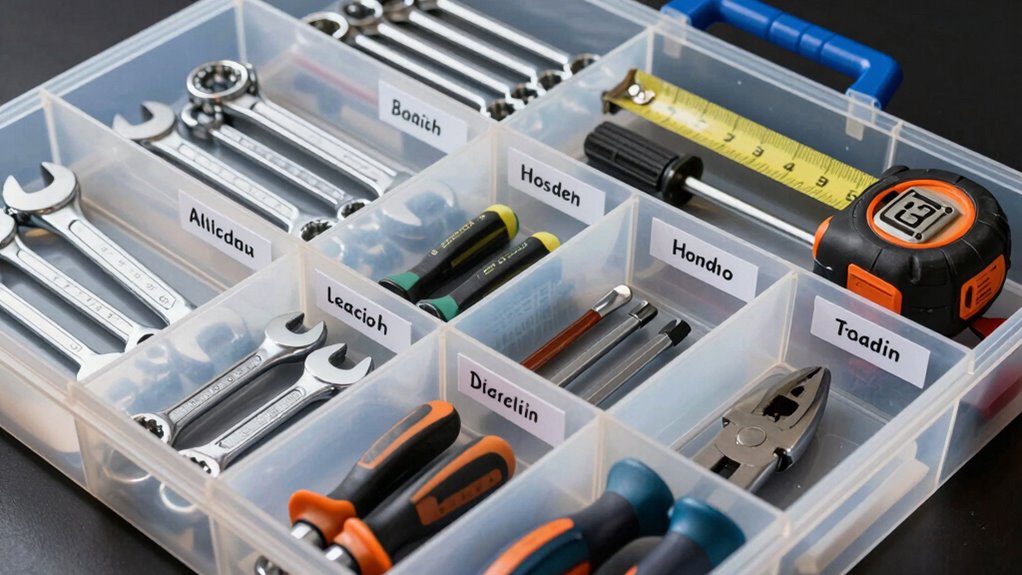
You should establish a clear labeling system that makes tools instantly recognizable.
Color-coded identification tags help you sort items by category or frequency of use.
Permanent marker labels guarantee your organization system stays intact through regular wear and tear.
Clear Labeling System
When you label everything in your tool box clearly, you’ll save valuable time searching for specific tools during projects. A systematic labeling approach transforms your toolbox chaos into organized efficiency that every craftsman appreciates.
- Use bold, readable labels on every compartment and drawer front so you instantly recognize tool locations.
- Create category headers like “Screwdrivers” or “Pliers” above grouped tools for quick visual scanning.
- Apply consistent font sizes throughout your labeling system to maintain professional appearance.
- Update labels immediately when you reorganize or add new tools to keep your system current.
Your perfectly labeled toolbox becomes a source of pride and belonging among fellow DIY enthusiasts.
Color-Coded Identification Tags
Color-coding your tools takes organization to the next level by creating visual shortcuts that your brain processes faster than text alone. You’ll want to assign specific colors to different tool categories – red for electrical, blue for plumbing, yellow for automotive work.
This system lets you grab exactly what you need without fumbling through drawers.
Start by purchasing color-coded tags or tape that won’t fade over time. Apply them consistently to tool handles, boxes, or storage compartments. Group similar tools together under matching colors so everything has its designated home.
Your color system should make sense to anyone using your toolbox. Keep contrasting colors for dissimilar tools – don’t use red for both wrenches and screwdrivers.
Maintain this organization habit every time you return tools to their spots.
Permanent Marker Labels
Permanent marker labels provide a straightforward identification method that complements your color-coding system perfectly.
You’ll create clear, lasting identification that helps everyone quickly locate tools.
- Write tool names directly on handles using bold, black permanent marker.
- Label container lids with contents so you don’t need to open multiple boxes.
- Mark measurement scales on tape measures and rulers for quick reference.
- Create category labels for grouped items like “plumbing” or “electrical” sections.
These labels become your visual language, connecting you to your organized system instantly.
Create Zones Based on Project Needs
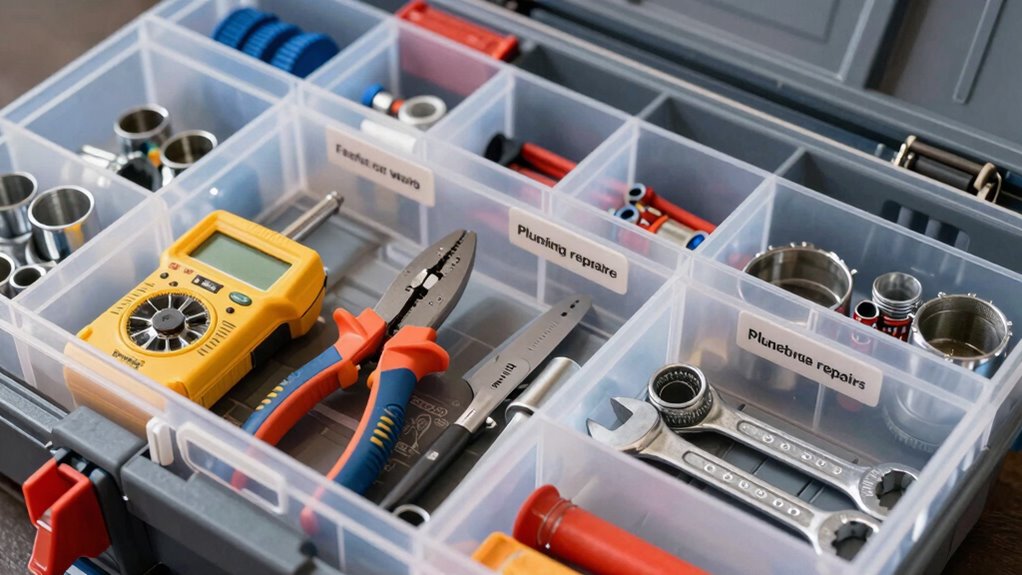
While organizing your toolbox, you should designate specific zones for different types of projects to maximize efficiency.
Start by identifying your most common tasks – electrical work, plumbing, carpentry, or general repairs. Assign dedicated areas for each project type, grouping related tools together.
Place frequently used items in easily accessible zones near the front or top of your toolbox. Keep specialized tools in separate sections to prevent misplacement.
Label each zone clearly using the permanent marker labels you created earlier. This systematic approach helps you locate tools quickly during projects, reducing frustration and saving time.
You’ll develop a natural rhythm when accessing your organized zones, making every repair job feel more manageable and professional.
Build Daily Habits to Sustain Clean Tool Storage
After you’ve established your organized zones, maintaining clean tool storage requires consistent daily habits that prevent clutter from accumulating. You’ll build muscle memory through repetition, making organization second nature.
- Wipe down tools – Clean dirt and grease from each tool before returning it to its designated zone.
- Return items immediately – Put tools back in their assigned spots rather than leaving them scattered.
- Check your zones – Spend two minutes scanning each section to verify everything’s properly placed.
- Close containers tightly – Secure all drawers, boxes, and compartments to protect tools from dust and damage.
These simple actions become automatic within thirty days. You’re not just organizing tools – you’re joining a community of craftsmen who value respect for their equipment.
Your toolbox reflects your professionalism. Clean, organized tools last longer and perform better. You’ll find exactly what you need, when you need it.
Fix These 5 Common Toolbox Organization Mistakes
Even with daily maintenance habits, common mistakes can sabotage your toolbox organization efforts. You’re not alone in making these errors.
First, don’t throw tools randomly into drawers. Group similar items together.
Second, avoid overcrowding your toolbox. Keep frequently used tools accessible.
Third, stop neglecting small parts. Use compartments or containers for screws and bolts.
Fourth, don’t ignore tool maintenance. Clean and sharpen tools regularly.
Fifth, avoid poor labeling. Clearly mark compartments and groupings.
These mistakes create chaos and waste time. You deserve better. Fixing them transforms your toolbox into an efficient workspace where every tool has its place. Your future self will thank you for taking action now.
Conclusion
Organize your toolbox systematically: sort tools by type, match storage to your needs, and label everything clearly. Create zones for different projects, use dividers in drawers, and build daily habits to maintain order. Avoid common mistakes that waste time and frustrate you. Keep tools clean, return them after use, and maintain your system regularly. Your toolbox stays organized when you stick to these principles consistently.
