

What’s the fastest way to turn a simple repair into a dangerous battle? When you’re facing a seized bolt that won’t budge, proper technique becomes essential. You’ll need to assess the bolt’s condition, choose the right tools, and apply penetrating oil correctly. But there’s one vital step most people miss that can make or break your entire approach. Let’s examine the systematic process that separates successful bolt removal from stripped threads and injured hands.
Assess Bolt Type and Condition First
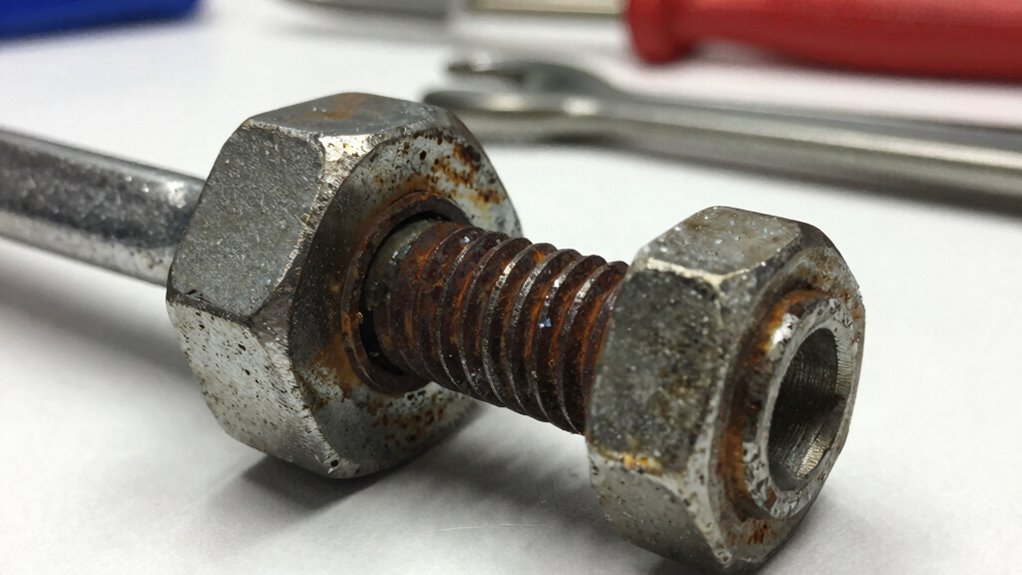
Before attempting any bolt removal, you should first identify the bolt type and examine its current condition to determine the appropriate removal strategy.
Check whether it’s hex, socket, or Torx head style. Look for signs of rounding, corrosion, or damage that might affect your tool selection.
Examine the surrounding area for adequate clearance and accessibility. Determine if the bolt is standard or metric threading.
Inspect for any locking mechanisms like lock washers or thread locker. Assess whether the bolt head protrudes enough for tool engagement or sits flush/recessed.
Consider the material – steel, stainless, or aluminum – as this affects torque requirements and potential seizing.
Document your findings methodically. This preliminary assessment prevents stripped heads, broken tools, and unnecessary frustration while ensuring you select proper extraction techniques suited to your specific bolt situation.
Why Bolts Get Stubborn (and How to Tell)
When bolts become difficult to remove, it’s often because corrosion, seizing, or mechanical interference has occurred between the threads and surrounding materials.
You’ll notice seized bolts when they won’t turn despite adequate force application. Corrosion creates rust bonds that fuse the bolt to its surroundings. Mechanical interference happens when vibration or thermal cycling causes thread galling.
Look for visual signs like discoloration, flaking, or distorted heads. Tight fits and unusual resistance during normal turning indicate potential problems. Thread damage becomes apparent when bolt rotation feels gritty or catches unexpectedly.
Always inspect the bolt head condition before applying force. Worn or rounded heads require immediate attention. Recognizing these warning signs helps you choose appropriate removal strategies safely.
Essential Tools for Stubborn Bolt Removal
Having identified the signs of seized bolts, you’ll need specific tools designed for challenging removal situations.
Select a high-quality impact wrench with sufficient torque rating for your bolt size. Choose socket sets with thin walls to fit confined spaces. Invest in breaker bars that provide extended leverage without flexing. Keep various penetrating oil applicators handy for maximum reach.
Utilize heat guns or torches specifically designed for automotive work. Don’t overlook safety equipment including impact-rated gloves, safety glasses, and steel-toed boots. Socket adapters and extensions help access awkward positions. Impact sockets prevent rounding off damaged bolt heads.
Torque wrenches guarantee proper reassembly specifications. Quality penetrating oils break down corrosion effectively. Keep these essential tools organized in a dedicated toolbox for quick access during stubborn bolt removal operations.
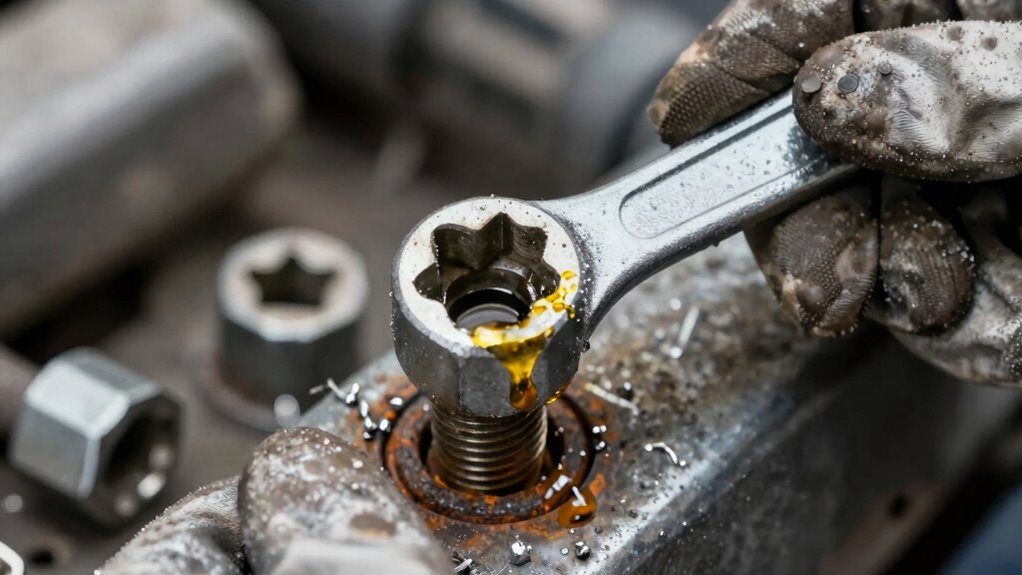
Apply Penetrating Oil and Let It Sit
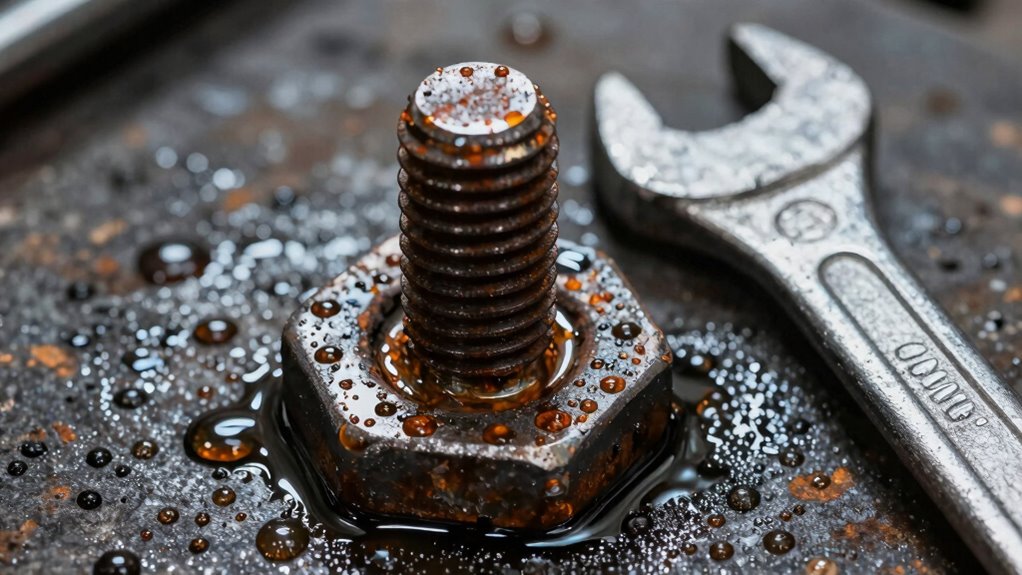
You’ll need to select a high-quality penetrating oil like PB Blaster or Liquid Wrench and apply it liberally to the bolt threads.
Allow the oil to penetrate for at least 15-30 minutes, or longer for severely corroded bolts.
Work the oil into the threads by gently tapping the bolt with a hammer to help break up corrosion and rust.
Choose Right Oil Type
While selecting the appropriate penetrating oil may seem straightforward, choosing the wrong type can greatly delay your bolt removal process. You need petroleum-based oils containing kerosene or mineral spirits for maximum rust penetration. These solvents break down corrosion effectively.
Avoid cooking oils or automotive motor oil, which lack necessary penetrating properties. Look for products specifically labeled as “penetrating oil” rather than general lubricants. Consider viscosity ratings – lighter oils penetrate tighter spaces better than heavy greases.
Check manufacturer specifications for temperature ranges and material compatibility. Always verify the oil’s safety data sheet before application. Some oils contain volatile compounds requiring adequate ventilation.
Wear protective gloves and eye protection during handling. Store penetrating oils away from heat sources and ignition hazards. Proper selection guarantees effective bolt removal while maintaining workplace safety standards everybody expects.
Apply Generously And Wait
Although you’ve selected the proper penetrating oil, effective bolt removal requires generous application and adequate dwell time for the solvents to work. You must saturate the bolt threads completely, ensuring the oil reaches all contact surfaces.
Don’t skimp on quantity – stubborn bolts demand thorough coverage. Apply the oil liberally around the bolt head and down the shank if accessible.
Wait patiently for the solvents to penetrate rust and corrosion. Most penetrating oils need fifteen to thirty minutes of dwell time. Resist the urge to rush this process.
The chemicals need time to break down metallic bonds and lubricate seized threads. Check manufacturer specifications for ideal waiting periods. Your patience now prevents broken bolts and damaged components later.
Work Oil Into Threads
Penetrating oil needs to seep deep into bolt threads to break down rust and corrosion effectively. You should apply penetrating oil directly onto the bolt head and threads, ensuring complete coverage.
Work the oil into tight spaces using a brush or cloth. Tap the bolt gently with a hammer to create vibrations that help oil penetrate deeper. Wait at least fifteen minutes before attempting removal.
For heavily corroded bolts, repeat applications and wait longer. Thread seizure often occurs from moisture and heat cycles. Oil displacement prevents further oxidation.
Always wear safety glasses when tapping bolts. Check surrounding components aren’t damaged by oil overspray.
Professional mechanics know patience pays off. Don’t rush this step. Proper penetration means easier, safer removal later.
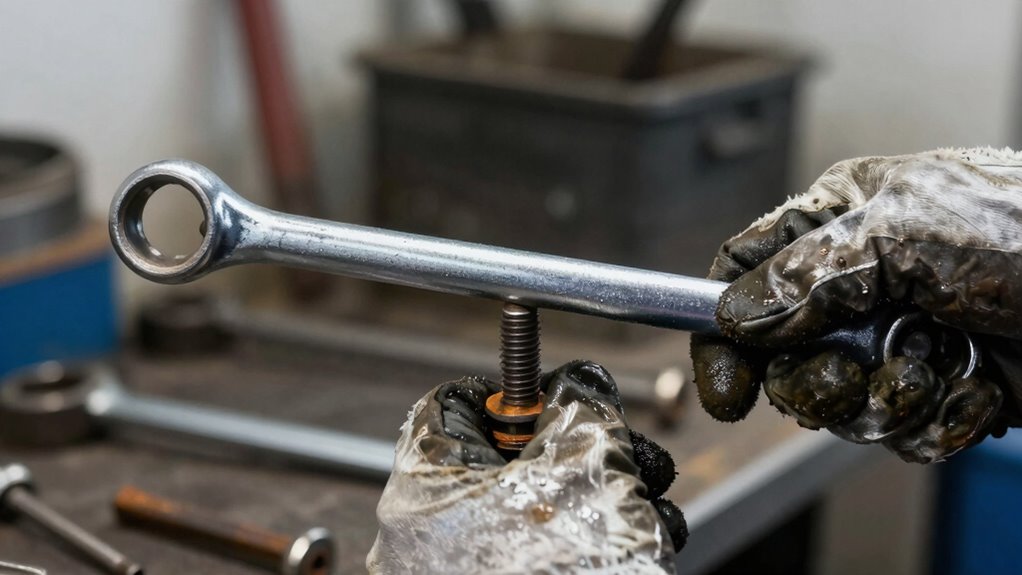
Tap the Bolt to Push Oil In
One effective method for loosening stubborn bolts involves tapping the bolt head with a hammer to drive penetrating oil deeper into the threads. This technique helps break up corrosion and rust that’s binding the bolt.
- Apply penetrating oil to the bolt threads and let it sit for several minutes before tapping.
- Use a brass or plastic hammer to avoid damaging the bolt head while delivering consistent taps.
- Strike the bolt head squarely, working your way around the circumference to distribute force evenly.
- Continue tapping while periodically trying to turn the bolt with your wrench.
This method creates vibration that works the oil deeper into seized threads.
You’re not trying to knock the bolt loose with brute force, but rather helping the lubricant penetrate where it’s needed most.
Keep your strikes controlled and focused.
Heat the Bolt to Loosen Corrosion
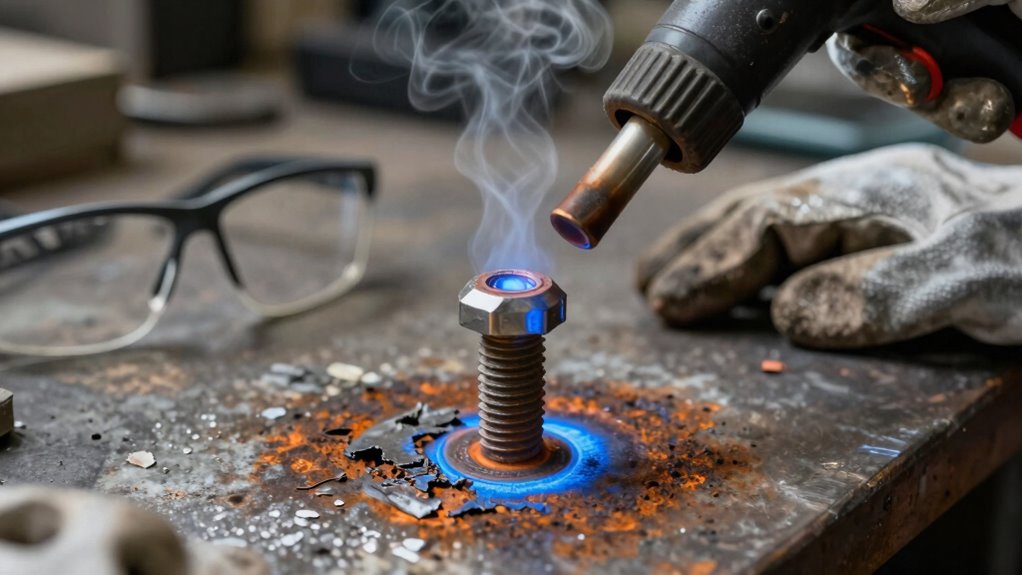
You should apply direct heat to the corroded bolt using a propane torch or induction heater to expand the metal and break down rust bonds.
Keep the flame moving steadily across the bolt head and threads while monitoring temperature to prevent overheating.
Wear safety glasses and heat-resistant gloves since the expanded metal will become extremely hot and may cause burns.
Apply Heat Directly
Applying direct heat to stubborn bolts often proves essential when corrosion has fused the metal components together. You’ll need precise heat application to break down rust bonds effectively.
- Position your heat source at the bolt head, maintaining consistent distance to avoid overheating surrounding materials.
- Apply heat in thirty-second intervals, allowing brief cooling periods between applications to prevent metal expansion issues.
- Focus heat directly on the bolt thread area where corrosion typically accumulates most heavily.
- Monitor surrounding components continuously, ensuring heat doesn’t damage adjacent parts or create fire hazards.
Direct heat application requires patience and precision.
You’re not just heating metal; you’re carefully manipulating material properties to restore mechanical function.
Success depends on controlled thermal expansion breaking corrosion’s grip.
Prevent Bolt Damage
Heat application requires careful control to avoid damaging bolt threads while breaking corrosion bonds. You should heat the bolt directly using a torch, focusing on the nut or bolt head area.
Apply heat evenly for thirty seconds initially, then test with a wrench. If resistance persists, heat in thirty-second intervals until the bolt loosens. Avoid overheating, which damages threads and weakens metal.
Monitor temperature carefully—excessive heat changes metal properties. Let the bolt cool slightly before attempting removal to prevent thermal expansion issues.
Use penetrating oil after heating for maximum effectiveness. Work methodically, checking progress regularly.
You’re part of a community that values precision and safety—maintain control throughout this process.
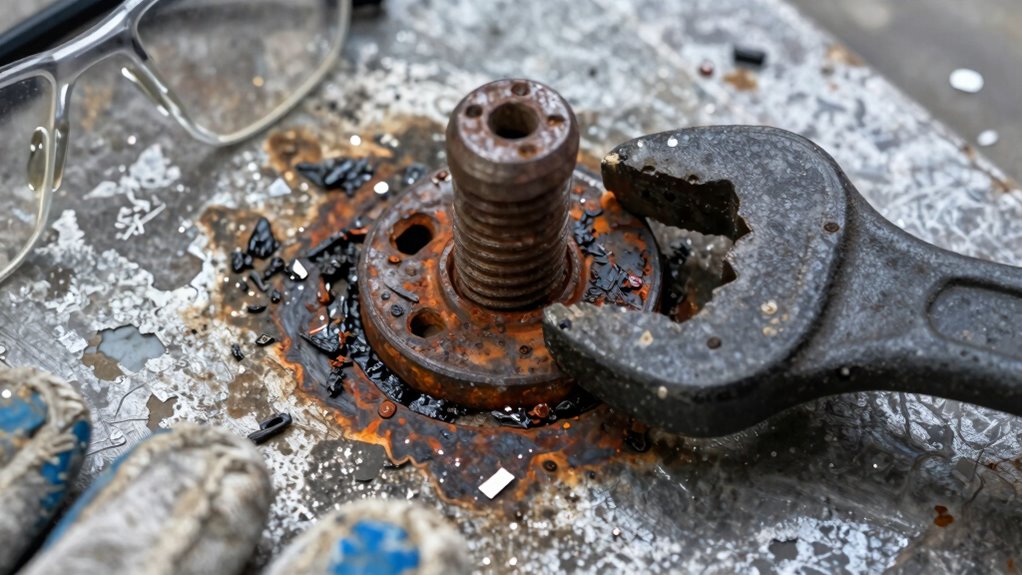
Match the Correct Socket or Wrench Size
One critical step in removing stubborn bolts requires selecting the proper socket or wrench size that fits the fastener head precisely.
Improper sizing creates slippage risks and bolt damage.
- Measure the bolt head across flats using a caliper or ruler for exact dimensions.
- Choose sockets that fit snugly without gaps or excessive play on the fastener.
- Verify wrench jaws fully contact all six sides of hex bolt heads.
- Test fit by hand before applying force to ascertain proper engagement.
Using correct sizes prevents rounding bolt corners and maintains tool integrity.
You belong in this repair community when you master these fundamentals.
Precision fitting protects both you and your equipment from unnecessary damage during stubborn bolt removal operations.
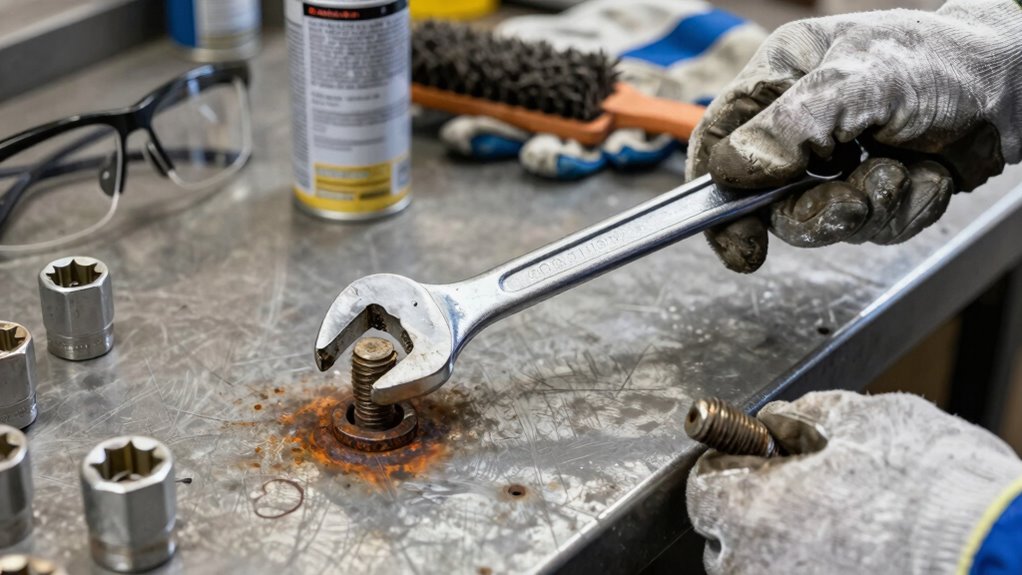
Use Steady, Controlled Force: No Jerking
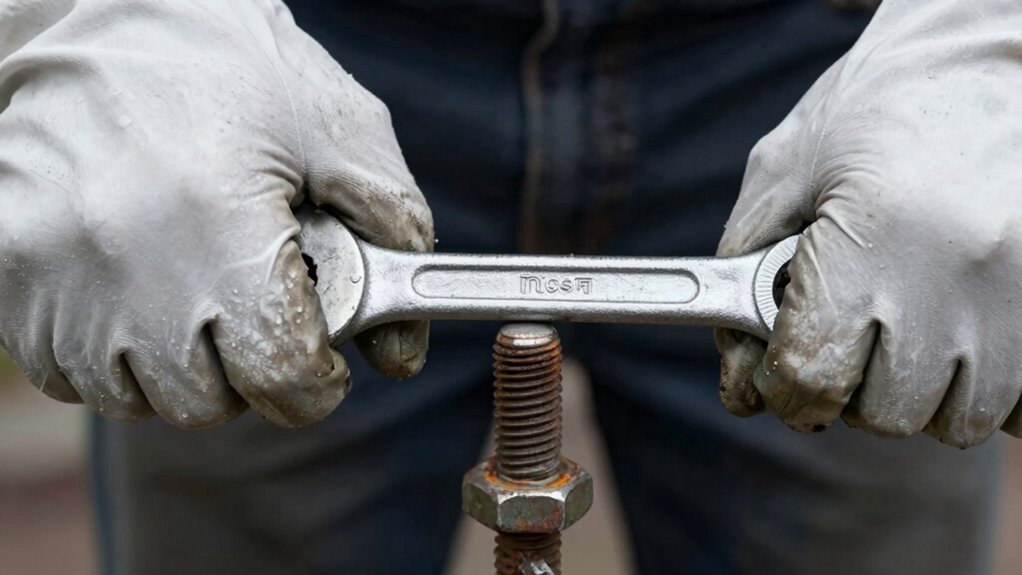
You must apply consistent, even pressure when turning stubborn bolts to prevent sudden breakage or injury.
Avoid jerking or yanking motions that can cause the tool to slip or the bolt to snap unexpectedly.
Maintain controlled force throughout the entire rotation process for maximum safety and effectiveness.
Apply Consistent Pressure
Apply steady, controlled force when turning stubborn bolts to prevent rounding off the fastener heads or breaking the bolt entirely. Maintaining consistent pressure guarantees you work with the bolt’s resistance rather than against it.
- Grip your wrench firmly with both hands for maximum control.
- Apply gradual torque increase instead of sudden force spikes.
- Feel for the bolt’s resistance pattern to understand its condition.
- Maintain constant contact between tool and fastener surface.
Consistent pressure prevents tool slippage that causes injuries and damaged components. You’ll develop better tactile feedback when you avoid erratic movements.
Professional mechanics rely on this technique because it works every time. Your tools perform better when you treat them properly. Keep your body positioned safely while maintaining ideal leverage throughout the process.
Avoid Sudden Movements
While maintaining consistent pressure proves essential for stubborn bolt removal, avoiding sudden movements requires equal attention to prevent tool slippage and fastener damage.
You must apply steady, controlled force throughout the entire process. Jerking or snapping motions can strip threads, round off bolt heads, or cause dangerous tool kickback. Keep your grip firm but relaxed, allowing gradual torque buildup.
Work in smooth, deliberate increments rather than abrupt twists. If resistance increases, pause and reassess instead of forcing harder. Your body positioning matters—maintain stable footing and proper leverage.
Sudden movements compromise both safety and effectiveness. Trust the process of steady, methodical force application.
This approach preserves tool integrity, prevents injury, and guarantees successful bolt removal through patience and controlled technique.
Extend Torque With a Breaker Bar
A breaker bar considerably amplifies your torque output when dealing with seized fasteners. This extended lever arm provides mechanical advantage that regular wrenches can’t match.
- Select a breaker bar length appropriate for your bolt size and accessibility constraints.
- Position the bar parallel to the fastener axis, ensuring proper socket engagement.
- Apply steady, controlled pressure rather than sudden jerking motions.
- Monitor surrounding components for potential damage from increased leverage forces.
Always wear safety glasses when using breaker bars. Never exceed the tool’s rated capacity or use cheater pipes that might cause unexpected failure.
Keep your body positioned safely away from the anticipated rotation path. These techniques help you work efficiently while maintaining control throughout the process.
Remove Broken Bolts With Extractors
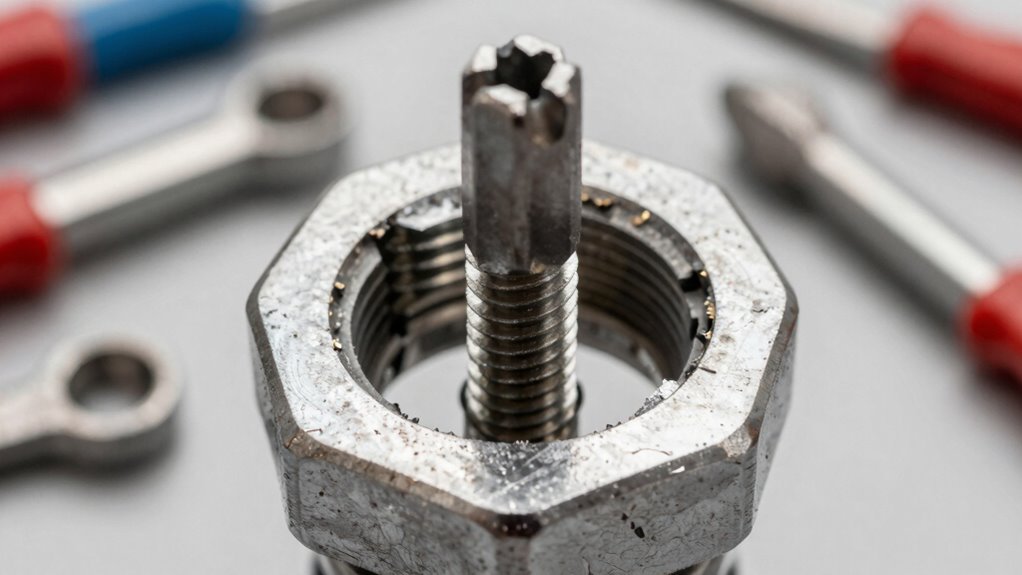
You’ll need to select an extractor that matches your broken bolt’s diameter and thread pitch before attempting removal.
Start by drilling a precise pilot hole through the center of the broken bolt, then carefully thread the extractor into the hole using clockwise rotation.
Always wear safety glasses and work in a well-ventilated area when using power tools for bolt extraction.
Choosing The Right Extractor Size
When removing broken bolts with extractors, selecting the correct extractor size proves critical for successful extraction without further damaging the bolt or surrounding material. You must match the extractor to the bolt’s dimensions precisely.
- Measure the bolt’s diameter accurately using calipers or a ruler to determine the exact size needed.
- Choose an extractor that’s slightly smaller than the bolt’s diameter for ideal grip.
- Confirm the extractor’s spiral flute design matches your bolt’s material type.
- Verify the extractor’s length accommodates the bolt’s remaining threaded portion.
Incorrect sizing causes extractor slippage, bolt expansion, or complete failure. Precise measurement prevents these issues while maintaining thread integrity.
Your tool selection directly impacts extraction success rates.
Proper Extraction Technique Steps
After selecting the correct extractor size, following proper extraction technique becomes essential for removing broken bolts without causing additional damage.
You must drill a precise pilot hole at the bolt’s center using a center punch and drill press. Maintain steady pressure while drilling to prevent wandering.
Insert the extractor into the hole, ensuring proper thread engagement. Turn the extractor counterclockwise gradually, applying consistent force.
Don’t rush the process or use excessive torque that might break the extractor. Feel for resistance changes as the bolt begins loosening.
Continue turning until the bolt moves freely. If resistance remains too high, stop and reassess your approach.
Clean metal shavings frequently during extraction.
Safety Precautions For Extraction
Following proper extraction technique requires equal attention to safety protocols that protect both the operator and the workpiece.
You must prioritize these critical safety measures during bolt extraction operations.
- Wear appropriate PPE – Always use safety glasses, gloves, and protective clothing to shield against flying debris and sharp metal fragments.
- Secure the workpiece – Clamp or anchor the component firmly to prevent movement that could cause extractor slippage or injury.
- Inspect tools before use – Check extractors and drilling equipment for cracks, wear, or damage that might fail during operation.
- Maintain proper ventilation – Validate adequate airflow when using cutting fluids or generating metal dust to protect respiratory health.
These precautions create a safer working environment while preserving equipment integrity throughout the extraction process.
Try Reverse Threads on Stripped Bolts
If your bolt has stripped threads that prevent standard removal tools from gripping properly, you can try using reverse threads as an alternative extraction method.
Select a reverse-threaded extractor that matches your bolt’s diameter. Insert the extractor into the damaged bolt head, turning counterclockwise to engage the reverse threads.
Apply steady, controlled pressure while rotating in the opposite direction of normal removal. The reverse threads bite into the metal, creating grip where standard threads failed.
Maintain consistent downward force to prevent the extractor from slipping. Work slowly and methodically, checking progress frequently.
If resistance increases dramatically, stop immediately to reassess your approach. This technique requires patience and precision, but reverse threading often succeeds where conventional methods fail, helping you overcome stripped threads safely.
Create a New Grip on Slipping Heads
You’ll need to create a new grip on slipping bolt heads using three primary methods.
Start by applying penetrating oil to lubricate the threads.
Then use an impact driver to deliver controlled rotational force.
If the bolt remains stuck, heat the nut with a torch to expand the metal and break the corrosion bond.
Use Impact Driver Technique
An impact driver technique proves invaluable when stubborn bolts have stripped or rounded heads that won’t grip standard sockets or wrenches.
You’ll need to create a new grip strategy for effective removal.
- Select a slightly larger socket or bit that can grip the damaged head’s remaining edges securely.
- Apply steady downward pressure while engaging the impact driver’s rotational force.
- Use short, controlled bursts rather than continuous pressure to prevent further damage.
- Maintain perpendicular alignment between the tool and bolt axis throughout the process.
This method works because the impact driver’s sudden torque bursts break loose seized threads without requiring perfect surface contact.
You’re fundamentally using shock force to overcome friction.
Always wear safety glasses when attempting this technique, as sudden bolt release can cause unexpected movement.
Keep your workspace stable and guarantee proper footing during operation.
Apply Penetrating Oil Method
Penetrating oil application creates essential lubrication between seized threads and corroded surfaces, allowing you to establish renewed grip on slipping bolt heads.
You should apply the oil directly onto the bolt head and threads, letting it penetrate for several minutes. The lubricant breaks down rust and corrosion that prevents normal removal.
While waiting, tap the bolt gently with a hammer to help the oil work deeper into tight spaces. This creates microscopic gaps where the penetrating oil can flow.
After penetration time, attempt removal with your wrench or socket. The oil reduces friction considerably, often allowing previously stuck bolts to turn freely.
Always wear safety glasses when tapping bolts to protect your eyes from debris. Work methodically, reapplying oil as needed.
Employ Heat Expansion Process
When stubborn bolts refuse to yield after penetrating oil application, heat expansion offers a powerful alternative that creates renewed gripping opportunities on damaged heads. You’ll need precise temperature control and proper equipment for this technique.
- Position your heat source carefully, maintaining a safe distance from surrounding materials while directing flame at the bolt head uniformly.
- Heat the bolt head gradually, allowing metal to expand naturally without causing structural damage or overheating nearby components.
- Monitor temperature closely using an infrared thermometer, targeting the ideal range between 300-400°F for maximum thermal expansion effect.
- Apply penetrating oil immediately after heating, letting temperature differential assist lubricant penetration while metal remains expanded.
This method works because heated metal expands, creating temporary relief in corroded threads.
You’re fundamentally buying time to break the bond between seized surfaces.
Prevent Bolt Head Stripping With Proper Grip
Proper grip prevents bolt head stripping by ensuring your tool seats fully in the fastener. You must select the correct socket or wrench size that matches your bolt head precisely.
Inspect the tool’s contact surfaces for wear or damage before use. Position yourself so your pulling force aligns directly with the bolt axis. Apply steady, controlled pressure rather than sudden jerking motions.
When using impact tools, maintain firm hand control to prevent slipping. Check that your ratchet mechanism engages properly before applying torque.
Worn or improperly sized tools create excessive play, leading to rounded bolt heads. You should always verify tool-to-fastener compatibility before starting. Proper seating eliminates gaps that cause slippage.
Maintain consistent downward pressure while turning. These techniques protect both you and your equipment from damage.
Protect Threads When Removing Bolts
While removing stubborn bolts, you must protect the threads to prevent damage that complicates future installations.
Thread protection guarantees components fit properly during reassembly and maintains structural integrity.
- Apply penetrating oil generously around bolt threads before loosening to reduce friction and prevent galling.
- Use correct socket or wrench sizes that fully engage bolt heads to avoid slippage that damages threads.
- Turn bolts slowly with steady, controlled pressure rather than sudden force that can strip threads.
- Clean thread debris regularly during removal process to prevent contaminants from causing additional wear.
Following these steps keeps threads intact, making future maintenance easier while guaranteeing reliable mechanical connections throughout your project.
Replace Damaged Bolts: Don’t Reuse Them
Inspect bolts carefully after removal and replace any that show signs of damage rather than attempting to reuse them. Check for stripped threads, cracked heads, or bent shanks. Damaged bolts fail under stress, creating safety hazards.
Don’t risk it – install fresh fasteners instead.
Examine thread engagement closely. Cross-threaded or galled bolts won’t seat properly. Look for corrosion, pitting, or deformation that compromises structural integrity. Measure bolt length and diameter to guarantee replacement specs match original requirements.
Select replacement bolts from reputable suppliers. Verify grade markings and material specifications. Using inferior substitutes defeats the purpose of safe bolt removal practices. Your team relies on properly functioning fasteners.
Make the right choice – replace questionable bolts immediately. Safety-conscious mechanics don’t take shortcuts with critical connections. Protect your work and your colleagues by installing only verified, undamaged fasteners.
Use Impact Tools on Frozen Fasteners
When frozen fasteners resist conventional removal methods, impact tools deliver the sudden torque spikes needed to break loose corrosion and seized threads. You should consider these critical factors before proceeding:
- Select appropriate impact tooling – Match the driver size to your fastener head to prevent rounding and guarantee maximum torque transfer efficiency.
- Position yourself properly – Maintain stable footing and keep your body aligned with the tool’s axis to control sudden movement when the fastener breaks free.
- Start with lower settings – Begin at reduced impact frequency before escalating force to avoid damaging surrounding components or stripping threads.
- Apply penetrating oil first – Allow solvents time to work between hammer blows, as impact alone won’t overcome severe corrosion without proper lubrication preparation.
Wear Safety Gear to Avoid Injury
Impact tools generate significant force that can cause fasteners to suddenly break free, creating risks from flying debris and unexpected tool movement.
You must wear safety glasses or goggles to protect your eyes from metal fragments and chips.
Impact wrenches can slip, causing sudden rotational forces that may injure your hands or arms. Wear work gloves with reinforced palms for better grip and protection.
Steel-toed boots prevent foot injuries from dropped tools or falling debris.
Hearing protection becomes essential when using pneumatic impact tools that generate excessive noise levels.
Don’t overlook respiratory protection when working in confined spaces or areas with poor ventilation.
Always inspect your safety equipment before each use, replacing damaged gear immediately.
Your safety gear is your first line of defense against preventable injuries during stubborn bolt removal operations.
Ensure Good Lighting and Stable Work Area
Adequate illumination and a secure workspace form the foundation of successful bolt removal operations. You must establish proper conditions before attempting any stubborn bolt extraction.
- Position bright work lights directly on your target area, eliminating shadows that obscure bolt heads and socket orientation.
- Secure your workpiece using clamps or vise grips to prevent dangerous movement during forceful extraction attempts.
- Clear debris and grease from your workspace to maintain footing stability and tool control.
- Ascertain adequate space around your work area for comfortable tool manipulation and emergency evacuation.
Poor lighting causes misaligned tools, stripped threads, and potential injury. Unstable surfaces create hazardous situations where slipping tools can cause serious harm.
Professional mechanics understand that preparation determines success. Your safety and efficiency depend on these fundamental workspace conditions. Master these basics before advancing to complex extraction techniques.
Maintain Tools After Each Bolt Job
Because you’ve invested time and effort into removing that stubborn bolt, you must now protect your tools for future jobs.
Clean debris from wrenches, sockets, and ratchets immediately after use. Wipe down metal surfaces with a dry cloth to prevent moisture buildup.
Inspect tools for cracks, worn teeth, or damaged handles that could fail during significant moments. Store tools properly in designated cases or racks to maintain organization and prevent accidental damage.
Apply light machine oil to metal components if storage conditions are humid. Check torque wrenches for calibration drift regularly.
Replace worn or damaged tools promptly rather than risking job site failures. Proper maintenance guarantees your tools remain reliable when you need them most.
Your reputation depends on having properly functioning equipment. Don’t skip this significant step after each bolt removal task.
Prevent Seizing With Anti-Seize Lubricants
While removing stubborn bolts can be challenging, you should apply anti-seize lubricants during reassembly to prevent future seizing. This preventive measure guarantees smooth disassembly later and protects your investment in time and effort.
- Select the appropriate anti-seize compound for your specific application and environmental conditions.
- Clean bolt threads thoroughly with wire brushes or solvents before applying lubricant to remove contaminants.
- Apply a thin, even layer of anti-seize lubricant to threads and under bolt heads, covering all contact surfaces completely.
- Torque bolts to specified values immediately after lubrication, as friction coefficients change with anti-seize compounds.
Regular application becomes part of your professional maintenance routine, demonstrating expertise and preventing costly equipment downtime.
You join experienced technicians who prioritize prevention over reactive repairs.
Conclusion
You’ve got this! Stubborn bolts don’t stand a chance when you follow proper technique. Remember to assess, lubricate, and apply steady pressure. Keep your workspace clean and your tools sharp. Don’t let seized fasteners slow you down – prevent future headaches with anti-seize compound. Stay safe, stay methodical, and trust the process.
