

You can save up to 20% on heating and cooling costs by sealing door gaps properly. Installing weather stripping might seem straightforward, but doing it correctly makes all the difference. Many homeowners skip vital preparation steps or choose the wrong materials. Let’s walk through the essential techniques that guarantee your weather stripping actually works.
Should You Install Weather Stripping on Your Doors?
Why should you consider weather stripping for your doors?
You’ll save money on energy bills immediately. Cold air won’t seep in during winter, and cool air stays inside during summer. Your heating and cooling system won’t work as hard, reducing wear and tear.
You’ll notice fewer drafts around door frames, making your home more comfortable year-round. Weather stripping blocks outside noise, creating a quieter living space.
It’s an affordable upgrade that pays for itself quickly through energy savings. You’ll feel proud knowing you’re reducing your environmental impact.
Installation takes minimal time and skill. Most homeowners handle it themselves easily.
Your family deserves a home that feels secure and energy-efficient. Weather stripping delivers noticeable results immediately after installation.
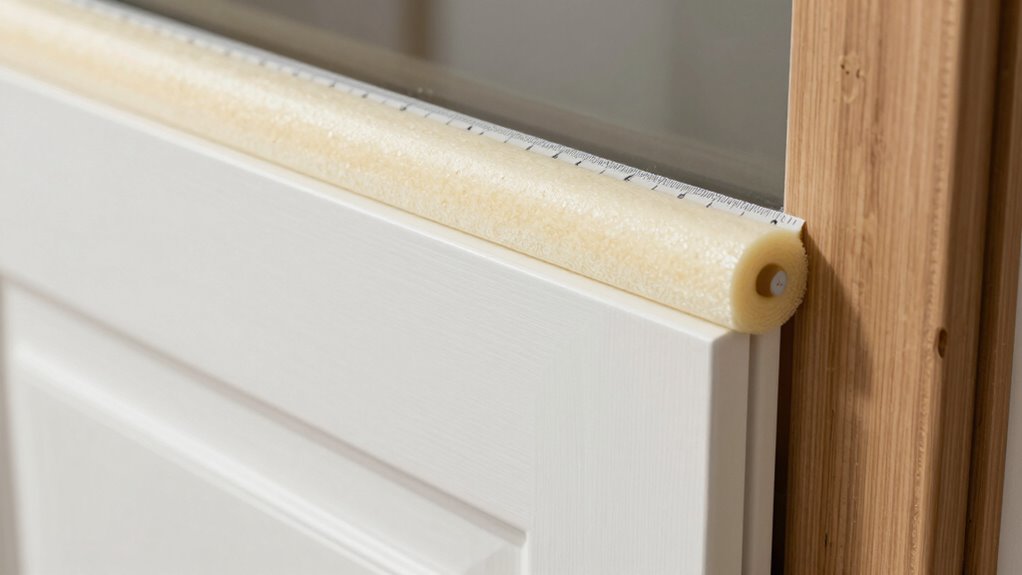
Measure Your Door Gaps Before Choosing Strips
Several methods exist for measuring door gaps, but the simplest approach uses a dollar bill or playing card. Slide the bill between your door and frame at multiple points. If it slides easily, you’ve got gaps needing attention. Check the top, sides, and bottom edges thoroughly.
You’ll want to measure gap width too. Use a ruler or tape measure for precise readings. Most gaps range from 1/16 to ¼ inch. Wider gaps might indicate bigger issues like warped doors or frames.
Document your measurements carefully. Take photos if needed. You’ll reference these when selecting appropriate weather stripping later. Don’t skip this step – accurate measuring prevents buying wrong-sized materials and saves you money.
Pick the Right Type for Your Door Style

You need to match your weather stripping material to your door’s construction and your climate conditions.
Measure your door frame carefully to verify proper fit and coverage.
Consider vinyl, rubber, or foam options based on your specific door type and insulation needs.
Choose Material Type
Different door styles demand different weather stripping materials, and selecting the right type depends on your door’s construction and the gaps you’re sealing.
You’ll want vinyl or rubber strips for metal doors since they expand and contract with temperature changes. Wood doors work best with felt or foam tape because they don’t handle rigid materials well.
Fiberglass doors accept most types, but compression seals offer superior performance. Consider adhesive-backed foam tape for quick fixes around door frames.
V-strip provides excellent sealing for tight gaps, while tube-shaped weather stripping works better for larger spaces. Don’t overlook brush seals for irregular surfaces or areas where pets frequently pass through.
PVC and aluminum strips last longer outdoors but cost more. Choose magnetic strips for steel doors requiring maximum insulation. Match the material thickness to your gap size for ideal results.
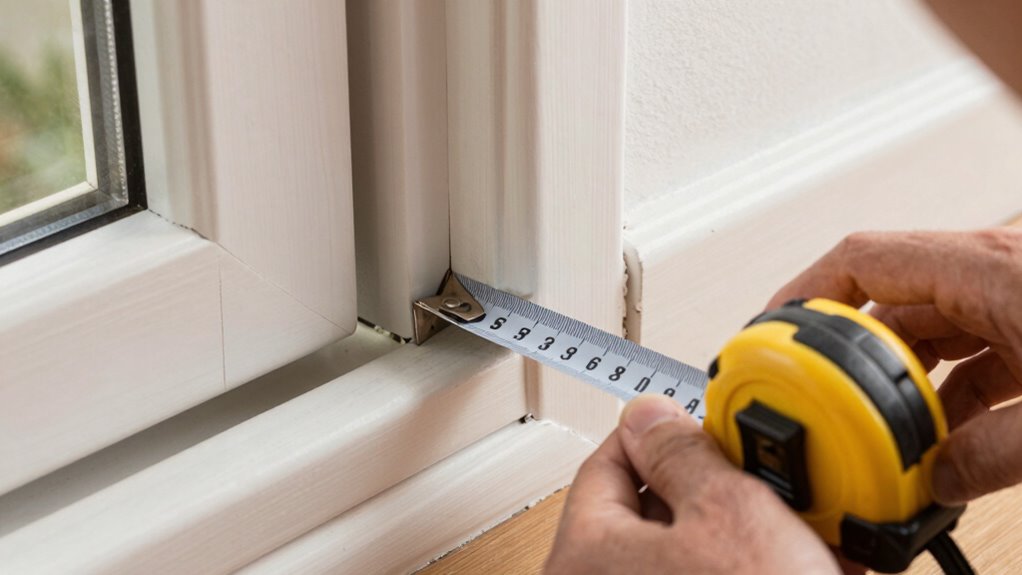
Measure Door Dimensions
Accurate measurements determine which weather stripping type works best for your door’s specific dimensions and gap sizes. Grab your tape measure and check the door’s width, height, and thickness. Measure the door frame’s perimeter where the weather stripping will sit. Pay attention to any gaps or uneven spaces around the door’s edges.
Check your door’s swing direction and threshold height. These factors influence whether you need compression seals, foam tape, or door sweeps.
Don’t forget to measure existing weather stripping if you’re replacing it. Standard doors typically use 84-inch or 96-inch strips, but older homes often have non-standard sizes. Measure twice to avoid buying incorrect materials.
Your measurements guarantee you select the right product that fits snugly and creates an effective seal. Proper sizing prevents air leaks and energy loss.
Gather Tools You Already Own for This Project
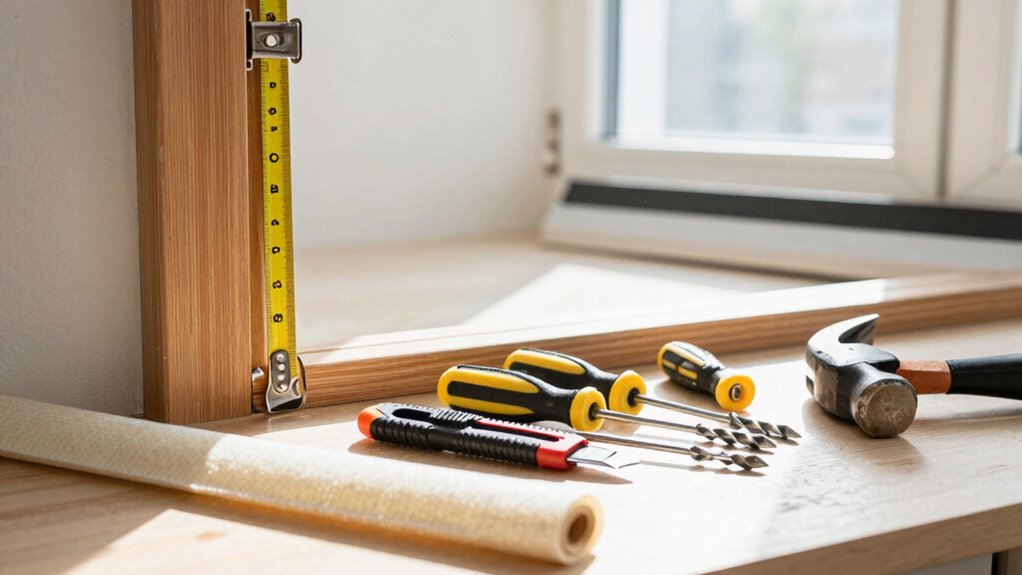
You’ll need a few basic tools you probably already have around the house.
Grab your tape measure, utility knife, and screwdriver before starting.
Make sure your door area is clean and dry so the weather stripping adheres properly.
Gather Essential Tools
Before you start installing weather stripping, gather the essential tools you’ll need for this project. Having everything ready makes the job smoother and faster.
- Utility knife: You’ll need this for cutting weather stripping to length and trimming excess material cleanly.
- Measuring tape: Accurate measurements prevent waste and guarantee proper fit around door frames.
- Screwdriver set: Both flathead and Phillips head screwdrivers help remove old stripping and secure new pieces.
- Pliers: These come in handy for removing stubborn old weather stripping and adjusting metal components.
- Cleaning cloth: Wipe down surfaces before installation to guarantee proper adhesion and remove debris.
Most homeowners already own these basic tools. Check your garage or toolbox before heading to the store.
You don’t need fancy equipment – standard household tools work perfectly for this DIY weatherproofing project.
Prepare Door Area
Once you’ve gathered your essential tools, it’s time to prepare the door area for weather stripping installation. Clear any obstacles around the door frame and remove existing weather stripping if present.
Check that your door closes properly without gaps or binding issues. Clean the door frame thoroughly using a damp cloth to remove dirt, dust, and old adhesive residue. Allow surfaces to dry completely before proceeding.
Inspect the door perimeter for any damage or warping that might affect weather stripping performance. If you find significant damage, address those issues first.
Make certain your workspace is well-lit so you can see what you’re doing. Having good lighting prevents mistakes and guarantees proper installation.
Take a moment to familiarize yourself with the door’s operation and identify where gaps occur.
Measure Door Dimensions
With the door area clean and ready, grab your measuring tools to determine the exact dimensions needed for proper weather stripping fit. You’ll need accurate measurements to guarantee your weather stripping seals effectively without gaps or excess material.
- Measure the door width – Take measurements at top, middle, and bottom since doors aren’t always perfectly square.
- Check door height – Measure from threshold to header, including any existing trim gaps.
- Note gap sizes – Identify where air leaks occur around the door frame.
- Account for door sweep space – Leave proper clearance for the bottom seal to function.
- Write down all measurements – Keep dimensions handy when shopping for weather stripping materials.
Precision now prevents frustration later. Don’t guess – measure twice, cut once. Your future energy bills will thank you for getting this right the first time.
Prepare Door Surfaces for Perfect Adhesion
Proper surface preparation makes all the difference in weather stripping adhesion. You’ll need to clean door surfaces thoroughly before installing any weather stripping.
Grab a damp cloth and wipe away dirt, dust, and debris from the door frame and jamb areas where you’ll apply the strips. Don’t skip this step – contaminants prevent adequate bonding.
Remove any old adhesive residue or tape remnants using a plastic scraper or sandpaper. Make sure surfaces are completely dry before proceeding.
For best results, use rubbing alcohol to degrease areas where previous weather stripping was attached. This removes oils and guarantees your new strips stick properly.
Check for paint chips or rough spots that could interfere with adhesion. Sand these areas smooth with fine-grit sandpaper. Clean away any sanding dust completely.
Your weather stripping needs clean, dry, smooth surfaces to create an effective seal that lasts.
Apply Weather Stripping to the Top of Your Door
One essential step that often gets overlooked is applying weather stripping to the top of your door. This area lets in cold air and drafts that you’ll feel every time you walk through your home’s entrance.
- Measure your door width precisely – you don’t want gaps or overlaps
- Choose adhesive-backed foam or rubber strips that match your door’s width
- Clean the door frame thoroughly with alcohol to guarantee proper sticking
- Apply the strip evenly along the top edge, pressing firmly for good adhesion
- Test the door swing immediately after installation to check for interference
You’ll notice the difference right away when cold winds howl outside. Your family will appreciate the warmer entryway, and you’ll save on heating costs too. Don’t skip this simple upgrade.
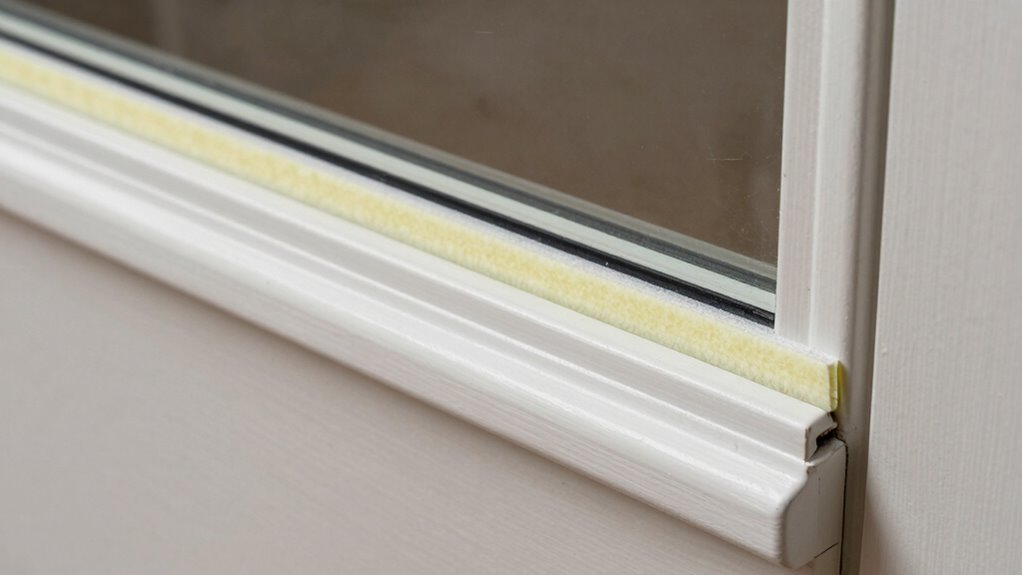
Seal Sides With Flexible Foam or V-Strip Types
You’ll want to choose between flexible foam tape or V-strip for the sides of your door, depending on your gap size and preference.
Foam tape works best for smaller gaps and irregular surfaces, while V-strip handles larger gaps and provides more adjustable sealing.
Both options require clean surfaces and proper measurement for effective installation.
Foam Tape Application Guide
Flexible foam and V-strip weather stripping work best when applied correctly to door sides. You’ll achieve a tight seal that keeps drafts out and saves energy.
- Clean the door frame thoroughly with rubbing alcohol to remove dirt and debris.
- Measure your door sides carefully to determine how much foam tape you need.
- Peel back the adhesive backing slowly while positioning the tape straight.
- Press firmly along the entire length to guarantee proper adhesion.
- Trim any excess tape with a utility knife for a clean finish.
Apply the foam tape vertically along both sides of your door frame.
Make sure it compresses slightly when the door closes. This creates that satisfying seal you want.
Don’t rush this step – taking time guarantees your home feels more comfortable and energy-efficient.
V-Strip Installation Tips
When installing V-strip weather stripping, start by ensuring your door frame is completely clean and dry.
Measure the door edge precisely and cut the V-strip slightly longer than needed.
Apply adhesive-backed V-strip along the door stop where it meets the door edge. Press firmly to create a tight seal.
For best results, install V-strip on the hinge side and top of the door frame. Make sure the V-shape faces the door when closed.
Test the door swing after installation to confirm proper alignment. Trim excess material with a utility knife.
Check that the door closes smoothly without gaps. V-strip works best on doors with minimal warping or settling issues.
Install Bottom Seals and Door Sweeps Correctly
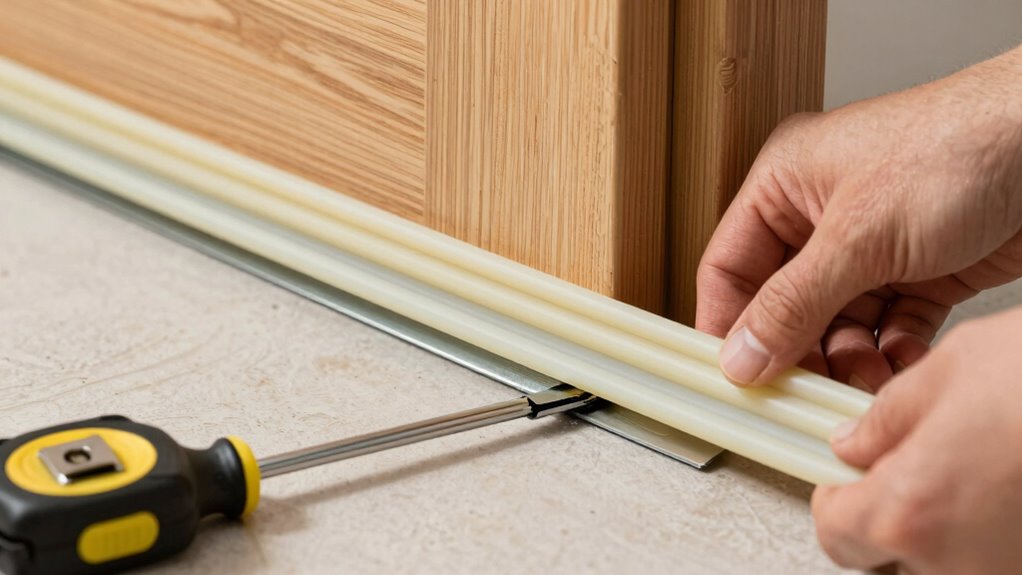
Start by measuring your door’s width and selecting a bottom seal or door sweep that spans the entire opening. You’ll want to choose the right type for your door’s clearance gap.
- Clean the door bottom and threshold area thoroughly before installation.
- Position the sweep so it contacts the threshold without creating resistance.
- Use screws or adhesive strips depending on your door material.
- Adjust the sweep height to eliminate gaps while allowing smooth door operation.
- Test the door swing after installation to verify proper clearance.
Installing bottom seals correctly makes everyone in your home more comfortable.
You’re creating that cozy feeling everyone wants during harsh weather.
Don’t rush this step – take time to get it right. Proper installation prevents air leaks and keeps your energy costs down.
Check Exterior Doors First for Draft Leaks
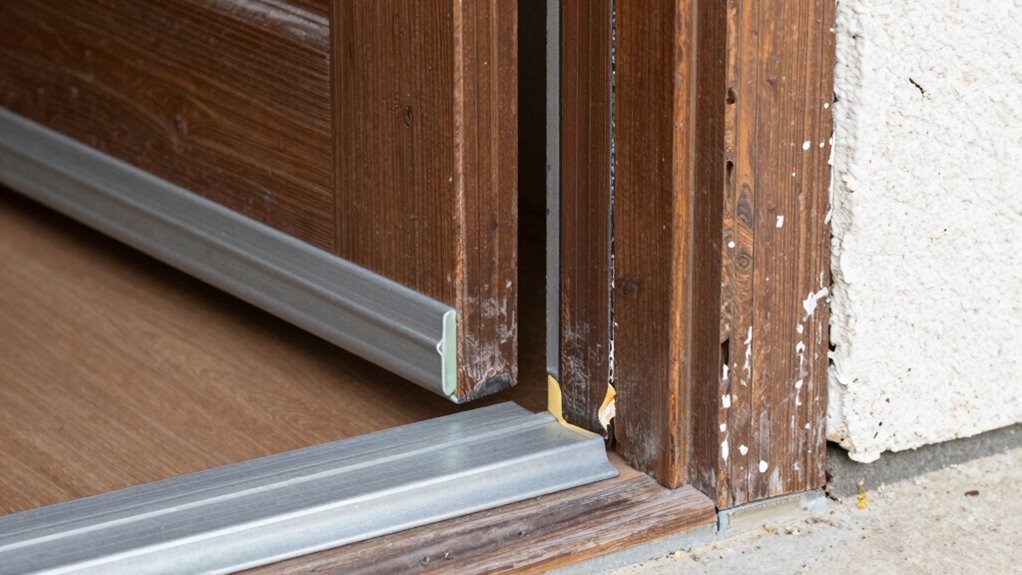
You should check your exterior doors first because they’re often the worst offenders for air leaks.
Start by identifying draft sources around the door frame, then test existing seals by closing a piece of paper in the door – if it pulls out easily, you’ve found a gap.
Measure these gap sizes accurately so you can choose the right weather stripping for each problem area.
Identify Draft Sources
Because exterior doors are often the primary source of drafts in your home, you should check them first before moving to other areas.
Start by examining common problem spots where cold air sneaks in.
- Door edges – Check gaps around the door frame where weather stripping might be missing or damaged.
- Threshold area – Look beneath the door where the bottom seal meets the floor.
- Window-door combinations – Inspect areas where doors and windows share frames.
- Old or warped doors – Notice if your door doesn’t close properly against the frame.
- Visible light gaps – Shine a flashlight around closed doors to spot air leaks.
These draft sources waste energy and make your home feel uncomfortable.
Identifying them early helps you choose the right weather stripping materials and placement strategies for effective sealing.
Test Door Seals
After identifying potential draft sources around your doors, it’s time to test the existing seals to determine where air leaks occur.
Close your exterior doors and check for gaps around the frame. Run your hand along the door’s perimeter, feeling for air movement. Light a candle or incense stick and hold it near the door edges; flickering flames indicate air leaks.
Check the door sweep at the bottom for worn or missing sections. Inspect weatherstripping around the sides and top frame for cracks, gaps, or compression damage. Pay special attention to corners where sealing often fails.
Don’t forget to examine the door threshold for proper alignment. These tests reveal exactly where your door system needs improvement. Mark problem areas with tape or chalk for quick reference when you’re ready to install new weather stripping.
Measure Gap Sizes
Several methods help pinpoint exactly how much space exists around your doors.
You’ll want to check exterior doors first since they’re your main source of draft leaks.
- Use a ruler or tape measure – Slide it directly into gaps to get precise measurements
- Try the dollar bill test – If you can pull a bill out easily when the door’s closed, you’ve found a problem spot
- Feel for air movement – Your hand can detect drafts you might miss visually
- Check all four sides – Don’t forget corners where gaps often hide
- Measure multiple spots – Gap sizes vary, so take several readings
Mark problem areas with tape so you remember where to focus your weather stripping installation efforts.
Match Materials to Interior Door Needs Too
While exterior doors often get the most attention for weatherproofing, interior doors also need proper sealing to maximize energy efficiency throughout your home.
You should match weather stripping materials to each door’s specific conditions. Check whether your interior doors have smooth or textured surfaces, since foam tape works best on smooth surfaces while felt works better on textured ones.
Measure your gap sizes accurately to choose the right thickness. Don’t forget to take into account the door’s location and usage patterns. High-traffic areas need more durable materials.
Choose materials that complement your existing décor while providing effective sealing. Proper material selection guarantees your interior doors function efficiently and contribute to your home’s overall comfort.
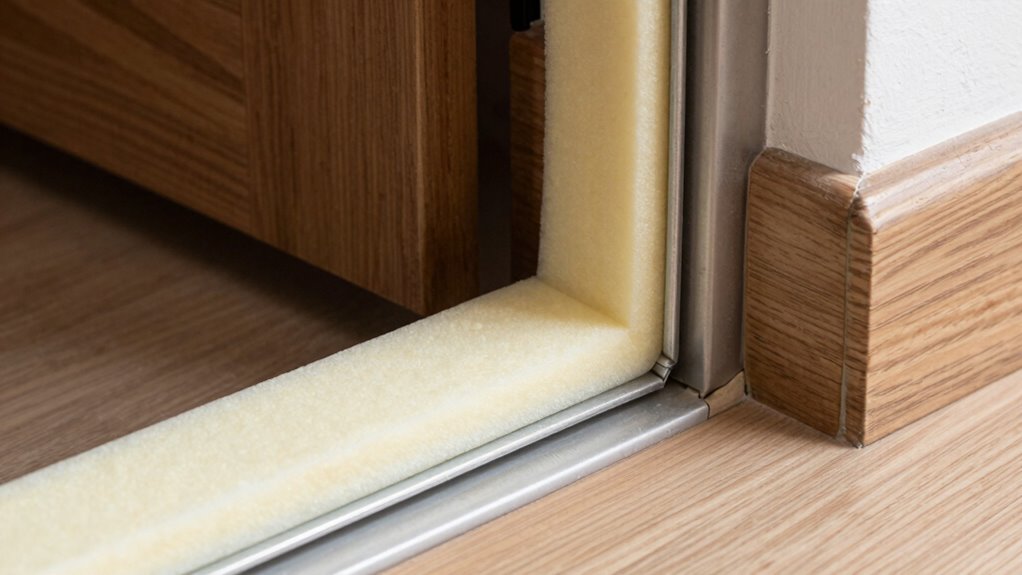
Fix Air Leaks From Frame to Floor Gap
One common source of air leaks occurs where your door frame meets the floor, creating gaps that let conditioned air escape and drafts enter.
You’ll want to address these gaps quickly to improve comfort and energy efficiency.
- Measure the gap width at multiple points along the door’s bottom edge
- Choose weatherstripping that matches your gap size and door material
- Clean the installation area thoroughly before applying new weatherstripping
- Cut strips precisely with sharp scissors or a utility knife
- Press firmly along the entire length, ensuring consistent contact with the floor
Don’t skip checking for gaps periodically, especially after seasonal changes.
Your door moves with temperature fluctuations, so what fits perfectly now might need adjustment later.
Take pride in knowing you’re creating a tighter, more comfortable home environment that belongs to you.
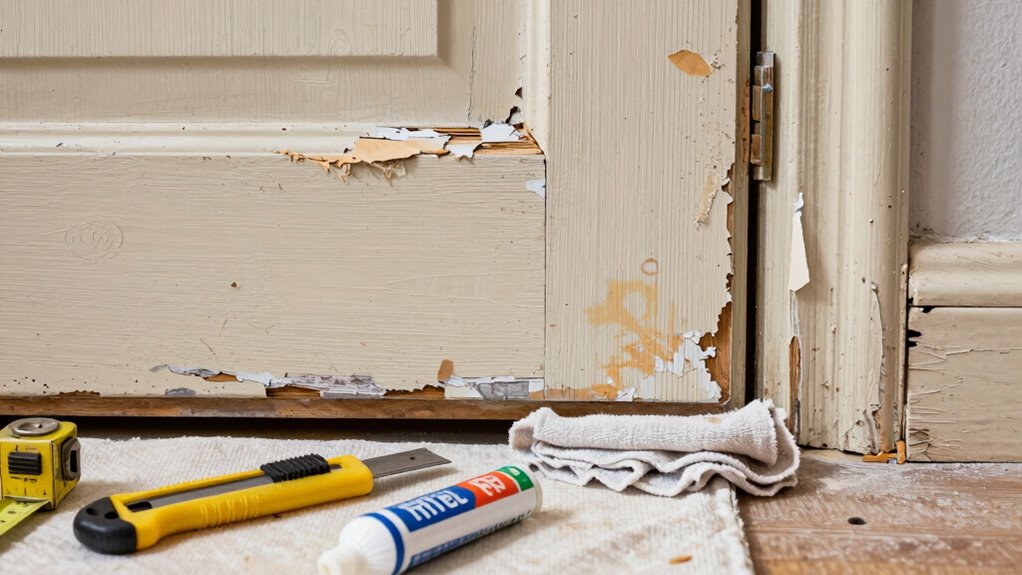
Solve Bubbles, Peeling Edges, and Uneven Cuts
When you notice bubbles, peeling edges, or uneven cuts in your weatherstripping, don’t wait to fix these problems since they’ll only get worse over time.
You’ll need to remove the damaged section immediately. Use a utility knife to carefully cut away bubbled or peeling areas. Make sure you remove all loose adhesive residue with a clean cloth.
For uneven cuts, trim the excess material with sharp scissors, ensuring clean, straight edges. Apply new weatherstripping sections, pressing firmly to eliminate air pockets.
You should check your work by running your hand along the entire length. Proper alignment prevents future bubbling.
Don’t skip cleaning the surface thoroughly before reapplication. Your door’s energy efficiency depends on these small details.
Take your time and get it right the first time.
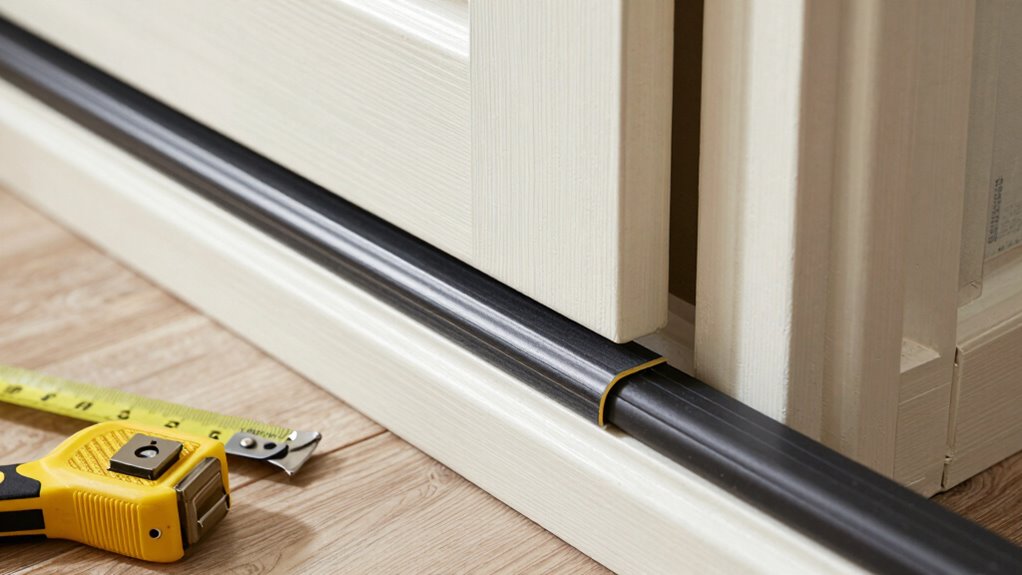
Trap Cold Air Under Sliding Glass Doors
Sliding glass doors often create gaps where cold air seeps in from outside, but you can stop this problem with proper weatherstripping installation. You’ll want to focus on sealing the bottom track where most cold air infiltration occurs.
- Check the door’s bottom edge for worn or missing seals.
- Clean the track thoroughly before applying new weatherstripping.
- Measure the gap width to choose the right foam or vinyl strip.
- Apply adhesive-backed strips along the door’s perimeter.
- Press firmly to guarantee proper adhesion and eliminate air pockets.
Install compression seals where the door meets the frame. These create tight barriers that prevent drafts.
Don’t forget to test the door’s movement after installation. You should feel resistance when closing, indicating proper sealing.
Replace old, cracked weatherstripping immediately.
Use Door Sweeps to Block Noise and Breezes
While door sweeps might seem like simple accessories, they’re actually powerful tools that can dramatically reduce both noise infiltration and air leakage around your doors.
You’ll find that installing a quality door sweep creates a tight seal between the door bottom and threshold, blocking drafts and outside sounds effectively. Choose sweeps with flexible rubber or vinyl fins that conform to uneven floors. Measure your door width carefully before purchasing.
Install the sweep along the door’s bottom edge, ensuring it contacts the floor without creating friction that makes the door hard to open. Test the seal by closing the door on a piece of paper – you should feel resistance when pulling it out.
Properly installed door sweeps will help you belong to the group of homeowners who’ve successfully weatherized their homes.
Replace Old Weather Stripping Before Winter Hits
Old weather stripping loses its effectiveness over time, so you’ll want to replace it before winter arrives. Don’t wait until you’re already feeling the chill – tackle this now while you’ve got time.
You should check your weather stripping regularly because:
- Cracked or brittle strips let cold air sneak in
- Compressed foam no longer seals properly
- Gaps appear where strips have pulled away
- Door operation becomes less smooth
- Energy costs start climbing unnecessarily
Replacing worn stripping is straightforward work you can handle yourself. Remove old material completely, clean the surface, and install new strips according to manufacturer instructions.
Choose quality materials that’ll last through multiple seasons. Your future self will thank you when winter’s bitter cold hits and you’re staying cozy inside.
Cut Drafts Now and Lower Monthly Energy Bills
Installing weather stripping eliminates drafts that drive up your energy costs.
You’ll notice immediate savings on monthly bills when you seal gaps around doors properly. Cold air won’t sneak in, and warm air stays inside where it belongs. Your heating system won’t have to work as hard, reducing wear and tear while cutting utility expenses.
You’re not just saving money – you’re creating a more comfortable home environment for your family. Proper installation makes your house feel tighter and more secure.
You’ll enjoy consistent temperatures throughout your living space, eliminating those annoying cold spots near entryways. Weather stripping is one of the quickest, most cost-effective improvements you can make.
You’ll wonder why you waited so long to tackle this simple project that delivers real results.
Quick Fixes That Make Weather Stripping Last Longer
Several simple maintenance habits can greatly extend your weather stripping’s lifespan. You don’t need expensive tools or professional help to keep your weather stripping performing well.
- Clean rubber seals monthly with mild soap and water to prevent dirt buildup.
- Check for gaps or cracks every season and replace damaged sections immediately.
- Lubricate vinyl or rubber stripping with silicone spray to maintain flexibility.
- Remove old adhesive residue carefully before reapplying new weather stripping.
- Store spare weather stripping in a cool, dry place away from direct sunlight.
These quick fixes prevent common problems that shorten weather stripping life.
You’ll save money and avoid frequent replacements. Regular maintenance keeps your doors sealed properly, reducing energy costs while maintaining comfortable indoor temperatures year-round.
Conclusion
You’ve got this! Picture your door sealed tight like a cozy blanket, blocking every draft. With the right strips applied firmly, your home will feel warmer and your energy bills lighter. Don’t wait for winter’s chill—seal those gaps now and enjoy the satisfaction of a job well done. Your wallet and comfort level will thank you.
