

You’re about to replace door hinges, but doing it correctly means more than just swapping old for new. First, you’ll need to assess whether your current hinges can be repaired or if they require complete replacement. Consider your skill level and the door’s weight before proceeding. Don’t skip measuring twice and cutting once – misaligned hinges will cause binding and uneven wear. Let’s walk through the essential steps to guarantee your door swings smoothly and securely.
Choose the Right Tools Before Replacing Hinges

Gather your tools before you begin replacing door hinges to avoid unnecessary trips to the hardware store mid-project. You’ll need a screwdriver set, drill with bits, chisel, hammer, measuring tape, and level. Don’t forget safety glasses and work gloves for protection.
Select hinge screws that match your existing hardware diameter and length. Measure twice to guarantee proper fit. A cordless drill speeds up removal and installation considerably. Use a chisel to deepen mortises if new hinges are thicker than old ones.
Having the right tools makes you confident and efficient. You’ll join the ranks of successful DIYers who complete projects smoothly. Proper preparation prevents frustrating delays and guarantees professional results that make you proud of your accomplishment.
Should You Repair or Replace Hinges?
Having the right tools ready won’t matter much if you haven’t decided whether to repair or replace your hinges.
You’ll save time and money by knowing when each option makes sense.
Repair when hinges squeak, sag slightly, or need lubrication.
Replace when pins wear smooth, leaves crack, or mortises strip out.
Check for rust, corrosion, or visible damage that compromises function.
If your door swings properly after cleaning and oiling, repair works.
However, if problems persist or worsen, replacement becomes necessary.
Consider your skill level too.
Simple adjustments anyone can handle, but complex issues might require professional help.
Don’t ignore persistent problems hoping they’ll fix themselves.
Address them promptly before they create bigger headaches.
Your decision impacts both door performance and your wallet.
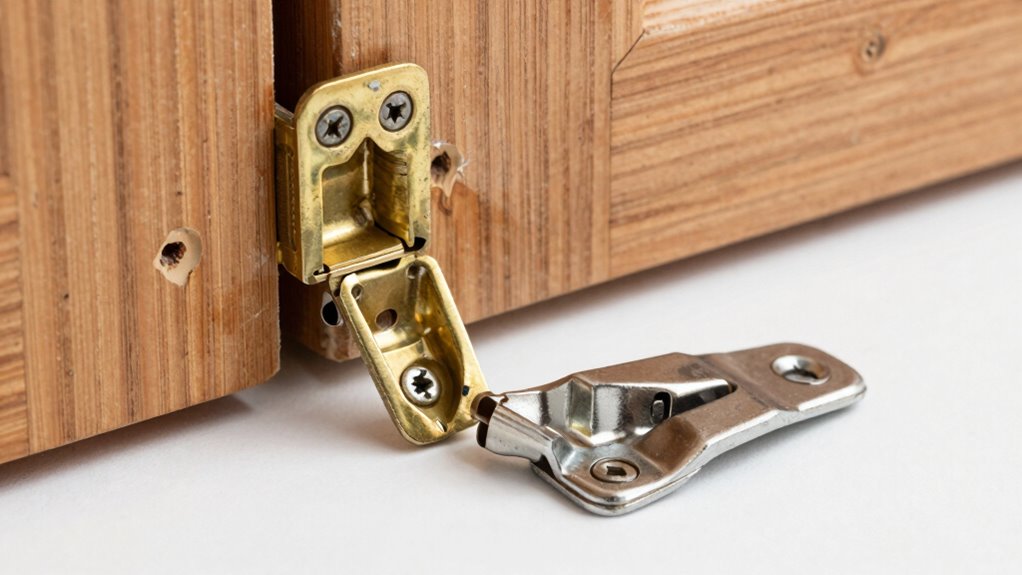
Identify the Right Hinge Type for Your Door
Understanding your door’s hinge type is essential before you start any replacement project.
You’ll need to identify whether you have butt hinges, which sit inside the door frame, or surface hinges that mount on the outside. Check if your current hinges are removable pin-style or fixed.
Examine the mounting method – do they screw into the door edge or attach to the surface? Look at the knuckle style; some have decorative leaves while others are plain.
Determine if you’re dealing with standard residential hinges or heavy-duty commercial ones.
Don’t forget to note the finish type like brass, chrome, or oil-rubbed bronze.
Take photos and measurements to guarantee you’re matching exactly what you currently have installed.
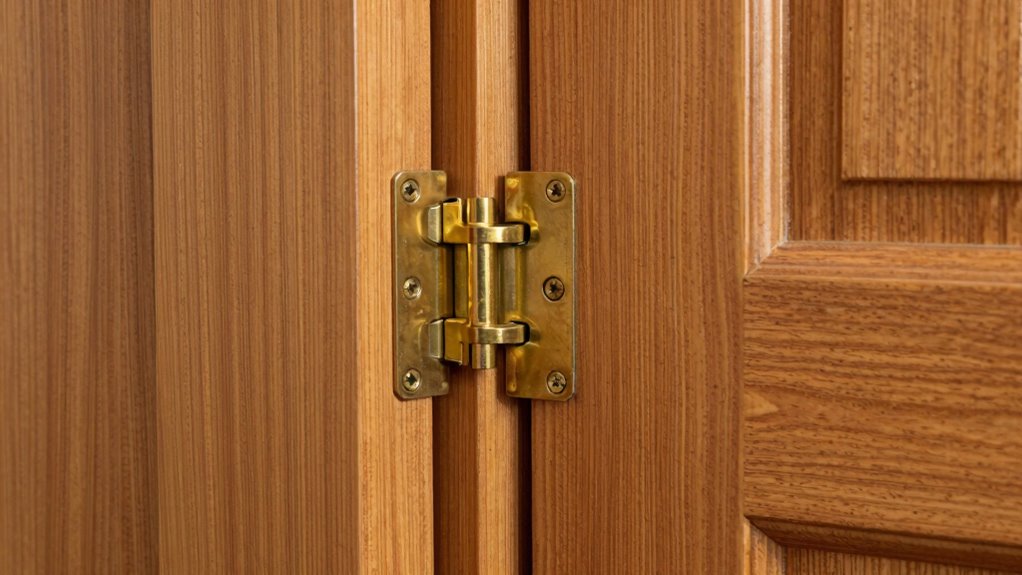
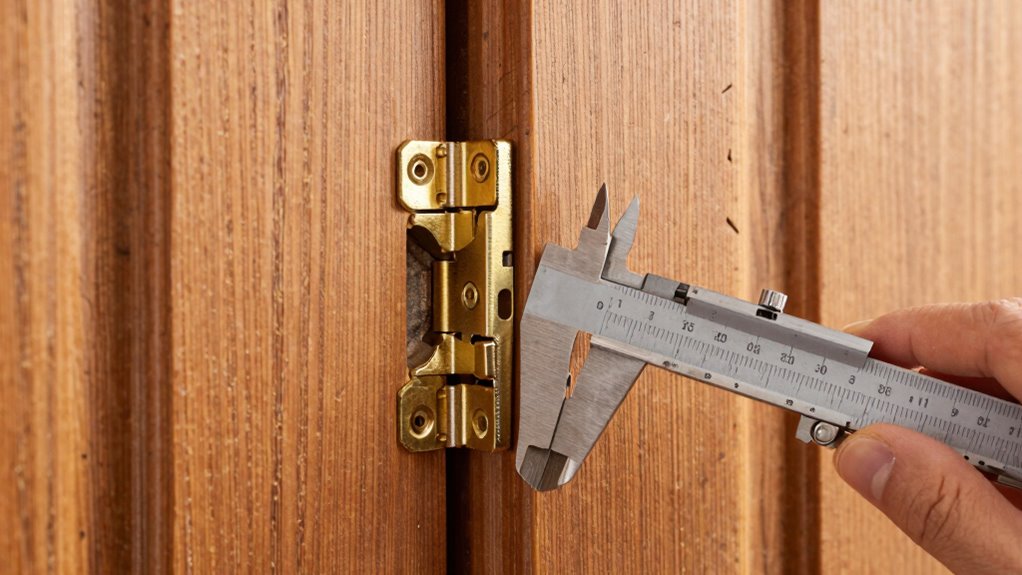
Match Hinge Size and Weight Rating to Your Door
Once you’ve identified your hinge type, you’ll need to confirm the replacement hinges match your door’s size and weight requirements. Measure your existing hinges carefully – length, width, and leaf dimensions. Don’t guess here; even small differences create installation problems.
Check your door’s weight rating too. Lightweight interior doors need different hinges than heavy exterior doors. Standard residential hinges typically handle 200-400 pounds, but your specific situation might require heavy-duty options.
Consider the door material – solid wood doors demand stronger hinges than hollow core ones. Match the finish and style for aesthetic continuity. Brass, steel, or stainless steel each serve different purposes.
Verify hinge pin diameter and knuckle spacing. These measurements confirm smooth operation. Wrong sizing creates binding, misalignment, or premature failure.
Take photos and measurements to your hardware supplier. Being precise prevents frustrating return trips and confirms professional results others can appreciate.
Safely Remove the Door for Hinge Work

Several key steps will help you safely remove your door for hinge work without damaging the frame or injuring yourself. Start by removing the door stop or trim on the hinge side using a pry bar.
Support the door’s weight with a helper or door jack before unscrewing any hinges. Always work from the top hinge down, keeping your hands clear of pinch points.
Remove the hinge pins by tapping them upward with a hammer and nail punch. Once pins are out, carefully lower the door with your helper.
Place the door on sawhorses or a flat surface. Never attempt this alone; doors are heavier than they appear.
Keep your back straight and let your legs do the lifting when moving the door.
Remove Old Hinges Without Damaging the Frame
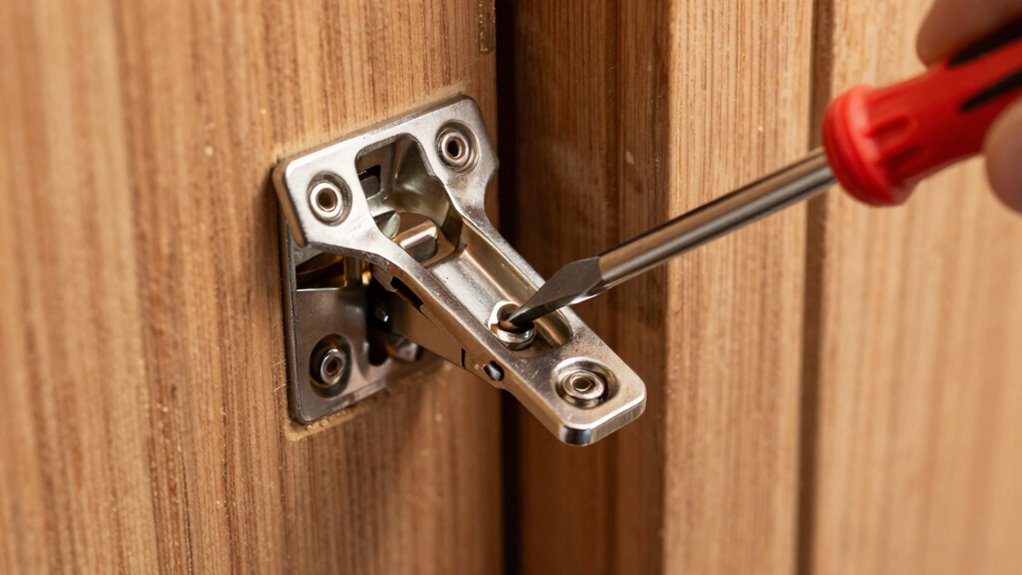
You’ll want to remove the hinge screws carefully by applying steady pressure with a screwdriver to avoid stripping the heads.
Protect the door frame by placing a block of wood behind the screwdriver to prevent it from slipping and gouging the wood.
Work methodically from the hinge pins inward to maintain control over the removal process.
Proper Screw Removal Technique
Start by positioning yourself comfortably in front of the door with your screwdriver or drill at the ready. Grip your screwdriver firmly and apply steady pressure while turning counterclockwise.
If screws feel stuck, don’t force them—switch to a drill with a screwdriver bit for better control. Work systematically from top to bottom, removing one screw at a time rather than loosening all screws first. This prevents the hinge from shifting unexpectedly.
When encountering stripped screws, use a rubber band between the screwdriver and screw head for extra grip, or carefully drill out the screw if absolutely necessary. Keep your workspace clean and organized throughout the process.
Frame Protection Methods
When removing old hinges, protecting the door frame requires deliberate technique and proper tools.
You should place a block of wood between the chisel and the frame when removing hinge mortises to prevent marring the surrounding area. Use a sharp utility knife to carefully cut away any paint or caulk around hinge edges before prying.
Position your pry bar at the correct angle and apply steady, even pressure rather than sudden jerks that can cause wood to splinter. Work systematically from one corner to the opposite corner.
If you’re dealing with painted surfaces, score the paint first with your knife.
Keep your workspace clean and organized so you don’t accidentally scratch the frame while handling tools.
Measure and Mark Hinge Placement Accurately

Accurate hinge placement requires careful measurement and precise marking before you cut any wood or remove existing hardware. Start by measuring the existing hinge locations from the door edge and floor line. Use a tape measure and pencil to mark these exact points on your new door or frame.
Don’t eyeball it – measure twice, mark once. Position your hinges so they’re perfectly aligned with the door’s natural swing path. Mark the hinge mortise locations with sharp pencil lines, guaranteeing square corners that match your hinge dimensions.
Check that your marks maintain consistent spacing between hinges. Verify measurements against the door frame’s corresponding locations. Proper marking prevents costly mistakes and guarantees smooth door operation.
Take your time here – rushing leads to misaligned doors that won’t close properly.
Patch or Reuse Existing Hinge Mortises?
If you’re working with existing hinge mortises, you’ll need to decide whether patching or reusing them makes more sense for your project. Reusing saves time when mortises are clean, properly sized, and aligned with your new hinges. Check that hinge pins sit flush and doors swing smoothly.
However, if mortises are damaged, oversized, or misaligned, patching becomes necessary. You’ll achieve better results and eliminate future headaches.
Assess existing mortises carefully. Look for loose hinge screws, worn edges, or gaps between hinges and wood. These issues cause doors to sag or bind.
When mortises are shallow or improperly positioned, patching gives you fresh, correctly located mounting points. Don’t force mismatched hinges into poor-fitting mortises. Take time to evaluate each mortise’s condition before making your decision. Your door’s performance depends on this choice.
Cut New Hinge Mortises in Wood or Metal
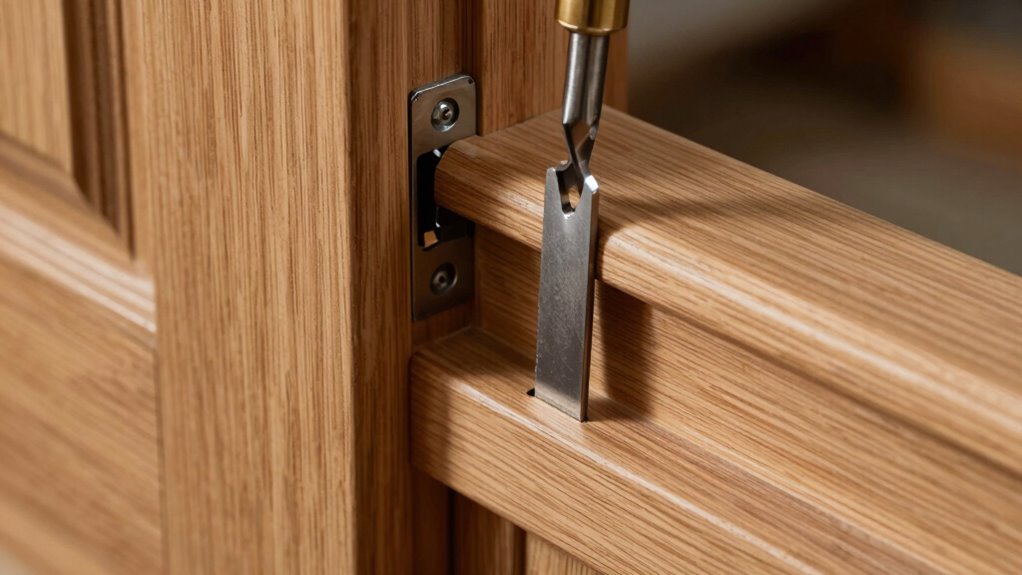
Cutting new hinge mortises becomes necessary when you’re installing hinges in a fresh location or working with doors that lack existing mortises.
You’ll need a sharp chisel, hammer, and drill with appropriate bits. Start by marking hinge locations accurately using a pencil and measuring tape.
Position the hinge flush against the door edge and trace around it. Remove hinge placement and carefully chisel along your marked lines to create clean, precise cuts. Work gradually, removing small wood pieces at a time.
For metal doors, use a rotary tool or drill multiple holes within the marked area, then file smooth edges. Verify mortises are deep enough so hinges sit flush with door surface. Check alignment frequently during cutting process.
Attach New Hinges Without Misalignment
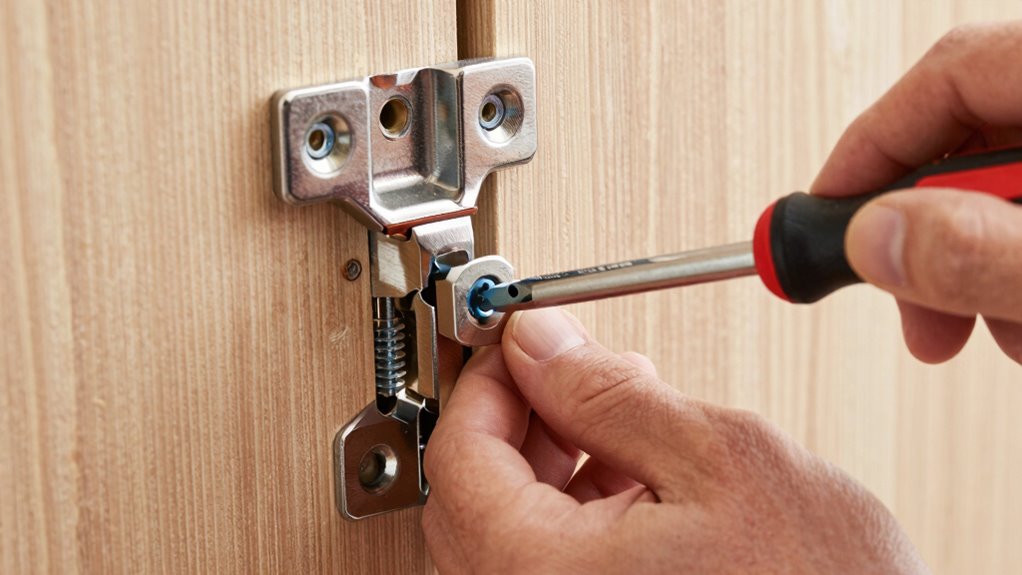
You’ll need to carefully position each hinge so the pin holes align perfectly between the door and frame before driving any screws.
Start by holding the hinge in place and checking that it sits flush against both surfaces, then mark your screw locations with a pencil to avoid wandering holes.
Use a level to verify the door hangs straight before fully tightening all screws, as you can’t easily correct misalignment once everything’s secured.
Proper Alignment Techniques
One essential step that determines your door’s smooth operation is properly aligning the new hinges before securing them permanently.
You need to get this right or you’ll struggle with gaps, binding, or doors that won’t close properly.
- Check hinge placement – Match the new hinges exactly to the old ones’ position and spacing
- Use a level – Confirm both hinges sit perfectly vertical and horizontal
- Test swing clearance – Verify the door moves freely without hitting the frame
- Mark screw holes carefully – Transfer all measurements precisely to avoid misaligned drilling
Secure Installation Methods
Having properly aligned your new hinges, you’re ready to secure them in place without throwing off that careful positioning.
Start by driving screws partially into the hinge knuckles, guaranteeing they’re snug but not fully tightened. Check that the door swings freely without binding or gaps.
Once you’re satisfied with the movement, fully tighten all screws gradually, alternating between them to maintain even pressure. Don’t overtighten, as this can strip screw holes or warp the hinge. If you encounter resistance, back out the screw slightly and realign before continuing.
Test the door’s operation after each screw is secured. Remember that proper installation guarantees smooth operation and longevity, making your repair job successful and professional-looking.
Rehang the Door and Test Its Swing
After removing the old hinges and preparing the door frame, it’s time to rehang the door and test its swing. You’ll want to ascertain everything aligns properly before finalizing the installation.
- Position the door – Lift the door and align the hinge knuckles with the corresponding hinges on the frame. Make sure the hinge pins are properly seated.
- Check the gap – Verify that the door has even spacing around all edges. The gap should be consistent between the door and frame.
- Test the swing – Open and close the door several times, observing how it moves through its full range of motion.
- Look for binding – Watch for any spots where the door catches or drags against the frame during operation.
Adjust Hinge Screws for Smooth Operation
You should check each hinge screw’s tightness regularly since loose screws cause binding and uneven door movement.
Use the correct screwdriver size to avoid stripping screw heads and guarantee proper torque when tightening.
Make sure hinge plates align perfectly during installation to prevent misalignment that requires constant adjustment.
Check Screw Tightness Regularly
While replacing door hinges addresses major alignment issues, maintaining smooth operation requires you to check screw tightness regularly. Loose screws cause doors to sag, bind, or swing improperly, creating frustrating daily inconveniences.
- Test each screw monthly – Grab screws shouldn’t spin freely; tighten any that feel loose.
- Pay attention to door behavior – Notice increased friction, gaps, or uneven movement indicating loose hardware.
- Focus on pivot points – Check top and bottom hinges first since they bear maximum weight stress.
- Don’t overtighten – Snug screws properly but avoid stripping threads or damaging hinge knuckles.
Regular maintenance prevents costly repairs and keeps your doors functioning smoothly for everyone in your household.
Use Proper Screwdriver Size
Proper screwdriver size makes all the difference when adjusting hinge screws for smooth operation. You need the right fit to avoid stripping screw heads.
A Phillips head that’s too large or small won’t grip properly, causing frustration and damage. Match your screwdriver tip precisely to the screw head dimensions. Flathead screws require exact width matching too.
When screws feel tight or won’t turn smoothly, check your tool fit first. Don’t force mismatched screwdrivers. Stripped screws create bigger problems requiring replacement rather than simple adjustment.
Keep multiple screwdriver sizes handy for different hinge types. Test fit before applying pressure. Correct sizing prevents cross-threading and guarantees clean, precise adjustments that last.
Align Hinge Plates Carefully
When hinge plates aren’t perfectly aligned, even small gaps or misalignments can cause binding, squeaking, or uneven door operation that affects the entire installation.
You need to take time getting this right because proper alignment makes everything work smoothly.
- Check gaps visually – Look for light showing through misaligned edges; even paper-thin gaps indicate poor fitment requiring adjustment.
- Use shims when needed – Place thin cardboard or metal shims behind loose plates to eliminate play and create flush mating surfaces.
- Tighten screws gradually – Work systematically, tightening each screw partially before fully torquing them down to prevent warping the plates.
- Test swing motion – Operate the door slowly after each adjustment, feeling for binding spots requiring further tweaking.
Avoid These Hinge Installation Mistakes
You’ll want to steer clear of common missteps that can turn a straightforward hinge replacement into a frustrating ordeal.
Don’t rush measurements – inaccurate cuts create gaps that compromise door alignment. Avoid using wrong screw sizes; they strip holes or won’t grip properly.
Never force hinges into misaligned mortises, as this damages wood fibers permanently. Don’t skip marking hinge locations precisely before cutting, causing crooked installations.
Always check swing clearance after mounting, ensuring doors open smoothly without binding. Test door operation frequently during installation rather than waiting until completion.
These mistakes create headaches you don’t need. Take time for accuracy initially, saving yourself from rework later. Your finished project will operate seamlessly when you avoid these pitfalls from the start.
When to Call a Professional for Heavy Doors
You should call a professional when your door exceeds 100 pounds because standard hinges and installation methods won’t support the weight safely.
Heavy doors require specialized tools like hydraulic lifts and torque wrenches that most homeowners don’t own or know how to use properly.
Don’t risk injury or property damage by attempting to handle doors that are too heavy for safe manual manipulation.
Weight Capacity Limits
Most standard door hinges can support between 150 to 200 pounds, but exceeding this limit often leads to sagging, misalignment, and premature wear.
You’ll notice your door dragging on the floor or sticking in the frame when hinges fail. Don’t ignore these warning signs.
- Solid core doors typically weigh 150-250 pounds and may require heavy-duty hinges rated for 250+ pounds.
- Exterior doors with security features often exceed 200 pounds and need reinforced hinge hardware.
- Commercial grade doors regularly surpass 300 pounds, demanding professional assessment and specialized hardware.
- Multiple hinge installations might seem like a solution, but improper spacing actually reduces overall capacity.
Test your door’s weight if you’re unsure. When in doubt, consult a professional who understands load-bearing requirements for your specific door type.
Specialized Tools Required
Heavy doors demand more than basic screwdrivers and wrenches.
You’ll need a power drill with torque settings, heavy-duty hinge pins, and possibly a reciprocating saw for cutting new mortises. Specialized hinge jigs guarantee perfect alignment when installing butt hinges on thick doors.
Consider your door’s weight and hinges’ condition before starting.
Exterior doors with security features often require professional assessment. If you’re struggling with alignment, hearing cracking sounds, or notice the door sagging severely, call a professional.
They bring hydraulic lifts, specialized cutting tools, and experience handling doors that could cause injury.
Your safety matters more than saving money.
When hinge replacement involves heavy commercial doors or complex security systems, professional installation prevents costly mistakes and potential injuries.
Safety Concerns
While replacing door hinges might seem straightforward, certain situations demand professional intervention to prevent injury or property damage. You shouldn’t tackle heavy door installations alone when safety risks outweigh DIY benefits.
- Weight considerations – Doors exceeding 100 pounds require proper lifting techniques and equipment you mightn’t possess.
- Structural modifications – When frames need reinforcement or custom fitting, professionals guarantee proper support.
- Commercial applications – High-traffic areas demand specialized knowledge about fire ratings and building codes.
- Complex hardware – Electronic access systems or specialized security hinges require certified installation.
Trust your instincts when the job feels beyond your capabilities.
Professional help prevents costly mistakes and keeps you safe. Your family’s security matters more than saving a few dollars.
When doubt creeps in, call experts who handle these challenges daily. They’ve got your back.
Conclusion
You’ve successfully replaced your door hinges, and surprisingly, the door swings perfectly on the first try. Don’t let this rare coincidence fool you—proper hinge replacement usually requires patience and attention to detail. Remember that matching hinge size and weight rating to your door prevents future sagging. If your door still binds or squeaks, you’ll need to adjust the hinge screws or call a professional for those heavy steel doors.
