

You might think large wall holes require a professional, but you can handle this repair yourself. Don’t let the size intimidate you – the right approach makes quick work of seemingly impossible damage. Before you grab any tools, you need to understand the proper technique that separates amateur attempts from seamless results. The key lies in choosing the correct patching method for your specific wall type.
Is Your Wall Hole Too Big to Fix Yourself?
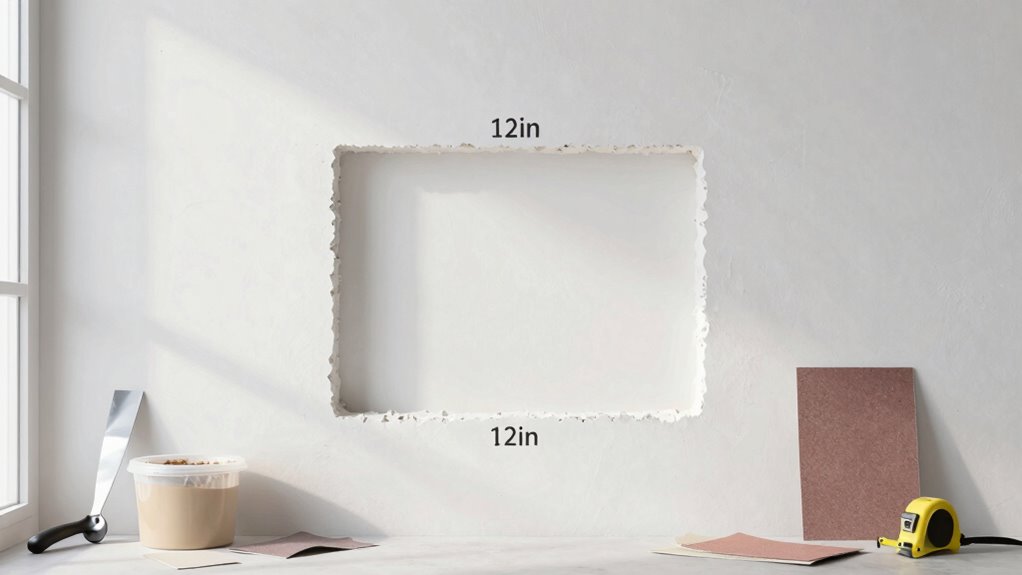
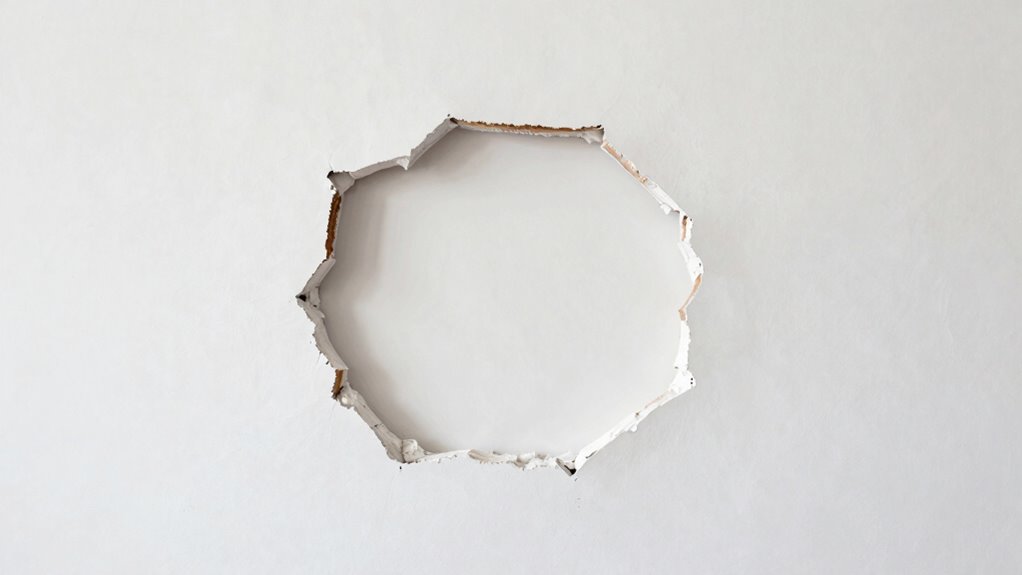
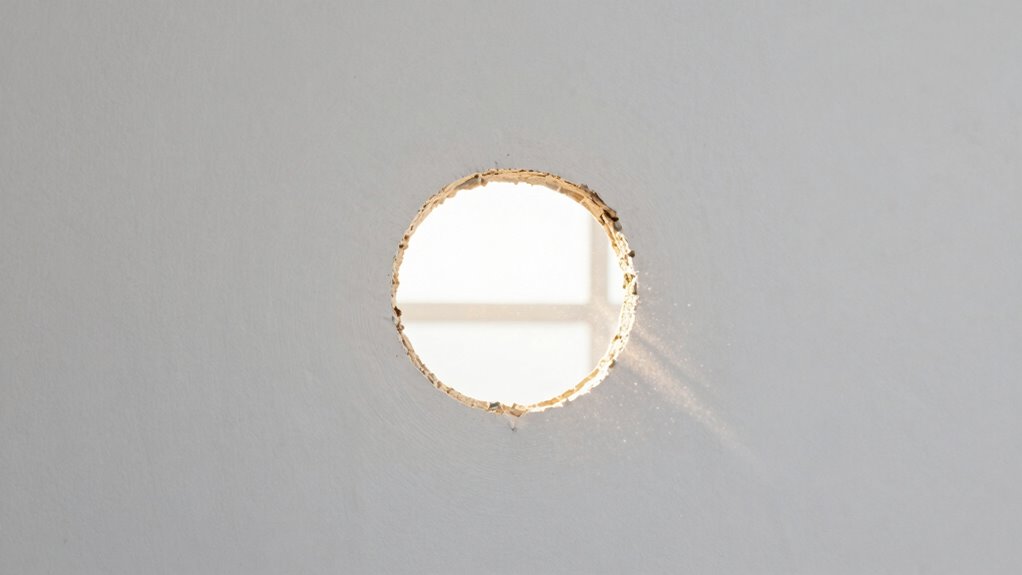
How do you determine whether a wall hole exceeds your DIY repair capabilities? Measure the diameter accurately using a ruler or tape measure.
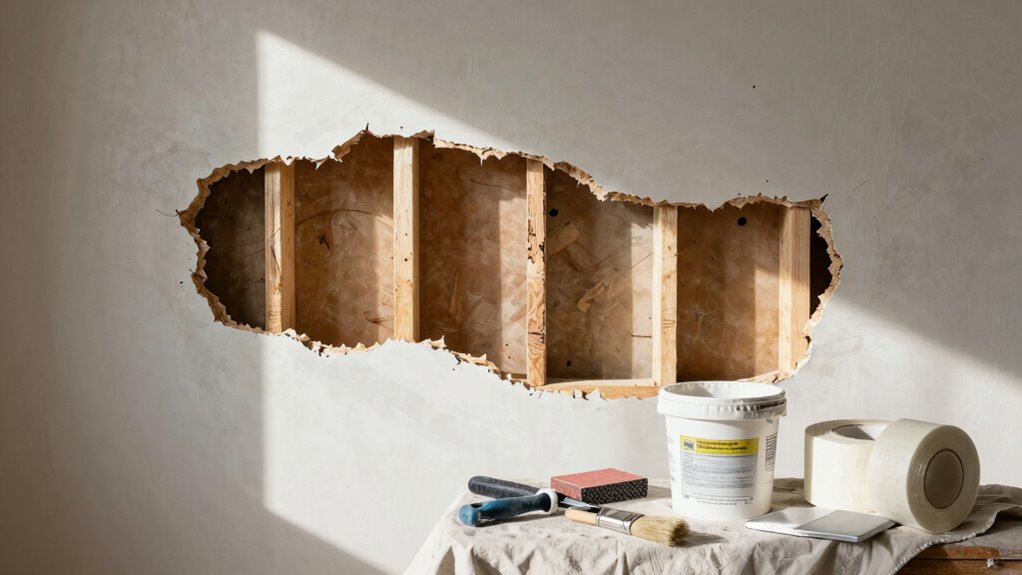
Holes smaller than three inches typically fall within standard patching territory. When damage spans four inches or more, structural considerations become critical.
You’ll need to evaluate the surrounding wall integrity. Large holes often require backing materials like wood or metal supports.
Consider your experience level honestly. Complex repairs involving electrical work, plumbing, or load-bearing walls demand professional expertise.
Don’t underestimate the importance of proper structural support. If you’re unsure about your ability to restore both functionality and appearance, consult a contractor.
Your safety and the wall’s long-term stability matter more than saving money. Trust your instincts when the repair seems beyond your skill set.
Patching Essentials: What You’ll Need
You’ll need specific tools, materials, and safety gear before starting any wall patching project.
Essential tools include a putty knife, sandpaper, and a utility knife, while proper patching compounds vary depending on your wall type and hole size.
Don’t overlook safety equipment like work gloves and safety glasses to protect yourself during the repair process.
Essential Tools Required
Several key tools form the foundation of successful wall patching projects.
You’ll need these essentials ready before starting any repair job.
- Utility knife – Sharp blade for clean cuts around damaged areas and precise patch trimming
- Putty knife – Flexible steel blade for spreading compound smoothly and removing excess material
- Sandpaper – Medium grit for smoothing patched surfaces and feathering edges seamlessly
- Measuring tape – Accurate measurements guarantee proper patch sizing and placement
These tools work together to create professional results.
Your utility knife handles preparation work, while the putty knife manages compound application.
Sandpaper eliminates ridges and imperfections, and measuring tape assures precise fitting.
Master these basics, and you’ll join the ranks of confident DIY repair enthusiasts who tackle wall damage like pros.
Choosing Right Patching Material
Choosing the appropriate patching material depends on three critical factors: hole size, wall material, and desired durability.
You’ll need to match your repair method to these variables for successful results. Small holes require lightweight spackle or joint compound, while larger openings demand mesh patches or drywall patches.
Consider your wall’s composition—drywall, plaster, or concrete—because each material requires compatible patching compounds.
Don’t overlook durability requirements; high-traffic areas need stronger materials than bedroom walls. You’ll want to select materials that blend seamlessly with your existing wall surface.
Professional results come from understanding how different compounds behave. Cheap materials often crack or shrink, creating more work later.
Invest in quality patching compounds that offer smooth application and lasting adhesion. Your finished repair should look permanent, not temporary.
Safety Equipment Necessities
Proper patching material selection directly impacts repair success, but without adequate safety preparation, even the best compounds won’t deliver superior results.
You’ll need essential protective gear before starting any wall repair project.
- Safety glasses shield your eyes from flying debris and dust particles during scraping and sanding operations.
- Work gloves protect your hands from sharp metal edges, chemical compounds, and abrasive materials.
- Dust mask or respirator prevents inhalation of harmful particles and chemical fumes from patching compounds.
- Coveralls or old clothing safeguard your skin and regular clothes from chemical burns and permanent staining.
Don’t overlook these fundamentals.
Your safety equipment becomes part of your professional toolkit, ensuring you complete repairs efficiently while protecting yourself from job-related injuries and health hazards.
Clean Up the Damage Before You Patch
You’ll need to remove all loose debris from the hole before applying any patching compound.
Sand the rough edges with fine-grit sandpaper to create a smooth surface for better adhesion.
Wipe away any remaining dust with a clean cloth to guarantee proper bonding of your patching material.
Remove Loose Debris
Clean out any loose material from the hole’s interior. This critical step guarantees proper adhesion for your patching compound and prevents future crumbling.
- Use a putty knife or scraper to chip away crumbling drywall, peeling paint, and splintered wood fragments from the damaged area.
- Tap loose gypsum chunks with your tool’s edge, letting them fall into the hole’s center where you can easily collect them.
- Vacuum loose dust and debris using a shop vacuum with a narrow nozzle attachment for precise control.
- Wipe the hole’s perimeter with a damp cloth to remove remaining dust particles that could interfere with patch adhesion.
Remove every loose particle completely. Your patching efforts depend on this thorough cleaning process for professional, lasting results.
Sand Rough Edges
Having removed all loose debris from the hole’s interior, you must now smooth the damaged area’s perimeter to guarantee your patching compound adheres properly.
Grab a medium-grit sandpaper or sanding block and carefully feather the rough edges outward from the hole’s center. Work in circular motions, maintaining even pressure while extending your sanding about two inches beyond the damaged zone.
This creates a gradual shift that prevents visible patch lines. Don’t over-sand or you’ll enlarge the hole unnecessarily. Focus on eliminating jagged edges and high spots that could compromise adhesion.
The surrounding surface should feel uniformly smooth when you’re finished. Proper edge preparation safeguards your patch bonds securely and lasts longer.
Check your work frequently during sanding to maintain control and achieve professional results.
Wipe Away Dust
Dust and debris from sanding can compromise patch adhesion if left on the surface. You need to clean the area thoroughly before applying any patching compound.
- Grab a tack cloth – These specialized cleaning cloths capture fine particles that regular rags miss, guaranteeing complete dust removal from your work area.
- Wipe in overlapping motions – Move systematically across the sanded surface, overlapping each stroke to prevent missing spots where dust might remain trapped.
- Pay attention to edges – Dust tends to accumulate along the perimeter where the hole meets intact wall surface, so spend extra time cleaning these critical areas.
- Inspect under good lighting – Hold a flashlight at different angles to spot any remaining dust particles that could interfere with proper patch adhesion.
Clean surfaces guarantee professional results every time.
Which Patching Method Fits Your Wall Type?
While different wall materials require specific patching approaches, selecting the right method depends on accurately identifying your wall type first.
You need to determine whether you’re working with drywall, plaster, or concrete. Drywall patches typically use joint compound and tape methods. Plaster walls demand patching plaster or setting compounds that match the existing texture. Concrete requires specialized fillers and bonding agents.
Don’t assume all holes are the same – wall thickness varies greatly between materials. Check your wall’s composition by examining an existing crack or removing a small section. Sound drywall produces a hollow noise when tapped, while plaster feels denser and heavier. Concrete walls remain consistently solid throughout.
Matching your patching method to the correct wall type guarantees professional results and prevents future failures.
Step-by-Step Guide to Drywall Patches
You’ll need to assess your hole’s dimensions and location before selecting the appropriate patch size and technique.
Cutting precise patch pieces and fitting them snugly into the opening guarantees a smooth, professional repair.
Securing the patch and properly finishing the seam edges creates an invisible repair that blends seamlessly with your existing drywall.
Assessing Hole Size And Location
Before beginning any drywall repair, carefully examine the damaged area to determine its dimensions and position relative to structural elements.
You need precise measurements to select appropriate patching materials and techniques.
- Measure the hole’s length and width using a ruler or tape measure, noting irregular edges that might affect patch fit.
- Check if studs frame the damaged area, as this determines your fastening options and patch support requirements.
- Look for nearby electrical outlets, light switches, or plumbing that could complicate your repair approach or require additional safety precautions.
- Assess whether the hole extends through multiple wall layers or insulation, which affects both material selection and repair complexity.
Accurate assessment prevents wasted materials and guarantees professional results.
Cutting And Fitting Patch Pieces
Having determined the precise dimensions and structural characteristics of your wall damage, you can now proceed to cut and fit the patch pieces that will restore your drywall’s integrity. Measure the hole’s width and height accurately, then transfer these measurements to your replacement drywall sheet.
Use a utility knife or drywall saw to score and cut the patch material, ensuring clean, straight edges free from tears or jagged sections. Test-fit each piece by inserting it into the opening, checking for proper alignment and minimal gaps. Trim any sections that bind or create excessive spacing.
Cut backup pieces slightly larger than needed, as you can always trim them down during installation. Remember that precise cutting now prevents fitting frustrations later, ensuring your repair blends seamlessly with the surrounding wall surface.
Securing And Finishing Seam Edges
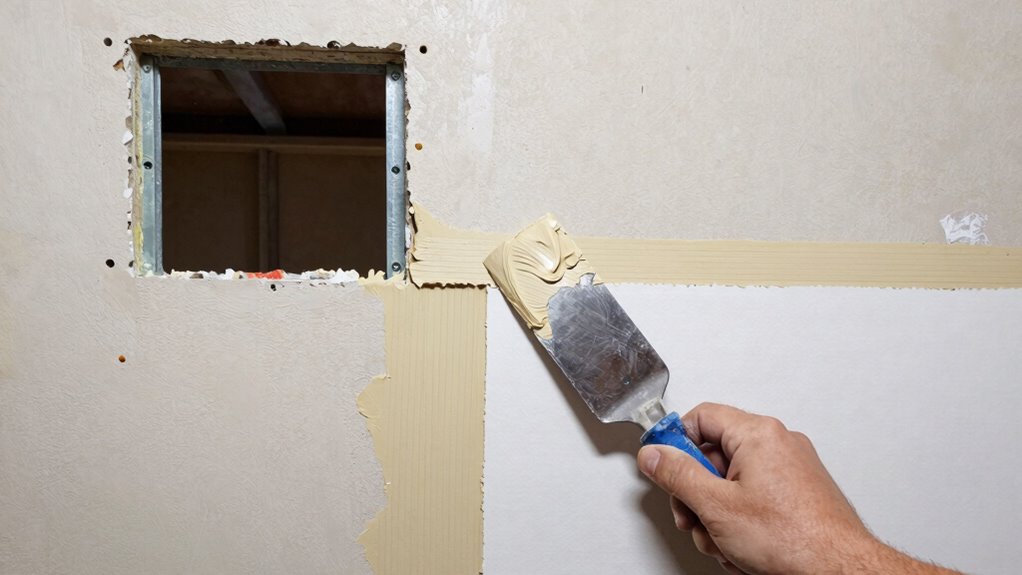
Apply joint compound along the seams where your patch meets the existing drywall, then embed drywall tape into the wet compound to create a seamless bond. This technique guarantees your repair blends invisibly with the surrounding wall surface.
- Spread a thin layer of joint compound over the seam using your putty knife at a 45-degree angle.
- Press the drywall tape firmly into the wet compound, eliminating air bubbles and wrinkles.
- Smooth the tape with gentle strokes, forcing excess compound out from underneath.
- Allow the compound to dry completely before applying additional coats.
Mastering this process makes you part of an experienced group who handles repairs confidently.
Your finished seams should be virtually undetectable, creating professional results that match your wall’s original finish quality.
Apply Joint Compound Like a Pro
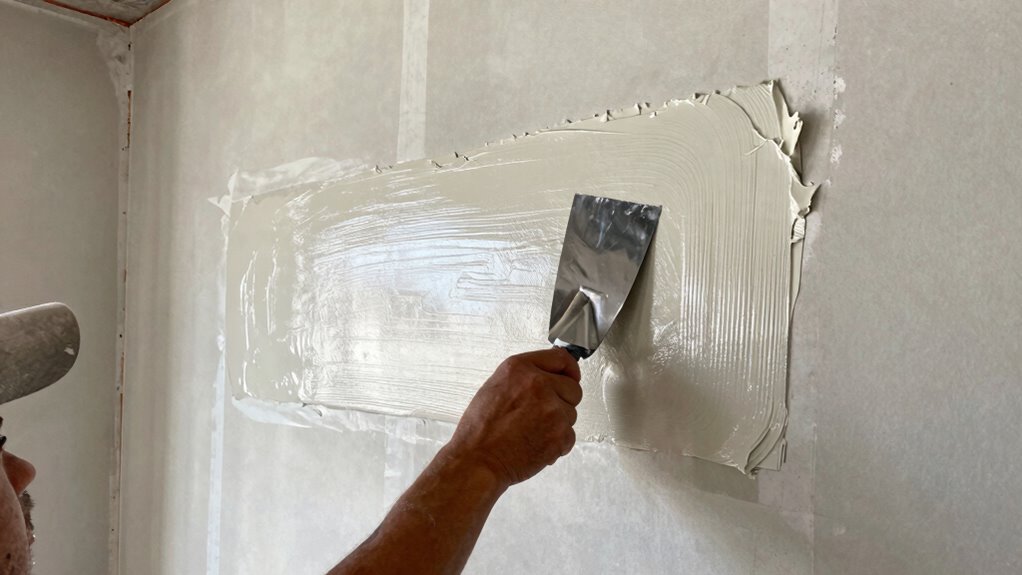
A proper joint compound application requires thin, even layers that build up gradually rather than thick coats that crack and bubble.
You’ll achieve professional results by starting with a small amount of compound on your knife, about a tablespoon. Spread it in straight, smooth strokes, maintaining consistent pressure. Work in sections, overlapping each pass slightly.
Let each layer dry completely before applying the next one. Sand lightly between coats using fine-grit paper. Keep your knife clean and angled properly—this prevents gouging. Apply three thin coats rather than one thick coat.
Focus on feathering the edges seamlessly into the existing wall surface. Don’t rush the drying process. Check for smoothness by running your finger across the surface. Correct any imperfections immediately while the compound remains workable.
Tape It Right: Mesh vs Adhesive Backing
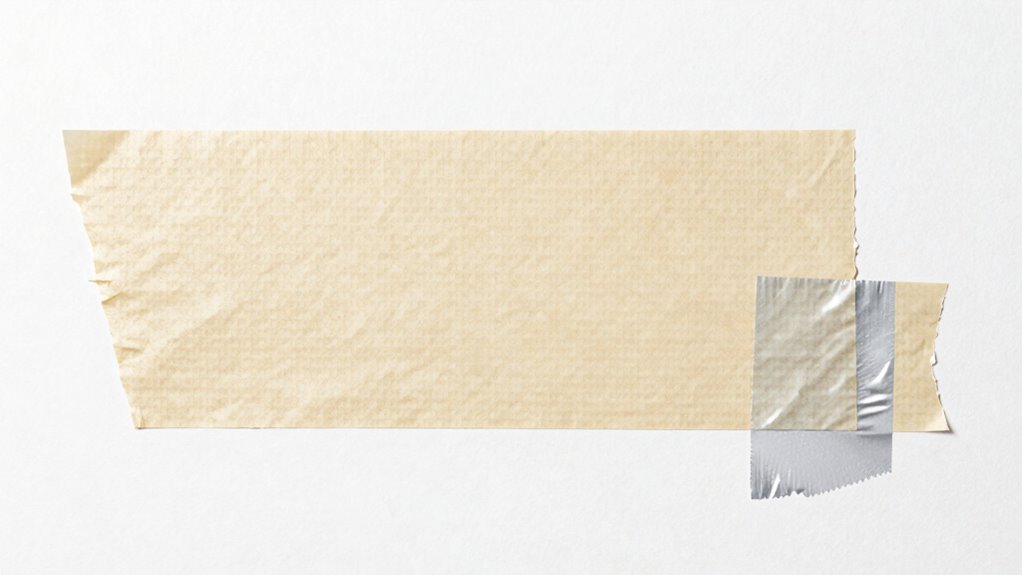
While both mesh and adhesive-backed tape can effectively reinforce wall repairs, choosing the right type depends on your specific hole size and surface conditions.
You’ll want to evaluate these key factors when making your selection:
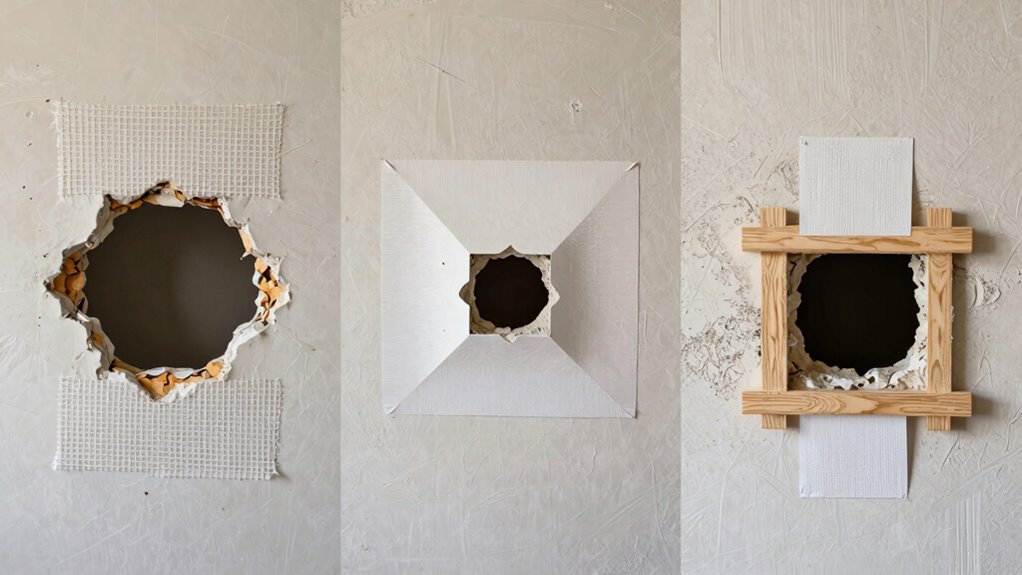
- Mesh tape creates stronger bonds for larger holes, embedding deeply into joint compound for maximum durability.
- Adhesive-backed tape works best on smooth surfaces, adhering instantly without additional compound layers.
- Fiberglass mesh prevents cracking around door frames and corners where movement occurs frequently.
- Paper tape with adhesive backing suits small to medium holes in standard drywall surfaces.
Match your tape choice to your wall’s specific needs.
Large holes demand mesh tape’s superior strength, while smooth surfaces accept adhesive-backed options seamlessly.
Your repair’s longevity depends on this vital selection.
Sand Down for a Smooth, Even Finish
Once you’ve properly selected and applied your tape, achieving a professional finish requires careful sanding to eliminate ridges and imperfections.
You should use 120-grit sandpaper for compound areas, moving in circular motions until surfaces feel smooth. Focus on feathering edges where patching compound meets existing wall texture. Don’t oversand delicate tape edges.
Switch to 220-grit paper for fine finishing, removing any remaining dust particles. Check your progress by running your hand across sanded areas. You’ll feel proud when surfaces feel seamless.
Proper sanding eliminates visible patch lines that scream “amateur job.” Your repaired wall should look professionally finished, not like a weekend warrior attempt.
Take time here; rushing creates more work later.
Prime and Paint to Hide the Patch
Priming and painting your patched wall area requires careful preparation and technique to achieve an invisible repair.
You’ll want to create a seamless blend that makes your patch disappear completely.
- Apply primer in thin, even coats using a high-quality brush or roller, working in small sections.
- Feather the primer edges outward, creating gradual shifts with the existing wall surface.
- Allow complete drying time between coats, typically 2-4 hours depending on humidity levels.
- Match your paint color and sheen exactly to surrounding areas for perfect blending.
Your patching job’s success depends on these finishing steps.
Don’t rush this process – taking time guarantees professional results that blend seamlessly with your existing wall surface.
Avoid These Common Patching Mistakes
Even after carefully preparing your wall surface, several critical errors can compromise your patching results if you don’t follow proper techniques.
You shouldn’t skip cleaning debris from holes completely, as loose material prevents proper adhesion.
Don’t rush applying joint compound in thick layers; this creates cracking and poor bonding.
You must avoid using wrong patching materials for your wall type – drywall requires different compounds than plaster.
Never sand before the compound fully cures; premature sanding damages the patch surface.
You shouldn’t neglect feathering compound edges smoothly into surrounding walls.
Don’t ignore proper drying times between coats.
Skipping primer after patching creates visible color differences.
You must avoid over-sanding, which removes too much material.
Finally, don’t rush painting without adequate surface preparation.
Conclusion
You’ve got this repair handled with the right tools and technique. Don’t let concerns about visibility stop you—proper feathering and priming will make that patch disappear. Large holes aren’t necessarily harder; they just require more patience with drying times. Trust the process: clean edges, gradual buildup, and smooth sanding create professional results every time.
