

You’re about to discover why even experienced woodworkers struggle with miter saw accuracy. Most problems stem from improper setup and measurement errors that compound quickly. Before you make your first cut, let’s address the critical alignment issues that cause gaps and misfit joints. Your projects deserve better than guesswork.
Why Clean Miter Cuts Prevent Project Failure

Clean miter cuts are the foundation of successful woodworking projects. You prevent gaps, misalignment, and weak joints when you master this fundamental skill.
Poor cuts create visible flaws that compromise your work’s integrity and your reputation as a craftsman. Imperfect angles cause fitting nightmares.
You’ll struggle with caulk-filled gaps or poorly aligned corners that scream amateur work. These mistakes waste materials, time, and confidence.
Precision cutting eliminates these problems entirely. You create tight-fitting joints that require no hiding. Your projects gain professional quality that makes other woodworkers take notice.
Clean cuts also reduce finishing work. You won’t need excessive sanding or filler to hide sloppy joints. Your time investment upfront saves hours later.
Master this skill and you’ll join the ranks of craftsmen who produce work others admire and respect.
Setting Up Your Miter Saw for Precision
Before you make any cut, you must confirm your miter saw is properly calibrated and aligned.
Your saw’s accuracy determines every joint’s success, and sloppy setup creates gaps that compromise your project’s integrity.
1. Check your blade’s perpendicularity using a reliable square against the fence and table.
Adjust the bevel angle until your blade sits perfectly vertical.
2. Verify miter gauge accuracy by cutting a test piece and measuring both sides.
Calibration confirms your angles meet precisely where intended.
3. Secure your fence alignment by loosening adjustment screws and confirming zero play between fence and blade.
Tighten everything firmly.
These steps create reliable, repeatable cuts that make you feel confident in your craft.
Proper setup transforms uncertainty into certainty, making every cut count toward professional results.
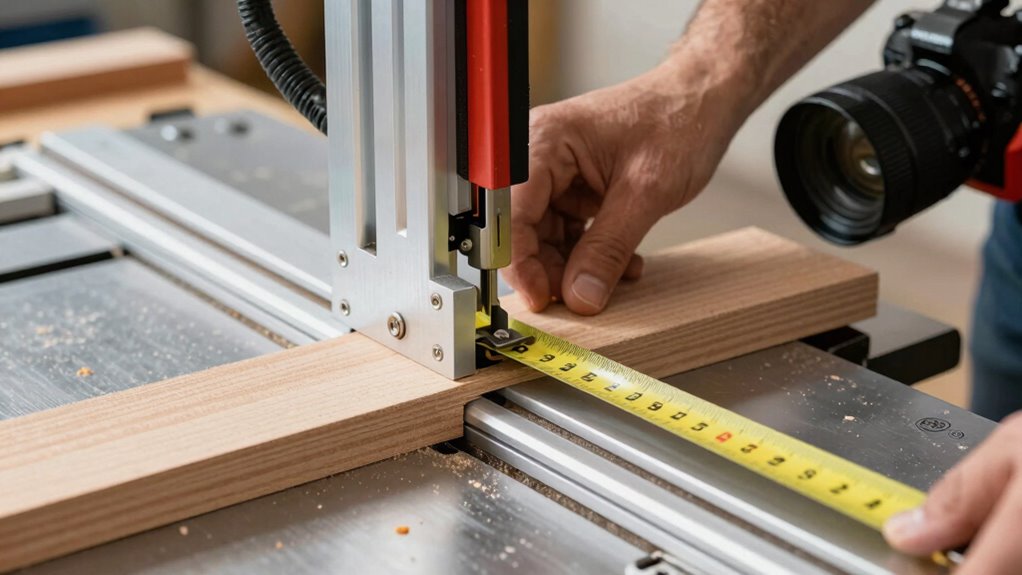
Measuring and Marking Wood Accurately
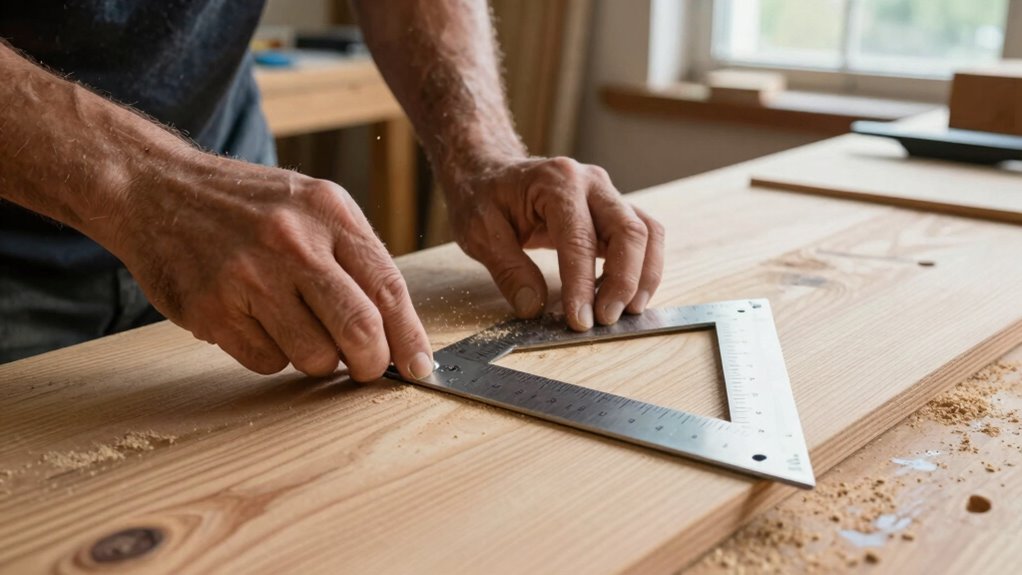
Every successful miter saw cut begins with precise measurement and clear marking. You must use a quality tape measure and mark your cuts with a sharp pencil or marking knife. Measure twice from the same reference point to eliminate cumulative errors.
Position your wood against the fence consistently, ensuring it doesn’t shift during marking. Make small, deliberate marks rather than long lines that blur into the cut. Use a combination square for perpendicular marks and verify your measurements before cutting.
Don’t rush this step – inaccurate marks guarantee imperfect angles. Clamp your workpiece securely to prevent movement. Check that your marks align with the saw’s blade path.
Remember that your final cut quality directly reflects the care you take during this measuring phase. Precision here builds confidence in your craftsmanship.
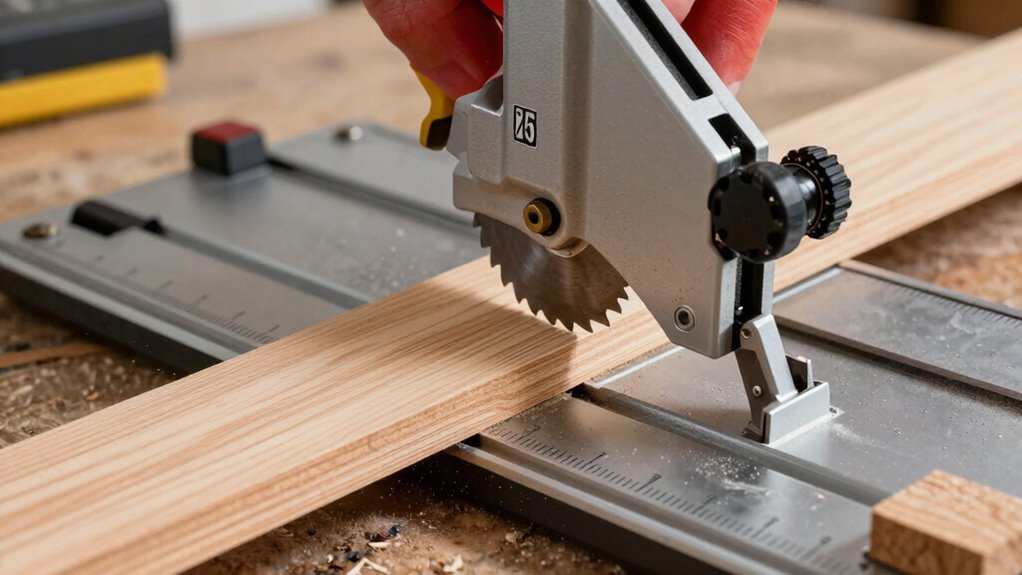
Selecting the Right Blade for Sharp Cuts
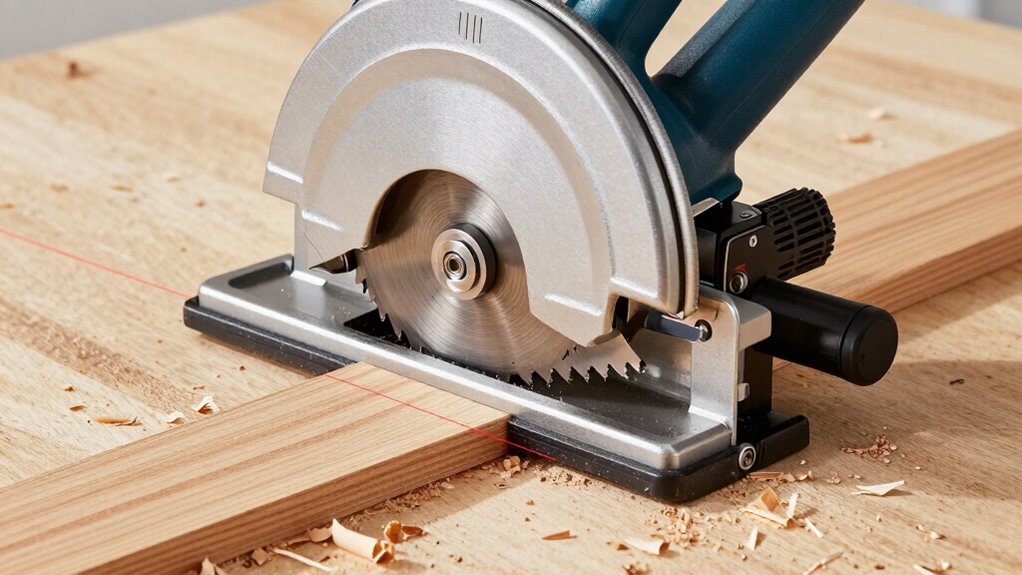
You need to choose between crosscut and combination blades based on your primary cutting tasks.
Crosscut blades excel at clean cuts across wood grain, while combination blades handle both crosscuts and rip cuts effectively.
Your blade selection directly impacts cut quality, so match the blade type to your specific miter saw applications.
Blade Type Selection
Often, woodworkers overlook blade selection when chasing perfect miter cuts, but your saw’s performance hinges on this critical choice.
Your blade type directly impacts cut quality, precision, and finish.
- Crosscut blades feature fewer teeth with wider gullets, designed specifically for clean cuts across wood grain. These deliver superior results for most miter saw applications.
- Combination blades offer versatility but compromise ideal performance. They work adequately for mixed tasks but won’t produce the cleanest cuts compared to specialized options.
- Premium carbide-tipped blades provide exceptional durability and cut quality.
Invest in quality carbide blades with proper tooth configuration for consistent, accurate miter cuts that professional woodworkers demand.
Cutting Edge Sharpness
Sharpness determines cut quality more than any other blade characteristic. You need carbide-tipped blades for clean cuts.
Standard steel blades dull quickly and create tear-out. Check tooth configuration before purchasing.
Fine-pitch blades with more teeth deliver smoother results. You should inspect blades regularly for wear.
Dull blades cause burning and splintering. Replace blades when cutting becomes difficult.
Premium blades maintain sharpness longer. You’ll notice the difference in cut quality immediately.
Proper blade selection prevents rework and sanding. Invest in quality blades for professional results.
Your miter saw deserves better than bargain-bin options. Sharp blades reduce tear-out on delicate materials.
You’re not saving money with cheap blades. Quality cutting edges make clean angle cuts possible.
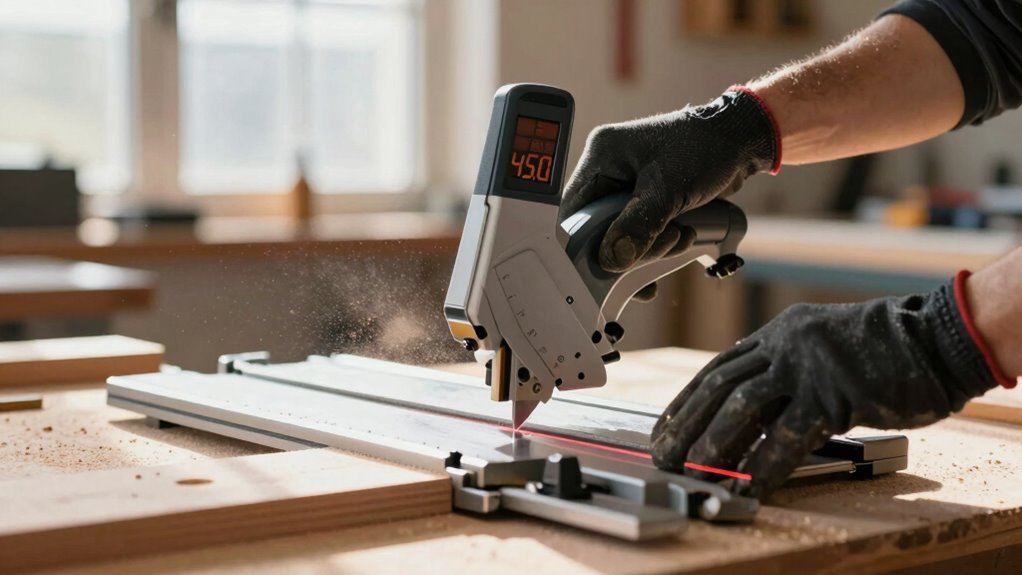
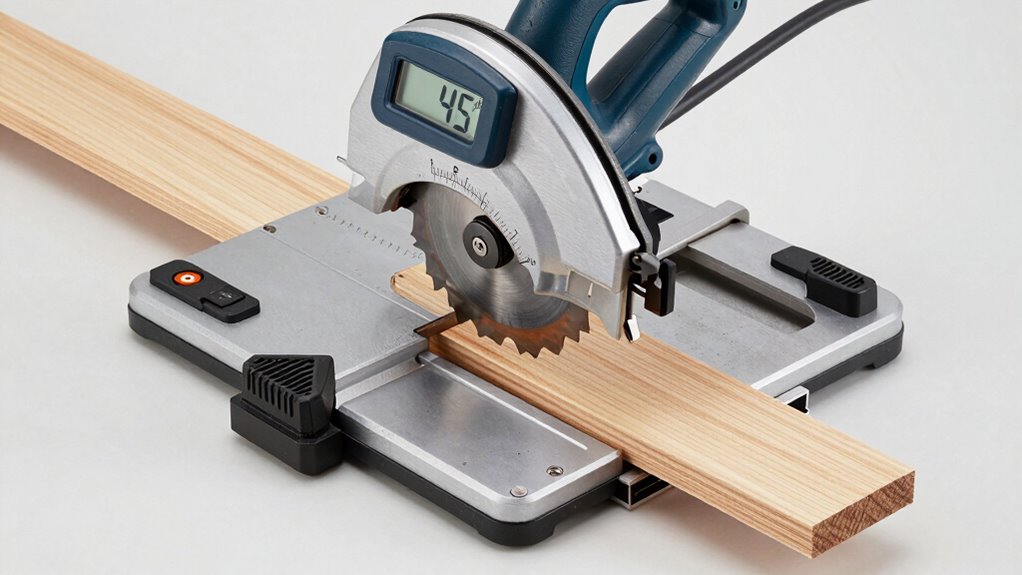
Adjusting Miter Angles Like a Pro
Mastering miter angle adjustments requires understanding three critical components: the detent system, angle calibration, and fence alignment. These elements work together to guarantee your cuts are dead-on every time.
- Check your detent system regularly. These preset stops can drift over time, causing inconsistent angles. Test them with a reliable square and adjust as needed.
- Calibrate your angle gauge using a precision measuring tool. Don’t rely on the factory settings alone. Verify accuracy at multiple angles, especially 45 and 90 degrees.
- Align your fence perfectly perpendicular to the blade. Even slight misalignment creates compound errors in your cuts.
You’re not just adjusting tools—you’re joining a community of craftspeople who demand precision. These steps separate amateurs from professionals.
Cutting Your First Precise Angle
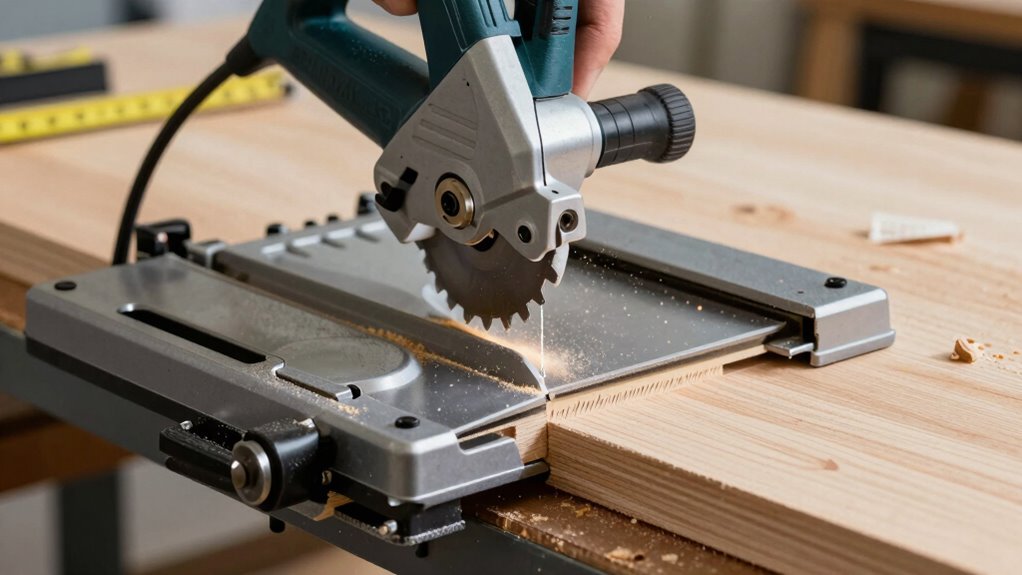
Before you make your first cut, guarantee your workpiece is properly secured and your saw’s angle is precisely set.
Position your material firmly against the back fence and hold it tight. Double-check that your miter saw’s angle matches your desired measurement exactly. Take a moment to verify everything feels solid and stable.
Line up your cut mark directly under the blade. Make sure you can clearly see your cutting line.
Don’t rush this step – precision matters more than speed. Hold your workpiece with both hands and apply steady pressure.
Let the saw do the work as you slowly lower the blade through the material. Keep your hands clear of the cutting path and maintain firm control throughout the entire cut.
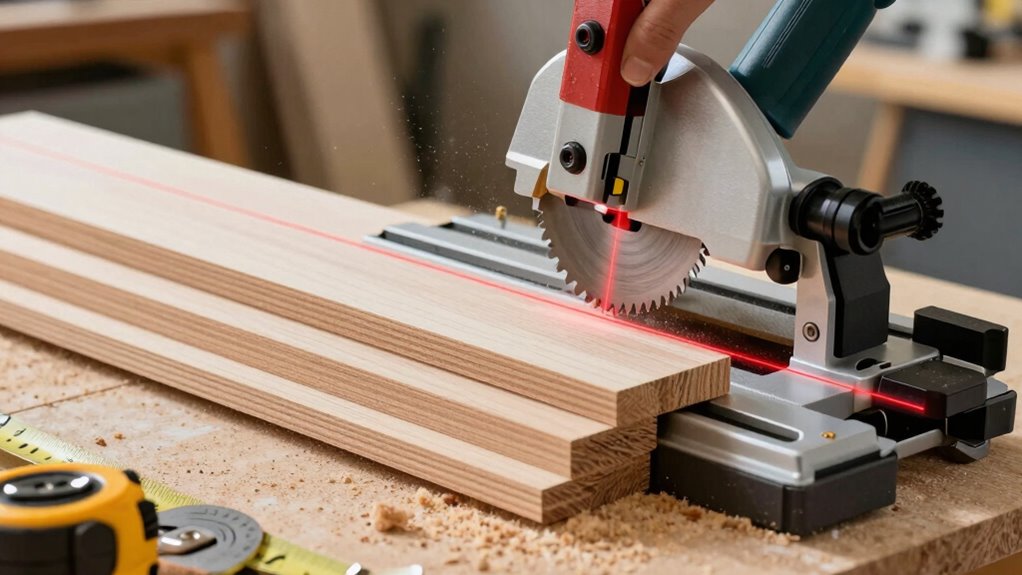
Using a Stop Block for Repeatable Cuts
When you need to make multiple cuts at the same length, a stop block guarantees each piece matches precisely. This simple jig becomes your best friend for consistent results.
- Set your measurement first – Position the stop block at your desired cut length and clamp it securely to the fence. Double-check this distance before making any cuts.
- Use a tight fit – Place your workpiece firmly against both the fence and stop block. Hold it snugly in place to prevent movement during cutting.
- Maintain pressure – Keep steady pressure against the stop block throughout the cut. This assures every piece comes out exactly the same length.
Stop blocks eliminate guesswork and deliver professional-grade consistency every time.
Avoiding Measurement and Alignment Errors
Even experienced woodworkers make mistakes with measurements and alignment, but these errors are completely avoidable with proper technique. You must double-check your measurements before making any cuts.
Use a reliable square to verify angles directly on your workpiece. Don’t rely solely on the miter saw’s angle gauge. Always guarantee your material sits flat against the fence and backstop.
Check that your blade isn’t tilted if you’re making straight cuts. Misaligned fences cause drift and inaccurate angles. You should also verify your miter saw’s calibration periodically. A poorly calibrated saw will frustrate even skilled craftsmen.
Take time to sight down your fence and blade alignment. These simple habits prevent costly mistakes and guarantee your cuts fit perfectly every time.
Mastering Compound Angle Cuts
Compound angle cuts demand precise setup and careful execution to achieve accurate results.
You’ll need to adjust both miter and bevel angles simultaneously, which requires methodical attention to detail.
- Set your miter angle first – Lock the miter gauge at your required angle before touching the bevel adjustment. This prevents accidental movement during setup.
- Adjust the bevel angle carefully – Tilt the saw blade to your needed bevel angle, ensuring the fence provides solid support for your workpiece throughout the cut.
- Test cut on scrap material – Always verify your compound angle settings with a practice cut before working on your final piece.
Mastering these cuts takes practice, but you’ll soon join the ranks of woodworkers who cut perfect joints consistently.
Fixing Rough or Uneven Cut Edges
Rough or uneven cut edges can ruin an otherwise perfect miter saw project, so you’ll want to address these issues immediately.
Start by checking your blade condition – dull or damaged teeth cause tear-out. Replace worn blades promptly. Adjust your cutting technique by slowing down the feed rate and letting the blade do the work. Don’t force cuts through material.
Clean your blade guard and verify it retracts properly. Misaligned guards create uneven pressure.
Check your fence alignment using a straightedge – gaps cause material movement during cuts. Tighten loose components including the blade arbor nut and fence mounting bolts.
Sand minor imperfections with fine-grit paper. For severe tear-out, make relief cuts slightly deeper than your intended cut line.
You’ll achieve cleaner edges consistently with proper blade selection, sharp teeth, and controlled cutting speed.
Verifying Angles With a Framing Square
After addressing rough or uneven cut edges, you’ll want to confirm your miter saw’s angle accuracy before proceeding with precision work. Grab your framing square to check those critical angles.
- Position your square correctly – Place the framing square’s heel at your workpiece corner, guaranteeing both legs align perfectly with your cut edges. Any gaps reveal angle discrepancies.
- Check for light gaps – Sight along the square’s edges looking for inconsistent spacing between the tool and your workpiece. Even small light gaps indicate your miter saw needs adjustment.
- Measure twice, cut once – Confirm your square’s accuracy by checking known angles first. A reliable 90-degree corner should show zero gap when tested against the square’s legs.
This verification prevents costly mistakes and guarantees your cuts meet perfectly.
Cutting Baseboards With Tight Miters
You’ll need to measure your wall angles precisely before cutting baseboards, as even slight inaccuracies will create gaps at the corners.
Secure your baseboard firmly against the fence and hold it tight to prevent movement during the cut.
These fundamentals guarantee your tight miters fit perfectly without gaps or overlaps.
Measuring Angles Accurately
When cutting baseboards with tight miters, accurate angle measurement becomes critical for achieving seamless joints. You need reliable techniques that guarantee precision every time.
- Use a quality angle finder tool – Digital or mechanical, these gadgets eliminate guesswork. Position them firmly against corner walls for exact readings.
- Measure twice, cut once philosophy – Take multiple readings from different spots. Corners aren’t always perfectly square, so average your measurements for best results.
- Test cuts on scrap material – Before cutting your actual baseboard, verify angles using leftover pieces. This prevents costly mistakes and gives you confidence in your measurements.
Your success depends on trusting your measurements completely. Don’t rush this step – tight miters demand precision.
Securing Baseboard Properly
Proper baseboard securing requires careful attention to alignment and stability before you even touch the miter saw.
You’ll want to clamp your baseboard firmly against the fence and table to prevent any movement during cutting. Position your material so the marked cut line aligns exactly with the blade path. Tighten your clamps gradually, checking that no warping occurs.
Make certain your baseboard sits flat without gaps between the surface and clamps. Double-check your measurement marks are visible and accessible.
Don’t rush this step – secure holding means clean cuts. Your miter saw’s accuracy depends entirely on how well you’ve secured the workpiece. Take time to guarantee everything stays put.
Working With Crown Molding Corners
Although crown molding installation demands precision, mastering corner cuts transforms this challenging task into a manageable process.
You’ll need to approach inside and outside corners differently to achieve professional results.
- Measure twice, cut once – Check your corner angle with a digital angle finder before setting your saw. Most corners aren’t exactly 45 degrees, so adjust accordingly.
- Use the correct cutting technique – For inside corners, cut test pieces first. Outside corners require opposite angles, so your left corner needs a right-hand cut.
- Test fit every joint – Don’t assume your measurements are perfect. Crown molding expands and contracts, so leave slight gaps for adjustments.
Your peers will notice the difference between rushed work and meticulous craftsmanship.
Keeping Your Miter Saw Sharp and Reliable
You’ll maintain accurate cuts and extend your miter saw’s lifespan by keeping the blade sharp, cleaning debris from the cutting area after each use, and checking calibration regularly.
Sharp blade maintenance prevents tear-out and guarantees clean angles, while proper cleaning techniques remove buildup that affects performance.
Regular calibration checks keep your saw cutting true angles every time.
Sharp Blade Maintenance
A sharp blade makes all the difference when cutting precise angles with your miter saw. Dull blades cause tear-out and inaccurate cuts that compromise your project’s quality.
Keep your blade sharp by following these essential practices:
- Inspect teeth regularly – Check for nicks, dullness, or resin buildup after each use. Replace blades showing significant wear.
- Use proper cutting techniques – Let the blade do the work without forcing through material. Excessive pressure damages teeth quickly.
- Store blades properly – Keep them in protective cases or blade guards when not in use. Prevent accidental contact that dulls edges.
Maintain consistent cutting performance by respecting your blade’s condition. Sharp blades aren’t just better—they’re safer and more reliable for achieving those perfect miter cuts every time.
Proper Cleaning Techniques
While maintaining blade sharpness guarantees clean cuts, keeping your miter saw clean prevents buildup that compromises accuracy and safety. You should disconnect power before cleaning.
Remove debris from the blade guard and around the blade using a brush. Wipe down the miter table and fence with a damp cloth. Clear sawdust from the motor housing and air vents. Use compressed air for stubborn particles in tight spaces.
Clean the blade with appropriate solvent monthly. Don’t forget to remove any resin buildup on the blade teeth. Check the depth adjustment mechanism for debris. Keep the miter gauge slot free from dust.
Store your saw covered when not in use. Regular cleaning prevents costly repairs and maintains cutting precision. You’ll notice better performance immediately after thorough cleaning sessions.
Regular Calibration Checks
Regular calibration guarantees your miter saw maintains the accuracy needed for perfect angled cuts. You shouldn’t rely on factory settings alone—regular checks prevent costly mistakes and guarantee professional results every time.
- Check the blade alignment monthly by making test cuts on scrap wood at various angles. Measure each cut precisely and adjust your saw’s settings if deviations exceed 1/64 inch.
- Verify angle accuracy using a reliable square or digital angle finder. Tighten all locking mechanisms and guarantee zero-degree settings align perfectly before each cutting session.
- Test bevel adjustments regularly by cutting compound angles and checking fitment against mating pieces. Small calibration tweaks make significant differences in your project’s final appearance and structural integrity.
Conclusion
You’ve mastered the fundamentals of cutting perfect angles with your miter saw. Remember that precision setup prevents project disasters better than any fancy tool. Keep your blade sharp, measure twice, and trust your square. These methodical steps will transform your cuts from frustrating failures into seamless joints that fit like magic. Perfect angles aren’t luck—they’re the result of disciplined technique and attention to detail.
