

Most woodworkers overlook the critical role of workbench height in their productivity and comfort. You’ll want to get this right before cutting any wood. A bench that’s too tall or short can wreck your posture and make precision work miserable. Let’s walk through the essential steps to build a sturdy, functional workbench that’ll serve you for decades.
Plan a Workbench That Fits Your Needs

Why build a workbench that’s too small for your projects or awkwardly tall for your comfort? You need dimensions that match your body and work style. Measure your height first – your bench height should be about elbow height when standing. Standard heights range from 34-38 inches.
Consider your workbench depth too; 24-30 inches gives you adequate workspace without straining. Width matters based on your projects – 6 feet minimum for most woodworking tasks.
Think about your vise placement and tool storage needs. Plan for future projects, not just current ones. Your workbench becomes your workshop foundation, so make it fit your specific requirements perfectly. This guarantees comfort during those long building sessions.
Tools and Materials You’ll Need
With your workbench dimensions planned according to your body and project needs, you’ll want to gather the right tools and materials before cutting any wood.
Having everything ready keeps your workflow smooth and prevents frustrating trips to the hardware store mid-project.
You’ll need these essential items:
- Lumber: 2x4s for the frame, 3/4-inch plywood or solid wood for the top
- Fasteners: 3-inch screws for frame assembly, 2-inch screws for the top
- Wood glue: Construction adhesive for strong, durable joints
- Basic tools: Circular saw or miter saw, drill with bits, measuring tape, square
- Safety gear: Safety glasses, dust mask, and work gloves
Gathering quality materials upfront guarantees your workbench lasts years.
Don’t skimp on lumber thickness or skip safety equipment. Your future self will thank you for proper preparation.
Pick a Workbench Design That Works
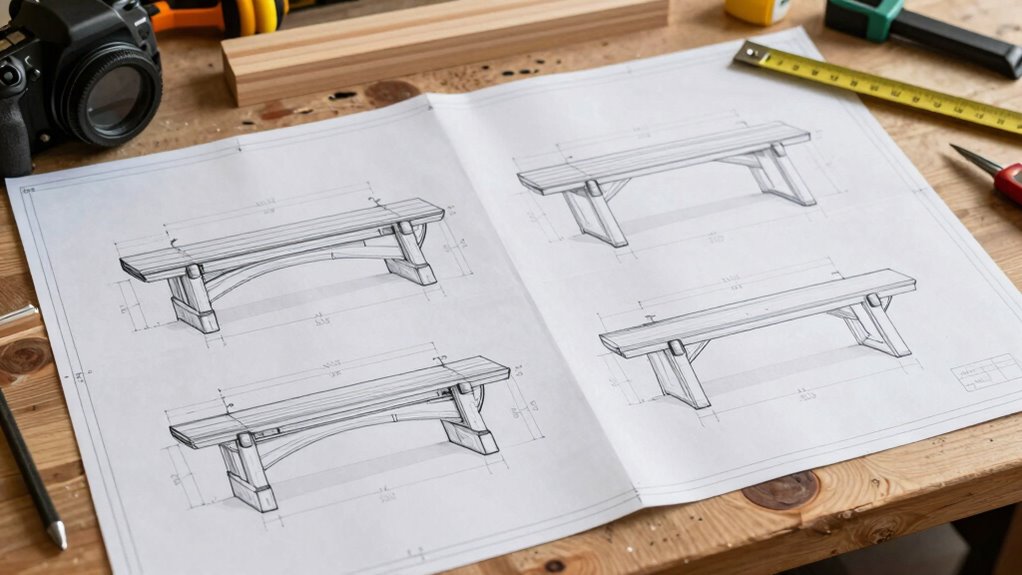
You’ll want to choose a design that balances simple principles with sturdy construction methods, ensuring your workbench can handle heavy use without compromising functionality.
Consider how you’ll use the space and plan your layout accordingly, keeping frequently used tools within easy reach.
A well-thought-out design prevents costly mistakes and creates a workspace that actually works for your specific needs.
Simple Design Principles
When you’re selecting a workbench design, focus on simplicity and functionality rather than elaborate features. Your workbench should serve as a reliable foundation for countless projects, not distract with unnecessary complexity.
Keep these principles in mind:
- Solid tabletop thickness prevents flexing under pressure
- Adequate leg spacing guarantees stability during heavy work
- Simple joinery methods reduce construction time and mistakes
- Standardized dimensions make it easier to find replacement parts
- Built-in storage options keep tools organized without cluttering your workspace
Choose designs that prioritize straight lines and basic geometry. Avoid curved elements or decorative details that don’t enhance performance.
Sturdy Construction Methods
A solid workbench design relies on time-tested construction methods that prioritize strength over aesthetics.
You’ll want to choose joinery methods like mortise-and-tenon or dowels instead of relying solely on screws. These traditional techniques create joints that’ll withstand decades of heavy use.
Select hardwood species like oak, maple, or ash for your frame – they handle stress better than softwoods. Your benchtop should span supports no more than 36 inches apart to prevent sagging. Double up on aprons and use substantial timber dimensions, typically 2×4 or larger for frames.
Don’t skip the diagonal bracing between legs; it prevents racking and keeps your bench rock-solid. Pre-drill all screw holes to avoid splitting, and use wood glue liberally at every joint.
These methods guarantee your workbench becomes a reliable tool you’ll trust for years.
Functional Layout Planning
Several proven workbench designs exist, each suited for different workshop tasks and available space. You need to choose a layout that matches your specific woodworking needs and workshop dimensions.
Consider these key factors when selecting your workbench design:
- Work surface height – Standard 34-36 inches works for most people, but adjust based on your stature and tasks.
- Bench width – 24-30 inches provides adequate workspace without overreaching.
- Length requirements – Minimum 6 feet accommodates most projects; longer benches handle large stock.
- Storage integration – Built-in drawers, shelves, or tool racks maximize efficiency.
- Vise placement – End or side vises depend on your dominant hand and workflow patterns.
Your workbench becomes an extension of your craft when properly planned.
Choose Your Wood Type and Size
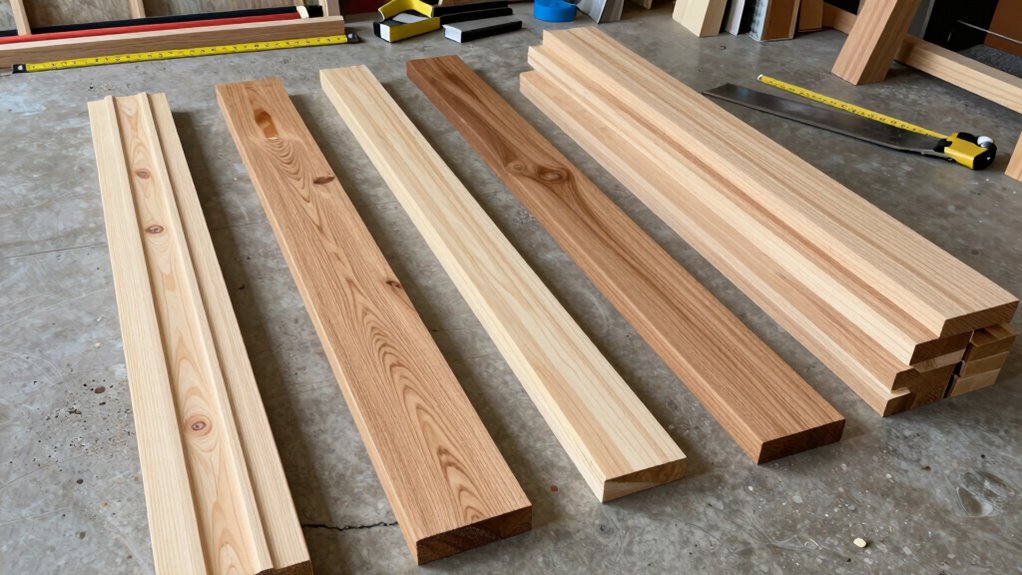
Your workbench’s strength and durability depend largely on selecting the right wood type and dimensions for your specific needs. Hardwoods like oak, maple, and beech offer superior strength and resistance to wear, making them ideal for heavy-duty work.
Softwoods such as pine or fir work well for lighter tasks and budget-conscious projects. Consider your workshop environment too – dense hardwoods handle moisture better than softwoods.
For dimensions, typical workbench tops range from 2-inch to 4-inch thickness. Thicker tops provide more stability but add significant weight.
Standard widths span 24 to 36 inches, while lengths vary from 6 to 8 feet. Your height should accommodate your work style – generally 34 to 38 inches tall.
Don’t forget to factor in your own physical dimensions and preferred working posture when making these critical selections.
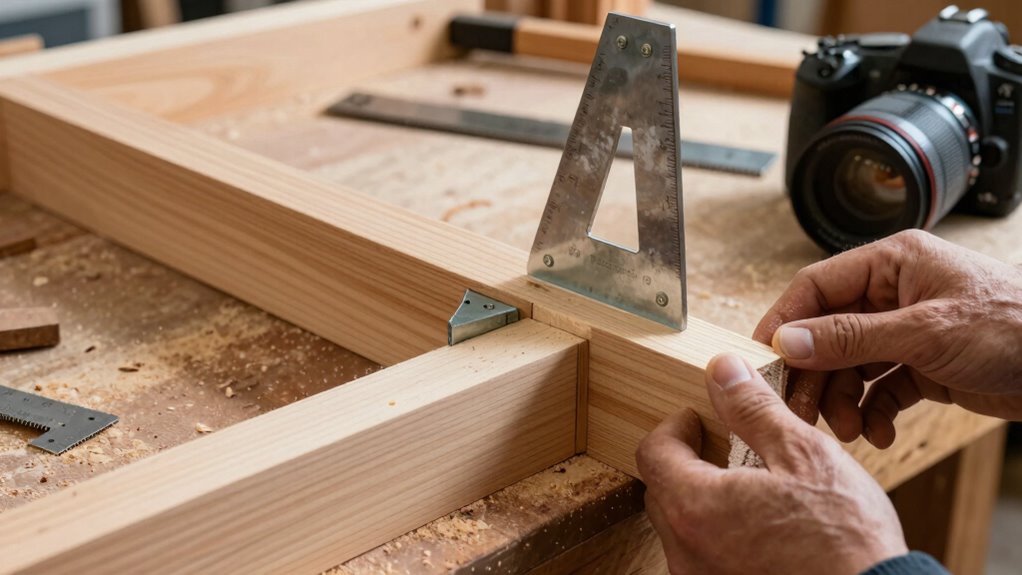
Measure and Cut Wood to Size
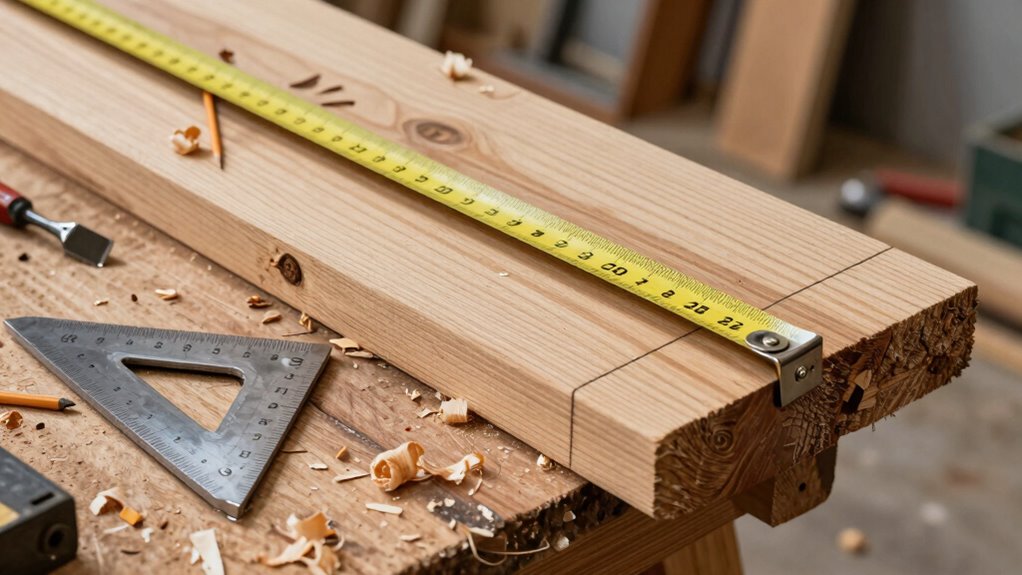
Careful measurement and precise cuts form the foundation of a solid workbench. You’ll want to measure twice and cut once to avoid costly mistakes that frustrate many beginners.
- Use a reliable tape measure – Make certain it’s accurate and readable
- Mark clearly – Use a sharp pencil and mark your cutting lines distinctly
- Square your cuts – A good speed square prevents crooked cuts that compromise joints
- Cut with purpose – Rushing leads to binding, tear-out, and misaligned pieces
- Double-check everything – Verify dimensions against your plans before final cuts
Your workbench dimensions should reflect your workspace and intended projects.
Standard sizes work well for most woodworkers, but custom lengths accommodate specific needs.
Remember that accurate cuts now save hours of frustration later. Take your time and focus on precision.
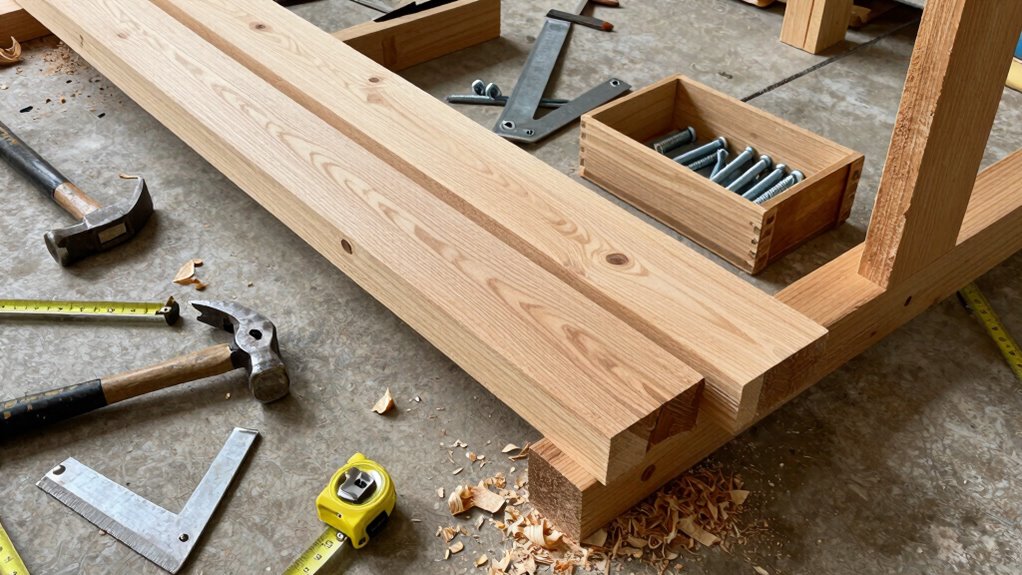
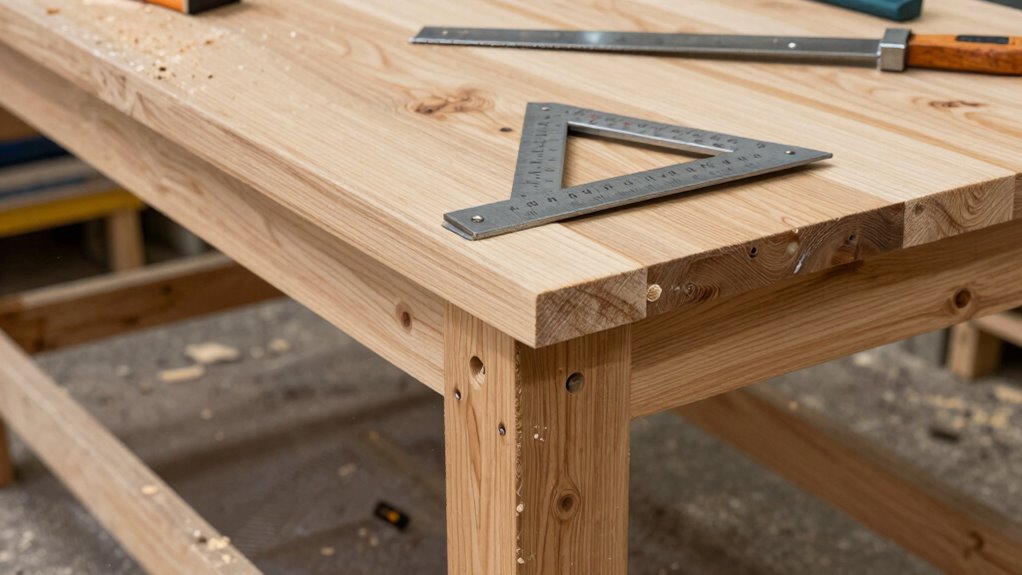
Build a Stable Bench Base First
A solid bench base requires proper preparation and assembly techniques that you can’t skip. Start by laying out your cut lumber on a flat surface, ensuring all pieces are square and true. Your base consists of two parallel beams with connecting stretchers between them.
Position the main beams first, checking they’re perfectly parallel and spaced correctly for your bench width. Use a framing square to verify corners are ninety degrees before securing anything permanently.
Don’t rush this critical step – your entire workbench stability depends on it. Check diagonal measurements repeatedly; they must match exactly or your base will rack. Temporary clamps help hold pieces while you verify alignment.
Once satisfied with positioning, mark all joint locations clearly. This foundation determines how solid your future projects will be when worked on top. Take your time here, because shortcuts now create problems later.
Attach the Apron and Supports
You’ll need to measure and cut your apron pieces to fit between the legs.
Then attach the supports to your frame with pocket screws or dado joints.
Next, secure the apron to the legs using wood glue and screws, making sure everything is square and tight.
These connections create the foundation that holds your workbench together under heavy use.
Measure And Cut Apron Pieces
Several apron pieces require precise measurement and cutting before attachment.
You’ll need to measure twice and cut once to guarantee everything fits perfectly. Take your time with these cuts because accurate apron pieces create the foundation for your workbench’s structural integrity.
- Measure the distance between your legs precisely
- Cut two long apron pieces for the sides using 2×4 lumber
- Cut one shorter apron piece for the back, allowing space for your legs
- Ascertain all pieces are square and smooth before final cutting
- Double-check measurements against your leg dimensions
Your measurements should account for the thickness of your leg assemblies.
Use a miter saw or circular saw with a straight edge guide for clean, straight cuts.
Sand any rough edges before moving forward.
Attach Supports To Frame
With your apron pieces cut to precise dimensions, you’re ready to secure them to the leg assemblies and add supporting structure.
Position your aprons between the legs, guaranteeing they’re perfectly aligned with your layout marks. These aprons form the backbone of your bench’s structural integrity.
Grab your drill and 2½-inch screws. Pre-drill holes through the apron ends into the leg faces to prevent splitting. Drive two screws per joint, keeping them evenly spaced. Don’t rush this step – accuracy matters more than speed.
Install your corner braces next, positioning them diagonally between aprons and legs. These triangular supports prevent racking and add serious strength.
Check that everything remains square as you work. A solid frame guarantees your bench won’t wobble or twist under pressure. Tighten all connections firmly.
Secure Apron To Legs
Position the apron pieces between the legs and align them with your layout marks before securing them in place.
You’ll create strong joints that’ll last decades with proper technique.
- Use pocket screws – Drill 2½-inch pocket screws through the apron ends into the leg faces for quick, solid connections.
- Check your square – Verify 90-degree angles before driving any fasteners to avoid twisted assemblies.
- Pre-drill holes – Prevent splitting by pre-drilling clearance holes in hardwood species like oak or maple.
- Apply wood glue – Brush PVA glue on all mating surfaces for maximum joint strength.
- Clamp everything tight – Use bar clamps to pull joints together while screws set permanently.
Drive screws slowly, feeling for solid engagement.
These connections form your workbench’s backbone, so take time getting them right.
Your future projects depend on this foundation’s reliability.
Create a Flat, Solid Top Surface
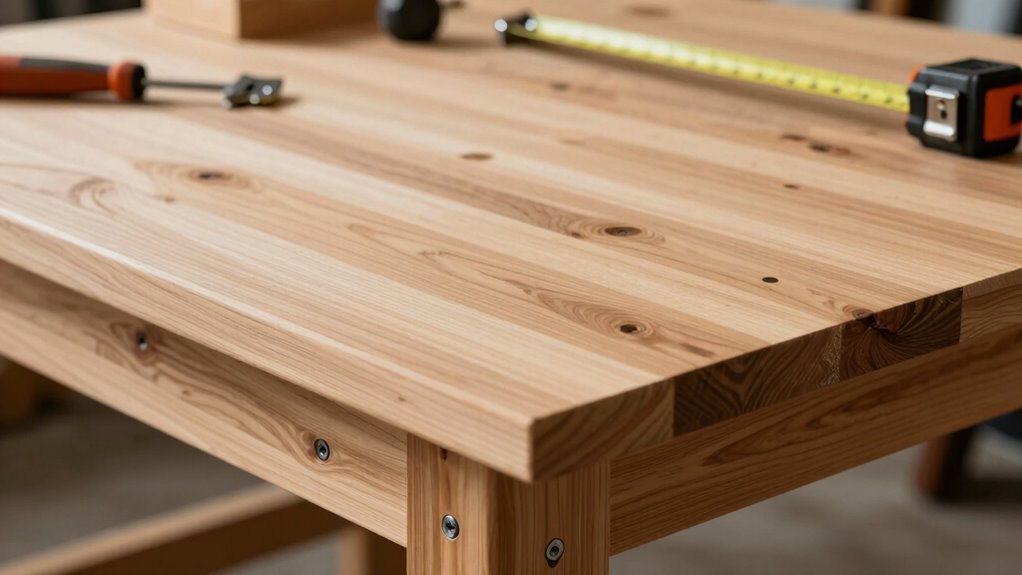
Once you’ve gathered your lumber and tools, you’ll want to focus on creating a flat, solid top surface that can handle years of heavy use. Select straight, knot-free boards that fit together tightly. Arrange them face-up on sawhorses, guaranteeing minimal gaps between boards.
Check for twists by placing a long straightedge across multiple boards. Mark high spots with a pencil. Use a hand plane or belt sander to remove these high points gradually. Work systematically from one end to the other.
Apply wood glue to mating surfaces when satisfied with flatness. Clamp boards together firmly using bar clamps every six inches.
Wipe excess glue immediately. Allow glue to cure completely before proceeding. This foundation guarantees your workbench top remains stable through years of dependable service.
Use Strong Joinery for Longevity
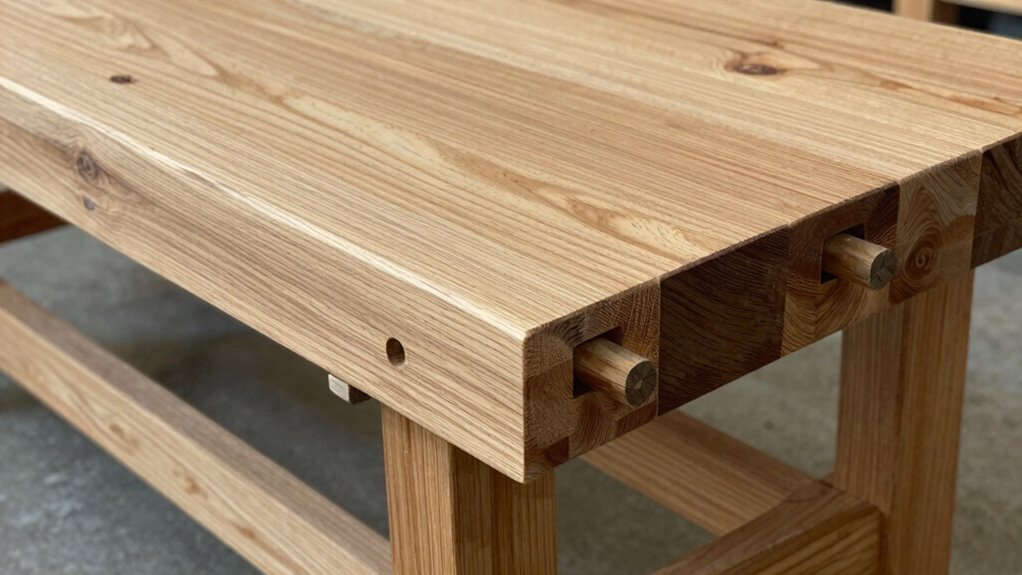
You’ll want to choose strong joint techniques like mortise and tenon or dovetails that have stood the test of time in furniture making.
Don’t underestimate the importance of selecting durable hardwoods such as oak, maple, or cherry that can handle years of heavy use. These foundational choices determine whether your workbench survives decades of abuse or falls apart after a few months.
Strong Joint Techniques
When you’re building a workbench that needs to withstand decades of use, your joint choices determine whether it’ll hold up or fall apart.
Don’t underestimate how critical strong joinery is for longevity.
Focus on these time-tested techniques that professional woodworkers trust:
- Mortise and tenon joints provide exceptional strength for leg-to-rail connections.
- Dovetail joints create nearly indestructible corner joints without glue.
- Pocket screws offer quick, reliable assembly for face frames.
- Biscuit joints align panels perfectly while adding structural integrity.
- Traditional wedged through-tenons resist withdrawal forces better than bolts.
Each method has specific applications where it excels.
Master these fundamentals and your workbench joins will outlast your tools.
You’re not just building furniture; you’re crafting something that becomes part of your workshop legacy.
Durable Wood Selection
Your workbench’s lifespan depends heavily on selecting hardwoods that can handle repeated abuse while maintaining their structural integrity. Choose oak, maple, or beech for exceptional durability and shock resistance. These hardwoods won’t dent easily when you’re pounding joints together or dropping tools repeatedly.
Avoid softwoods like pine or cedar that’ll show wear quickly. Your bench needs to withstand years of heavy use without compromising its stability. Dense hardwoods also accept screws and bolts better, creating stronger connections.
Consider your local climate when selecting wood. Kiln-dried hardwoods prevent warping and cracking. Invest in quality lumber now rather than replacing weak wood later.
Your fellow woodworkers will notice the difference in craftsmanship. Solid hardwood construction shows you belong among serious makers who build for generations.
Connect the Top to Your Base
Several methods exist for connecting your workbench top to the base, but the most reliable approach uses pocket screws driven through the apron into the underside of the top. This creates a strong, lasting bond that’ll serve you well.
- Pre-drill clearance holes to prevent wood splitting when driving screws.
- Use 2½-inch pocket screws for maximum holding power through thick apron material.
- Space screws every 6 inches along the apron for even load distribution.
- Apply wood glue before joining pieces for extra strength and vibration resistance.
- Clamp pieces tightly during assembly to guarantee flush, gap-free connections.
You’ll feel confident knowing your bench can handle serious work when you’ve properly connected these components.
Take your time with this step – it’s what separates a wobbly table from a rock-solid workspace that’ll last decades.
Your future projects depend on getting this right.
Install Vises and Add Tool Storage
You’ll want to choose vises that match your workbench’s strength and your specific woodworking needs, focusing on brands known for durability and smooth operation.
Strategic placement of your tool storage keeps frequently used items within easy reach while maintaining a clean, organized workspace.
Essential tools like chisels, planes, and measuring devices should have designated spots that make them quick to grab and put away.
Choosing Quality Vises
When selecting vises for your wooden workbench, prioritize those with solid construction and precise machining that will withstand years of heavy use. Your vises become trusted companions in every project, so choose wisely.
Look for these key features:
- Heavy-duty cast iron or steel bodies that resist wear
- Smooth-action screws with replaceable jaws
- Wide throat capacity for handling large workpieces
- Swivel bases allowing angled work positioning
- Quick-release mechanisms for efficient adjustments
Quality vises aren’t just tools; they’re investments in your craft. Cheap alternatives fail when you need them most, potentially ruining projects and endangering safety.
Spend time researching reputable brands known for durability. Test jaw alignment and screw operation before purchasing.
Strategic Storage Placement
Strategic placement of vises and tool storage transforms your wooden workbench from a simple work surface into an efficient workshop centerpiece.
You’ll want to mount your primary vises at comfortable working height, typically between thirty-six and forty-two inches from the floor. Position them where you’ll have maximum leverage and accessibility. Install auxiliary vises on the end vise or nearby surfaces for specialized tasks.
Add pegboards, hooks, and small shelves within arm’s reach of your main work area. Place frequently used tools at eye level and waist height. Store heavier items lower down for stability.
Consider magnetic strips for small metal tools. Keep your most essential tools positioned where you won’t need to bend or stretch excessively. This setup creates a workspace that feels intuitive and belongs uniquely to your working style.
Essential Tool Organization
Installation of vises and tool storage systems forms the backbone of your workbench’s functionality.
You’ll transform your workspace into a efficient crafting hub that serious woodworkers respect.
- Mount your front vise flush with the bench’s left edge for maximum leverage
- Install a smaller shoulder vise on the right end for detailed work
- Add wooden pegboard strips along the back edge for hanging chisels and planes
- Secure a shallow shelf beneath the bench for frequently used hand tools
- Attach magnetic strips near your vise for quick access to screwdrivers and knives
These upgrades create serious workspace credibility.
Your tool organization shouldn’t just look good—it needs to support your workflow practically.
Position everything within natural reach while you’re working.
Sand, Finish, and Protect Wood
Sand the wood surfaces thoroughly before applying any finish, starting with coarse grit and working up to fine grit for a smooth surface.
Begin with 80-grit sandpaper to remove rough spots and tool marks, then progress through 120-grit to 220-grit for glass-smooth results. Wipe away all dust with tack cloth between grits.
Choose your finishing approach based on intended use. For durability, apply oil-based polyurethane in thin coats, sanding lightly between applications.
Watco Danish oil works well for indoor benches requiring less sheen. Apply finishes evenly with quality brushes, avoiding drips.
Let each coat cure completely before light sanding with 320-grit paper. Your finished bench should showcase wood grain while providing lasting protection.
Test finishes on scrap wood first to guarantee desired appearance and compatibility with your workspace lighting conditions.
Tips for a Level, Rock-Solid Bench
While building your wooden workbench, verify maximum stability by properly preparing your foundation and carefully checking alignment at every stage. Your bench needs a solid base that won’t shift or rock during use.
- Check your legs are perfectly square before attaching them to the apron.
- Use clamps liberally to hold pieces in place while drilling pilot holes.
- Measure twice, mark clearly, and verify measurements match across corresponding parts.
- Tighten all joints gradually, working your way around the assembly to avoid warping.
- Test levelness frequently with a reliable spirit level, adjusting foot pads as needed.
These steps confirm your workbench stays true and steady through years of projects. Take your time with each connection point.
Mistakes to Avoid When Building
Avoid these common pitfalls that can compromise your workbench’s structural integrity and functionality.
Don’t rush through measuring twice, cutting once—you’ll waste wood and create joints that don’t fit.
Skip proper glue application, and your bench won’t last.
Ignore grain direction when cutting, and you’ll fight tear-out and weak joints.
Using green lumber means warping and instability later.
Cheap hardware fails under pressure, so invest in quality bolts and washers.
Forget to account for wood movement, and your top will crack.
Don’t bother with proper joinery, and your bench becomes wobbly junk.
Rushing through planning means missing critical support structures.
Cheap finishes won’t protect your investment.
You’re building something that should last decades—cut corners, and you’ll rebuild it sooner than you think.
Conclusion
You’ve now got the skills to build a workbench that’ll last centuries. Don’t let your tools and materials go to waste—follow these steps carefully, and you’ll create a rock-solid workspace that transforms your projects from frustrating disasters into satisfying successes. Your future self will thank you for taking the time to do it right the first time.
