

You’ll want to control moisture content carefully, because wood cracks when it dries too quickly or unevenly. Start by stacking lumber properly with spacers for airflow, and consider end-sealing freshly cut boards. Monitor humidity levels between 30-50% indoors. But there’s more to preventing cracks than just controlling moisture – wood orientation, species selection, and drying methods all play essential roles that you can’t ignore if you want stable, crack-free results.
Why Wood Cracks and How Moisture Content Causes It
When wood loses moisture too quickly, it shrinks and develops cracks that can ruin your project. You’re dealing with natural expansion and contraction cycles that occur as moisture content changes.
Fresh-cut lumber contains significant water that evaporates during drying. If this process happens too rapidly, internal stresses build up faster than the wood can adjust.
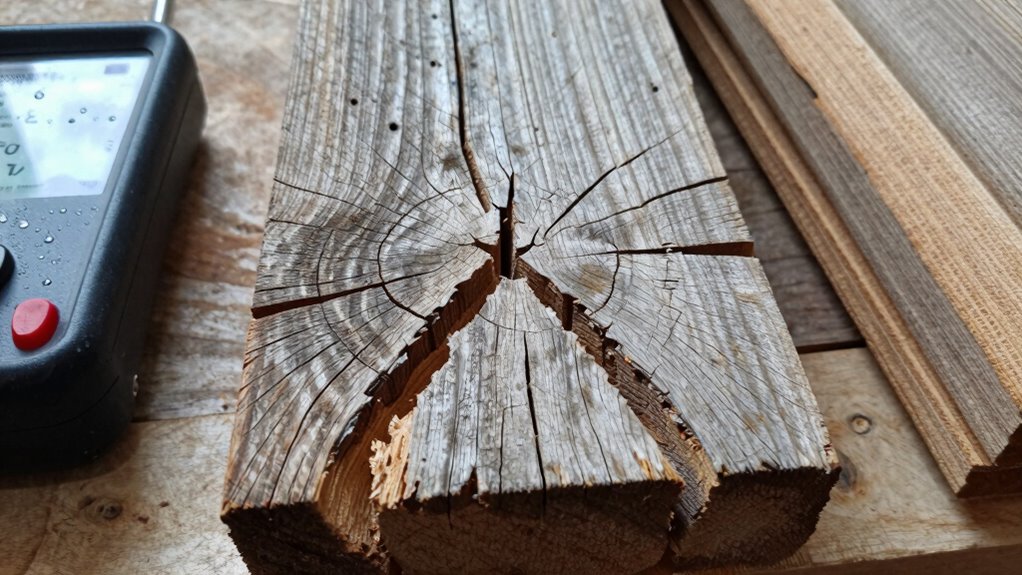
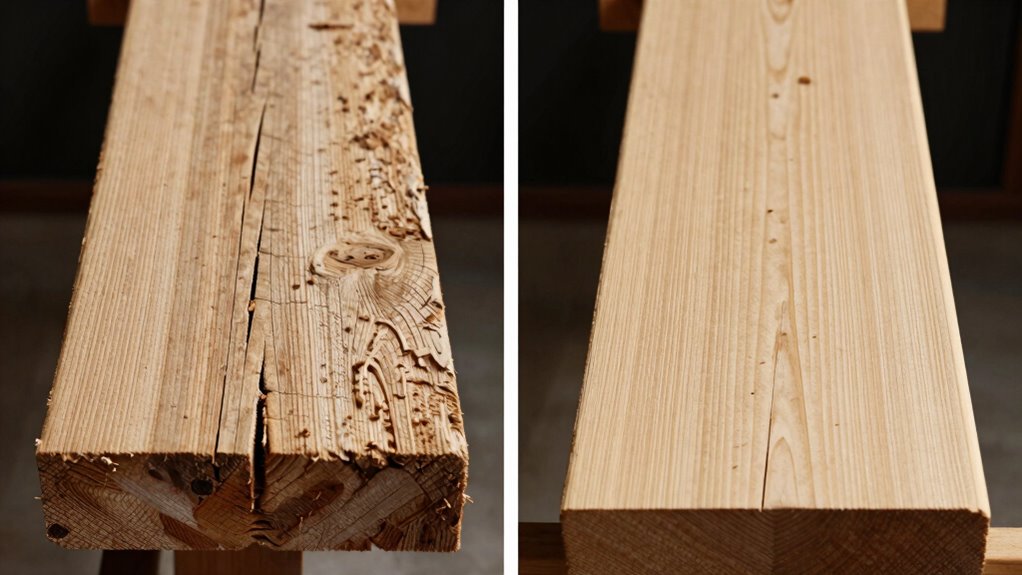
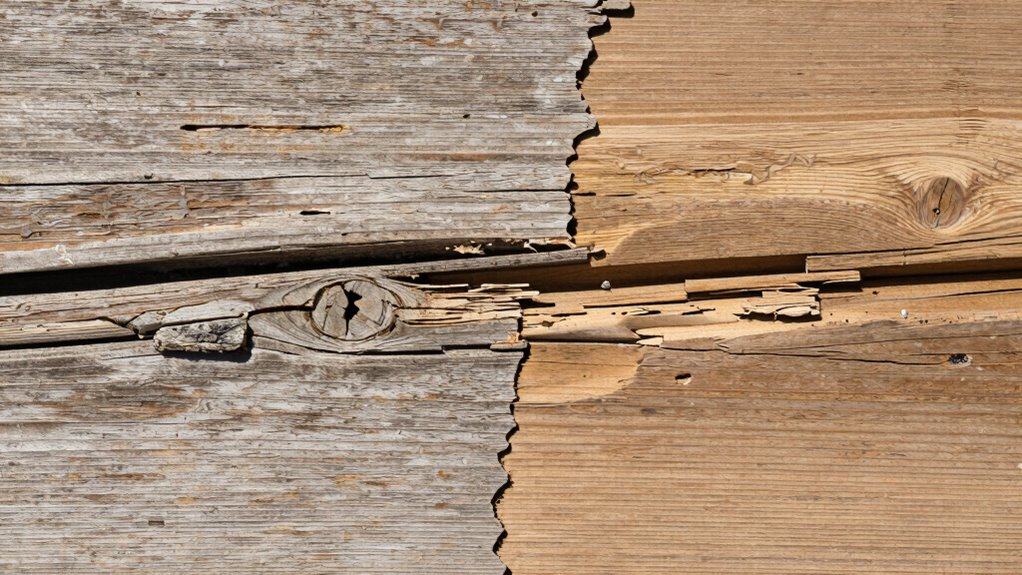
You’ll notice cracking starts at the weakest points – typically ends and edges. The outer layers shrink more than inner core sections, creating tension that wood can’t withstand.
Environmental factors like low humidity, direct sunlight, and wind accelerate moisture loss.
Understanding this process helps you take preventive steps. Proper acclimation time, controlled drying conditions, and maintaining consistent moisture levels prevent most cracking issues you might encounter.
How Wood Orientation Affects Cracking Risk
You need to understand how grain direction directly influences where cracks will form, since wood expands and contracts differently along its length versus across the grain.
Your project’s success depends on recognizing that longitudinal shrinkage is minimal while radial and tangential movement creates the most stress.
These wood movement patterns explain why you should always orient boards properly and allow for seasonal expansion when building outdoor structures.
Grain Direction Impact
The orientation of wood grain plays a critical role in determining how susceptible your project will be to cracking. You need to understand that wood expands and contracts differently along each grain direction.
When you work with boards where grain runs parallel to the length, you minimize stress concentration points that cause splitting. Quarter-sawn lumber provides better dimensional stability compared to plain-sawn material because its growth rings are perpendicular to the face.
You should always examine board ends to identify grain patterns before cutting. Irregular grain patterns create weak spots where cracks initiate easily. Straight-grained woods like pine or oak handle movement better than curly or interlocked grains.
When you orient pieces properly during assembly, you distribute stresses evenly throughout your project, preventing those unsightly cracks that compromise both appearance and structural integrity.
Wood Movement Patterns
While grain direction determines where cracking might occur, understanding how wood moves across different orientations helps you predict and prevent those failures.
You’ll notice wood expands and contracts primarily across the grain, not along it. Quarter-sawn lumber moves less than flat-sawn because growth rings run perpendicular to the face.
When you’re building, match wood orientation to minimize stress concentrations. Place pieces with similar movement patterns together. Use floating panels where cross-grain movement occurs.
Don’t constrain wood too tightly; allow for seasonal expansion. Pay attention to heartwood versus sapwood movement differences.
Frame structures accommodate movement better than rigid joinery. You’ll reduce cracking considerably when you work with wood’s natural movement tendencies instead of fighting them.
What Species Are Best for Minimizing Cracks?
When selecting lumber for projects where cracking is a concern, choosing the right wood species makes all the difference in achieving durable results.
You’ll want to focus on species with tight, even grain patterns and stable moisture content.
- Oak – Offers excellent stability with interlocked grain that resists splitting
- Cherry – Known for its dimensional stability and smooth, tight grain structure
- Walnut – Provides good stability with straight grain patterns that minimize warping
- Cedar – Naturally resistant to cracking due to its straight grain and low shrinkage rates
These species perform better because they’ve adapted to handle moisture fluctuations without dramatic movement.
You’ll notice fewer end grain cracks and surface checking when you choose these reliable options for your projects.
Is Green Wood Ever Safe to Use Without Cracking?
You can use green wood safely without cracking if you understand when moisture content matters most and apply proper drying techniques.
Thick slabs and boards need careful air drying over weeks or months, while thin pieces might only require a few days in controlled conditions.
Your success depends entirely on matching the wood’s moisture content to its final environment before locking it into place.
When Is Green Wood Safe?
Green wood can be safe to use in specific circumstances, but understanding when requires careful consideration of moisture content and intended application. You’ll want to assess these key factors before deciding:
- Immediate projects – Green wood works for temporary structures or projects where appearance isn’t critical.
- Thick sections – Large timber pieces dry slower and crack less dramatically than thin boards.
- Controlled environments – Indoor projects with stable humidity prevent excessive moisture loss.
- Non-structural items – Decorative pieces or furniture where minor cracking won’t compromise integrity.
You’re smart to evaluate your project’s requirements carefully.
Green wood isn’t always the enemy – timing and application matter most. Trust your judgment about when quick turnaround outweighs perfect drying. Your experience will guide you toward successful outcomes while avoiding unnecessary disappointment.
Proper Drying Techniques Matter
While green wood often develops cracks during drying, proper techniques can minimize this risk considerably.
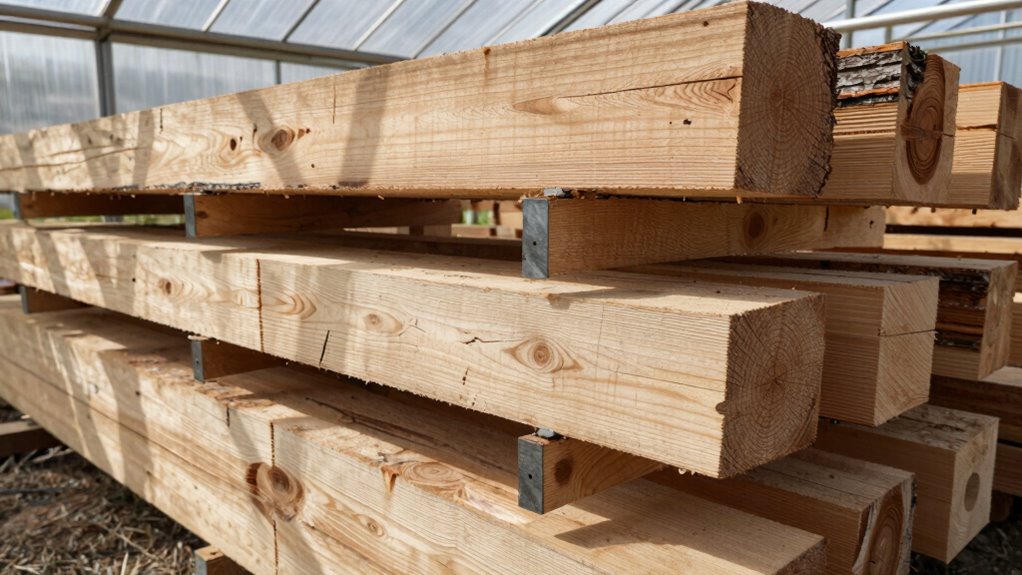
You should always air-dry lumber slowly in a controlled environment, stacking boards with spacers between each layer. Cover the top layer while leaving sides open for airflow. Don’t rush the process—most wood needs one year per inch of thickness.
Kiln drying works faster but requires careful temperature control. You’ll want to seal the ends of boards immediately after cutting to prevent end-grain checking. Monitor moisture content regularly using a moisture meter, aiming for 6-8% for most projects.
Rotate stickers periodically during air drying. If you skip these steps, you’re practically guaranteeing cracks will develop. Your finished projects deserve properly dried wood.
Should You Air Dry or Kiln Dry Wood?
Why does the drying method matter so much for preventing wood from cracking?
You’re dealing with wood movement and moisture content gradients that directly impact structural integrity. The right choice depends on your project timeline, wood species, and desired outcome.
Consider these key factors when choosing between air drying and kiln drying:
- Time investment – Air drying takes months to years, while kiln drying completes in days.
- Control level – Kiln drying offers precise moisture content management versus air drying’s weather dependency.
- Wood stability – Kiln dried wood typically shows less future movement and cracking.
- Cost considerations – Air drying costs virtually nothing compared to kiln drying expenses.
You’ll want to match your drying method to your specific woodworking goals and resources.
How to Dry Wood Without Causing Cracks
When you’re drying wood, controlling moisture loss is what prevents those unsightly cracks from forming. You need to dry wood slowly and evenly to avoid stress buildup.
Start by stacking lumber properly with stickers between each layer, allowing air circulation on all sides. Don’t rush the process – air drying typically takes one year per inch of thickness.
Keep wood away from direct sunlight and extreme temperature changes. Cover the top of your stack to prevent rain while maintaining airflow underneath. Rotate stickers regularly to guarantee uniform drying.
If you’re kiln drying, program gradual temperature increases and maintain consistent humidity levels. Never expose green wood to rapid drying conditions like direct heat or forced air.
Check wood periodically for warping or splitting signs. Properly dried wood feels lighter and makes cleaner cuts when planed.
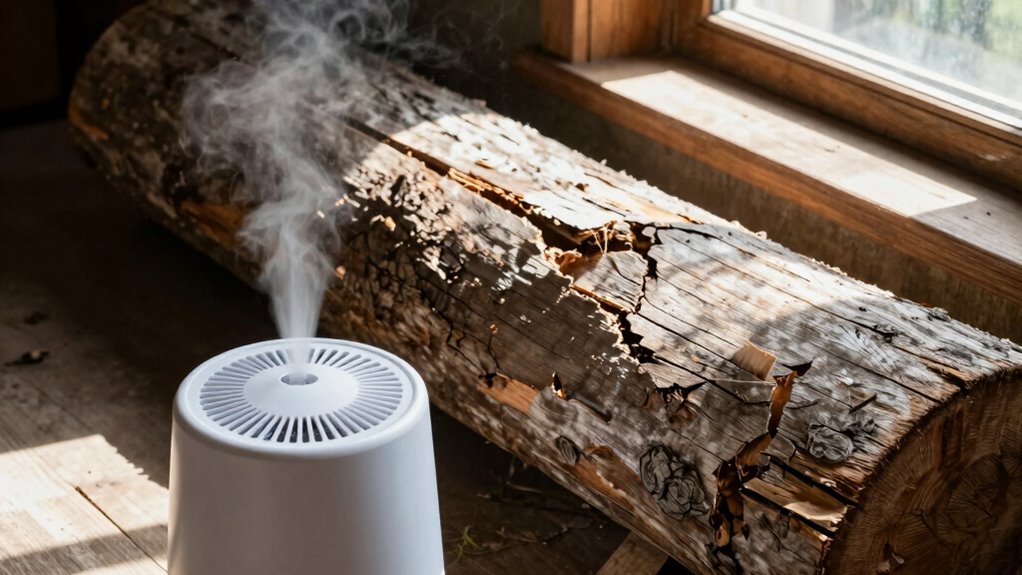
Tools to Track Moisture During Drying
You need reliable moisture meters to track wood’s drying progress and prevent cracking before it happens.
These tools give you accurate readings of moisture content throughout the drying process, letting you make informed decisions about when to adjust conditions.
Humidity monitoring devices work alongside moisture meters to help you maintain ideal drying environments that keep wood stable.
Moisture Meters for Wood
Everyone needs reliable tools to monitor moisture content during wood drying, and moisture meters are essential instruments for this task. You’ll want to choose the right meter for your specific wood projects and drying conditions.
- Pin-type meters penetrate wood surface for accurate internal moisture readings.
- Pinless meters scan moisture content without damaging wood surfaces.
- Combination meters offer both pin and pinless functionality for versatile use.
- High-quality meters provide consistent, calibrated measurements you can trust.
Invest in a meter that matches your woodworking frequency and project complexity. Regular calibration keeps your readings accurate.
Don’t skip checking multiple spots on each board since moisture varies throughout the wood. Proper moisture meter usage prevents costly cracking and guarantees your finished projects maintain their integrity.
Your tools should become trusted companions in achieving professional results.
Humidity Monitoring Devices
Several essential devices help you track humidity levels throughout the wood drying process, guaranteeing ideal conditions that prevent cracking and warping.
You’ll want a reliable hygrometer to measure ambient moisture content accurately. Digital models offer precise readings and often include temperature tracking too.
Place these devices strategically around your drying area to monitor conditions consistently. Data logging hygrometers prove invaluable for long-term projects, recording humidity fluctuations over time.
You should also consider moisture-resistant models that withstand harsh drying environments. Calibration matters greatly, so choose devices you can adjust periodically.
Professional woodworkers rely on these tools daily, making them indispensable for achieving quality results.
Don’t overlook hygrometer placement near heat sources or drafts, as these areas skew readings dramatically.
Regular monitoring with quality devices guarantees your wood dries evenly.
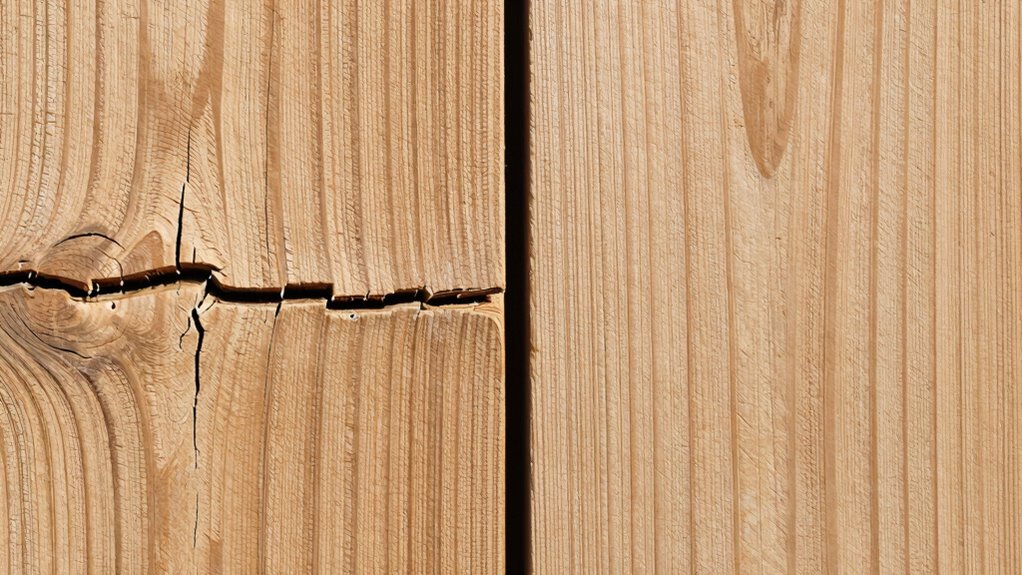
How to Seal End Grain and Prevent Splits
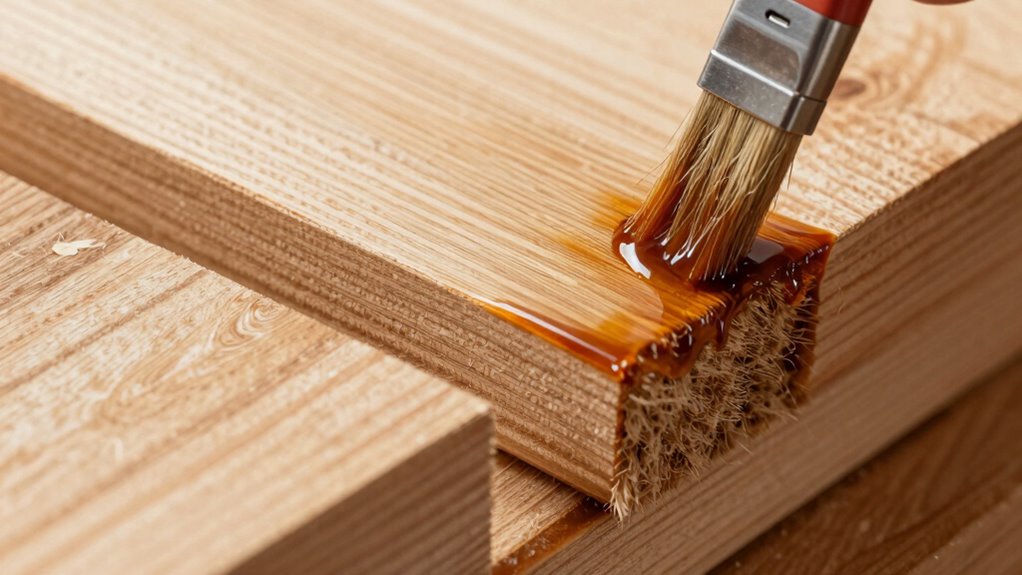
Sealing end grain effectively prevents splits by stopping moisture from escaping too quickly through the wood’s most absorbent surface.
You’ll want to address these vulnerable areas immediately after cutting or whenever you notice exposed ends.
- Apply a thick coat of melted wax or paraffin to completely cover the end grain.
- Use specialized end grain sealers that penetrate deep into the wood fibers.
- Paint latex or oil-based paint on cut ends for immediate moisture barrier protection.
- Wrap exposed ends with plastic tape or moisture-proof materials during storage.
Don’t skip this step thinking it’s minor – end grain absorbs moisture fifty times faster than side grain.
Your project’s integrity depends on protecting these weak points.
Work quickly after cutting, as wood begins absorbing moisture immediately when exposed to air.
What Finishes Protect Wood From Splitting?
While end grain sealing provides essential initial protection, choosing the right finish determines how well your wood resists splitting over time.
You should consider polyurethane for maximum durability, especially on hardwoods exposed to moisture. Apply thin, even coats and sand lightly between applications.
For outdoor projects, spar varnish offers superior flexibility and UV resistance. Don’t overlook epoxy finishes when working with live-edge slabs or furniture exposed to varying conditions. These create an impenetrable moisture barrier.
Oil-based finishes penetrate deeper than water-based alternatives, reducing surface cracking risk. Tung oil and Danish oil work well for indoor pieces requiring natural appearance.
Remember that film-forming finishes like lacquer can trap moisture, potentially causing worse splits than no finish at all.
Test finishes on scrap pieces first, matching your wood type exactly.
Does Indoor Humidity Affect Wood Stability?
You need to understand how humidity levels directly impact wood movement before you can effectively prevent cracking.
Wood expands when moisture content rises and contracts when it drops, creating stress that leads to splits and cracks.
Controlling your indoor moisture content between 30-50% prevents these damaging expansion and contraction cycles.
Humidity Levels And Wood Movement
When indoor humidity fluctuates dramatically, wood responds by expanding and contracting, which can lead to cracks if the movement exceeds the material’s natural flexibility. You need to understand how moisture content affects your wood’s stability.
- Low humidity causes wood to shrink and pull apart at joints
- High humidity makes wood swell, creating pressure that leads to splitting
- Rapid changes between extremes stress wood fibers beyond their tolerance
- Seasonal variations require constant monitoring and adjustment
Wood moves across grain more than along grain, so flat-sawn lumber shows greater expansion. Quarter-sawn wood remains more stable.
You’ll notice tabletops cupping or warping when humidity isn’t controlled. Door frames might stick or gap. These movements happen gradually but compound over time. Understanding this behavior helps you anticipate problems before they start.
Your wood’s moisture content directly correlates with surrounding air conditions.
Controlling Indoor Moisture Content
Managing indoor moisture content directly impacts your wood’s long-term stability, building on the understanding that humidity fluctuations cause dimensional changes.
You should monitor indoor humidity levels between 30-50% for ideal wood preservation. Use a hygrometer to track conditions and identify problem areas.
Dehumidifiers work effectively in basements and crawl spaces where moisture accumulates. Humidifiers help during winter months when heating systems dry indoor air.
Guarantee proper ventilation throughout your home, especially in kitchens and bathrooms where moisture production is high. Seal air leaks around windows and doors to prevent outdoor humidity from affecting interior conditions.
Consider installing exhaust fans to remove excess moisture at its source. Regular HVAC maintenance keeps systems operating efficiently.
You should also use moisture barriers in basements and install proper drainage around your foundation.
These steps create stable indoor conditions that prevent wood from expanding, contracting, and ultimately cracking.
When Should You Reinforce Wood to Avoid Cracks?
Reinforcement becomes essential once wood shows signs of stress or environmental exposure that typically leads to cracking.
You should act immediately when you notice these warning signs to prevent irreversible damage.
- Visible hairline cracks appear along the wood grain, indicating internal stress buildup
- Warping or bowing occurs when moisture content fluctuates dramatically
- Checking develops at the ends of boards exposed to varying humidity levels
- Squeaking or creaking sounds signal movement within joints or structural elements
Don’t wait until cracks worsen. Address these issues promptly by adding support bracing, adjusting environmental controls, or applying preventive treatments.
Your proactive approach protects both the wood’s integrity and your investment.
Can Glue or Joinery Prevent Wood From Cracking?
While glue and joinery can markedly reduce wood movement that leads to cracking, they won’t completely eliminate the risk if environmental factors remain uncontrolled.
You should choose high-quality wood glue suitable for your specific wood type and application. Proper joint design matters tremendously – dovetails, mortise-and-tenon, and biscuit joints distribute stress effectively.
You’ll achieve better results when you apply glue to joints that fit tightly rather than relying on excess adhesive to fill gaps. Clamping pressure must be adequate but not excessive, as you’re working with wood’s natural properties.
Structural glue-ups using quality adhesives create stronger, more stable pieces. However, you’re only addressing part of the equation.
Wood’s dimensional changes primarily respond to moisture content fluctuations. Joinery techniques help manage these movements, but controlling humidity and temperature remains equally vital for preventing cracks.
Why Finishing Sometimes Causes Wood Cracks
Finishing wood can actually cause cracks when you don’t account for the material’s natural movement.
Wood expands and contracts with moisture changes, and rigid finishes restrict this vital movement.
You’ll encounter problems when finishes:
- Create a shell that can’t flex with wood movement
- Trap moisture between the wood and finish layer
- Are applied too thickly, preventing natural breathing
- Use incompatible products that don’t work together
These issues build internal stress that eventually breaks through the finish or splits the wood itself.
You’re fundamentally locking wood into place while expecting it to behave like a living material.
The key is choosing finishes that work with wood’s natural properties rather than against them.
Understanding this relationship helps you make better finishing decisions that prevent cracking.
How Environmental Factors Affect Long-Term Wood Integrity
Since wood responds dynamically to its surroundings, understanding how environmental factors affect long-term wood integrity becomes essential for preventing structural failures.
You’ll notice that humidity fluctuations cause wood to expand and contract, creating stress that leads to cracking over time. Temperature changes work similarly, with extreme heat drying wood excessively and cold making it brittle.
UV exposure breaks down lignin, weakening wood’s structural bonds. You should monitor moisture content regularly, ideally keeping it between 6-12%. Proper ventilation prevents trapped moisture that rots wood from within.
Storage areas need consistent climate control. You’re not just protecting wood’s appearance—you’re maintaining its load-bearing capacity.
These environmental stresses accumulate silently, so staying vigilant pays off. Your preventive measures today determine whether wood lasts decades or fails prematurely.
Conclusion
You’ll crack wood less by controlling moisture content through proper drying methods. Don’t rush the process—even green wood needs careful handling. Maintain humidity between 30-50% and use quality joinery techniques. Some species naturally resist cracking better than others, but proper technique matters more than wood type. End grain sealing and consistent environmental conditions prevent most cracking issues effectively.
