

You’ll want to start by selecting a location that receives adequate sunlight and has good drainage. Next, gather your tools—post-hole digger, drill, level, and measuring tape. Mark your placement points carefully. Dig holes at least two feet deep. Align posts and pour concrete. But there’s more to guarantee your trellis lasts and supports your plants effectively.
Why Every Garden Needs a Trellis System

While you mightn’t initially realize it, a trellis system transforms any garden into a more productive and organized space. You’ll maximize vertical growing area, allowing plants to climb upward instead of sprawling across ground level. This creates order in your garden while making harvesting easier and more efficient.
A trellis system supports healthy plant growth by improving air circulation around leaves and stems. You’ll reduce disease issues considerably when plants aren’t crowded together. Additionally, trellises protect delicate vines from wind damage and ground pests.
You’ll discover that trellising creates natural privacy screens and attractive focal points in your outdoor space. Neighbors will admire your organized garden aesthetic while you enjoy increased yields from better-supported plants.
Installing a trellis system joins you with countless gardeners who’ve transformed their spaces into productive, beautiful areas that foster community connections through shared knowledge and impressive results.
Choosing the Right Trellis Type for Your Plants
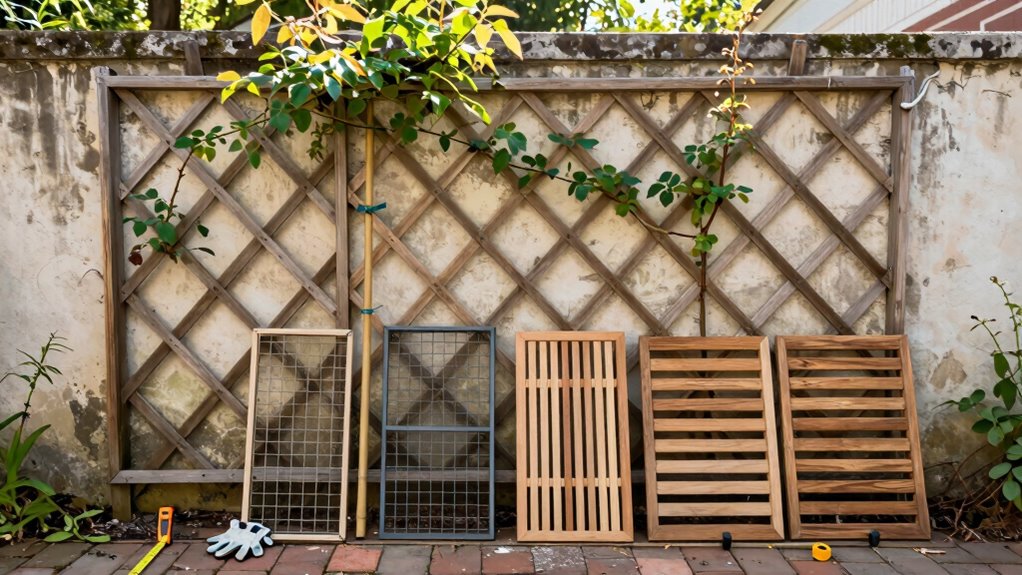
Selecting the appropriate trellis type depends entirely on your specific plants’ growth habits and support requirements. You need to match the trellis strength to your plant’s weight capacity.
Lightweight mesh works perfectly for delicate climbers like sweet peas, while heavy-duty wooden structures support robust plants like tomatoes or cucumbers. Consider your plant’s climbing method too – some twine around supports, others cling with tendrils or aerial roots.
Flat trellises suit vining plants that spread horizontally, whereas tall, vertical designs accommodate upward-growing varieties. Flexible wire systems let you adjust positioning as plants develop.
Don’t forget maintenance access; choose designs that allow easy harvesting and pruning. Your trellis material should complement both plant needs and garden aesthetics.
Metal lasts longer but conducts heat, while wood blends naturally but requires periodic treatment. Match functionality with visual appeal for best results.
Picking the Perfect Spot in Your Garden

Your trellis placement can make or break your plants’ success, so choosing the right location requires careful consideration of several key factors.
You’ll want to select a spot that receives adequate sunlight for your specific plants, typically six to eight hours of direct light daily. Guarantee the area has good drainage to prevent waterlogging roots.
Consider proximity to water sources for easy maintenance and accessibility for pruning. Wind exposure matters too – choose a location sheltered from strong gusts that might damage delicate vines.
Measure the space carefully to accommodate your trellis dimensions and plant growth. Don’t forget to check for underground utilities before digging.
Finally, position your trellis where you can easily access it for harvesting and routine care while guaranteeing it complements your garden’s aesthetic flow.
Selecting Durable Materials That Last
You should choose weather-resistant woods like cedar or redwood that naturally withstand outdoor conditions without requiring frequent replacement.
Consider metal trellis options such as galvanized steel or aluminum if you want maximum durability and resistance to rust or corrosion.
These materials will save you time and money by lasting decades with minimal maintenance.
Choosing Weather-Resistant Woods
Several hardwood species naturally resist weather damage and provide long-lasting support for your garden trellis.
You should consider cedar, which contains natural oils that prevent rot and insect damage. Redwood offers similar protection with its tannin-rich heartwood that resists moisture absorption. Teak provides exceptional durability through its dense grain structure and natural water resistance.
Avoid softwoods like pine or spruce that require chemical treatments for outdoor use. Instead, choose hardwoods with tight grain patterns that minimize water penetration.
You’ll want to look for woods that don’t need regular staining or sealing. These materials maintain their structural integrity season after season.
Your trellis will benefit from woods that age gracefully outdoors. Select materials that complement your garden’s aesthetic while providing reliable support for climbing plants.
Evaluating Metal Trellis Options
Metal trellises offer distinct advantages over wood when properly selected for durability and longevity. You’ll want to focus on galvanized steel or aluminum options that resist rust and corrosion naturally. Galvanized coatings provide excellent protection against moisture damage, while aluminum won’t rot or splinter like wooden alternatives.
Consider powder-coated finishes for additional weather resistance and color options that complement your garden design. Check manufacturer warranties carefully; quality metal trellises typically offer longer guarantees than wood products.
Examine weld points and joints closely for structural integrity. Don’t overlook weight considerations during installation planning. Metal trellises are often heavier than wooden ones, requiring stronger mounting systems.
You’re making a long-term investment, so prioritize materials that withstand harsh weather conditions common in your region. Quality metal construction guarantees your trellis remains functional and attractive for decades, becoming a permanent fixture in your gardening community.
Gathering Essential Tools for Installation
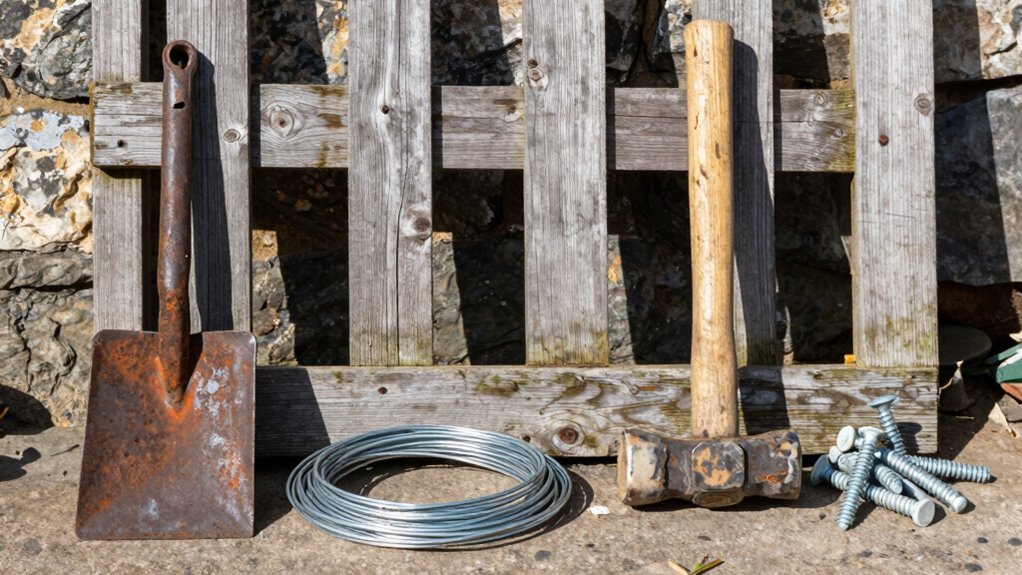
Before installing your garden trellis, gather these essential tools to confirm a smooth and efficient setup process.
You’ll need a drill with various bit sizes, concrete mix for secure anchoring, a level to confirm proper alignment, and a tape measure for accurate spacing.
Don’t forget screwdrivers, wrenches, and pliers for hardware adjustments. A post-hole digger works best for creating clean, precise holes in soil or turf.
Wire cutters help trim excess material neatly. Steel stakes or anchors provide additional stability, especially in windy areas.
Having work gloves protects your hands during installation. Keep safety glasses nearby when drilling or cutting metal components.
These tools confirm your trellis installation succeeds while maintaining structural integrity throughout seasonal weather conditions.
Measuring and Marking Placement Points
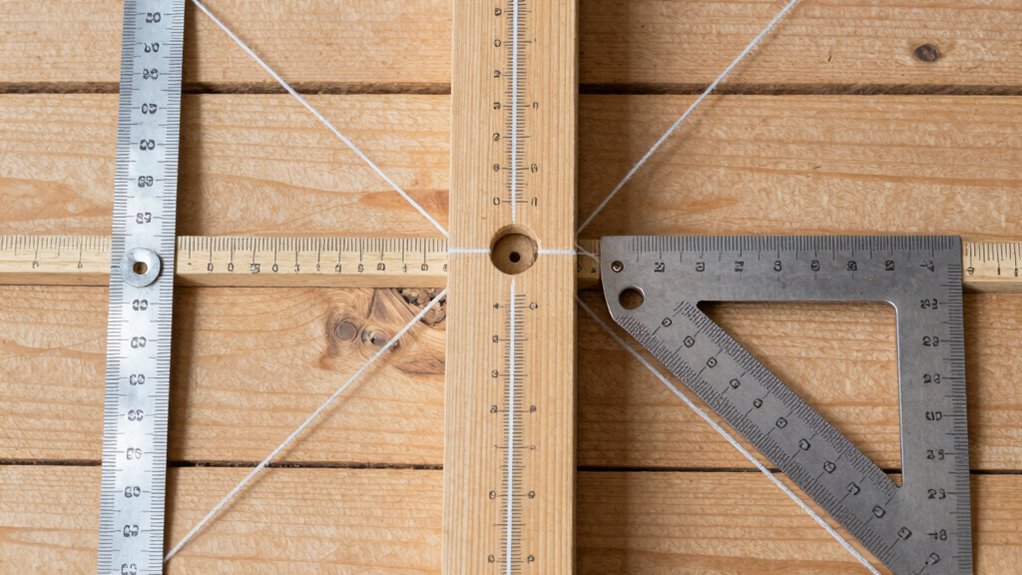
Accurate placement of your garden trellis begins with precise measurements and clear marking of installation points.
You’ll want to measure the trellis width and height first, then determine spacing between multiple units. Use a tape measure to mark exact locations on the ground where posts will go. Consider plant growth patterns and guarantee adequate space for mature vegetation. Mark each point with spray paint or wooden stakes.
Double-check measurements before making permanent marks. Your future garden’s success depends on getting this step right the first time. Take your time and measure twice if needed.
Proper planning here prevents costly mistakes later. You’re creating a foundation that’ll support your plants for years, so precision matters. Ensure all team members understand the marked locations before proceeding.
Setting Strong Post Foundations Deep

Because your trellis will support heavy plant loads over time, establishing deep, solid post foundations is essential for long-term stability.
You’ll need to dig holes at least two feet deep, though three feet provides better anchoring in most soils. Use a post hole digger or auger to create clean, straight-sided holes slightly wider than your posts.
Mix concrete according to package directions, then pour it around each post base. Verify posts remain perfectly vertical using a level while the concrete sets. Add water to eliminate air pockets, then allow twenty-four hours for initial curing.
Check that all posts align properly before the concrete fully hardens.
This foundation work determines your trellis’s entire lifespan, so take time to get it right.
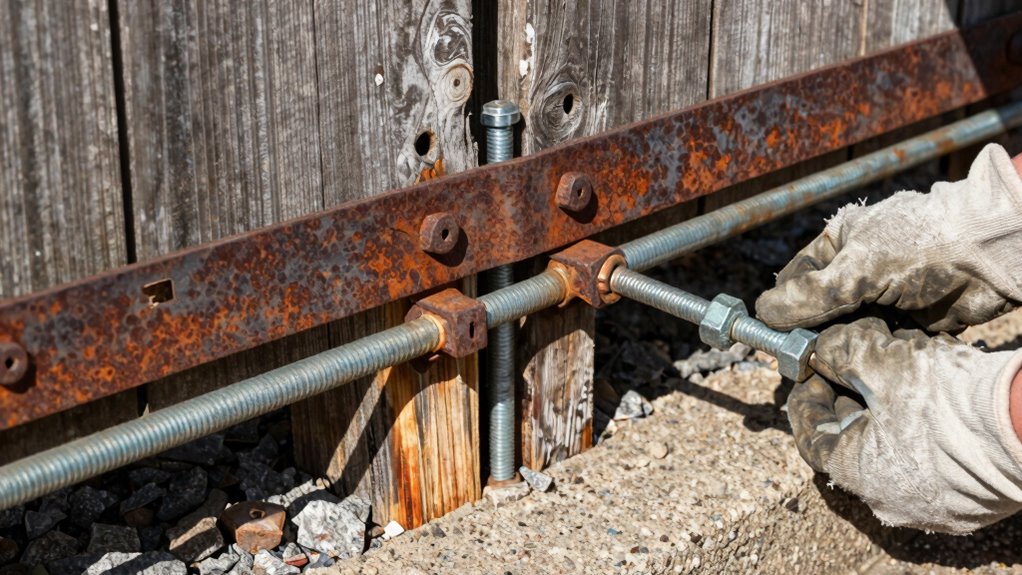
Securing Trellis to Existing Walls
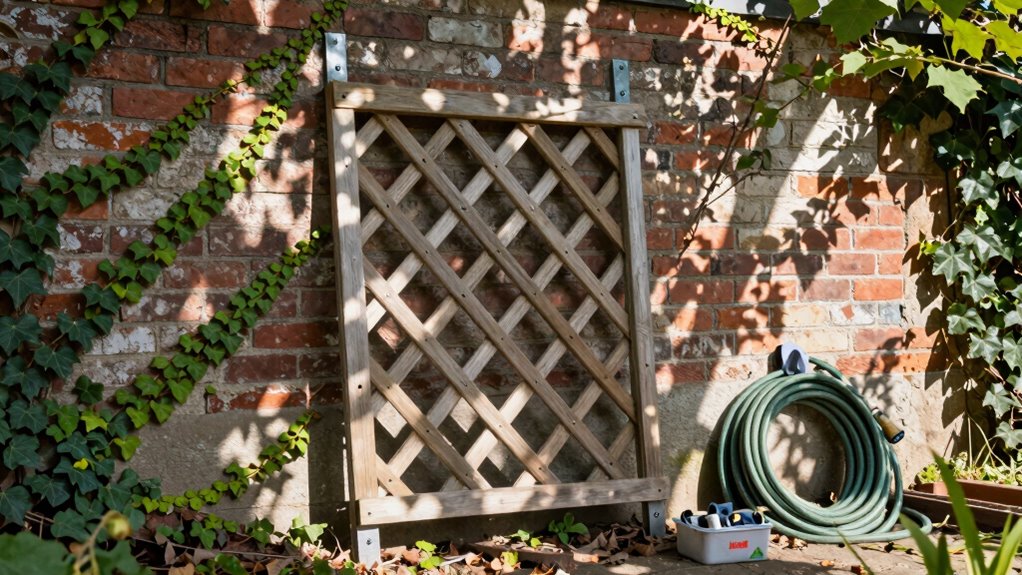
When you’re working with an existing wall, proper trellis attachment requires careful planning and the right fastening system. You’ll want to choose anchors that won’t damage your wall while providing adequate support for mature plant weight.
- Assess wall material first – Determine if you’re dealing with brick, concrete, wood, or stone, as each requires specific fasteners and drilling techniques for secure attachment.
- Use appropriate anchors – Select masonry anchors for brick or concrete walls, while wood screws work for wooden surfaces. Avoid standard nails that won’t hold substantial weight.
- Maintain proper spacing – Position fasteners every 12-18 inches vertically and verify horizontal stability with additional brackets where needed.
Check wall integrity before drilling and always use weather-resistant hardware for longevity.
Installing Standalone Trellis Units

Standalone trellis units offer flexibility for gardens without suitable walls or structures to attach to.
You’ll need to select a level location with adequate sunlight for your climbing plants. Position the trellis where you want it, ensuring stability by checking that all feet sit flat on the ground. Secure the unit by driving stakes through the base holes into the soil, or use ground anchors for extra support.
Tighten all connection points and verify that the structure doesn’t wobble. Consider the mature size of your plants when positioning the trellis, leaving enough space for growth.
Test the unit’s stability by gently pushing on it. Make adjustments immediately if you notice any movement or instability before planting.
Proper Spacing for Maximum Support
You need to space trellis posts 6-8 feet apart to provide adequate support without overwhelming your garden layout.
Position your trellis height according to your plants’ mature size, typically 6-12 feet tall for most climbing varieties.
Space individual plants 12-18 inches apart along the trellis base to guarantee proper air circulation and prevent overcrowding.
Proper Distance Between Trellis Posts
Six feet represents the ideal maximum distance between trellis posts for most garden applications. This spacing provides adequate support while preventing excessive material costs and installation effort.
- Structural integrity: Posts placed 4-6 feet apart distribute weight evenly, reducing sagging and preventing post failure under heavy plant loads.
- Plant accessibility: Proper spacing allows you to reach plants from both sides, making maintenance, harvesting, and pruning greatly easier.
- Material efficiency: Correct post distance minimizes lumber waste while maximizing your trellis system’s lifespan and effectiveness.
You should measure carefully before digging post holes, ensuring consistent intervals throughout your trellis installation.
Adjust spacing slightly based on specific plant varieties and expected growth patterns.
Optimal Height For Plant Support
While proper horizontal spacing between trellis posts guarantees structural stability, vertical height plays an equally important role in supporting healthy plant growth.
You should match trellis height to your plants’ mature size, typically installing supports 6-8 feet tall for most climbing vegetables and flowers. Taller plants like pole beans or cucumbers need 8-10 foot trellises to accommodate their full growth cycle.
Don’t forget to account for ground-level planting depth when measuring total height. Secure your trellis at both ground level and near the top to prevent swaying.
Consider your garden’s mature plant heights before installing, ensuring adequate vertical clearance for harvesting and maintenance access underneath.
Spacing Plants Along Trellis Structure
Proper plant spacing along your trellis structure maximizes both support effectiveness and growing potential.
You’ll want to position plants strategically to prevent overcrowding while ensuring adequate airflow and light penetration.
Consider these essential spacing guidelines:
- Vining plants like cucumbers and peas need 6-12 inches between each plant, allowing their tendrils to grasp the trellis effectively.
- Heavy fruiting vines such as tomatoes require 12-18 inches of space to accommodate their mature size and prevent branch breakage under weight.
- Delicate climbers including morning glories thrive with 8-10 inches spacing, giving their slender stems room to weave through the trellis without competing for attachment points.
Always factor mature plant size into your planning.
You’re creating a supportive community where each plant contributes to the whole structure’s success.
Stopping Your Trellis From Falling Over
A trellis that topples over can undo all your careful planting and training work, so securing it properly from the start will save you considerable time and effort later.
You should drive sturdy wooden or metal stakes at least two feet into the ground on both sides of your trellis. Use galvanized wire or heavy-duty ties to anchor the trellis firmly to these supports.
For added stability, angle the stakes outward slightly and secure them with tensioned wire. Consider using concrete footings for permanent installations.
Check that your anchoring system can withstand strong winds and the mature weight of climbing plants.
Test the trellis stability by gently pushing it from different angles before finalizing your installation.
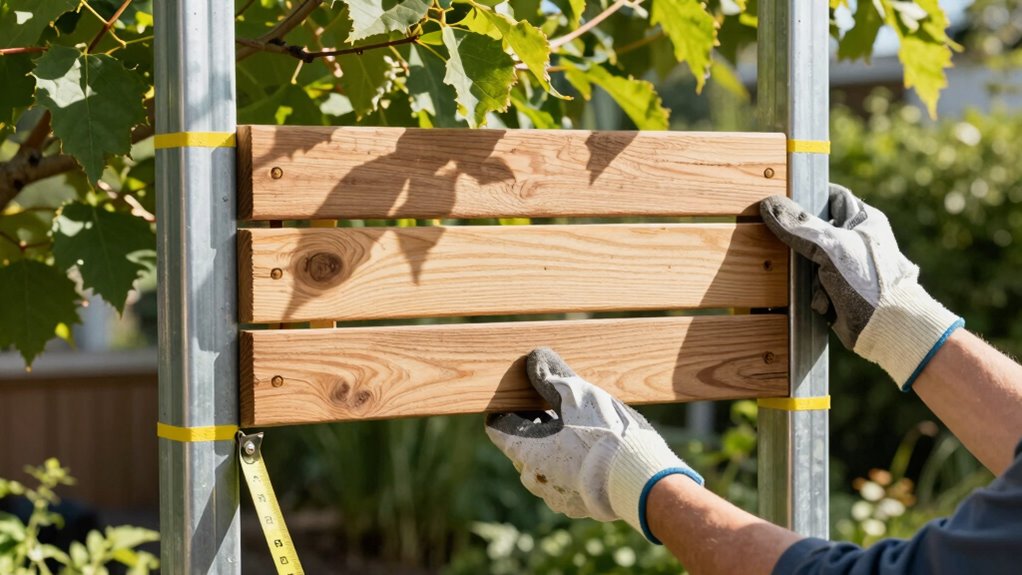
Attaching Climbing Support Panels
Attach your climbing support panels securely to the main trellis frame using galvanized screws or bolts that won’t corrode over time. Position each panel evenly, maintaining consistent spacing between vertical supports. This guarantees your future plants have adequate room to grow while creating a uniform appearance that complements your garden’s design.
- Pre-drill holes through panel corners to prevent wood splitting during installation.
- Space panels 6-8 inches apart to provide ideal climbing surfaces for various vine types.
- Check panel alignment with a level before fully tightening all fasteners.
Tighten connections firmly but avoid over-tightening, which can strip threads or damage wood fibers. These support panels become the foundation your climbing plants will rely on for years, so taking time to install them correctly matters.
Your future self will appreciate this attention to detail when watching vines flourish. Verify all connections feel solid before moving forward with planting preparations.
Planting Vines at the Right Distance
You should space your vines according to their mature growth patterns to prevent overcrowding and guarantee proper air circulation.
Consider the specific climbing habits of your chosen plants when determining ideal distances between each vine.
Proper spacing promotes healthy growth while maximizing your trellis system’s effectiveness.
Spacing Considerations
When installing a garden trellis, proper spacing becomes essential for healthy vine development and ideal growth patterns.
You’ll want to position plants far enough apart to prevent overcrowding while maintaining an attractive display.
Consider these critical spacing factors:
- Plant mature width – Space vines according to their full-grown spread to avoid future pruning issues.
- Air circulation requirements – Leave adequate gaps between plants to promote healthy airflow and prevent disease.
- Trellis structure capacity – Match plant spacing to your trellis strength and design limits.
Proper spacing creates thriving vines that complement your garden’s aesthetic while reducing maintenance needs.
Growth Patterns
While proper spacing prevents overcrowding, understanding how vines naturally grow helps you position plants at perfect distances from the start.
You should research your specific vine’s mature width and growth habit before planting. Fast-growing vines like clematis need more space than slower varieties.
Plant vigorous climbers 12-18 inches from trellis supports, allowing room for proper air circulation. You’ll want to take into account both horizontal and vertical growth patterns when determining placement.
Weak-stemmed vines require closer proximity to supports for adequate anchoring. Remember that young plants look sparse, but they’ll fill designated spaces within two growing seasons.
You’re creating a balanced ecosystem where each plant has adequate room to thrive without competing for resources, ensuring healthy growth and ideal yields throughout your garden’s life cycle.
Training Plants Up Your New Trellis
Once your trellis is securely installed, it’s time to begin training your plants to climb and spread across its structure. Start by gently guiding young stems toward the trellis and securing them with soft plant ties or twine.
- Early intervention works best – Begin training when plants are young and stems are flexible, making them more receptive to directional guidance.
- Consistent monitoring prevents problems – Check your plants weekly and redirect growth as needed before stems become woody and difficult to manipulate.
- Proper spacing guarantees even coverage – Space multiple plants appropriately to avoid overcrowding and promote balanced trellis utilization.
Regular attention during the first growing season establishes strong climbing habits.
Your plants will soon embrace their new support system naturally.
Avoiding These Common Installation Mistakes
You’ll want to prepare your soil properly before installing your trellis system, as loose or compacted ground creates an unstable foundation that won’t support your plants effectively.
Don’t space your posts too far apart or use inadequate anchoring methods, since these errors lead to wobbly structures that collapse under plant weight.
Your trellis needs a solid, well-draining base with properly spaced and securely anchored posts to provide reliable long-term support.
Improper Soil Preparation
When installing a garden trellis, failing to properly prepare the soil can compromise the entire structure’s stability and longevity.
You’ll regret skipping this vital step when your trellis wobbles or collapses under plant weight.
1. Test soil drainage before installation. Waterlogged soil weakens post foundations and causes rot.
Dig test holes and fill with water to check drainage speed.
2. Remove grass and weeds completely from the installation area.
These plants compete for nutrients and can undermine your trellis foundation over time.
3. Amend poor soil conditions with organic matter or gravel for better stability.
Sandy soils need compaction, while clay soils require drainage improvement.
Proper soil preparation guarantees your trellis remains sturdy and becomes a reliable garden feature your plants can depend on.
Incorrect Post Spacing
While installing your garden trellis might seem straightforward, spacing the posts incorrectly can lead to structural weaknesses that undermine the entire system.
You should maintain consistent distances between posts, typically four to six feet apart, depending on your trellis design. Posts placed too far apart create excessive span stress, causing sagging or failure under plant weight. Too-close spacing waste materials and create unnecessary bulk.
Measure twice before digging post holes. Use a string line and stakes to mark exact positions.
Account for corner posts, end posts, and intermediate supports. Your trellis needs adequate support distribution across its entire length. Proper spacing guarantees stability, longevity, and effective plant support. Precise measurement prevents costly corrections later.
Weak Foundation Support
A strong foundation determines your trellis’s ability to withstand plant weight and environmental stresses, yet many installations fail due to inadequate base support. You must address foundational weaknesses before they compromise your entire structure.
- Shallow post depths create instability that worsens over time. Drive posts at least two feet into solid ground, or use concrete footings for heavy-duty applications.
- Poor soil preparation undermines structural integrity. Compact loose earth thoroughly and consider soil composition—clay requires different anchoring approaches than sandy terrain.
- Insufficient bracing connections lead to wobbling frameworks. Secure posts with horizontal braces and use proper fasteners rated for outdoor conditions.
Don’t let weak foundations ruin your gardening efforts. Proper preparation guarantees your trellis remains sturdy while supporting flourishing plants season after season.
Quick Repairs for Weak Structure Points
If your garden trellis shows signs of weakness at specific joints or connection points, you can quickly strengthen these vulnerable areas with targeted reinforcement techniques.
Apply wood glue to loose joints, then secure with additional screws or nails. Replace deteriorated fasteners immediately to prevent further damage.
Use metal brackets or corner braces to reinforce wobbly connections, attaching them firmly with appropriate hardware.
For cracked or split wood sections, inject epoxy resin to restore structural integrity.
Wrap thin or brittle areas with wire or metal strapping for added support.
Check all attachment points regularly, tightening loose hardware before it compromises the entire structure.
These quick fixes prevent small problems from becoming major failures.
Simple Maintenance for Years of Use
Regular maintenance keeps your garden trellis sturdy and functional for many seasons. You should inspect your trellis monthly for loose connections, rust spots, or weather damage. Early detection prevents costly repairs and extends your trellis’s lifespan considerably.
- Clean debris regularly – Remove fallen leaves, twigs, and plant material that accumulate around your trellis base. This prevents moisture buildup and pest harboring.
- Apply protective coatings – Refresh paint or sealant annually to shield wood and metal from moisture damage. This simple step maintains structural integrity.
- Check fasteners monthly – Tighten loose screws, bolts, or nails before they compromise your trellis stability. Secure connections guarantee reliable plant support.
These straightforward tasks keep your trellis performing efficiently while protecting your investment.
Making Seasonal Growth Adjustments
While your trellis provides essential support throughout the growing season, seasonal plant growth demands periodic adjustments to maintain ideal performance. You should monitor plant development monthly, tightening loose ties and adding new ones as stems thicken.
Spring growth requires frequent checking as vines rapidly extend, while summer demands sturdier support for heavy fruiting branches. Autumn adjustments focus on securing overgrown sections before winter weather strikes.
Don’t wait for plants to struggle against inadequate support. Proactive tweaking prevents damage and promotes healthier yields. Check attachment points regularly, replacing worn ties before they fail.
Your trellis system works best when you stay ahead of growth spurts, ensuring plants remain secure while developing naturally.
Cost-Effective Trellis Design Options
You can maintain your garden’s vertical support system without straining your budget by choosing smart, affordable trellis designs. Simple wooden lattice panels work excellently for climbing plants like peas or beans. Repurposed materials create functional trellises while reducing costs considerably.
Consider these budget-friendly approaches:
- Wooden stakes and twine – Use untreated lumber scraps and garden twine for basic climbing support.
- Wire mesh panels – Salvage wire fencing materials for sturdy, adjustable plant training.
- Bamboo pole arrangements – Bundle bamboo canes into teepee shapes for natural, inexpensive structures.
These options provide reliable plant support while keeping expenses minimal. You’ll achieve professional results without financial stress, creating trellises that blend seamlessly into your garden space.
Smart design choices help you belong among experienced gardeners who understand practical solutions.
Building Decorative Garden Features
Building decorative garden features transforms ordinary outdoor spaces into visually stunning retreats that reflect your personal style.
You’ll want to plan your design before purchasing materials, considering how trellises complement existing landscaping. Choose weather-resistant woods like cedar or redwood for longevity, or opt for metal frameworks that offer modern appeal. Install sturdy posts at least two feet deep to guarantee stability against wind loads.
Space horizontal slats evenly for climbing plants like clematis or jasmine. You should also consider adding decorative elements such as finials or lattice work that matches your home’s architecture.
Position features where they create natural focal points while providing functional support for vegetation. Regular maintenance keeps these installations looking fresh and integrated into your garden’s evolving aesthetic.
Conclusion
Installing a garden trellis transforms your outdoor space while supporting healthy plant growth. Choose durable materials and proper placement for long-term success. Notably, trellises can increase garden yield by up to 40% by maximizing vertical growing space. With the right tools and technique, you’ll create a functional, attractive support system that enhances both beauty and productivity in your garden.
