

You probably don’t think about tools until something breaks. A leaky faucet, a loose screw, or a stuck window can turn into a headache fast. But what if you had the right tools ready? You’d save time, avoid costly handyman visits, and handle small repairs with confidence. Let’s get you set up with a basic kit that actually works.
Why a Basic Home Repair Kit Saves Time and Money
When you have a basic home repair kit on hand, you can tackle small problems immediately instead of waiting for a professional or making multiple trips to the hardware store.
You’ll save hundreds of dollars annually by handling minor repairs yourself. That leaky faucet won’t cost you a plumber’s hourly rate, and you won’t need to purchase tools for every small job.
Having your own repair kit means you’re prepared when neighbors ask for help or when family members need assistance.
You’ll gain confidence knowing you can handle everyday maintenance issues. Emergencies won’t catch you off guard, and you’ll avoid the stress of scrambling for solutions.
Your kit becomes an investment that pays for itself through avoided service calls and convenient, immediate repairs.
What Tools Every Homeowner Should Have
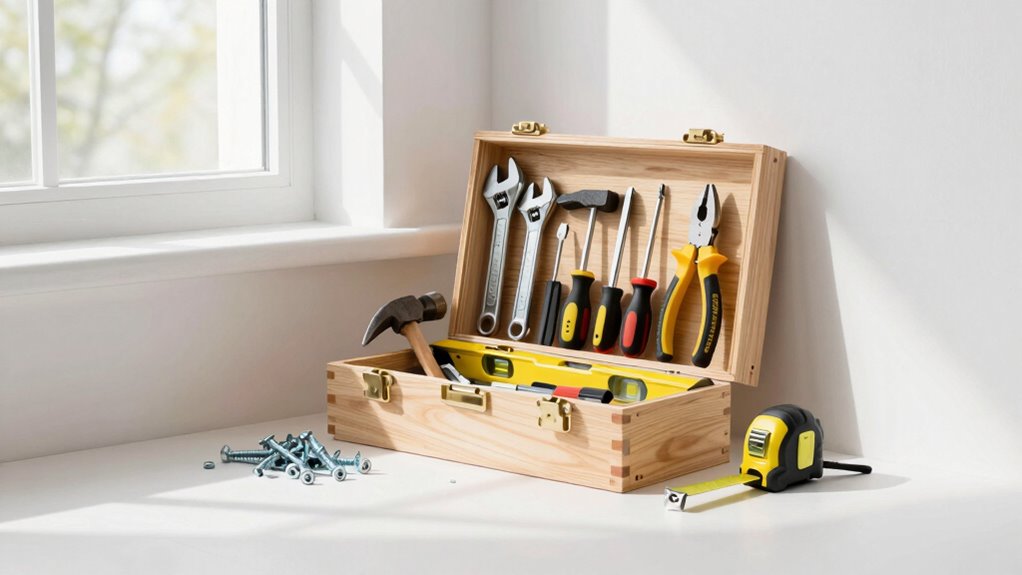
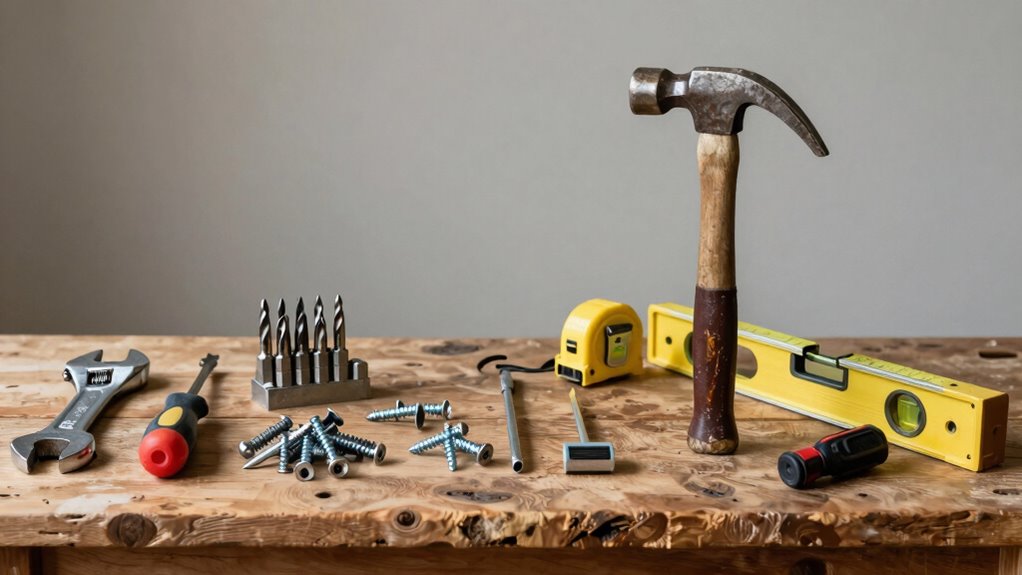
Every homeowner should keep fifteen essential tools readily accessible for basic repairs and maintenance tasks.
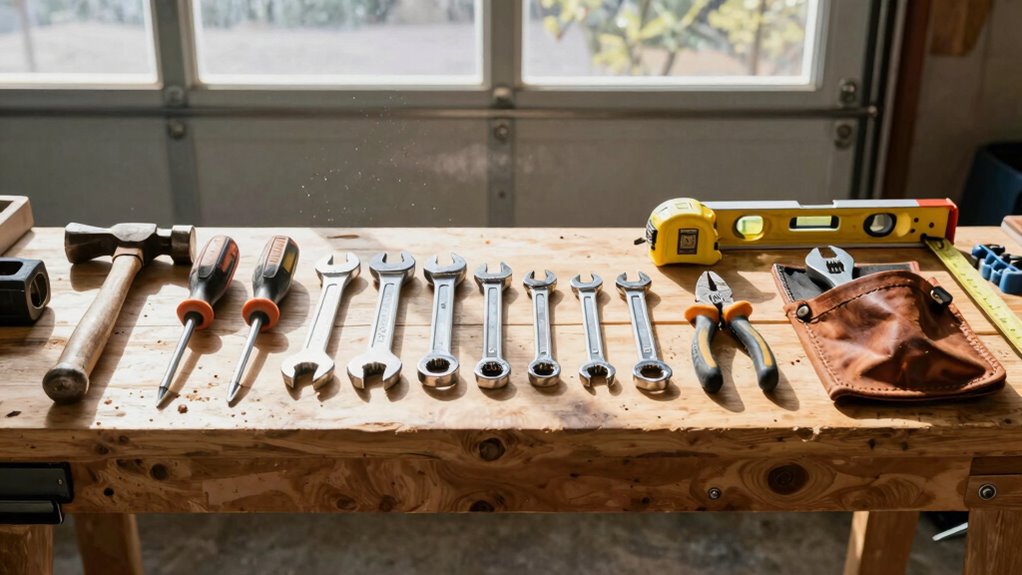
You’ll need a hammer for driving nails and breaking apart materials. A tape measure helps you get accurate dimensions every time. Pliers let you grip, bend, and cut wire effectively. A wrench set handles nuts and bolts of various sizes. A level verifies your projects hang straight. Wire cutters strip and cut electrical wires safely.
A utility knife blade cuts through packaging and materials. Needle-nose pliers reach into tight spaces. A stud finder locates wall framing behind drywall. Cable ties organize wires and secure components. A flashlight illuminates dark areas during repairs.
A workbench or sturdy table provides workspace. Storage containers keep everything organized and protected. These tools handle ninety percent of household fixes efficiently.
Essential Screwdrivers: Flathead & Phillips
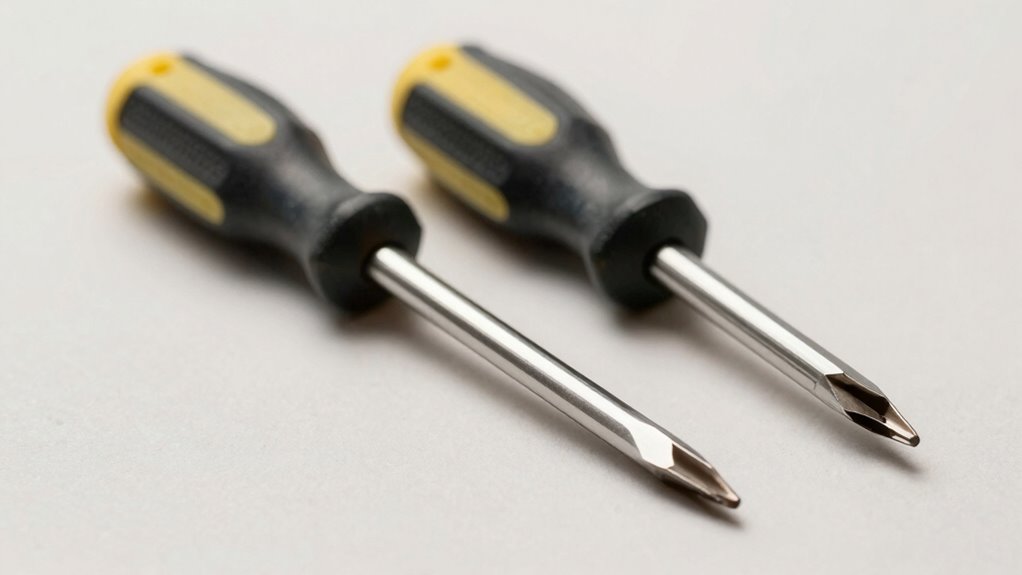
Two screwdriver types form the backbone of any reliable home repair kit: flathead and Phillips.
You’ll encounter flathead screws everywhere – from old furniture to electrical outlets. Phillips head screws dominate modern appliances and electronics.
Start with a basic set containing multiple sizes of each type. Look for screwdrivers with comfortable grips that won’t slip during use.
Magnetic tips help hold screws in place, especially overhead. Quality matters here – cheap screwdrivers strip screws easily and frustrate you quickly. Invest in chrome vanadium steel blades that last.
Keep your screwdrivers clean and organized. You’ll feel confident tackling everyday repairs when you’ve got the right tools ready.
These essential drivers handle most household tasks, making you feel prepared for whatever comes up.
Pliers That Grip, Pull, and Cut
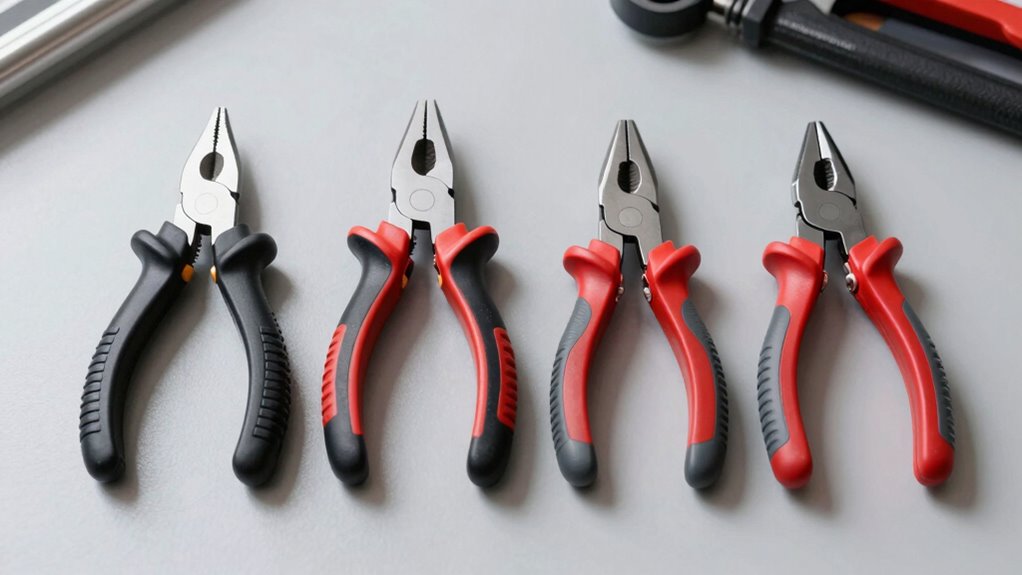
You’ll need different pliers for gripping, pulling, and cutting tasks around your home.
Choose combination pliers for general work, needle-nose pliers for tight spaces, and wire cutters for electrical work.
Keep your pliers clean and properly adjusted so they work smoothly when you need them.
Types Of Pliers For Different Tasks
When you’re tackling household repairs, having the right pliers for each job makes all the difference.
Standard needle-nose pliers handle tight spaces and delicate work. Use them for gripping small objects or reaching into narrow areas.
Slip-joint pliers adjust to different sizes, making them versatile for various tasks. They’re perfect for gripping nuts and bolts.
Wire cutters handle electrical work, cleanly cutting through cables and wires.
Tongue-and-groove pliers, also called water pump pliers, excel at gripping larger objects and turning nuts.
Lineman’s pliers tackle heavy-duty cutting and gripping jobs. They’re built for electrical work and thick materials.
Each type serves specific purposes, so you’ll want options that cover gripping, pulling, and cutting tasks efficiently.
Maintaining Your Pliers Properly
Proper maintenance keeps your pliers working effectively for years.
You should clean your pliers after each use, removing dirt and debris from the jaws and pivot point. Wipe them down with a cloth and apply a light coat of oil to prevent rust.
Check the pivot nut regularly and tighten it when loose, but avoid over-tightening.
Store your pliers in a dry place, preferably in a tool box or on a pegboard.
Replace worn jaw covers promptly since they’re essential for gripping.
Inspect cutting edges for nicks and file them smooth when needed.
Don’t use pliers for jobs they’re not designed for, like prying or hammering, which damages their functionality.
Treat your pliers right, and they’ll last decades.
The Right Hammer for More Than Nails
You’ll need more than just a basic claw hammer for home repairs.
Consider ball-peen hammers for metalwork and framing hammers for heavy-duty tasks.
Choose the right weight for your projects and keep your hammer clean for better performance.
Hammer Types And Uses
Several hammer types exist for different home repair tasks, and choosing the right one makes your work more efficient.
You’ll want a claw hammer for general framing and nail removal. The curved claw helps pull nails cleanly.
For masonry work, grab a ball-peen hammer with its flat face and rounded peen end.
Tile installation requires a rubber mallet to avoid cracking delicate materials.
Use a sledgehammer for heavy demolition jobs where you need maximum force.
A framing hammer’s longer handle provides extra leverage for driving large nails.
Don’t overlook the utility of a small tack hammer for precision work.
Each hammer serves specific purposes, so match the tool to your task rather than forcing one hammer to do everything.
Choosing The Right Weight
Hammer weight matters more than many homeowners realize, and selecting the right one can prevent fatigue while improving your work quality.
You’ll want a 16-ounce hammer for most general repairs and framing jobs. This weight provides enough force without exhausting you during extended use.
For fine finish work, consider a 12-ounce hammer to avoid marring delicate surfaces. Heavy 20-ounce hammers work best for demolition and driving large nails, but they’re tiring for prolonged tasks.
Test different weights before purchasing – you’ll quickly discover what feels comfortable and balanced in your hand.
Don’t overlook handle material either; fiberglass handles absorb shock better than wooden ones.
Remember that proper hammer weight reduces strain on your wrist and elbow joints.
Maintenance And Safety Tips
While often overlooked, maintaining your hammer properly extends its lifespan and prevents accidents during use.
You should regularly inspect the handle for cracks or splinters that could break during impact. Replace worn leather or rubber grips immediately to maintain control. Keep the head clean and free from oil or debris that reduces striking effectiveness.
Store your hammer in a dry place to prevent rust and handle deterioration. Check the head attachment periodically; a loose head is dangerous and ineffective.
When using your hammer, always wear safety glasses to protect against flying debris. Maintain proper grip and stance to avoid slipping or losing control mid-swing.
These simple habits keep you safe and your tools reliable.
Measuring Accurately for Repairs

Accurate measurements form the foundation of successful home repairs, and mastering this skill will save you time, materials, and frustration.
You’ll need a reliable tape measure, ruler, and possibly a laser measure for larger projects. Always measure twice, cut once – this old adage prevents costly mistakes.
When measuring, verify your tool is straight and flush against surfaces. Don’t forget to account for wall thickness when hanging items. Mark measurements clearly with pencil or chalk.
For round objects, use calipers or wrap string around them. Digital measuring tools offer precision, but standard tape measures work perfectly for most repairs. Keep your measuring tools clean and store them properly.
Developing confidence in measuring accurately makes you feel like you belong among experienced DIYers. Practice measuring common household items to build your skills.
Adjustable Wrench for Faucet Fixes
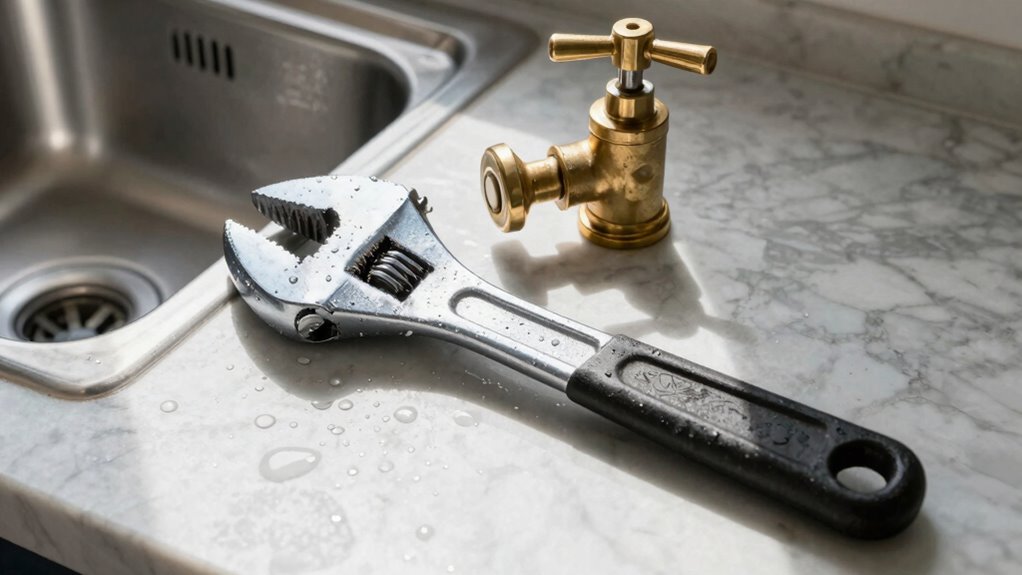
You’ll need an adjustable wrench that can grip various nut sizes, typically ranging from 6 to 12 inches in length.
This tool becomes essential when you’re replacing washers, O-rings, or cartridge assemblies in faucets.
Having the right adjustable wrench means you can tackle most faucet repairs without struggling with stripped nuts or improper fit.
Adjustable Wrench Features
An adjustable wrench becomes your go-to tool when faucet repairs demand versatility. You’ll appreciate these key features that make quick work of leaky fixtures.
- Jaw adjustment lets you grip nuts and bolts of various sizes without swapping tools constantly.
- Wide opening capacity handles larger plumbing connections you’ll encounter under sinks.
- Non-slip grip keeps wrench steady on stubborn fasteners, preventing rounding off hex nuts.
- Compact design stores easily in toolboxes while maintaining leverage for tight spaces.
Look for chrome vanadium steel construction that won’t rust from water exposure.
A quality adjustable wrench pays dividends during unexpected plumbing emergencies. You’ll feel confident tackling basic faucet repairs when you’ve got the right tool ready.
Faucet Repair Techniques
Faucet repair doesn’t require advanced plumbing skills when you’ve got the right technique. A quality adjustable wrench handles most basic faucet fixes with straightforward steps.
You’ll need to identify your faucet type first – compression, ball, cartridge, or ceramic disk. Turn off the water supply before starting any work. Adjust your wrench jaws to fit the nut snugly, avoiding overtightening that strips threads.
Replace worn washers, O-rings, or cartridges depending on your faucet style. Clean mineral deposits from aerators regularly to maintain water flow. Most leaks stem from deteriorated internal components you can replace without calling a plumber.
Keep extra washers and O-rings in your repair kit. Practice these techniques on older faucets first. You’ll gain confidence quickly when you see immediate results from your efforts.
A Sharp Utility Knife for Quick Cuts
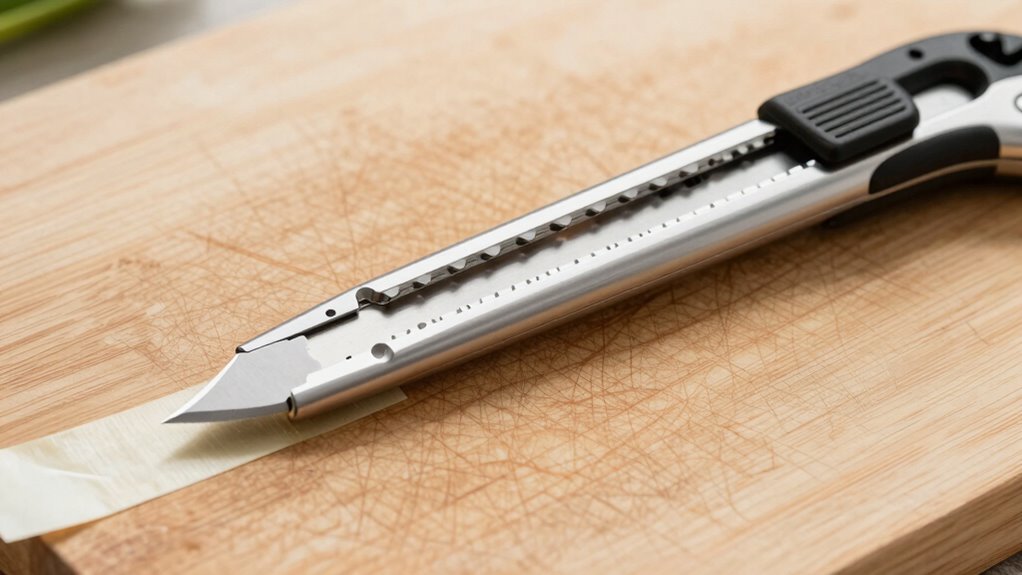
Because you’ll encounter countless situations where precision cutting matters, a sharp utility knife becomes indispensable for quick repairs around the house. You’ll find yourself reaching for it constantly.
- Choose a retractable blade knife with a comfortable grip that fits your hand well.
- Keep extra blades on hand since dull blades are dangerous and ineffective.
- Always cut away from your body and keep fingers clear of the blade path.
- Store your utility knife safely in a drawer or tool box when not in use.
A quality utility knife handles everything from opening boxes to trimming excess material.
You’ll appreciate having this reliable cutting tool nearby for those unexpected repair moments.
Make sure yours stays sharp and accessible.
Keep Things Straight With a Level
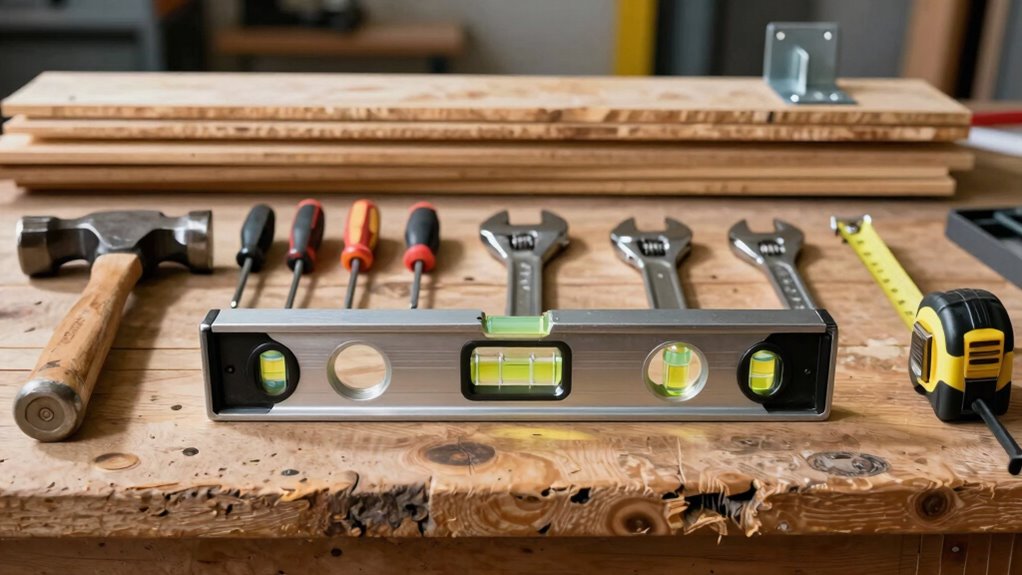
Whether you’re hanging a picture frame or installing shelves, keeping things straight with a level guarantees your work looks professional and functions properly.
You’ll need both a torpedo level for tight spaces and a longer level for bigger projects. Magnetic levels stick to metal surfaces, making overhead work easier. Check that bubbles center between lines when leveling objects.
Store your level properly to maintain accuracy. A damaged level gives false readings, ruining your projects. Test your level’s accuracy by flipping it 180 degrees on the same surface. If readings differ, your level needs replacement.
Quality levels last decades with proper care. Don’t skip this essential tool when building your kit.
Cordless Drill for Fastening & Drilling
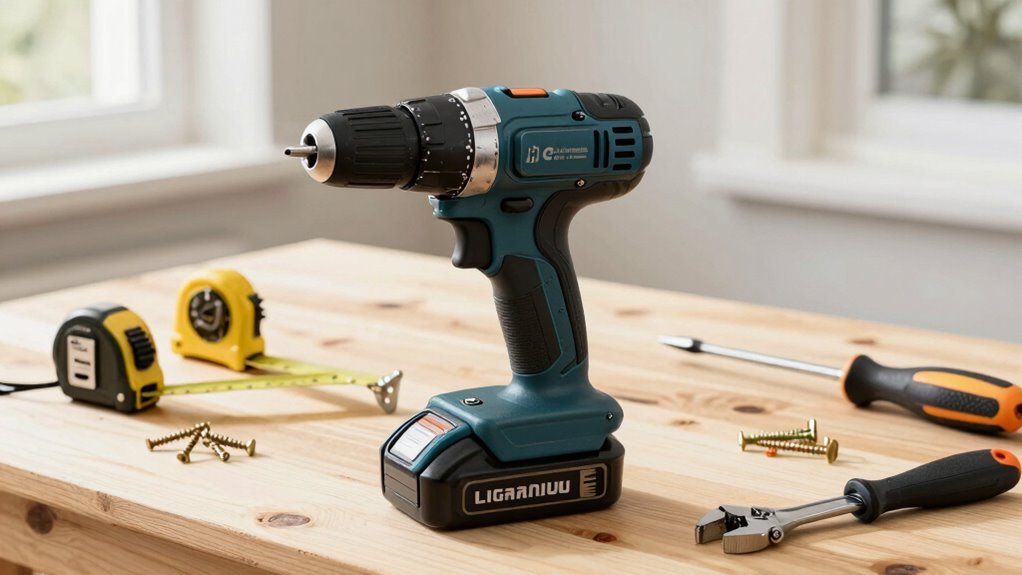
While you might think a hammer and nails cover most fastening tasks, a cordless drill makes quick work of everything from hanging cabinets to assembling furniture.
You’ll wonder how you ever managed without one.
Here’s what makes a cordless drill essential:
- Power and convenience – You can drive screws faster and drill holes without needing outlets nearby.
- Versatility – Switch between drilling and driving modes depending on your task.
- Portability – Take it anywhere in your home without worrying about extension cords.
- Time-saving – Complete projects in minutes instead of hours compared to manual tools.
Don’t overlook getting extra batteries and basic drill bits.
You’ll use this tool regularly once you start.
Find the Right Spot With a Stud Finder
A cordless drill helps you drive screws and drill holes almost anywhere, but knowing where to put them makes all the difference. You need a stud finder to locate wall studs accurately. Without it, you’re guessing where to anchor heavy shelves or mount TVs.
Running into electrical wires or plumbing becomes a real risk when you miss the mark. A basic electronic stud finder costs under twenty bucks and saves you from costly mistakes.
Place it flat against drywall and move it slowly across the surface. It’ll beep or light up when it detects a stud’s edge. Mark both edges, then find the center point for strongest mounting. Some models detect multiple studs at once, making your job even easier.
Don’t skip this tool – it’s essential for serious home repairs.
Stay Safe With Light for Repairs
You’ll need adequate lighting to work safely and effectively on home repairs. Poor lighting causes accidents and mistakes that could cost you time and money.
- Flashlights work great for quick fixes and tight spaces where electrical outlets aren’t available.
- Work lights plug directly into outlets and provide bright, steady illumination for extended projects.
- Headlamps keep your hands free while delivering focused light exactly where you need it.
- LED bulbs last longer than traditional bulbs and won’t overheat during lengthy repair sessions.
Don’t underestimate how much proper lighting improves your work quality. You’ll see details clearly, avoid damaging components, and complete tasks faster.
Good lighting isn’t optional – it’s essential for every repair job.
Store Your Tools the Smart Way
You should organize your tools by type so you can find what you need quickly during repairs.
Wall mounting systems keep your tools visible and accessible while saving workspace.
Label everything clearly to avoid wasting time searching through drawers or boxes.
Organize Tools By Type
Storing your tools by type creates a logical system that saves time and prevents frustration. You’ll find exactly what you need without rummaging through scattered equipment.
- Group similar tools together – keep all screwdrivers in one spot, wrenches in another.
- Use separate containers or drawers for each category.
- Label sections clearly so anyone can find what they need.
- Place frequently used items in easily accessible locations.
This organization method works because it mirrors how your brain naturally categorizes things. When you need a hammer, you know to look with other striking tools.
Mechanics, carpenters, and DIY enthusiasts all rely on this simple approach. You’re not just organizing tools – you’re creating a system that makes you feel competent and prepared.
Smart storage transforms chaos into confidence.
Use Wall Mounting Systems
While organizing tools by type creates a solid foundation, wall mounting systems take your workshop efficiency to the next level by putting frequently used items within arm’s reach.
You’ll save time and reduce frustration when you can grab what you need without rummaging through drawers or boxes.
Install pegboards, slat walls, or magnetic strips depending on your space and tool collection. Hang hammers, screwdrivers, and pliers at eye level where you work most.
Place frequently used tools in the center zone, less common ones higher or lower.
Don’t overcrowd your walls – leave room for new additions. Position tools so handles face outward, making identification quick.
Keep heavy items closer to mounting points to prevent damage. Wall systems transform your workspace into a professional setup where everything has its place and purpose.
Label Everything Clearly
Every tool in your kit deserves a clear, permanent label that eliminates guesswork during repairs. You’ll save time and frustration when you can quickly identify what you need.
- Use durable labels that won’t fade or peel over time
- Write tool names in large, readable font sizes
- Include measurement specifications for wrenches and screwdrivers
- Update labels immediately when you add new tools
Don’t underestimate how much proper labeling improves your efficiency. When you’re mid-repair and need that 10mm wrench, you won’t waste minutes searching through unlabeled drawers.
Experienced DIYers know that organization separates hobbyists from serious home repair enthusiasts. Your labeled toolkit shows you’re committed to doing quality work.
Take pride in maintaining clear identification systems – it’s what separates competent DIYers from those who struggle with basic repairs.
Upgrading Your Kit: Next-Level Tools to Consider
How do you take your basic tool kit from functional to exceptional? You start adding precision tools that make jobs easier and faster.
Consider a cordless drill with multiple bits – it’ll handle most screw driving and drilling tasks. Add a quality tape measure with a lock feature, and a stud finder for hanging heavy items safely. A digital multimeter helps troubleshoot electrical issues confidently. Include a set of hex keys for furniture assembly and appliance repairs.
A good flashlight or headlamp guarantees you see what you’re doing in dark spaces. These tools transform you from someone hoping to fix things into someone who actually gets stuff done.
You’ll tackle projects others avoid, save money on service calls, and gain real confidence in your abilities.
Buy Tools Without Breaking the Bank
You don’t need to spend a fortune to build a capable toolkit – smart shopping strategies will save you hundreds while getting you the tools that actually work.
- Hit garage sales and estate sales early for quality tools at fraction of retail prices – experienced mechanics and craftsmen often sell their collections.
- Check Craigslist and Facebook Marketplace for local deals – you’ll find barely-used tools from people who bought them once and never used them.
- Shop Harbor Freight, Northern Tool, or similar stores during sales – their cheap tool sets actually work fine for basic home repairs.
- Buy name-brand tools gradually instead of complete sets – focus on getting quality screwdrivers, a good hammer, and reliable pliers first.
Maintain and Organize Tools for Long Life
While building your toolkit on a budget gets you started, keeping those tools in good condition guarantees they last decades without replacement.
You should clean tools after each use, removing dirt and debris that cause rust. Apply lubricant to moving parts regularly. Store tools in a dry place away from moisture. Use a pegboard or toolbox with compartments to keep everything organized and prevent damage.
Sharp tools work better and last longer, so maintain blade edges with proper sharpening. Check handles for cracks or looseness periodically. Replace worn parts immediately rather than waiting for complete failure.
Keep tools together in one designated spot so you always know where everything belongs. Proper maintenance prevents costly replacements and assures your tools remain reliable when you need them most.
Essential Safety Gear You Should Never Skip
Safety gear protects you from injury during every repair project, and maintaining your tools properly helps guarantee this protection works effectively.
You need reliable safety equipment that becomes second nature to use.
- Safety glasses shield your eyes from flying debris, dust, and chemical splashes during drilling, cutting, or grinding tasks.
- Work gloves protect your hands from cuts, abrasions, and blisters while handling rough materials or sharp tools.
- Steel-toed boots prevent foot injuries from dropped tools or heavy objects falling during overhead work.
- Hearing protection safeguards your ears from loud power tools like drills, saws, or impact drivers used over extended periods.
Don’t skip these basics – they’re non-negotiable for serious DIY work.
Conclusion
You don’t need a fancy toolkit to look like a competent adult. Just grab a hammer, some screwdrivers, and call it a day. Your leaks will still drip, your shelves will still wobble, but at least you’ll have expensive tools collecting dust. Welcome to homeownership – where buying a drill feels like winning the lottery and everything else is basically rocket science.
