

You don’t need a green thumb to turn your backyard into a productive garden. Start by mapping out where sunlight hits your yard throughout the day—those bright spots are your golden opportunities. Test your soil’s health with simple home kits, then enrich it with compost or needed amendments. Choose crops that actually thrive in your conditions rather than fighting against them. Raised beds and containers give you better control over growing conditions while maximizing space. Keep track of what works and what doesn’t; your future self will thank you for the notes.
Start With Basics: What Exactly Is Light Farming?
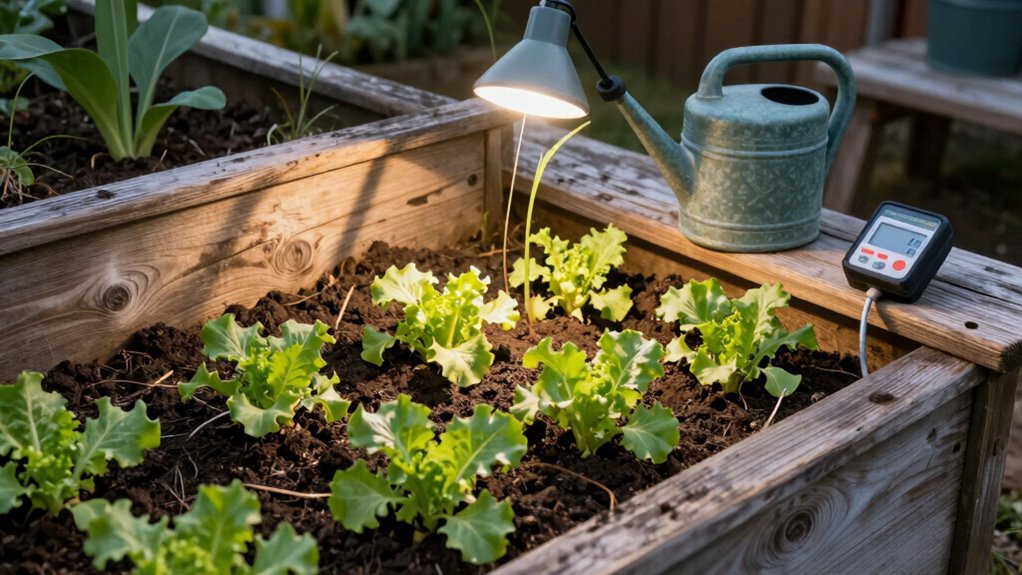
Light farming isn’t about growing crops—it’s about maximizing your exposure to natural sunlight for health benefits. You’re fundamentally cultivating wellness by strategically positioning yourself in sunny spots throughout your yard. This practice boosts vitamin D production, improves mood, and enhances sleep quality.
You don’t need special equipment or expensive tools—just awareness of where sunlight lands in your space. Start by identifying your favorite outdoor activities and matching them to sun-rich areas. Morning light energizes you for exercise, while afternoon sun relaxes you after work.
You’ll discover how simple it’s to integrate light farming into daily routines. Your body craves this natural connection, and light farming satisfies that deep need for belonging to something larger than yourself—nature’s rhythm.
Check Sunlight Patterns in Your Yard
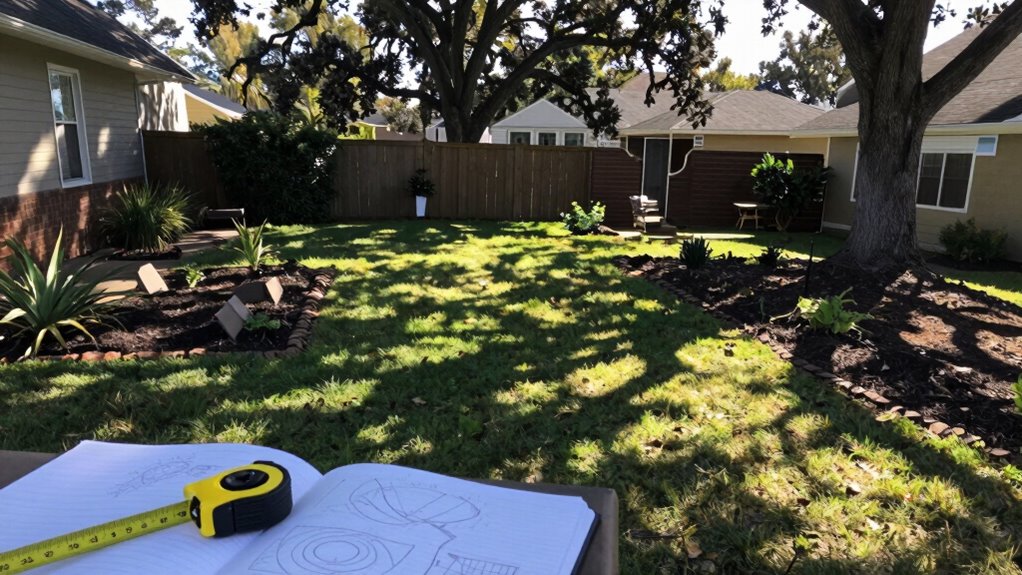
Understanding how sunlight moves across your yard helps you identify the best spots for light farming. You’ll want to observe your space at different times to see where light naturally gathers.
- Morning light hits east-facing areas first, giving you early growing opportunities.
- Midday sun creates intense heat spots that might need protection.
- Afternoon shade provides relief for more delicate plants.
- Seasonal changes mean sun patterns shift as months pass.
- Obstructions like trees or buildings cast shadows you must plan around.
Don’t worry if your yard seems complicated at first. Every space has potential.
Take notes, maybe even sketch your observations. You’re joining a community of growers who started exactly where you’re now. Trust what you see, and you’ll find perfect spots for your light farming journey.
Pick Crops Perfect for Part-Shade Gardens
You can grow plenty of delicious vegetables even in areas that don’t get full sun all day.
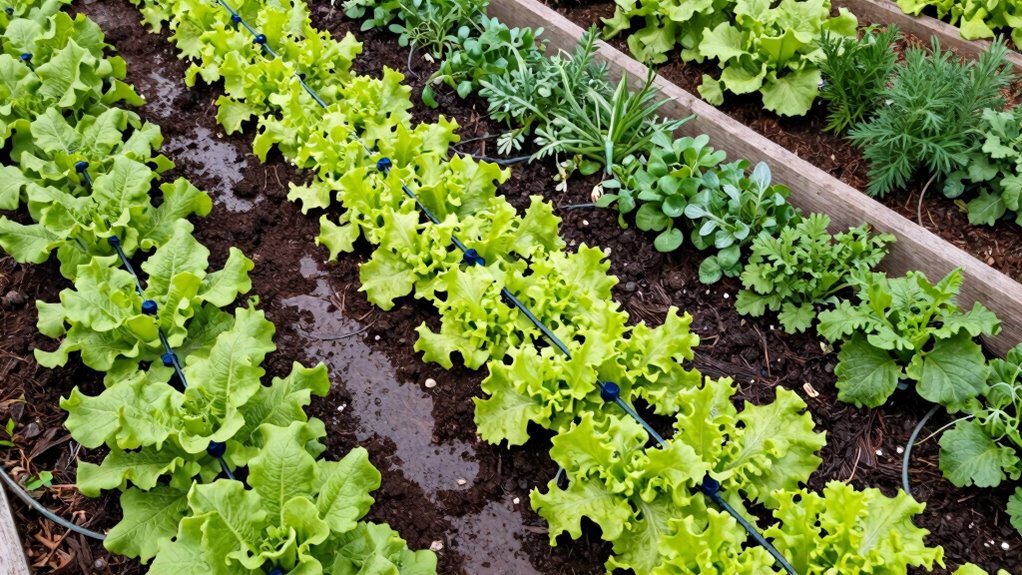
Leafy greens like lettuce, spinach, and kale actually prefer partial shade and will bolt less quickly in cooler conditions.
Root vegetables such as carrots, radishes, and beets also perform well in low-light growing conditions, making them perfect choices for your part-shade garden.
Shade-Tolerant Vegetable Varieties
While full sun might seem ideal for vegetable gardens, many crops actually thrive in partial shade conditions where other plants would struggle. You can successfully grow delicious vegetables even in areas that receive limited sunlight throughout the day.
Consider these shade-tolerant varieties for your backyard light farming:
- Leafy greens like spinach, lettuce, and kale produce tender leaves in cooler, shaded spots.
- Root vegetables including carrots, radishes, and beets develop well with less direct sun.
- Herbs such as parsley, cilantro, and mint often prefer partial shade.
- Broccoli and cabbage family members actually enjoy cooler growing conditions.
- Peas and beans can produce abundantly in areas with morning sun and afternoon shade.
These vegetables prove that you don’t need perfect sunny conditions to create a productive garden. Your shaded backyard spaces can contribute meaningfully to your homegrown food supply.
Low-Light Growing Conditions
Part-shade gardens offer unique opportunities to grow productive crops that don’t require intense sunlight. You can successfully cultivate leafy greens like spinach, lettuce, and kale in areas receiving only three to four hours of direct sun daily.
Herbs such as parsley, cilantro, and chives thrive in these conditions while adding flavor to your meals. Root vegetables including radishes, carrots, and beets perform well with limited light exposure.
Don’t overlook broccoli, cauliflower, and cabbage – these cool-season crops actually prefer partial shade.
Your part-shade garden becomes a productive space where you’re not just growing food, but joining a community of gardeners who maximize every corner of their outdoor areas.
These crops prove that less sun doesn’t mean less harvest.
Partial Sun Crop Selection
Although many gardeners assume that productive crops need full sun, selecting the right partial sun varieties can yield impressive harvests in less-than-ideal lighting conditions.
You don’t need perfect sunny spots to grow delicious food.
Focus on these part-shade performers:
- Leafy greens like spinach, lettuce, and kale thrive with just 3-4 hours of direct sunlight.
- Root vegetables including carrots, radishes, and beets produce well in filtered light conditions.
- Herbs such as parsley, cilantro, and chives actually prefer partial shade over intense heat.
- Broccoli and cabbage family members excel when protected from harsh afternoon sun.
- Strawberries surprise many gardeners by producing sweet fruit even in moderate shade.
These crops prove that you can join the growing community regardless of your yard’s lighting challenges.
Start small, experiment with different locations, and watch your confidence bloom alongside your harvest.
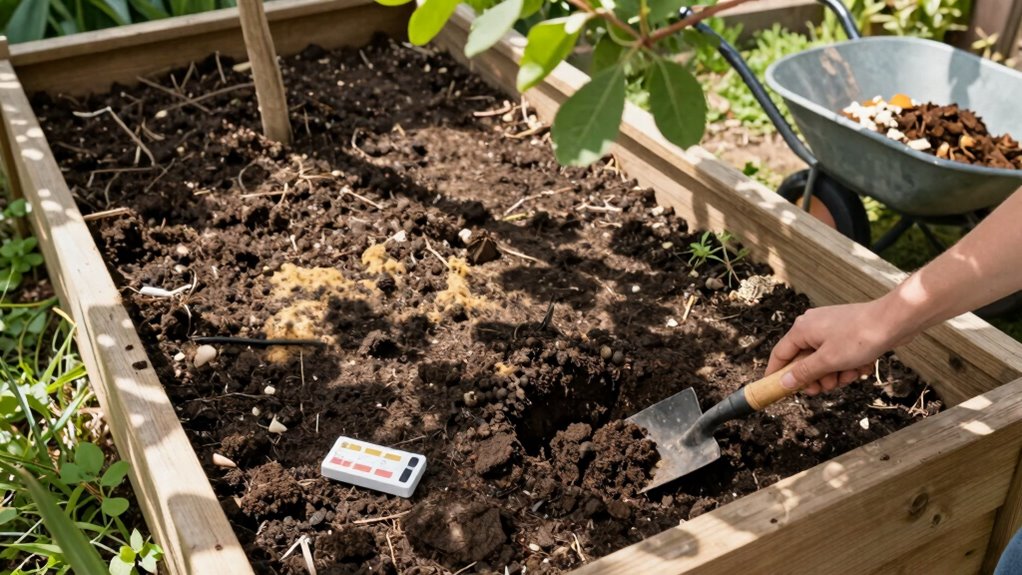
Test Soil Health at Home Easily
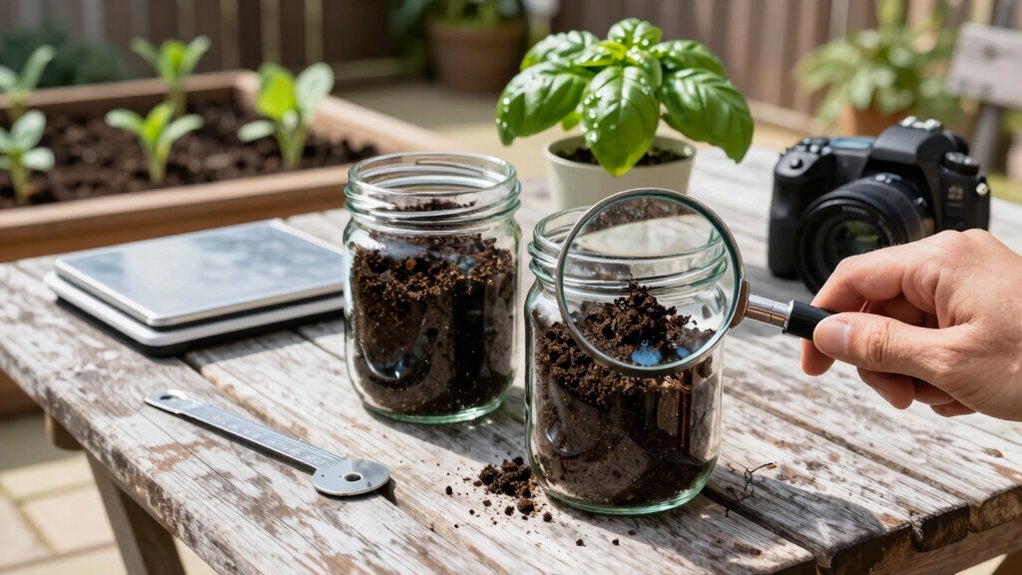
You can easily test your soil’s pH level using simple home methods like vinegar and baking soda tests, or invest in an affordable pH meter for more accurate readings.
Identifying nutrient deficiencies in your soil doesn’t require expensive lab work – you can spot common problems like nitrogen, phosphorus, and potassium shortages by observing your plants’ growth patterns and leaf colors.
These basic soil tests will help you understand what your plants need to thrive in your part-shade garden.
Soil PH Testing Methods
Testing your soil’s pH doesn’t require expensive equipment or laboratory analysis – you can easily check it at home with simple methods that give accurate results.
Understanding your soil’s acidity helps you grow healthier plants and join the community of successful backyard farmers.
- Purchase a digital pH meter – Get instant readings by inserting the probe into moist soil.
- Use pH test strips – Mix soil with distilled water, dip strips, and compare colors to charts.
- Try the vinegar test – Add vinegar to soil samples; fizzing indicates alkaline soil.
- Perform the baking soda test – Mix baking soda with soil; fizzing shows acidic conditions.
- Send samples to extension services – Get professional analysis for thorough soil health.
These methods help you understand your soil’s needs and connect with local gardening communities who share similar growing conditions.
Nutrient Deficiency Identification
How do you spot nutrient deficiencies before they devastate your crops? Watch your plants closely for yellowing leaves, stunted growth, or unusual color patterns.
Nitrogen deficiency shows pale green or yellow leaves starting from older growth.
Phosphorus shortage creates purple or dark green leaves with poor root development.
Potassium deficiency causes brown leaf edges and weak stems.
Test your soil health at home using simple kits or send samples to local extension services.
Check pH levels regularly since extreme acidity or alkalinity blocks nutrient uptake.
Add compost annually to replenish essential minerals naturally.
Trust your observations and don’t hesitate to ask fellow gardeners about their experiences.
You’re building confidence with each growing season, becoming part of a community that shares knowledge and grows together through trial and success.
Prep Soil Using Compost or Amendments
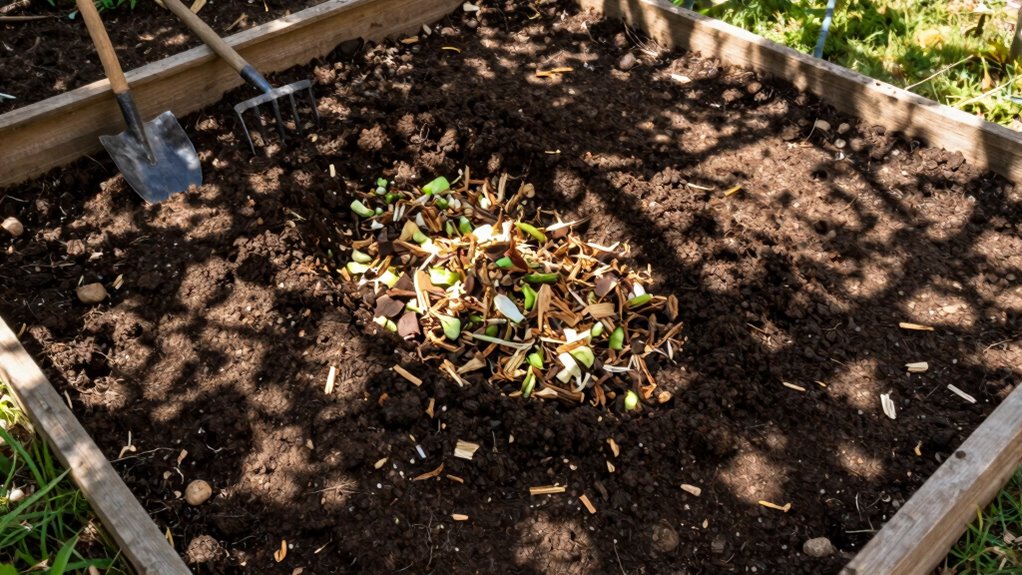
Healthy soil forms the foundation of successful light farming, and preparing it properly can make all the difference in your harvest.
You’ll want to test your soil’s pH and nutrient levels first, then amend accordingly.
- Compost – Add 2-3 inches of well-aged compost to provide essential nutrients naturally
- pH balance – Adjust soil acidity to 6.0-7.0 range for ideal nutrient absorption
- Organic matter – Mix in aged manure or leaf mold to improve soil structure
- Drainage – Incorporate perlite or coarse sand if your soil drains poorly
- Microorganisms – Introduce beneficial bacteria through compost tea or mycorrhizal fungi
Don’t skip this vital step – your plants will thrive when you give them nutrient-rich, well-prepped soil.
You’re joining a community of gardeners who understand that great harvests start with great soil preparation.
Decide on Containers or Raised Beds Now
You’ll need to choose between containers and raised beds based on your space and goals.
Containers work great for patios and small areas, while raised beds give you more growing room and better soil control.
Consider your available space, budget, and how much maintenance you want before making your decision.
Container Selection Options
Choosing the right containers for your light farming setup depends on several key factors that’ll impact your plants’ growth and your overall success.
You’ll want to take into account these essential elements before making your selection:
- Size matters – Pick containers at least 12 inches deep for most vegetables to allow proper root development.
- Drainage is vital – Confirm adequate holes prevent waterlogging that kills your plants.
- Material choices – Plastic retains moisture well, while wood breathes better and ages naturally.
- Portability needs – Lightweight options let you move plants for ideal sunlight exposure.
- Budget factors – Start small with affordable pots, upgrading as your green thumb develops.
Don’t overthink this step. Your container choice directly affects your harvest success, so pick wisely based on your specific growing conditions and plant requirements.
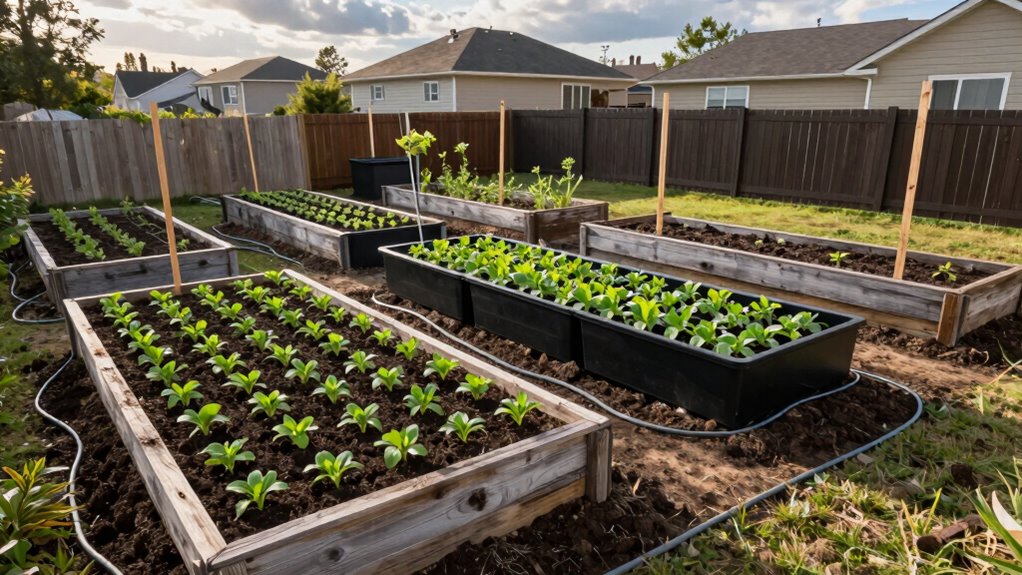
Raised Bed Construction Methods
Raised beds offer a fantastic alternative to containers when you’re ready to expand your light farming setup.
You’ll find they provide better soil drainage and root development than pots. Start by selecting materials like cedar planks, composite boards, or recycled plastic timbers.
Measure your available space and plan bed dimensions that work for your yard. Construct frames that are at least 6 inches deep, though 12 inches gives plants more room to grow. Corner brackets or simple screws hold frames together securely.
Fill beds with quality soil mix rather than native dirt. Consider adding pathways between multiple beds for easy access.
Raised beds let you control growing conditions while creating an organized garden area that feels like it belongs in your landscape. You’re building something permanent that enhances both your gardening experience and outdoor space.
Space Planning Considerations
Containers and raised beds each demand different approaches to space planning, so decide which path fits your situation best. Your choice shapes everything from plant selection to maintenance routines.
Consider these key factors:
- Available space – Measure your area carefully; containers work in small corners while raised beds need dedicated plots.
- Mobility needs – Containers let you move plants for ideal light, raised beds stay fixed in place.
- Soil quality – Raised beds allow better soil amendment, containers need fresh potting mix annually.
- Water access – Raised beds can utilize drip systems more efficiently than scattered containers.
- Community involvement – Raised beds often become neighborhood gathering spots for sharing harvests.
You’re not just choosing growing methods – you’re designing your connection to food and community.
Pick the option that makes you excited to get outside and grow something amazing.
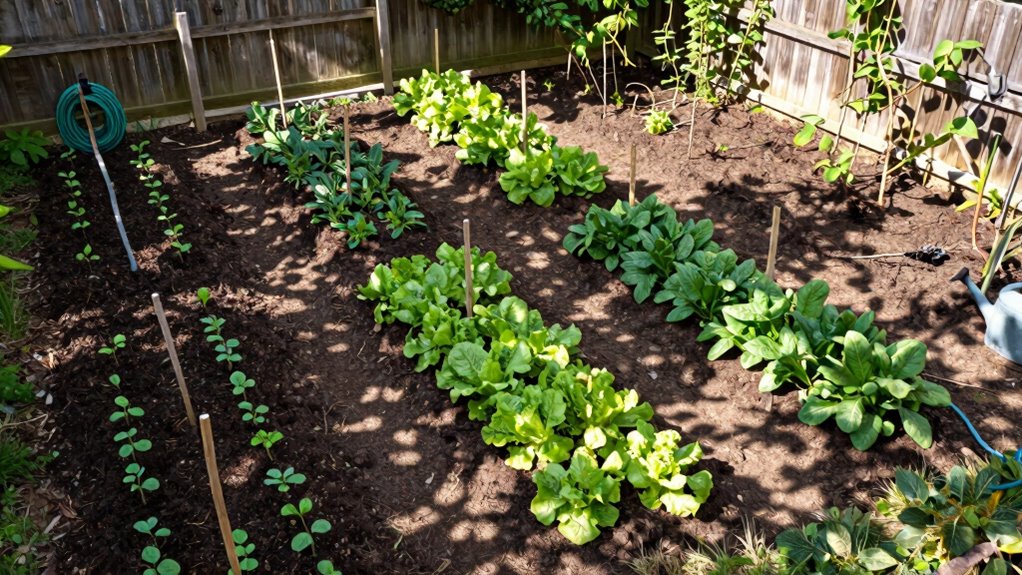
Lay Out Plant Beds for Maximum Yield
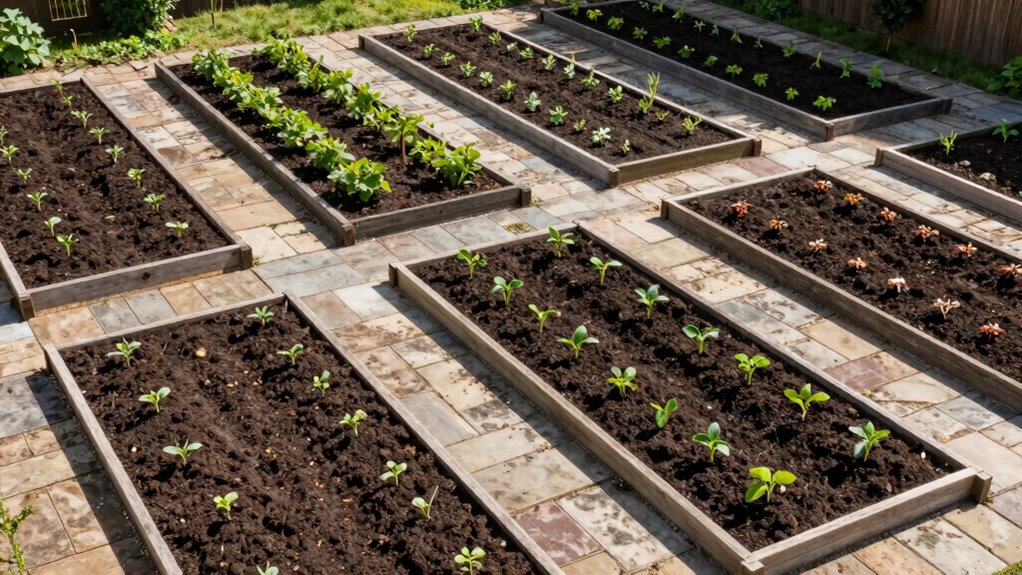
Proper plant bed layout can increase your harvest by up to 30% when you maximize every square inch of growing space.
Start by measuring your available area and planning beds that are 3-4 feet wide, allowing easy access without stepping on soil. Orient beds north to south for ideal sunlight exposure.
Group plants by height, placing taller varieties on the north side to prevent shading. Leave 18-24 inches between beds for walking and maintenance.
Consider companion planting to maximize space efficiency – grow quick-maturing crops between slower ones.
Don’t forget vertical space; use trellises for vining plants. Square foot gardening techniques work wonderfully for small spaces.
Remember that proper spacing reduces disease pressure and makes harvesting easier. You’re creating your own productive ecosystem.
Choose Between Seeds and Transplants Wisely
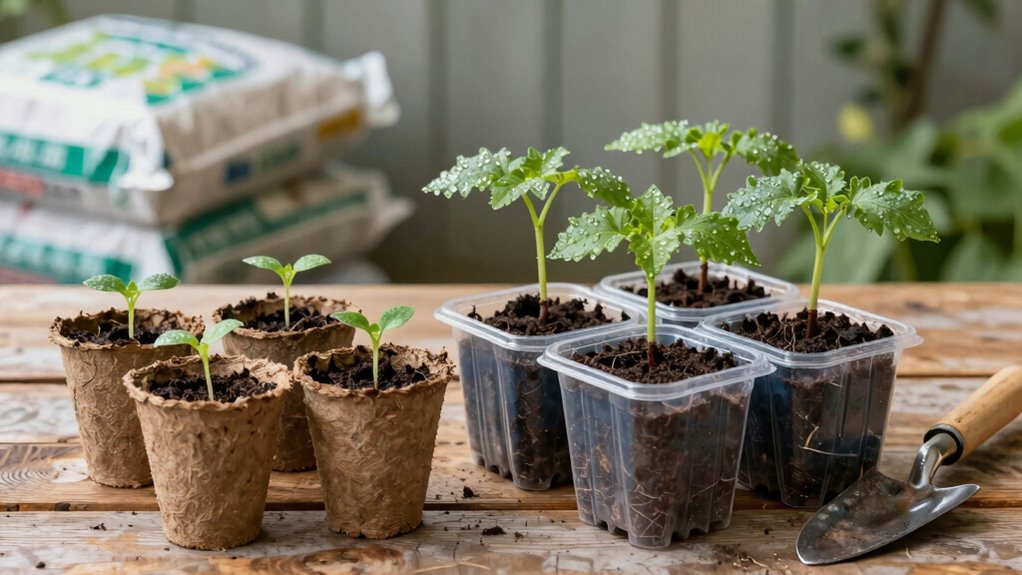
Why shouldn’t you overlook the seed versus transplant debate when planning your light farming operation?
Your choice directly impacts your harvest timeline, costs, and growing confidence. Starting from seed gives you variety options and saves money, while transplants offer quicker results and reliable starts.
Consider these key factors:
- Time investment: Seeds need extra weeks indoors before outdoor planting
- Budget consciousness: Seeds cost less but require more equipment and care
- Skill development: Growing from seed builds deeper gardening knowledge
- Crop variety: Some plants transplant better than others
- Season timing: Transplants help you beat short growing seasons
You’re not just choosing plants—you’re choosing your farming journey.
Both paths lead to fresh food and garden pride.
Pick what matches your lifestyle and watch your light farming dreams grow.
Water Efficiently: Avoid Root Rot Risk
How often do you check your plants’ soil moisture before watering? You should make this a daily habit, especially during hot weather.
Stick your finger two inches into the soil – if it feels dry, it’s time to water. Overwatering kills plants faster than underwatering, causing root rot that destroys your entire crop.
Water deeply but less frequently to encourage strong root growth. Morning watering works best because it prevents fungal diseases.
Use containers with drainage holes and well-draining soil mixtures. Consider installing drip irrigation systems or soaker hoses for consistent moisture delivery.
You’re not alone in learning proper watering techniques. Every gardener develops this skill through practice and observation.
Trust your instincts, monitor your plants closely, and adjust accordingly. Your plants will reward you with healthy growth and abundant harvests when you master efficient watering.
Feed Plants Based on What Soil Lacks
Plants need specific nutrients to thrive, and your soil might be missing key elements that limit your harvest potential. You can transform your growing results by identifying and addressing these deficiencies.
Start by testing your soil’s pH and nutrient levels. Most plants prefer slightly acidic to neutral soil (6.0-7.0).
Here’s what to watch for:
- Nitrogen deficiency creates pale, yellowing leaves from the bottom up
- Phosphorus shortage causes purple or dark green leaves with poor root development
- Potassium lack shows as brown leaf edges and weak stems
- Calcium insufficiency leads to blossom end rot in tomatoes and peppers
- Magnesium depletion creates yellow leaves with green veins
You’ll feel confident feeding your plants precisely what they need when you understand these signs.
Your garden will respond with vigorous growth and abundant harvests that make you proud.
Block Bugs Without Heavy Pesticides
You can protect your plants from harmful pests without relying on heavy chemical pesticides.
Natural barriers like companion planting, row covers, and beneficial insects create effective defense systems that keep bugs away.
These organic methods give you control over pest problems while maintaining a healthier growing environment.
Natural Barriers Against Pests
While many gardeners rely heavily on chemical pesticides to protect their crops, you can create effective natural barriers that keep pests at bay without introducing harmful substances to your growing environment.
You’ll discover how simple strategies transform your garden into a protected oasis.
- Plant marigolds around vegetable beds to repel nematodes and aphids naturally.
- Install copper tape around raised beds to deter slugs and snails effectively.
- Use row covers to physically block flying insects from reaching young plants.
- Create habitat corridors with native plants that attract beneficial predator insects.
- Build small barriers using crushed eggshells or diatomaceous earth around vulnerable stems.
These methods work harmoniously with nature while keeping your harvest safe.
You’re not just gardening; you’re participating in a sustainable community of growers who understand that working smarter beats working harder every time.
Organic Methods For Bug Control
Although chemical pesticides promise quick results, organic bug control methods offer sustainable solutions that protect your crops without compromising soil health or beneficial insect populations.
You can create natural barriers using companion planting – try marigolds around tomatoes or basil near peppers. Diatomaceous earth works wonders against soft-bodied insects while remaining safe for earthworms.
Introduce ladybugs and lacewings to your garden; they’ll devour aphids naturally. Spray neem oil diluted with water for broad-spectrum protection. Use reflective mulch to deter flying pests. Hand-pick larger insects early morning when they’re less active.
These methods build resilient ecosystems where your plants thrive alongside helpful creatures, creating harmony rather than destruction.
Catch Plant Diseases Before They Spread
Early detection of plant diseases saves your entire harvest from destruction. You don’t need to be an expert to spot trouble early.
- Check leaves daily – Look for spots, discoloration, or wilting that weren’t there yesterday.
- Examine stems closely – Soft, mushy, or discolored stems often indicate fungal infections.
- Monitor soil conditions – Overly wet or dry soil creates disease-friendly environments.
- Watch neighboring plants – Diseases spread quickly between close-growing crops.
- Act immediately – Remove affected parts before problems multiply.
You’re not just protecting plants; you’re safeguarding your community’s food security.
Every gardener faces these challenges, and catching issues early makes you part of the solution. Trust your instincts when something looks “off.”
Your vigilance keeps your light farming successful and productive for everyone involved.
Harvest Crops at Their Flavor Peak
Timing matters when you want vegetables that taste like they should. You need to harvest at peak ripeness for maximum flavor.
Check your crops daily during harvest season. Tomatoes should feel slightly soft and show full color. Pick peppers when they reach desired size and color.
Harvest leafy greens in morning when they’re crisp. Don’t wait too long – overripe vegetables lose their best qualities. Use sharp scissors or knives to avoid damaging plants.
Harvest herbs before flowers bloom for strongest flavor. Root vegetables like carrots taste sweeter when pulled at right size.
Trust your senses – smell, touch, and sight guide you. Regular harvesting encourages more production.
You’ll know you’ve got it right when your vegetables taste amazing. Keep picking at peak moments and you’ll enjoy garden-fresh flavor all season long.
Rotate Crops to Save Soil Long Term
Crop rotation is one of the most important practices you can adopt to keep your soil healthy and productive for years to come. You’ll prevent nutrient depletion and break pest cycles naturally.
- Legumes like beans fix nitrogen, enriching soil for future crops.
- Heavy feeders such as tomatoes exhaust nutrients, so follow them with soil-building plants.
- Root vegetables improve soil structure by breaking up compaction naturally.
- Brassicas need fertile ground, so plant them after nitrogen-fixing legumes.
- Companion planting within rotations maximizes space and benefits.
You’re not just growing food; you’re building a sustainable ecosystem.
Start small with three basic groups: nitrogen fixers, heavy feeders, and light feeders. Rotate these annually, and you’ll watch your garden transform into a thriving, self-sustaining community that any gardener can call home.
Extend Season With Tunnels or Cloches
While you might think your growing season ends with the first frost, extending it through tunnels or cloches can nearly double your harvest window.
These simple structures trap heat and protect plants from harsh weather. You can build low tunnels using wire hoops covered with row covers or plastic sheeting.
Cloches, like glass jars or plastic containers, work perfectly for individual plants. Both methods keep soil warmer and shield crops from freezing temperatures.
Start small with affordable materials like PVC pipes and clear plastic. Place them over cold-hardy vegetables like spinach, kale, or carrots.
You’ll be amazed how much longer you can harvest fresh produce. This approach makes you part of the growing community who maximizes their garden’s potential year-round.
Cut Costs With Seed Saving & Reuse
You can save money by collecting seeds from your healthiest mature plants at season’s end.
Store these seeds in cool, dry places like sealed containers in your refrigerator or a basement shelf.
When spring arrives, plant your saved seeds and watch your garden grow while keeping more money in your pocket.
Collect Seeds From Mature Plants
Saving seeds from your mature plants reduces costs and guarantees you’ll have reliable stock for future growing seasons.
You’re becoming part of a generations-old tradition that connects you to countless gardeners who’ve saved seeds before you.
- Choose fully ripened fruits and vegetables at their peak maturity
- Select the healthiest, most vigorous plants as your seed sources
- Harvest seeds on dry days when moisture won’t compromise quality
- Clean seeds immediately to prevent mold and bacterial growth
- Label everything clearly so you’ll remember what you’ve collected
You’re not just saving money—you’re preserving heritage varieties and building your own sustainable gardening system.
Each seed you collect carries forward the characteristics that made your plants successful.
Your future garden depends on these small but mighty beginnings. Start collecting and join the community of gardeners who understand the value of self-reliance.
Store Seeds In Cool, Dry Places
Proper storage conditions make all the difference in whether your saved seeds will germinate when you’re ready to plant.
Store your seeds in cool, dry places where temperature stays consistently between 32-41°F. Your refrigerator’s back shelf works perfectly for small collections. Use airtight containers like glass jars or sealed plastic bags to prevent moisture damage. Add silica gel packets or uncooked rice to absorb excess humidity.
Don’t forget to label everything clearly with seed type and collection date. Paper envelopes work well too, just guarantee they stay completely dry. Avoid storing seeds near heat sources or in fluctuating temperatures.
Basements often work if they’re dry and cool. Remember, good seed storage means successful gardening next season.
You’re joining countless gardeners who’ve preserved their harvest this way for generations.
Plant Saved Seeds Next Season
One of the most rewarding aspects of gardening is planting seeds you’ve saved yourself, and doing so can dramatically reduce your annual seed expenses.
You’ll feel connected to the growing cycle while building self-reliance.
- Choose open-pollinated varieties – these produce seeds that grow true to type, unlike hybrids
- Select healthy parent plants – save seeds only from your strongest, disease-free specimens
- Harvest at proper maturity – wait until seeds are fully developed and dry on the plant
- Test viability first – place seeds between damp paper towels to check germination rates
- Label everything clearly – include plant name and collection date to avoid confusion
Saving seeds connects you to generations of gardeners who preserved their harvests.
You’re not just cutting costs – you’re participating in an ancient tradition that builds community and food security.
Start small with easy crops like beans or lettuce.
Log Growth Notes to Refine Each Year
When you track your farming progress annually, you’ll notice patterns that reveal what’s working and what isn’t. Keep a simple notebook documenting plant performance, weather conditions, and harvest yields.
Note which varieties thrive in your specific microclimate and which struggle. Record planting dates, germination rates, and growth milestones. This information becomes invaluable for planning future seasons.
You’ll discover which companion plantings boost productivity and which don’t. Tracking helps you identify soil depletion patterns and nutrient needs. Don’t forget to note pest pressures and disease occurrences.
Your growth notes create a personal farming database that improves with each season. Review previous years’ entries before planting to avoid repeating mistakes. This practice connects you to your garden’s unique rhythm and builds confidence in your growing abilities.
Try Vertical Growing for More Space
Vertical growing lets you maximize your harvest without expanding your garden footprint.
You’ll discover how much more you can grow in the same space while creating a thriving garden community right in your backyard.
- Install trellises or cages to support climbing plants like tomatoes and cucumbers
- Use hanging baskets for herbs and strawberries to utilize overhead space
- Build vertical towers with PVC pipes or wooden pallets for leafy greens
- Train vining plants upward instead of letting them sprawl across the ground
- Create living walls with modular planters to grow more in smaller areas
You’re not just saving space—you’re joining countless gardeners who’ve accessed their garden’s full potential.
Vertical growing connects you to a tradition of smart, efficient food production that brings people together through shared harvests and bountiful results.
Join Backyard Grower Groups Near You
Connecting with other gardeners in your area amplifies your growing success while building lasting friendships.
You’ll discover local growing conditions, seasonal tips, and plant varieties that thrive nearby. Search Facebook groups, Meetup.com, or community centers for backyard grower networks.
Don’t wait until you’re an expert – these groups welcome beginners keen to learn. You’ll swap seeds, share harvests, and troubleshoot problems together.
Local nurseries often host gardening clubs too. Bring your questions, photos, or excess produce to share.
You’ll gain confidence faster when learning alongside others facing similar challenges. These connections provide ongoing support through seasons of trial and error.
Your community wants you to succeed, so reach out and join them today.
Conclusion
You’ve got this! Light farming transforms your backyard into a productive oasis with minimal effort. Start small, observe your space, and let nature guide you toward successful harvests. Your garden journey begins with simple steps today.
