

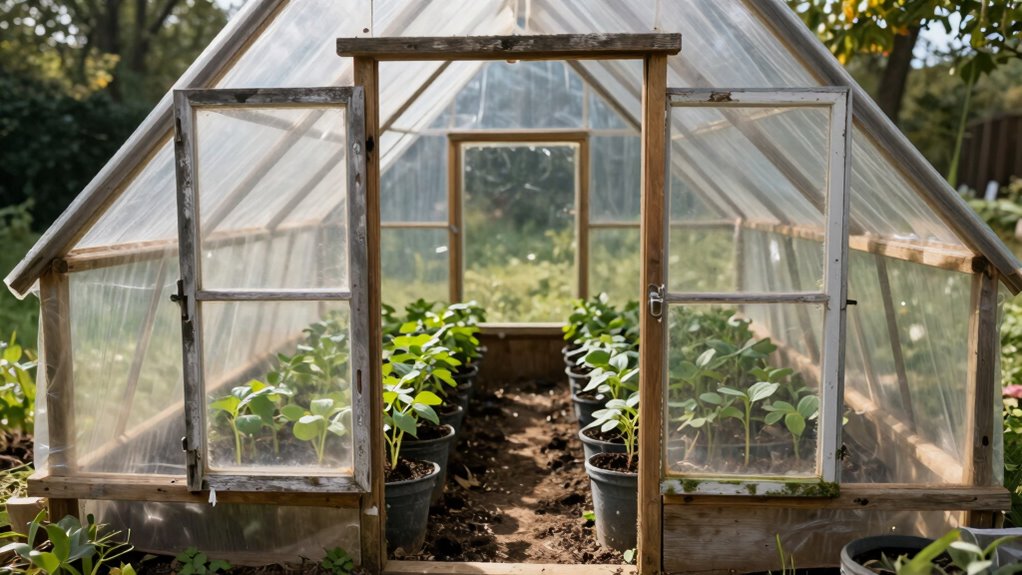
You don’t need thousands of dollars to extend your growing season. Building a simple greenhouse on a budget is entirely possible with the right approach. By choosing cost-effective materials like PVC pipes and plastic sheeting, you can create a functional space that protects your plants year-round. Smart planning and strategic shopping will keep upfront costs minimal while maximizing your investment. Want to know exactly what materials you’ll need and how to avoid common costly mistakes?
Benefits of a Low-Cost Greenhouse
While you might assume that a budget-friendly greenhouse offers limited advantages, building one actually provides several compelling benefits that extend far beyond simple cost savings.
You’ll gain valuable hands-on experience while creating something meaningful for your family. Your utility bills decrease considerably since you’re growing your own produce year-round. You’re not just saving money; you’re investing in sustainable living that reduces your environmental footprint.
Plus, there’s genuine satisfaction in harvesting fresh vegetables and herbs whenever you need them. Building this structure yourself means you understand every component, making future repairs straightforward.
You’re joining a community of self-sufficient gardeners who share knowledge and resources. This project strengthens your connection to nature while providing tangible returns through food production.
You’re creating lasting value for your property and family’s wellbeing.
Essential Tools and Supplies for DIY Builders
Several essential tools and supplies form the foundation of any successful DIY greenhouse project, and gathering these items strategically can save you both time and money throughout the building process.
You’ll need a reliable drill, measuring tape, level, and handsaw for basic construction tasks. Don’t overlook screws, nails, and brackets – these small items become costly when purchased separately.
A good quality staple gun helps secure plastic sheeting quickly. Consider borrowing tools you rarely use. Purchase materials in bulk when possible. Focus on multi-purpose items that serve several functions.
Quality cutting tools prevent mistakes that waste materials. Having the right supplies ready keeps your project moving forward. Smart tool selection prevents frustrating delays and expensive trips back to the store mid-project.
Cost Breakdown: What You’ll Spend Upfront
Your tool collection sets the stage for controlling project costs, and now it’s time to examine exactly what you’ll spend upfront.
Expect to invest $200-$500 for basic materials like PVC pipes, connectors, plastic sheeting, and framing lumber. Don’t overlook essential items: a good drill, measuring tape, level, and utility knife.
You’ll save money buying materials in bulk from salvage yards or online marketplaces. Consider repurposing old windows or doors for ventilation.
Factor in fasteners, screws, and zip ties – these small items add up quickly. Remember that quality tools last longer, reducing replacement costs.
Shop sales at hardware stores and compare prices between vendors. Your upfront investment pays dividends through years of productive growing seasons ahead.
Pick the Perfect Spot for Your Greenhouse
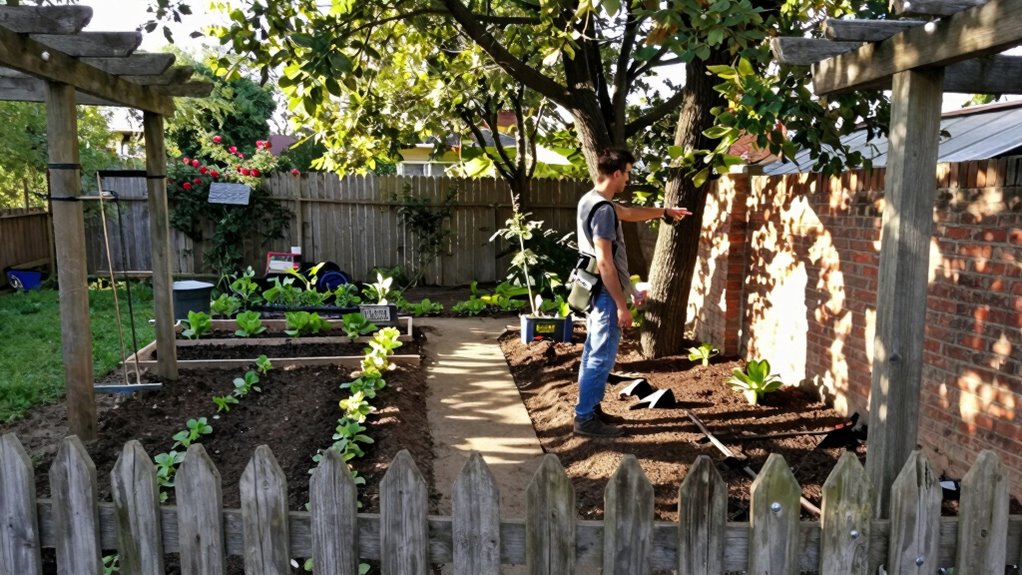
You’ll save money on artificial lighting and heating when you choose a location that gets maximum sun exposure throughout the day.
Look for spots that receive at least six hours of direct sunlight and avoid areas shaded by trees or buildings.
South-facing locations work best since they capture the most sunlight during winter months when your plants need it most.
Optimal Location Selection
Choosing the right spot for your greenhouse can make or shouldn’t be overlooked since it directly impacts your plants’ success and your budget.
You’ll want to select level ground that drains well to avoid costly foundation issues later. Look for areas protected from strong winds, which can damage your structure and increase heating costs.
Consider your water source location—placing your greenhouse near existing plumbing saves money on expensive line extensions. Check for nearby trees or buildings that might block airflow or create problematic shade patterns.
Ascertain you’ve got easy access for supplies and maintenance without trampling delicate plants. Don’t forget to verify local zoning requirements before committing to your chosen spot.
Your perfect location balances practical needs with your specific growing ambitions while keeping expenses minimal.
Sunlight Exposure Planning
Proper sunlight exposure directly affects plant growth and energy costs, making it a critical factor after you’ve identified a suitable location.
You’ll want to position your greenhouse where it receives maximum sunlight throughout the day. South-facing spots typically work best in the northern hemisphere. Avoid areas shaded by buildings, trees, or fences during peak growing hours.
Consider seasonal sun patterns since winter light differs from summer exposure. Morning sun exposure helps plants start photosynthesis early, promoting healthier growth. Track sunlight patterns for several days using a simple compass and notebook. You don’t need expensive tools for this planning stage.
Remember that excessive afternoon heat can stress plants, so some light shade during hottest hours actually helps. Clear any obstructions if possible rather than relocating.
This attention to sunlight placement saves money on artificial lighting and heating costs while maximizing your growing potential.
Frame Materials That Won’t Break the Bank
While PVC pipes and recycled lumber can considerably reduce your greenhouse framing costs, selecting the right materials requires balancing durability with your budget constraints.
You should consider salvaged materials from demolition sites or construction projects. Old fence posts, deck boards, and even discarded metal pipes often work perfectly.
Reclaimed materials not only save money but also add character to your greenhouse. Don’t overlook community resources like Facebook marketplace or Craigslist for free lumber.
Metal conduit pipes offer another affordable option, lasting years with proper maintenance. Composite decking scraps provide rot-resistant framing without premium prices.
Always inspect used materials carefully for structural integrity. Your local recycling center might’ve suitable materials too.
Remember that investing slightly more in quality materials upfront often prevents costly repairs later.
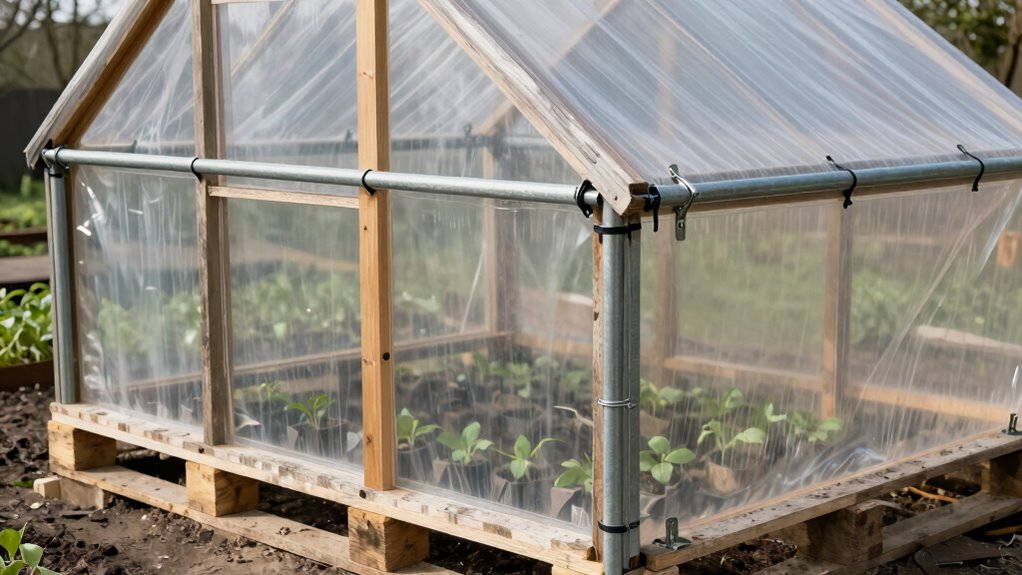
Build a Hoop House With PVC or Wood
You can build an affordable hoop house using either PVC pipes or wood for the frame, depending on your budget and tools.
PVC pipe construction costs less and requires minimal tools, while wooden hoops offer more durability and can use reclaimed lumber.
Both options work well with budget-friendly covering materials like plastic sheeting or old shower curtains.
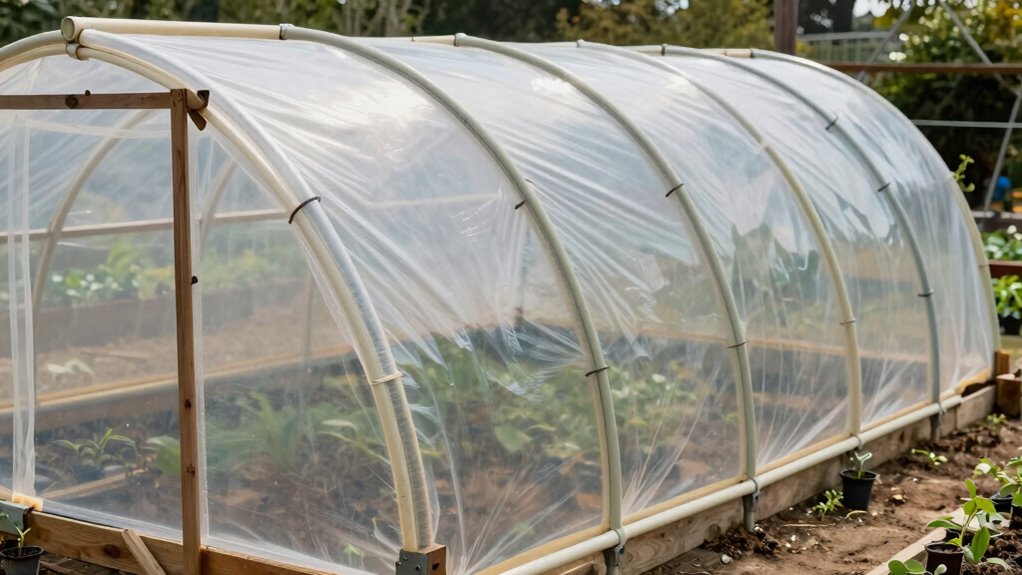
PVC Pipe Frame Construction
A PVC pipe frame costs pennies compared to traditional greenhouse framing materials.
You’ll save hundreds while creating a functional growing space. PVC is lightweight, easy to work with, and surprisingly durable when properly installed.
- 30-40% cost savings over metal or wood frames
- Flexible bending allows easy curved hoop construction
- Quick assembly with simple connectors and zip ties
- Corrosion-resistant PVC won’t rust like metal frames
- Beginner-friendly installation suitable for any skill level
Choose 1-inch diameter PVC pipes for small greenhouses or 1.5-inch for larger structures.
Use rebar anchors to secure vertical supports into the ground. Connect hoops with horizontal PVC pipes or wire.
This budget-friendly approach lets you join the greenhouse gardening community without breaking your wallet. Your plants will thrive in this affordable, effective growing environment.
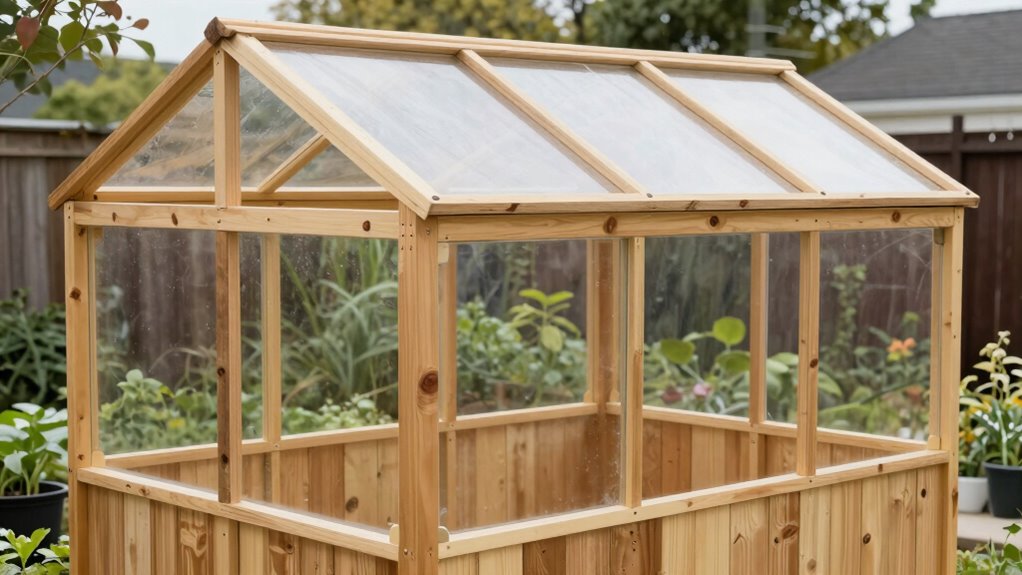
Wooden Hoop Support Options
Wooden hoop supports offer a cost-effective alternative to PVC piping, letting you build a sturdy greenhouse frame using affordable lumber.
You can use 2×4 or 2×6 boards to create curved arches that span your growing space. Cut lumber into identical lengths, then bend and secure the ends to base boards using galvanized screws or bolts.
Cedar and redwood naturally resist rot, making them ideal choices for outdoor structures. If you’re on a tight budget, pressure-treated pine works well too.
Space your hoops 4-6 feet apart for adequate support. Don’t forget to add cross-bracing between hoops for extra stability.
This wooden framework will last years with proper maintenance. You’ll save money compared to buying pre-fabricated metal frames while creating a greenhouse that blends naturally into your garden space.
Budget-Friendly Covering Materials
After constructing your wooden hoop support system, selecting the right covering material becomes your next budget-friendly challenge.
You’ll want materials that trap heat while letting sunlight through, without breaking your wallet.
Consider these cost-effective options:
- Clear plastic sheeting – cheapest choice, lasts one season
- Salvaged windows – free if you’re lucky, excellent insulation
- Recycled greenhouse panels – check Craigslist, Facebook Marketplace
- Thick trash bags – temporary but functional for starters
- Old shower curtains – surprisingly effective, often free
Don’t overlook your local landfill’s reuse area or ask neighbors about discarded materials.
Your community likely has hidden gems waiting for resourceful gardeners like yourself.
Use Polycarbonate Panels for Better Light
Polycarbonate panels deliver exceptional light transmission while costing considerably less than glass alternatives.
You’ll maximize your greenhouse’s growing potential without breaking your budget. These panels filter UV rays while allowing beneficial light through, protecting your plants from harmful radiation.
Installation is straightforward – you can cut them with basic tools and attach them using simple screws or clips. Unlike fragile glass, polycarbonate won’t shatter during storms or accidents.
You’re getting durability plus better insulation properties that help maintain consistent temperatures. Local hardware stores often carry these materials, making them accessible for your project.
Consider twin-wall polycarbonate for enhanced thermal performance. Your plants will thrive under this protective covering, and you’ll appreciate the long-term savings.
This smart choice gives you professional results while keeping costs manageable. You’re building something worthwhile without overspending.
Make the Most of Plastic Sheeting Economically
You can maximize your greenhouse’s effectiveness without breaking the bank by selecting clear plastic sheeting that lets in maximum sunlight.
Install it using a simple frame made from PVC pipes or wooden slats that you can assemble quickly and cheaply.
Make sure to secure all edges properly with clips or weights to prevent heat loss and protect your plants from drafts.
Choose Clear Plastic Sheeting
Clear plastic sheeting represents one of the most budget-friendly options for greenhouse covering, and making smart choices here can greatly reduce your overall project costs.
You’ll want to select sheeting that maximizes light transmission while fitting your budget constraints.
When choosing clear plastic sheeting, consider these key factors:
- Thickness matters: 6-mil sheeting offers good durability without breaking your budget
- UV treatment: Look for sheets rated for 1-4 years UV resistance
- Width availability: Choose widths that minimize seams and waste
- Local supplier options: Check farm supply stores for better pricing
- Seasonal timing: Buy during fall clearance for significant savings
Your community likely has others who’ve faced similar choices, so don’t hesitate to ask about their experiences.
Smart plastic selection keeps your greenhouse functional while staying financially responsible.
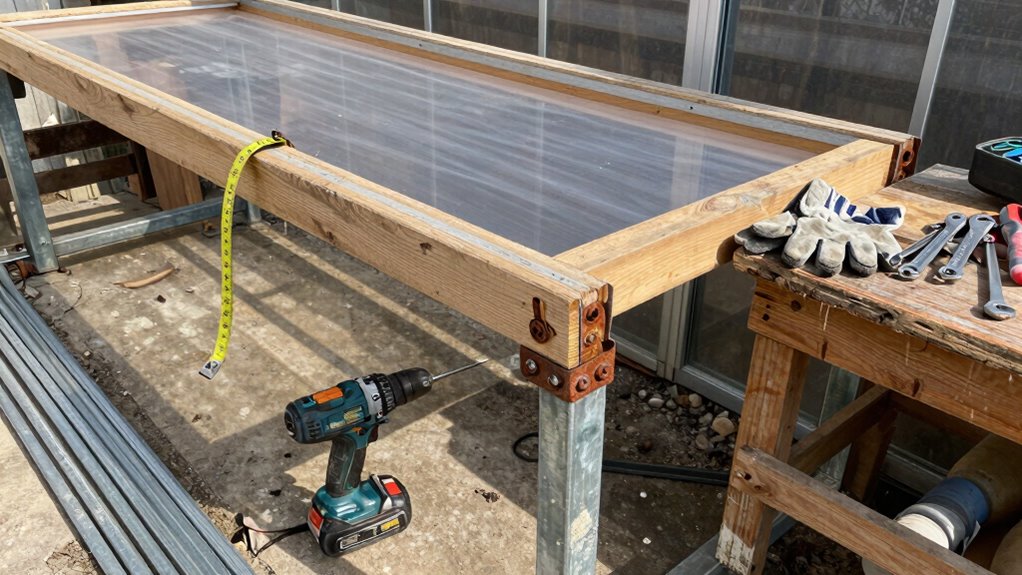
Install With Simple Frame
While clear plastic sheeting provides an affordable covering option, constructing a simple frame that maximizes its effectiveness requires careful planning and smart material choices.
You should opt for PVC pipes or wooden stakes spaced every four feet for structural support. Choose materials that won’t puncture the plastic when temperatures fluctuate. Measure your space carefully before cutting any components.
Create gentle curves rather than sharp angles to prevent stress points. Wooden frames work well but require treated lumber to resist moisture. PVC offers flexibility and costs less upfront.
Make certain your frame design allows for proper ventilation gaps. Don’t forget to account for wind loads in your area. Building a stable foundation matters more than perfect aesthetics. Your frame should feel solid when you push against it.
Test-fit all pieces before committing to permanent assembly. Simple geometry creates strong, economical structures.
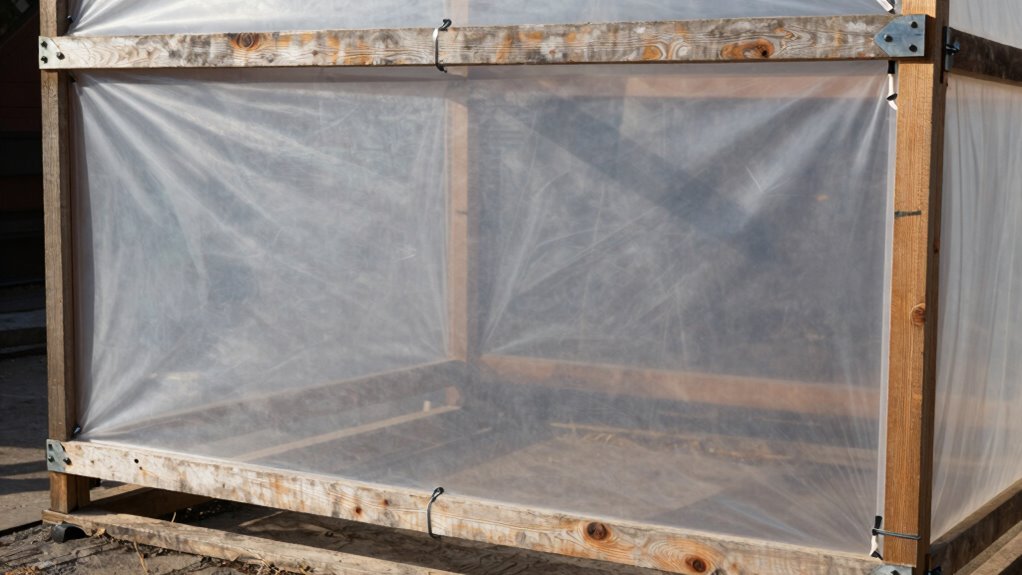
Secure Edges Properly
Proper edge sealing makes or breaks your budget-friendly greenhouse covering. You need to seal those edges tightly to prevent heat loss and keep your plants thriving without wasting money on replacements.
Don’t just staple plastic sheeting loosely – you’ll regret it when wind rips holes in your covering.
Take time to secure every edge properly using these methods:
- Use sandbags or bricks along bottom edges to create instant, adjustable weights
- Apply duct tape over overlapping seams for waterproof barriers
- Install battens or wooden strips to hold plastic tight against frame edges
- Thread rope through grommets for cinching tension evenly across surfaces
- Fold and tuck excess plastic under weights to eliminate flapping loose sections
These techniques maximize your investment while keeping construction costs minimal. Your plants will thank you for the stable environment.
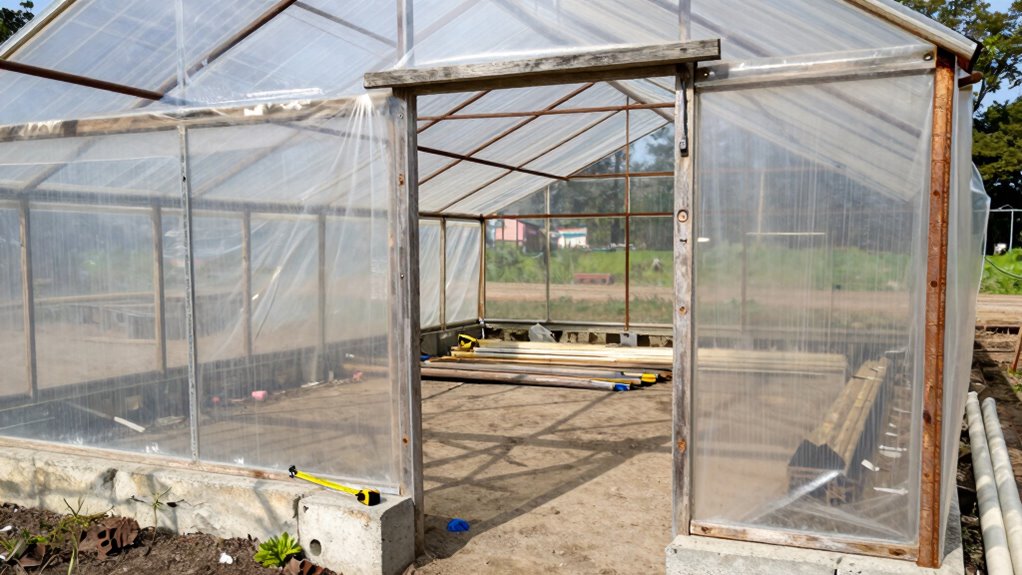
Build a Cheap But Sturdy Foundation
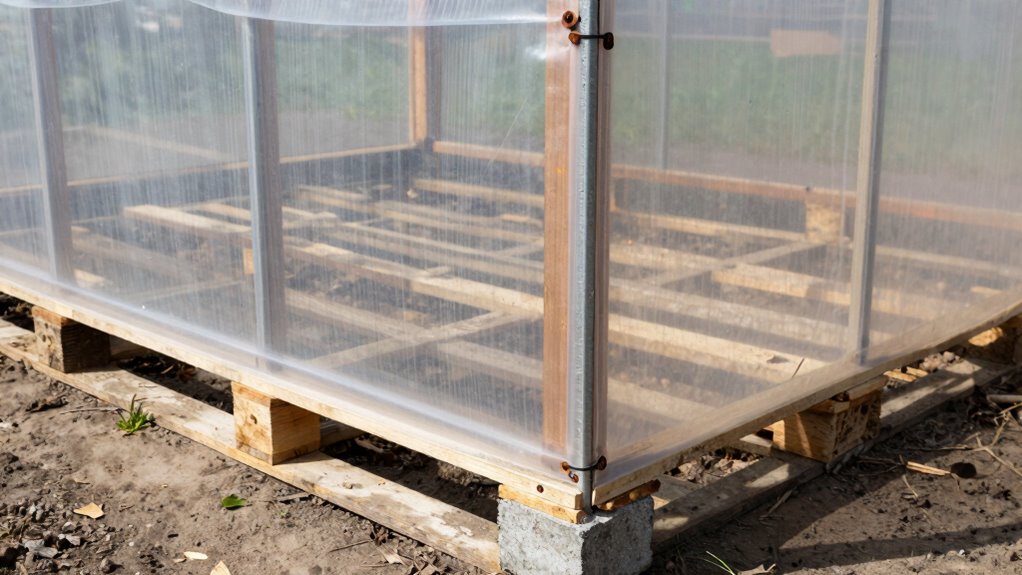
When you’re working with a tight budget, choosing the right foundation for your greenhouse doesn’t have to break the bank. You can create a sturdy base using concrete piers or cinder blocks spaced evenly around the perimeter.
These materials cost pennies compared to poured concrete and provide excellent support. Another budget-friendly option involves laying pressure-treated lumber in a rectangular frame, then filling it with gravel. This method prevents rot while offering solid footing for your structure’s walls.
Don’t overlook reclaimed materials from demolition sites or salvage yards. Old bricks, stones, or even used railroad ties can form a functional foundation when properly arranged.
Whatever materials you select, guarantee they’re level and stable before proceeding with wall construction.
Add Insulation Without High-Cost DIY Methods
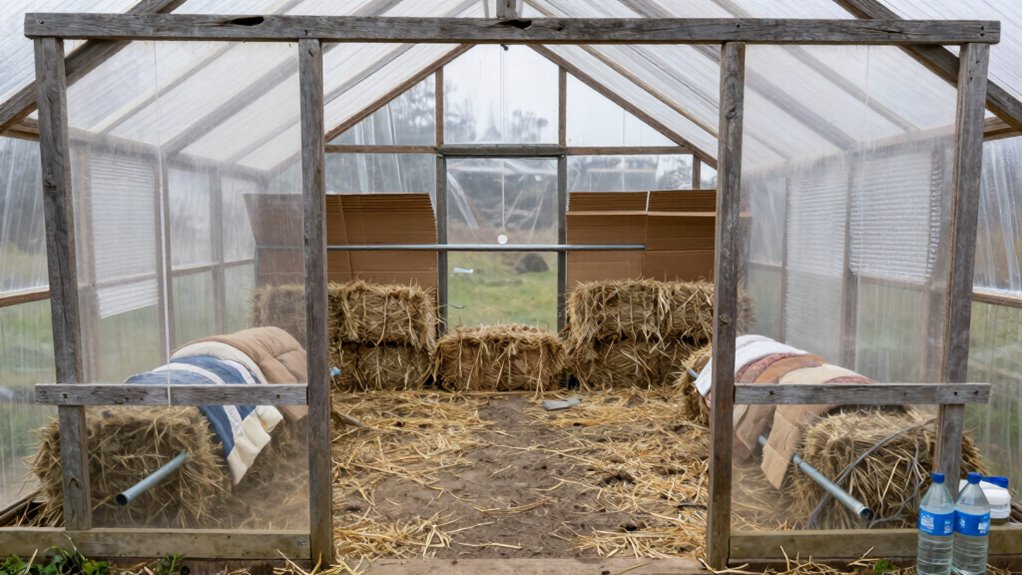
Although insulation typically represents one of the pricier aspects of greenhouse construction, you can effectively retain heat without draining your wallet. Smart insulation choices help you save money while keeping your plants warm.
Consider these budget-friendly insulation methods:
- Bubble wrap creates an effective thermal barrier when attached to interior walls.
- Old blankets or quilts work surprisingly well when draped over plants during frost.
- Cardboard boxes placed around plant containers provide extra warmth.
- Straw bales double as inexpensive insulation when positioned along exterior walls.
- Foam boards from packaging materials offer free insulation when repurposed.
These simple solutions keep your growing space cozy without breaking your budget. You’re joining a community of smart gardeners who make do with what they have.
Keep Air Flow Simple and Cheap
While ventilation often gets overlooked in budget greenhouse projects, you can maintain healthy airflow without expensive fans or complex systems.
You should open windows or roll up sides during warm days to let fresh air circulate naturally. Position your greenhouse doors opposite each other to create cross-ventilation flow. Install inexpensive window props or use wooden blocks to keep openings secure.
Ridge vents along the roof peak let hot air escape automatically. You can add simple exhaust ports near the floor to pull in cool air. Mesh screens prevent pests while allowing air movement.
Remember that proper spacing between plants improves circulation naturally. These basic techniques keep your growing space breathable without breaking your budget or requiring complicated equipment installations.
Winter Heating Tips on a Tight Budget
You can keep your greenhouse warm without breaking the bank by using bubble wrap as insulation, storing heat with thermal mass like water barrels, and lining walls with reflective materials.
These simple strategies work together to trap warmth during cold months while costing almost nothing to implement.
Start with bubble wrap on the north wall and add filled water containers to maximize free heat retention.
Insulate With Bubble Wrap
Bubble wrap isn’t just for protecting packages during shipping – it’s one of the most effective and affordable insulation materials for keeping your greenhouse warm during winter months.
You’ll be surprised how this simple material creates an insulating air pocket barrier that traps heat while letting light through.
- Double-layer installation maximizes insulation by creating additional air pockets between sheets.
- Large bubble sizes work better than small ones for greenhouse applications.
- Attach with UV-resistant tape or clips to prevent winter weather damage.
- Focus on north-facing walls where heat loss is typically greatest.
- Reuse materials yearly by carefully removing and storing during warmer months.
You’re joining countless budget-conscious gardeners who’ve discovered this practical solution.
This method keeps your plants thriving without breaking your wallet, proving that simple ideas often work best for greenhouse heating.
Use Thermal Mass Storage
Thermal mass storage works by collecting heat during the day and slowly releasing it at night when temperatures drop. You can create effective thermal mass using materials you already have.
Fill black plastic bottles with water and place them along your greenhouse walls. The dark color absorbs sunlight while water stores significant heat. Concrete blocks or bricks stacked near plants work similarly. They soak up daytime warmth and radiate it back when needed most.
Don’t overlook old tires filled with stones or sand. These heavy materials retain heat longer than air. Position your thermal mass where sunlight hits directly during peak hours. South-facing walls are ideal spots.
Remember that every gallon of water holds substantial thermal energy, making this method extremely cost-effective for maintaining stable temperatures through cold nights.
Install Heat-Reflective Barriers
One simple approach to retaining heat in your budget-friendly greenhouse involves installing reflective barriers that bounce warmth back toward your plants.
These barriers work by reflecting radiant heat that would otherwise escape through walls and ceilings.
- Use aluminum foil or emergency blankets – Cheap and highly effective at reflecting heat back into your growing space
- Install bubble wrap with reflective side out – Doubles as insulation while reflecting warmth toward plants
- Hang reflective tarps strategically – Position them on north walls and behind heat sources for maximum efficiency
- Recycle space blankets from camping gear – Perfect reflective material that’s lightweight and easy to install
- Create DIY reflective panels – Attach foil to cardboard or foam board for custom-sized heat barriers
These barriers cost pennies compared to heaters while dramatically improving your greenhouse’s thermal performance.
You’ll keep plants healthier through winter without breaking your budget.
Maximize Every Square Foot Inside
When you’re working with limited space, maximizing every square foot inside your greenhouse becomes essential for getting the most value from your investment.
You should install vertical shelving units made from recycled materials like pallets or old bookcases.
Hang baskets from the ceiling beams to grow trailing plants like herbs or strawberries.
Use tiered plant stands to create growing levels without taking up extra floor space.
Position taller plants towards the back where they won’t shade smaller ones.
Consider using hanging shoe organizers for starting seedlings or growing small plants.
You can also utilize the space under benches for storage containers or additional plants.
Every inch counts when you’re growing food for your family.
Protect Plants Without Expensive Gear
Now that you’ve maximized your greenhouse space, protecting your plants doesn’t require costly equipment. You can safeguard your garden with everyday materials and clever techniques that won’t break your budget.
- Use empty plastic bottles as cloches to shield seedlings from frost.
- Repurpose old window screens as protective barriers against pests.
- Create mini cold frames from discarded picture frames and plastic sheeting.
- Wrap plant pots with bubble wrap or old towels for insulation.
- Hang reflective materials like old CDs to deter birds and animals.
These simple solutions keep your plants healthy while saving money.
You’re not just growing plants; you’re joining a community of resourceful gardeners who understand that creativity beats expensive gear every time.
Grow Year-Round With Smart Season Control
While maintaining consistent temperatures can be challenging, you can extend your growing season without expensive heating systems.
Insulate your greenhouse using bubble wrap or old blankets around walls and doors. Create thermal mass with water barrels or concrete blocks that absorb heat during the day and release it at night. Use a small electric fan to circulate air and prevent cold spots.
Monitor temperatures with an inexpensive thermometer and adjust ventilation accordingly. Close vents during cold snaps and open them when temperatures rise.
Consider using row covers or cold frames inside your greenhouse for extra protection during harsh winter months.
These simple strategies keep your plants thriving year-round while keeping costs minimal.
During Construction: Top Things to Avoid
Building a budget-friendly greenhouse requires careful planning to avoid costly mistakes that can derail your project.
You’ll save time and money by steering clear of these common pitfalls that trip up many DIY builders.
- Don’t skip the foundation preparation – uneven ground creates structural problems and drafts that waste heat.
- Avoid using cheap plastic sheeting instead of proper greenhouse film – it tears easily and needs replacing yearly.
- Don’t overcrowd your space with unnecessary features that inflate costs and complicate construction.
- Skip the temptation to cut corners on frame materials – weak structures collapse under weather stress.
- Don’t ignore proper ventilation planning – poor airflow kills plants and creates humidity problems.
From Start to Seedling: A Budget Timeline
Six weeks before your first frost date, you’ll want to have your greenhouse foundation laid and frame assembled to stay on track with a budget-friendly timeline.
Don’t wait until the last minute or you’ll end up paying premium prices for rushed materials and labor. Start shopping for recycled windows or plastic sheeting early when prices drop.
Week one should focus on gathering free or cheap materials from salvage yards and online marketplaces.
By week three, you’ll need your foundation concrete poured or pavers laid.
Week four demands frame assembly complete.
Week five allows for covering installation and ventilation setup.
Finally, week six gives you time for soil preparation and seedling placement before frost hits.
Sticking to this schedule keeps costs low while ensuring your plants thrive.
Conclusion
You’ve got this! A simple greenhouse keeps costs low while maximizing plant growth. Sarah built hers for $200 using PVC pipes and plastic sheeting, growing tomatoes year-round. Focus on proper ventilation, choose your spot wisely, and use recycled materials when possible. Your budget-friendly greenhouse will pay for itself through fresh produce savings. Start small, plan carefully, and watch your garden thrive affordably.
