

Like a steady stream carving through stone, drip irrigation transforms your garden’s watering routine with precision and efficiency. You’ll need to gather essential components first: polyethylene tubing, pressure regulator, emitters, and proper fittings. Before connecting anything, sketch your garden zones and match emitter types to each plant’s specific flow requirements. What’s the first critical mistake most beginners make when placing their drip lines?
Why Use Drip Irrigation in Gardens?
Drip irrigation systems deliver water directly to plant root zones through a network of tubes, emitters, and valves that provide precise moisture control.
You maximize water efficiency while minimizing waste, reducing consumption by fifty to seventy percent compared to traditional sprinkler methods. Plants thrive with consistent hydration, and you prevent overwatering that causes root rot and fungal diseases. You’ll notice improved yields and healthier vegetation when using this targeted approach.
Installation requires minimal technical knowledge, making it accessible for weekend gardeners. You reduce weed growth between planted areas while maintaining ideal soil moisture levels.
Your garden becomes more sustainable and environmentally friendly through reduced water runoff and evaporation.
Gather Essential Tools and Parts First
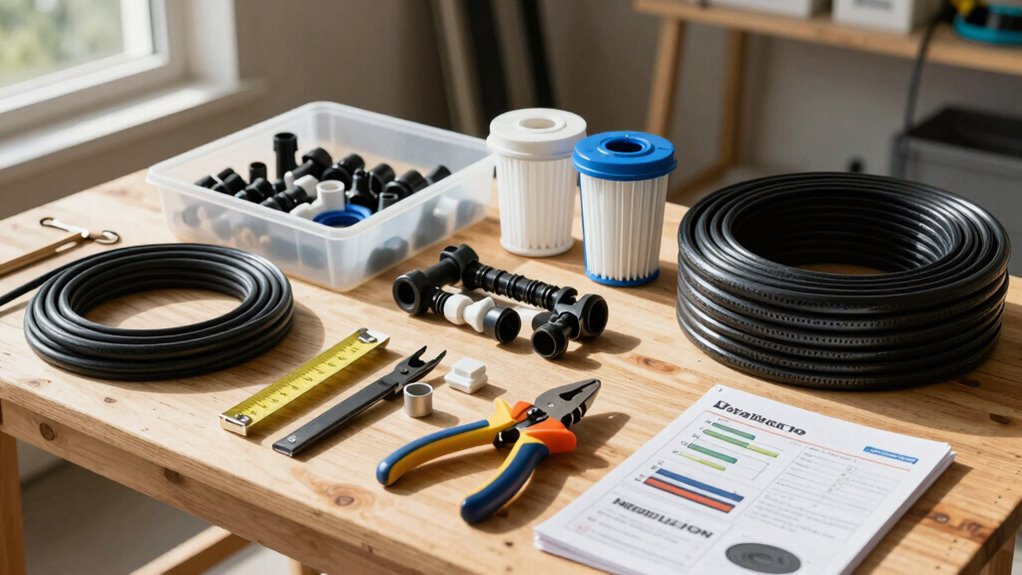
Before you begin installing your drip irrigation system, you’ll need to assemble the necessary components and tools to secure a smooth setup process.
Grab a drill with 3/16-inch bit, adjustable wrench, and tubing cutter.
Essential parts include polyethylene tubing, pressure regulator, backflow preventer, filtration system, emitters, and connectors.
Don’t forget stakes to secure tubing and a timer if you want automated watering.
Purchase fittings like elbows, tees, and end caps for routing water efficiently.
Confirm you’ve got quality barb connectors and clamps for leak-free joints.
Having everything ready prevents frustrating trips mid-installation.
Check your system’s compatibility before purchasing components.
Quality materials promote longevity and peak performance.
You’re building something that’ll nurture your garden for years.
Sketch Out Your Garden Watering Zones
You’ll need to identify each plant’s specific water requirements and group them into distinct watering zones based on their needs.
Map out clear boundaries for each zone, ensuring plants with similar water demands fall within the same designated area.
Plan your emitter placement carefully within each zone to deliver precise water amounts directly to each plant’s root zone.
Identify Plant Water Needs
While planning your drip irrigation layout, identifying each plant’s specific water requirements becomes essential for creating efficient watering zones.
You’ll need to assess individual plant species, their root depth, and moisture preferences to optimize your system’s performance.
- Group plants with similar water requirements together
- Research each species’ gallon-per-hour consumption rate
- Consider seasonal water demand fluctuations
- Account for soil drainage characteristics
- Factor in local climate conditions and rainfall patterns
Creating distinct watering zones based on these factors guarantees your drip irrigation system delivers precise amounts of water where needed.
This approach prevents overwatering some areas while underwatering others, ultimately promoting healthier plant growth and reducing water waste throughout your garden installation.
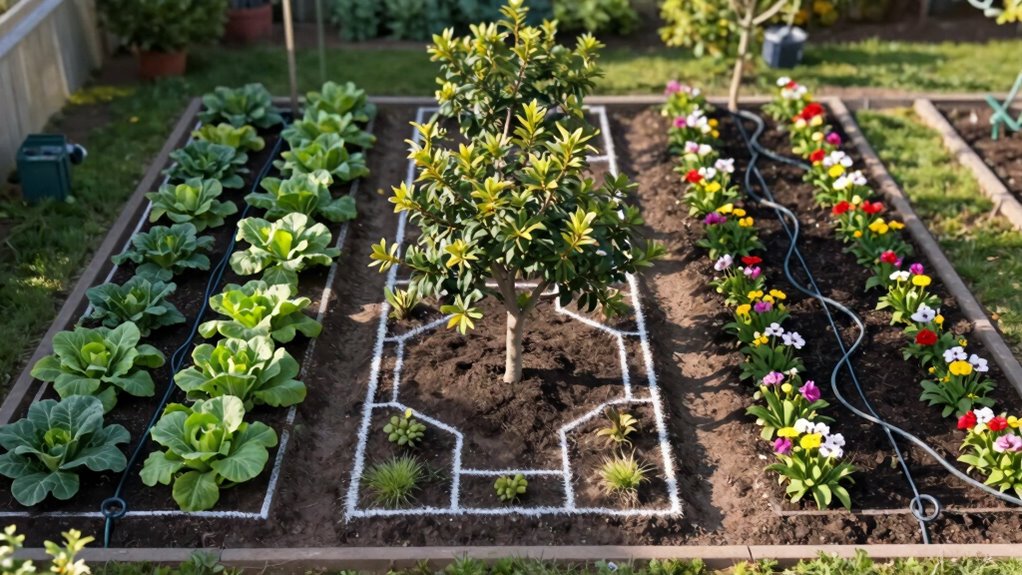
Map Out Zone Boundaries
After determining your plants’ individual water requirements, sketching out distinct watering zones becomes the critical next step in designing an efficient drip irrigation system.
You’ll need to group plants with similar water needs together into separate zones. Use graph paper or digital mapping tools to draw clear boundaries around each zone. Consider plant spacing, root zones, and water distribution patterns when defining these areas.
Label each zone according to its specific watering requirements – high, medium, or low water needs.
Account for slope variations, soil types, and sun exposure that might affect water retention within each zone. Create zones that correspond to your irrigation timer capabilities, typically limiting each zone to plants with identical watering schedules.
This systematic approach guarantees your drip system delivers precise water amounts where needed.
Plan Emitter Placement
Each zone requires strategic emitter placement to confirm uniform water distribution across your garden’s diverse plant types.
You’ll need to account for varying water requirements and root zones to enhance system efficiency.
- Calculate emitter spacing based on soil type and plant water needs
- Position emitters 6-12 inches from plant bases for ideal absorption
- Install multiple emitters for large plants with extensive root systems
- Adjust flow rates using pressure regulators for different plant zones
- Document emitter locations on your garden map for future maintenance reference
Place emitters closer together in sandy soils where water penetration is shallow.
Increase spacing in clay soils that retain moisture longer.
Group plants with similar water requirements within each zone.
Consider installing adjustable emitters for flexibility during different growing seasons.
Your careful planning confirms every plant receives adequate hydration.
Match Plants to Emitter Types and Flow Rates
Matching plants to appropriate emitter types and flow rates guarantees ideal water delivery and plant health in your drip irrigation system.
You must consider each plant’s water requirements when selecting emitters. Low-flow emitters (0.5-1 gallon per hour) work best for shallow-rooted plants like herbs and annuals. Medium-flow emitters (1-2 gallons per hour) suit most vegetables and small shrubs. High-flow emitters (2-4 gallons per hour) are necessary for large shrubs and trees.
Match emitter spacing to plant root spread – closer spacing for vegetables, wider intervals for established woody plants. Pressure-compensating emitters maintain consistent flow rates across varying elevations.
You should group plants with similar water needs on the same drip line. Calculate total system flow by adding individual emitter rates. This prevents overwatering delicate plants while ensuring adequate moisture for heavy feeders.
Your system’s efficiency depends on these critical matching decisions.
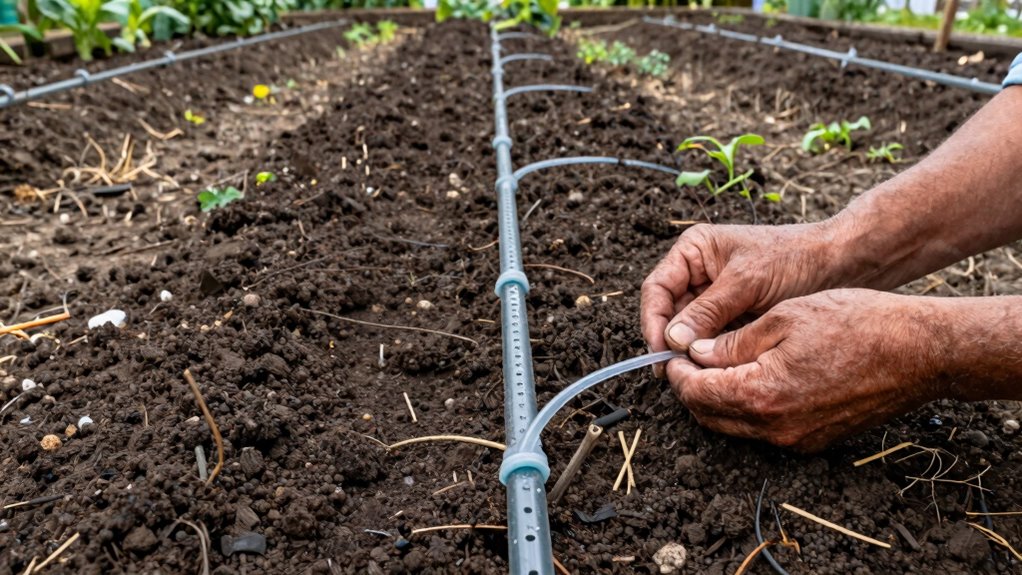
Place Drip Lines Near Root Zones
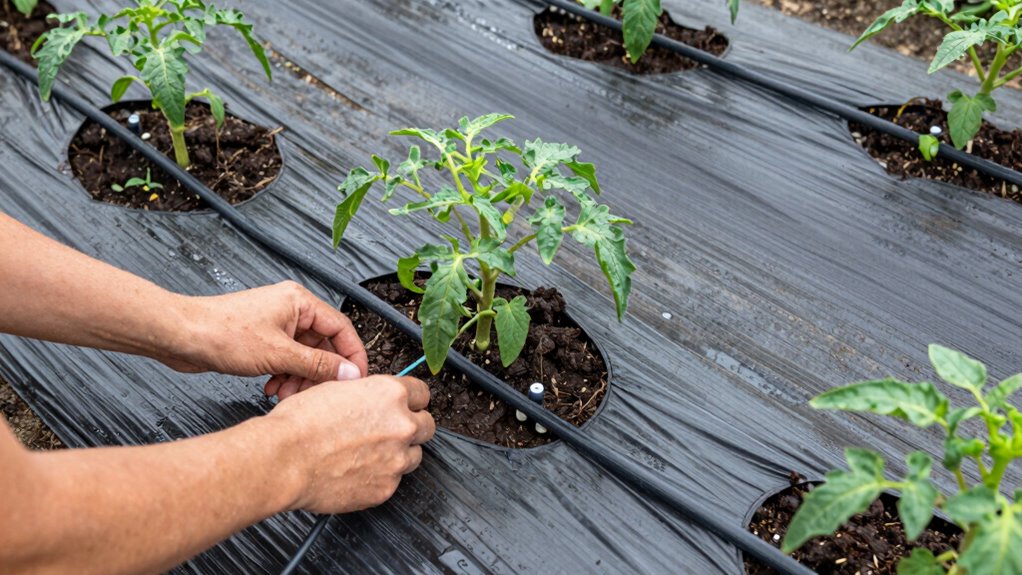
Proper emitter selection from the previous step directly influences where you position drip lines for peak water delivery. You must place emitters directly above or slightly beyond plant root zones to maximize water uptake efficiency.
- Position emitters 6-12 inches from plant stems for shallow-rooted species.
- Install multiple emitters around mature tree drip lines rather than single centralized locations.
- Space emitters according to soil type: closer together in sandy soils, farther apart in clay soils.
- Adjust emitter placement depth based on seasonal root growth patterns and frost considerations.
- Verify adequate coverage by mapping root spread using plant species guidelines.
Accurate positioning guarantees water reaches active root systems where nutrient absorption occurs. You achieve best irrigation efficiency when drip lines align with primary root zones, reducing waste while promoting healthy plant development through targeted moisture delivery.
Test Tap Pressure and System Capacity
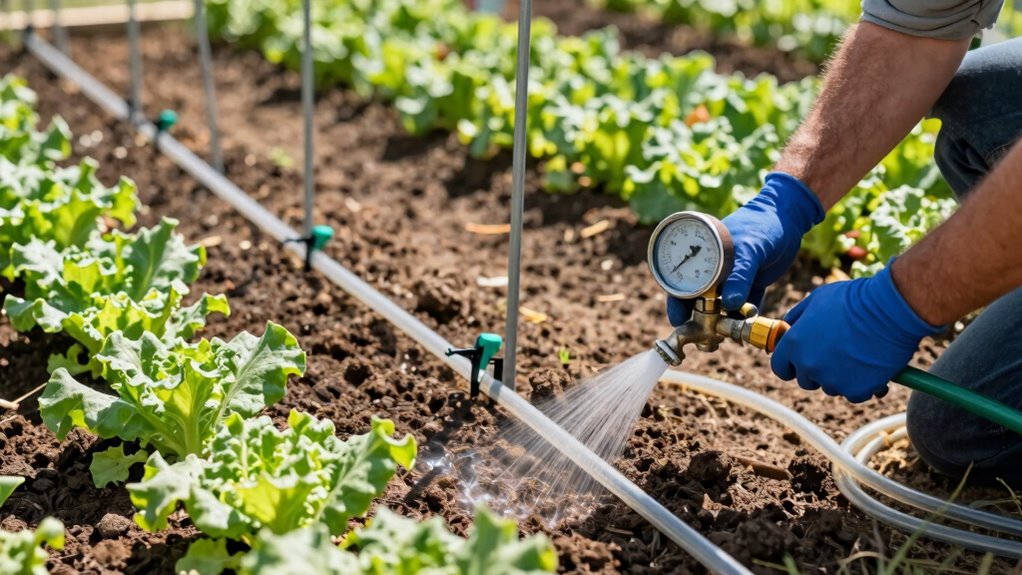
Before you connect your drip irrigation system to a water source, you must verify that your tap pressure and system capacity meet the requirements for excellent performance.
Test water pressure using a pressure gauge attached directly to your outdoor spigot. Ideal drip system operation requires 20-50 PSI pressure.
Measure your water flow rate by timing how long it takes to fill a one-gallon container. Most residential systems need 1-2 gallons per minute for effective irrigation.
If pressure exceeds 50 PSI, you’ll need a pressure regulator. Low pressure situations may require a booster pump.
Calculate your total system demand by adding up all emitter flow rates. Confirm your water source can supply this demand continuously.
Document these measurements for future reference.
Connect Faucet or Hose to Control Valve
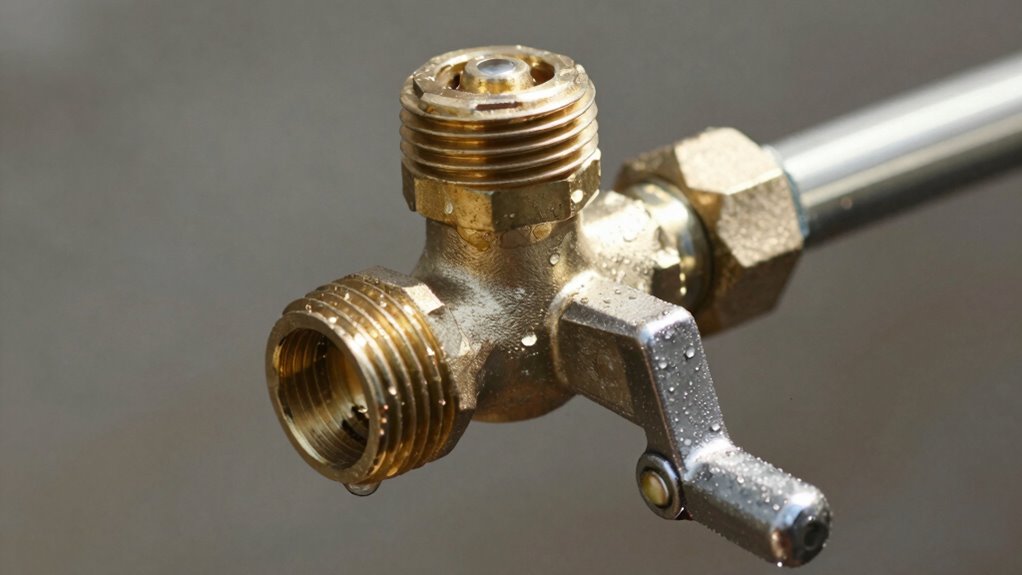
You’ll need to select a control valve that matches your faucet or hose connection type to guarantee proper compatibility.
Secure all hose connections using appropriate fittings and clamps to prevent leaks during operation.
Test the water pressure after connecting to verify the system maintains adequate flow rates for your drip irrigation setup.
Choose Compatible Valve Type
When connecting your drip irrigation system to a water source, selecting the correct valve type guarantees compatibility between your faucet or hose and the control valve.
You’ll need to match thread types and sizes precisely to prevent leaks and ascertain proper water flow.
Your valve selection impacts system performance, so consider these critical factors:
- Thread compatibility: Match male/female threads between faucet and valve connections
- Pressure rating: Verify valve handles your water source’s PSI requirements
- Flow capacity: Select valve size that accommodates your system’s gallons-per-minute needs
- Material durability: Choose brass or plastic valves based on your climate conditions
- Connection type: Confirm quick-connect, threaded, or compression fittings work with your setup
Making the right valve choice prevents future headaches and assures your irrigation system operates efficiently.
Secure Hose Connections
With your compatible valve selected, attach the faucet or hose to the control valve using appropriate fittings and techniques.
Thread the connection clockwise until hand-tight, then use adjustable pliers to secure an additional quarter to half turn.
Apply Teflon tape to male threads before connecting to prevent leaks.
Confirm fittings match your valve’s specifications – adapters may be necessary for different connection types.
Check that washers and O-rings are properly seated within fittings.
Tighten compression fittings by hand first, then use a wrench to avoid over-tightening.
Verify all connections are secure before proceeding.
Properly installed connections prevent system failures and water waste.
You’re joining a community of successful irrigation installers who prioritize precision.
Your system’s reliability depends on these critical connection points.
Test Water Pressure
Having secured all hose connections to your control valve, the next step involves verifying sufficient water pressure before proceeding with drip irrigation installation.
You’ll need to connect your faucet or hose to the control valve inlet.
- Turn on water supply gradually to prevent sudden pressure surges.
- Observe pressure gauge readings for consistent flow measurements.
- Check for leaks around all threaded connections and fittings.
- Verify pressure remains steady at 20-30 PSI ideal range.
- Document baseline pressure numbers for future system reference.
Proper water pressure guarantees your drip irrigation system operates efficiently.
Low pressure causes inadequate water distribution, while excessive pressure damages emitters and tubing.
Test different flow rates by adjusting your faucet valve.
Make pressure adjustments using built-in regulators.
Confirm all connections remain watertight during testing.
Record your final pressure settings. This baseline data proves invaluable when troubleshooting future irrigation issues or expanding your system.
Only proceed once you’ve achieved stable, suitable pressure readings.
Install Filter and Pressure Regulator Upfront
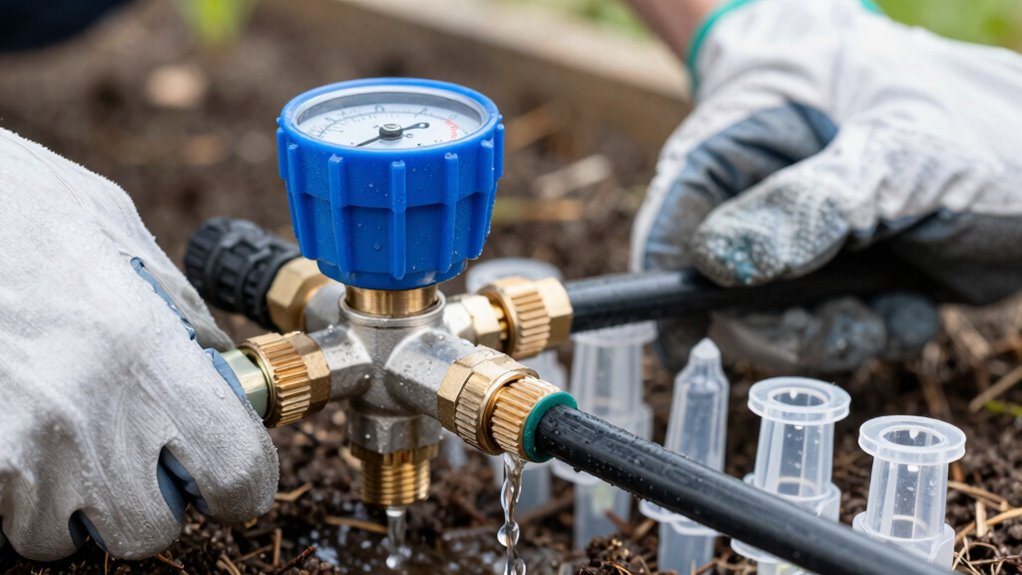
Before connecting any tubing or emitters, you’ll want to install a filter and pressure regulator at the water source to protect your drip irrigation system from debris and excessive pressure.
Thread the filter onto your faucet or connection point first, ensuring you wrap Teflon tape around the threads for a watertight seal. The pressure regulator installs downstream from the filter, typically using quick-connect fittings or threaded connections.
These components prevent clogging from sediment and maintain ideal operating pressure, usually between 25-30 PSI for most drip systems. Don’t skip this step, as contaminants will quickly block your emitters and tubing.
Make sure both components are rated for your system’s flow rate and pressure requirements. Test the assembly by slowly turning on the water supply.
Set Down Drip Tubing Smoothly
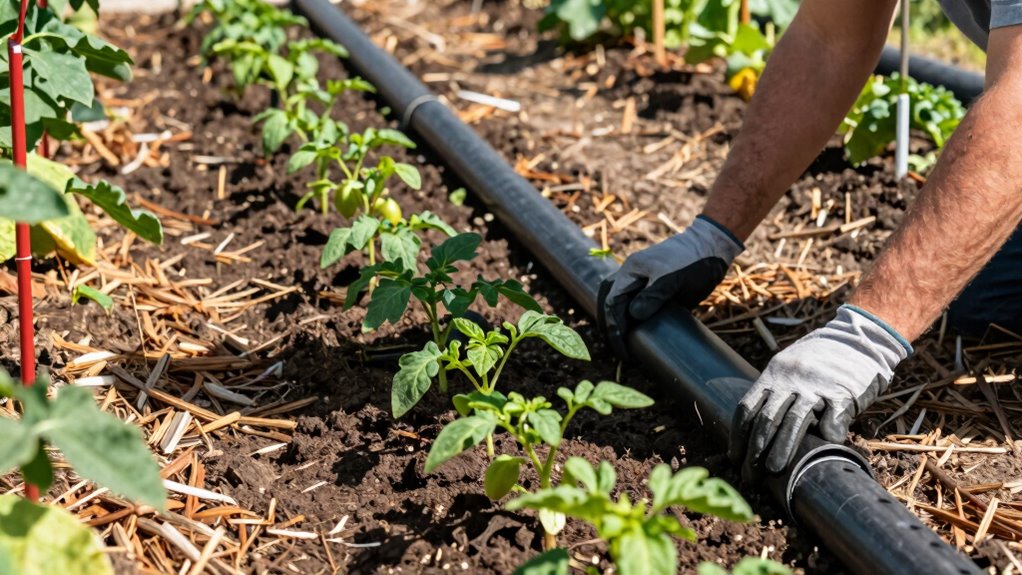
Installation of the drip tubing requires careful handling to prevent kinks and damage. You’ll want to lay the tubing smoothly across your garden bed, maintaining consistent spacing between runs. Avoid dragging the tubing across sharp objects or rough surfaces that could compromise the integrity of the material.
Keep these key points in mind:
- Uncoil tubing completely before installation to eliminate residual stress
- Maintain manufacturer-specified spacing between parallel runs
- Support tubing at regular intervals using stakes or clips
- Inspect tubing visually for defects before final placement
- Guarantee smooth curves around obstacles rather than sharp bends
Proper tubing placement guarantees uniform water distribution and system longevity. Your careful attention to detail during this phase prevents common issues like uneven watering patterns and premature system failure that frustrate many DIY installers.
Anchor Lines Firmly Without Kinks

You must guarantee anchor points properly to prevent line movement that causes kinks and system failures.
Install stakes or clips at regular intervals along the drip tubing to maintain straight, taut lines without excessive tension.
Proper anchoring guarantees uniform water distribution and prevents damage from expansion and contraction cycles.
Secure Anchor Points Properly
Properly secured anchor points prevent system failure and guarantee consistent water delivery throughout your drip irrigation setup. You must anchor tubing at regular intervals using appropriate fittings and stakes.
- Position anchors every 2-3 feet along main supply lines.
- Use plastic or metal stakes designed specifically for irrigation systems.
- Drive stakes completely into soil at 45-degree angle away from tubing.
- Secure tubing tightly against stakes using zip ties or specialized clamps.
- Check anchor placement after initial installation and following heavy rainfall.
Your system’s reliability depends on proper anchoring technique. Loose tubing creates stress points that lead to leaks and reduced water pressure.
Don’t overlook this critical step.
Avoid Kinks During Installation
When routing drip irrigation lines, guarantee tubing follows smooth curves rather than sharp bends that restrict water flow. You’ll prevent kinks by maintaining minimum bend radii of six inches during installation.
Secure anchor points every two to three feet using plastic stakes or clips that hold tubing firmly without crushing it.
Route tubing along gentle contours, avoiding areas where ground movement might create stress points. When shifting between different elevations, use vertical risers instead of sharp horizontal bends. Check that connections fit properly before backfilling.
Monitor tubing tension during installation, ensuring lines remain taut but not overly stretched. You’ll achieve ideal performance by maintaining consistent spacing between anchor points and avoiding excessive slack that leads to kinking under pressure.
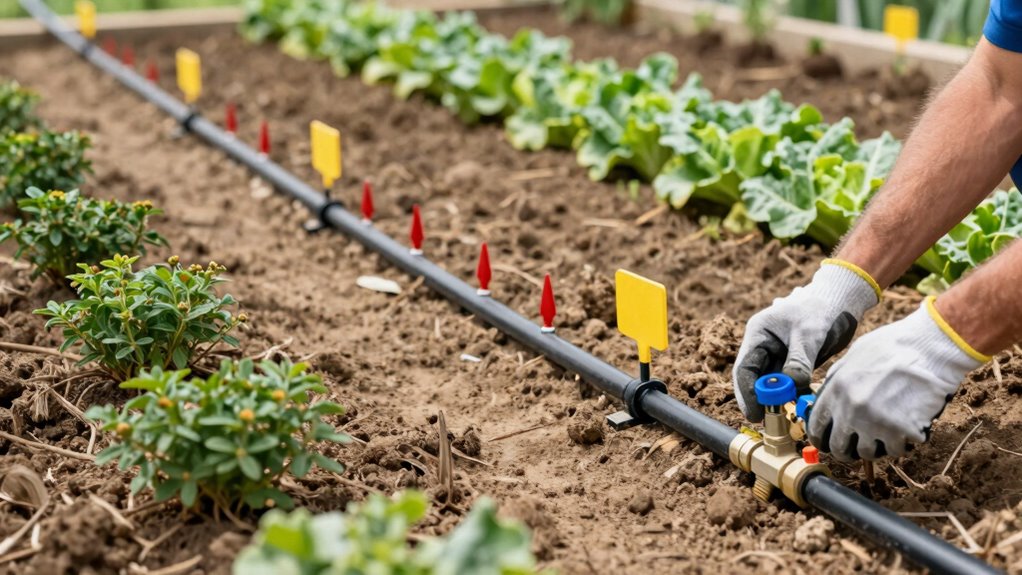
Attach Emitters Evenly Across Zones
Installing emitters at consistent intervals guarantees uniform water distribution across each irrigation zone.
You’ll achieve ideal plant hydration when water reaches every area systematically rather than concentrating in specific spots.
- Space emitters 12-18 inches apart for most garden applications
- Use pressure-compensating emitters for uneven terrain
- Install emitters at soil level, not elevated above plants
- Match emitter flow rates to your system’s water capacity
- Mark emitter locations before making final connections
Position each emitter so it delivers water directly to root zones where plants absorb moisture most efficiently.
Avoid placing emitters too close to stems, which can cause rot, or too far away, creating dry spots.
Your system’s effectiveness depends on this precise spacing strategy.
Run Initial Leak Detection Checks
After positioning emitters according to your zone specifications, you must verify system integrity before burying components or covering them with mulch.
Turn on the water supply gradually to avoid pressure surges that could damage fittings. Inspect every connection point, including tubing joints, emitter attachments, and filter housing seals. Look for moisture around fittings, listen for hissing sounds indicating small leaks, and watch for irregular water flow patterns.
Check pressure regulators and backflow preventers for proper operation. Examine the entire system visually from multiple angles. Don’t assume everything functions correctly just because water flows. Minor dripping can indicate significant issues that worsen over time.
Address any problems immediately by tightening connections or replacing faulty components. Running these checks prevents costly repairs and guarantees your system operates efficiently. Document any adjustments made during this process for future reference.
Adjust Flow Per Area Manually
You must manually adjust flow rates per area to match your plants’ specific water requirements and soil absorption capacity.
Fine-tuning your drip irrigation system guarantees ideal water distribution and prevents both under and over-watering scenarios.
- Calculate your plants’ water needs based on species, size, and growth stage
- Measure soil infiltration rates to determine appropriate emission times
- Adjust emitter flow rates using pressure regulators and flow control valves
- Monitor plant response and soil moisture levels to verify proper hydration
- Document your settings for future reference and system enhancement
Precision adjustments create uniform moisture distribution across different zones.
You’ll achieve better plant health while maximizing water efficiency through careful manual calibration.
Avoid These Setup Errors for Better Performance
You must maintain proper spacing between emitters to guarantee uniform water distribution across your irrigation zone.
Selecting incorrect tubing lengths will compromise system pressure and flow rates, so you’ll need to calculate distances accurately before installation.
Your hole punching technique directly affects emitter performance, making precision essential for ideal system operation.
Proper Spacing Between Emitters
Proper emitter spacing directly affects your drip irrigation system’s efficiency and plant health. You must calculate distances based on soil type, plant requirements, and emitter flow rates to avoid water waste and inadequate coverage.
- Soil absorption rate determines how far water travels horizontally, requiring closer spacing in sandy soils.
- Plant root zone dimensions dictate emitter placement to guarantee adequate moisture distribution.
- Emitter flow rates (gallons per hour) influence spacing intervals for uniform water delivery.
- Slope considerations demand tighter spacing on inclines to prevent runoff and dry spots.
- Crop type requirements vary notably, with vegetables needing more frequent emitters than trees.
You should measure carefully and adjust spacing according to these factors. Incorrect placement creates inefficient watering patterns, leading to plant stress and increased maintenance costs.
Correct Tubing Length Selection
Selecting the correct tubing length requires careful calculation of your system’s total demand and layout dimensions.
You’ll need to measure distances between your water source, main line, and each plant location accurately. Standard drip tubing comes in 200-foot rolls, but you should purchase based on your specific garden’s linear footage requirements.
Account for extra length needed for connections, fittings, and potential expansion. Don’t forget to include space for pressure regulation and filtration equipment. Your tubing must accommodate maximum flow rates without significant pressure loss.
Measure twice and cut once – excess tubing creates unnecessary friction losses. Proper length selection prevents system inefficiencies and guarantees uniform water distribution throughout your entire irrigation zone.
Accurate Hole Punching Technique
Every drip irrigation installation demands precise hole punching techniques to confirm ideal system performance and prevent common setup errors.
You’ll achieve optimal results by mastering these critical techniques that directly impact your system’s efficiency and longevity.
- Use a sharp, clean punch tool designed specifically for irrigation tubing to prevent tearing
- Mark hole locations accurately with a measuring tape before punching to maintain proper emitter spacing
- Punch holes at a 90-degree angle to confirm straight insertion of emitters and tubing connectors
- Avoid punching too close to tubing ends or existing holes to maintain structural integrity
- Create holes slightly smaller than your emitter barbs for secure, leak-free connections
These precise hole punching methods prevent costly mistakes like uneven water distribution, system leaks, and emitter failures that compromise your entire irrigation setup.
Clean Filters Regularly, Check Monthly
One essential maintenance task that keeps your drip irrigation system running efficiently is cleaning the filters monthly.
You should shut off the water supply before removing filter components. Disassemble the filter housing carefully, noting how parts fit together. Rinse mesh filters under clean water, scrubbing gently to remove debris. Inspect filter elements for damage or excessive wear that compromises performance. Replace worn filters immediately to prevent system failure.
Check pressure regulators and flow controls during this monthly routine. Reassemble components in correct sequence, ensuring proper sealing. Turn water supply back on gradually to avoid pressure surges.
Record maintenance dates and filter conditions in your system log. This regular attention prevents clogging, maintains ideal water distribution, and extends equipment lifespan while ensuring your irrigation investment continues delivering reliable performance season after season.
Drain Lines Before Freezing Temperatures Arrive
When freezing temperatures approach, you must drain your drip irrigation lines to prevent damage from expanding ice. Water left in polyethylene tubing expands when frozen, causing cracks and system failure. Drain your lines completely before temperatures drop below 32°F.
- Shut off main water supply valve completely
- Open all manual drain valves at system’s lowest points
- Remove end caps from drip lines to allow water evacuation
- Use compressed air at low pressure (20-30 PSI) to blow out remaining water
- Store exposed components indoors if temperatures drop markedly
You should also disconnect and store any quick-connect fittings.
Empty pressure regulators and filter housings completely.
Check manufacturer specifications for your specific system’s winterization requirements.
Proper drainage prevents costly repairs and extends your irrigation system’s lifespan considerably.
Troubleshoot Poor Flow or Blocked Valves
Poor flow or blocked valves often result from debris accumulation, mineral buildup, or improper system maintenance during seasonal changes.
You’ll need to isolate the problem area by checking pressure regulators, filters, and individual emitters. Start by shutting off the main water supply and opening drain valves to release pressure. Remove and inspect filter screens for clogs, cleaning them with mild acid solution if needed.
Check solenoid valves for mineral deposits that prevent proper sealing. Disassemble components carefully, noting their orientation for reassembly. Use compressed air or reverse flushing to clear blockages from tubing. Replace worn O-rings and gaskets that cause pressure drops.
Test system pressure after repairs. Regular quarterly maintenance prevents most flow issues. Keep detailed records of repairs to identify recurring problems and track component lifespan for proactive replacements.
Conclusion
You’ll find that installing drip irrigation requires precision, not guesswork. Ironically, the “simple” system demands meticulous attention to emitter placement, pressure regulation, and filtration—skipping these technical details guarantees you’ll master the art of flooding your garden inefficiently instead.
