

You need to locate studs, choose proper anchors, and mark precise bracket placements when installing heavy shelves on drywall. These foundational steps determine whether your installation succeeds or fails catastrophically. Standard drywall simply cannot support significant weight without reinforcement techniques that most people overlook. Understanding the difference between toggle bolts and molly bolts becomes essential when you realize that improper anchor selection causes most shelf failures. Before you drill that first hole, consider what happens when gravity meets inadequate support systems.
Why Drywall Requires Special Mounting Techniques

Drywall’s hollow core and brittle gypsum composition demand specialized mounting approaches that differ markedly from solid wall materials. You can’t rely on traditional wood-screwing methods because gypsum crumbles under stress.
Drywall’s paper-faced surface offers little holding power for heavy loads. You’ll need hollow-wall anchors that expand behind the drywall, distributing weight across a larger area. Avoid cheap plastic anchors that strip easily.
Toggle bolts, molly bolts, or heavy-duty sleeve anchors provide superior holding strength. You must match anchor size to your shelf’s weight requirements. Don’t guess—calculate the load-bearing capacity per anchor.
Multiple smaller anchors often work better than fewer large ones. Proper anchor installation prevents drywall damage and guarantees your shelves stay securely mounted without pulling through the wall surface.
How to Find Wall Studs for Shelf Support
You’ll need to locate wall studs accurately before mounting heavy shelves, since drywall alone can’t support significant weight without proper anchoring.
Your first approach should involve using a stud finder device, which detects changes in wall density behind the drywall surface.
Manual detection methods and proper confirmation techniques will verify you’ve identified legitimate stud locations rather than false positives.
Using A Stud Finder Device
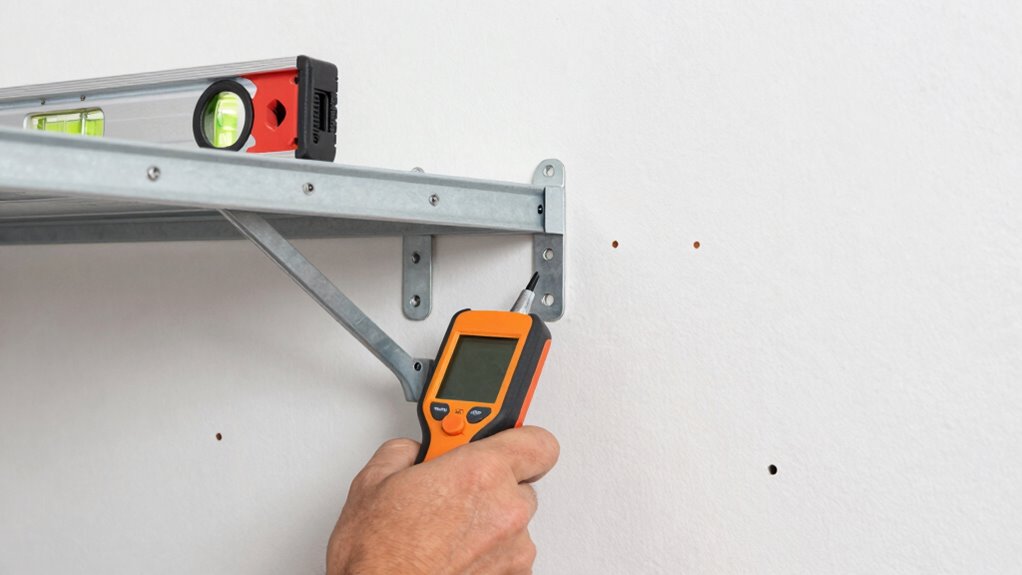
When installing heavy shelves on drywall, locating wall studs becomes vital since these vertical supports provide the necessary anchoring points to handle substantial weight loads. You’ll want to invest in a reliable electronic stud finder for accurate detection.
- Calibrate your device against a known stud location to guarantee precise readings throughout your project.
- Scan horizontally across the wall in slow, steady motions while maintaining consistent pressure.
- Mark both edges of each stud you locate to establish the full width and center point for mounting.
- Verify findings by checking multiple horizontal lines at different heights to confirm stud placement.
Modern stud finders use electronic sensors that detect density changes behind drywall. You’re not just finding wood – you’re identifying the structural framework that’ll support your heavy shelves safely.
Take your time with this vital step.
Manual Wall Stud Detection Methods
While electronic stud finders are common, you can locate wall studs manually using specific techniques that rely on identifying structural patterns behind drywall.
Start by measuring 16 or 24 inches from a known corner, since studs typically follow these standard spacing intervals.
Tap lightly along the wall and listen for solid thuds versus hollow sounds—studs create denser acoustic responses.
Use a strong magnet to detect screw heads or nails embedded in wooden framing.
Check electrical outlets and switches, as they often sit adjacent to studs.
Run your knuckles firmly across the surface, feeling for subtle texture changes where drywall compound covers stud edges.
These manual methods work effectively when electronic devices fail or aren’t available.
Confirming Stud Locations Properly
Although electronic stud finders offer quick results, confirming stud locations properly requires a systematic approach that combines multiple detection methods for maximum accuracy.
You shouldn’t rely solely on one detection method since drywall inconsistencies can produce false readings.
- Knock testing: Tap firmly along the wall and listen for solid thuds versus hollow sounds, marking junctions where density changes occur.
- Magnetic detection: Use a strong magnet to locate steel fasteners or metal stud components embedded in wooden framing.
- Measuring intervals: Standard stud spacing occurs every 16 or 24 inches, so measure from known corners or outlets to predict positions.
- Drilling confirmation: Create small test holes at suspected stud locations to physically verify wood or metal behind drywall.
Always cross-reference multiple detection points before committing to shelf anchor placement.
How Much Weight Can Your Shelf Actually Hold?
You’ll need to calculate your shelf’s maximum weight capacity based on the type of drywall anchors or stud connections you’re using, since standard drywall can only support 50-100 pounds per anchor without proper reinforcement.
Your actual load limit depends on whether you’re hitting studs, using toggle bolts, or relying on hollow-wall anchors, each method offering considerably different support capabilities.
Always factor in a 25% safety margin below the rated capacity to prevent catastrophic failure when mounting heavy items like books, equipment, or decorative objects.
Maximum Weight Limits
When installing heavy shelves on drywall, understanding the maximum weight limits is essential because exceeding these thresholds can lead to dangerous failures.
You’ll want to evaluate several critical factors before loading your shelves.
- Drywall thickness matters: Standard ½-inch drywall supports 5-10 pounds per anchor, while ⅝-inch drywall handles 10-15 pounds safely
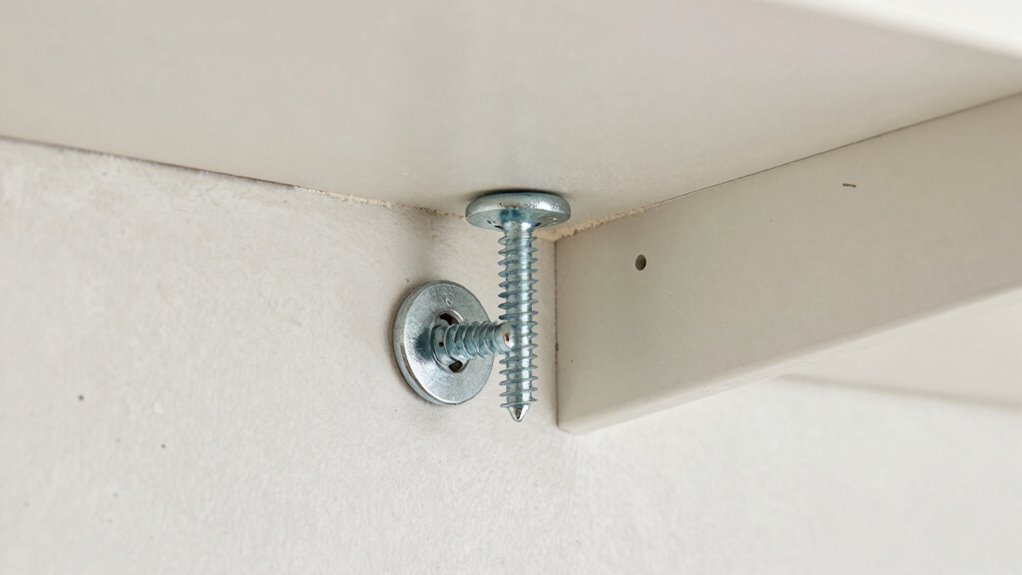
- Anchor type determines capacity: Toggle bolts support 25-50 pounds, while molly bolts handle 10-25 pounds depending on size and wall conditions
- Stud location changes everything: Direct stud mounting increases weight capacity exponentially compared to drywall anchors alone
- Distribution reduces stress: Spreading weight across multiple anchor points prevents concentrated stress that causes pull-out failures
Calculate your total load including shelf weight, contents, and safety margins.
Proper Support Methods
While drywall anchors provide basic support, calculating your shelf’s actual weight capacity requires factoring in multiple variables that directly impact structural integrity.
You must consider drywall thickness, anchor type, and stud placement. Standard 1/2-inch drywall supports roughly 20-50 pounds per anchor, but this varies greatly based on installation quality.
Toggle bolts offer superior holding power compared to plastic anchors, handling up to 100 pounds each when installed correctly. Multiple anchors distribute weight more effectively than single points.
Always locate wall studs using a stud finder; shelves anchored directly to studs can support considerably more weight.
Your shelf’s actual capacity equals the sum of all anchor ratings minus a 20% safety factor. Don’t guess—calculate precisely based on your specific wall conditions and anchor specifications for reliable, long-term performance.
Types of Drywall Anchors for Heavy Shelves
Because drywall lacks the structural integrity of solid wood or concrete, selecting the appropriate anchor type becomes critical for safely supporting heavy shelves.
You need anchors that can handle substantial weight without failing.
Different anchor types exist for specific load requirements and drywall conditions.
Plastic expansion anchors work well for medium loads up to 50 pounds.
Sleeve anchors provide superior holding power for heavier applications.
Self-drilling anchors eliminate pre-drilling holes, saving you time during installation.
Steel toggle anchors offer maximum strength for the heaviest shelves.
Understanding these options helps you choose correctly based on your shelf’s weight and contents.
Each type has distinct installation requirements and load ratings you must follow precisely.
Toggle Bolts vs Molly Bolts: What’s Best?

Toggle bolts and molly bolts each offer distinct advantages for mounting heavy shelves on drywall, though their performance differs markedly based on your specific application.
You’ll find toggle bolts excel in hollow wall applications, expanding behind the drywall to distribute weight across a larger area. Their wings pivot outward, creating superior holding power for heavy loads.
Molly bolts work better in thinner drywall, expanding as you drive the screw, gripping the wall material directly. They’re easier to install but provide less ultimate strength.
For heavy shelves holding books or equipment, toggle bolts are your best choice. They handle vibration better and won’t pull through over time.
Choose molly bolts only when space behind the wall is limited or when hanging lighter loads where maximum holding power isn’t critical.
Tools You’ll Need to Hang Heavy Shelves
Gathering the right tools guarantees your heavy shelves install securely and safely on drywall.
You’ll need specific equipment designed for heavy-duty applications.
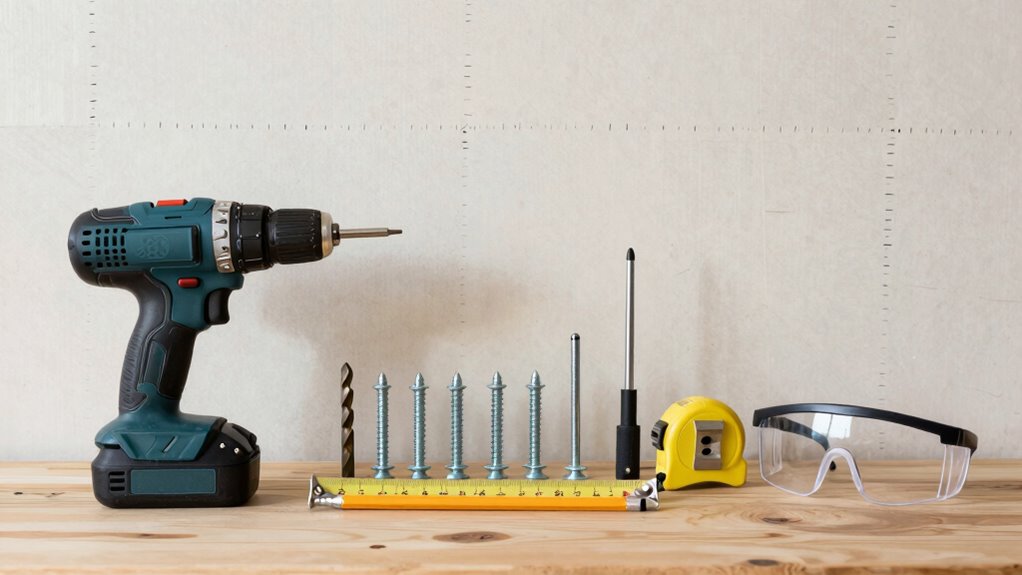
- Stud finder: Locate wall studs accurately to determine ideal mounting points
- Power drill: Essential for drilling pilot holes and driving screws into drywall anchors
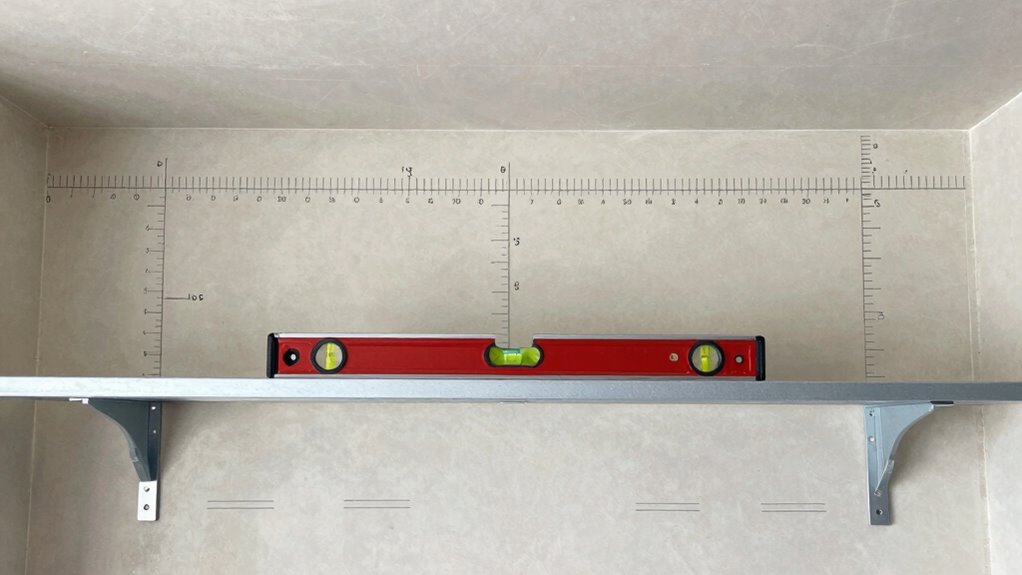
- Level: Ensures shelves hang straight and maintain proper alignment across mounting points
- Measuring tape: Critical for marking precise hole locations and spacing intervals
Professional installers rely on these fundamental tools because they eliminate guesswork.
Your stud finder prevents anchoring into empty drywall spaces. The power drill creates clean, precise holes without splitting surrounding material.
Leveling prevents uneven shelves that sag over time. Measuring tape ensures consistent hole placement matching your shelf’s bracket configuration.
These tools work together creating a solid foundation for heavy shelf installation success.
Prepping the Wall Before Shelf Installation

Before you begin installing heavy shelves, properly preparing the wall guarantees secure mounting and prevents future failures.
Start by cleaning the installation area with a damp cloth to remove dust and debris. Check for any loose paint or wallpaper that might interfere with bracket adhesion.
Use a stud finder to locate wall studs, marking their positions clearly. If you’re drilling into drywall without studs, make certain you’ll use appropriate wall anchors rated for your shelf’s weight.
Examine the wall surface for cracks, holes, or imperfections that could compromise mounting. Sand any rough spots smooth.
Verify the wall material type – standard drywall, plaster, or concrete – as this determines your fastening method.
Confirm the area is completely dry before proceeding with bracket placement.
How to Mark Shelf Bracket Placement Accurately
You’ll need to measure twice and mark once to guarantee your shelf brackets align perfectly, using a level to create straight reference lines that’ll guide your installation.
Don’t skip marking stud locations clearly with a pencil, as these points determine where you can safely anchor heavy loads without drywall anchors.
Accurate marking prevents crooked shelves and guarantees your heavy-duty installation won’t fail under weight stress.
Measure Twice, Mark Once
While accurate bracket placement requires careful attention to detail, marking your drywall correctly determines whether your heavy shelves will hang straight and remain secure. You can’t afford mistakes when supporting significant weight.
Use these essential techniques for precise marking:
- Reference multiple points from existing structures like baseboards or door frames to guarantee consistent height measurements across your wall.
- Account for bracket thickness by measuring from your pencil line to the actual mounting hole location, preventing misaligned installations.
- Verify shelf depth measurements before marking horizontal positions to maintain proper clearance and accessibility.
- Double-check all measurements against your shelf dimensions and spacing requirements before making final marks.
Your preliminary marks become permanent reference points. Take time to confirm each measurement meticulously.
Rushing leads to crooked shelves, uneven spacing, and potential safety hazards. Precision matters when heavy loads depend on your accuracy.
Use Level For Straight Lines
A level guarantees your shelf brackets align perfectly, eliminating guesswork from installation. Position your level horizontally across the wall where you plan to mount brackets, ensuring the bubble sits centered between marked lines. Mark pencil dots at each bracket location while maintaining consistent height measurements.
Don’t trust your eye alone; even slight angles compound across multiple brackets, creating visibly crooked shelves. Use a torpedo level for shorter spans or a four-foot level for longer runs. Check both horizontal and vertical alignment before finalizing marks. Adjust your pencil marks if the level shows deviation, redrawing until bubbles center properly.
This precision prevents wobbly, uneven shelves that announce amateur installation. Professional results demand accurate leveling techniques. Your heavy shelves deserve proper support alignment. Take time to verify level placement before drilling holes or attaching brackets permanently.
Mark Stud Locations Clearly
Although accurate stud location marks determine your shelf’s load-bearing capacity, many installers overlook proper marking techniques that prevent anchor failures.
You need precise stud identification before marking bracket placement points.
Use these essential marking methods:
- Electronic stud finder: Scan horizontally across wall sections, marking every 16 or 24 inches where wood density changes occur.
- Magnetic detection: Locate steel fasteners embedded in studs by running magnets vertically along drywall surfaces.
- Knock testing: Tap walls rhythmically, listening for solid wood sounds versus hollow drywall echoes between stud centers.
- Pencil angling: Hold pencil at 45-degree angles when marking to create visible witness marks that won’t disappear behind brackets.
These techniques guarantee you’re anchoring into structural framing rather than relying on drywall anchors alone.
Proper stud marking prevents catastrophic shelf failures and assures maximum load support for your heavy shelving installation.
How to Choose Screws for Heavy Shelves
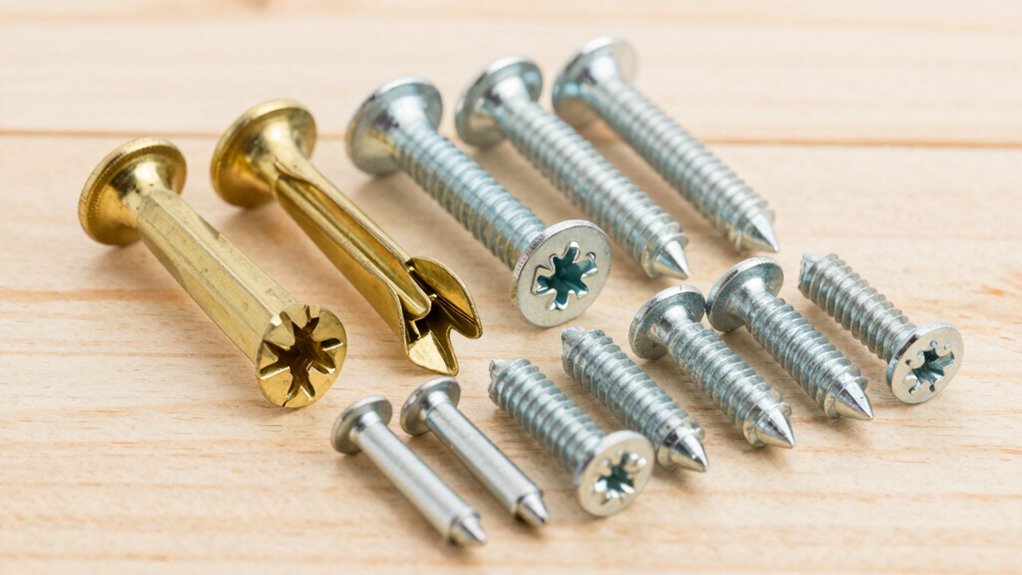
When you’re mounting heavy shelves on drywall, selecting the right screws determines whether your installation will hold securely or fail catastrophically. You need coarse-thread drywall screws rated for at least 50 pounds each, preferably #10 or #12 gauge with 2½ to 3-inch length.
Avoid fine-thread screws meant for wood or metal. Self-drilling tips prevent wood splitting when you’re anchoring into studs. You should choose screws with corrosion-resistant coatings like zinc or phosphate to prevent rusting.
Phillips head screws work best with power drills, while square drive heads offer better torque transfer. Don’t use drywall screws for toggle bolt applications; instead, select appropriate anchor screws.
Check screw specifications against your shelf brackets’ load requirements. Match screw length to your drywall thickness plus bracket depth. Quality screws prevent stripping and guarantee maximum holding power.
Prevent Drywall Cracking When Installing Anchors
You’ll prevent drywall cracking by selecting anchors rated for your shelf’s total weight capacity.
Install anchors at the correct depth to avoid over-driving or under-seating fasteners.
Distribute weight gradually across multiple anchor points rather than concentrating load on single fasteners.
Choose Proper Anchor Types
Three main anchor types dominate heavy-duty drywall installations: toggle bolts, molly bolts, and plastic expansion anchors.
You’ll want to match the anchor to your shelf’s weight and your wall’s thickness. Toggle bolts work best for heavy loads, expanding behind the drywall for maximum hold. Molly bolts suit medium-weight shelves, collapsing flush against the wall surface. Plastic expansion anchors handle light to moderate loads but require precise drilling.
Don’t guess your anchor size—calculate it based on:
- Shelf weight plus contents
- Drywall thickness at installation point
- Anchor manufacturer’s load ratings
- Wall stud proximity
Choose anchors that distribute weight across multiple drywall layers.
Avoid anchors too large for your shelf’s mounting hardware. Your installation’s success depends on selecting the right anchor type for your specific drywall conditions and shelf requirements.
Use Correct Installation Depth
Proper anchor selection from the previous step only works if you install each fastener at the correct depth—too shallow and your hardware won’t engage properly, too deep and you’ll crack the drywall surface.
You must drive anchors until the collar sits flush against the wall without applying excessive pressure. Stop immediately when you feel increased resistance or hear cracking sounds.
Threaded anchors require precise depth control; overdriving expands the anchor beyond drywall’s tolerance. Toggle bolts demand exact hole sizing—too large creates gaps, too small prevents proper expansion.
Plastic anchors should slip in snugly with gentle tapping. Metal expansion anchors need firm seating but shouldn’t crush surrounding drywall.
Always test depth with spare anchors first. Your shelving system’s integrity depends on these precise installation depths.
Apply Gradual Weight Distribution
When installing heavy shelves on drywall, distributing weight gradually across multiple anchor points prevents catastrophic drywall failure that occurs from concentrating load on single fasteners.
You’ll want to calculate your shelf’s total weight capacity and divide it evenly among several anchors.
- Space anchors 12-16 inches apart to create balanced support zones
- Use toggle bolts or molly anchors rated for 50% above your expected load per point
- Install anchors in a zigzag pattern rather than straight lines to distribute stress
- Add extra anchors at stress concentration points like shelf ends and center spans
This approach guarantees no single anchor bears excessive weight, preventing drywall cracking and anchor pullout that compromises your entire installation.
How to Mount Brackets Safely on Drywall
Before you begin mounting brackets on drywall, you’ll want to locate and mark your stud positions since attaching directly to studs provides maximum holding power.
Use a stud finder to identify vertical wood or metal supports behind the drywall. Mark these locations with pencil lines.
If you can’t hit studs, you’ll need heavy-duty drywall anchors rated for your shelf’s weight. Pre-drill pilot holes slightly smaller than your screws to prevent drywall cracking.
Position brackets level and secure them with appropriate fasteners – toggle bolts or molly bolts work well for heavy loads. Drive screws straight and avoid over-tightening, which can strip threads or damage drywall.
Check bracket stability by applying gentle pressure. Verify all mounting points are secure before loading shelves. Test-fit brackets without weight first.
Distribute Weight on Heavy Shelves Evenly
Even though heavy shelves can handle substantial loads, you’ll want to distribute weight evenly across the entire shelf surface to prevent sagging or bracket failure.
Uneven loading creates stress points that compromise your installation’s integrity.
Keep these distribution principles in mind:
- Place heavier items closest to wall brackets where support is strongest
- Avoid concentrated loads at shelf edges or center spans
- Use shelf pins or additional brackets for extra support when loading heavily
- Arrange items so weight disperses uniformly from front to back
Proper weight distribution prevents drywall anchor pullout and guarantees your shelves perform reliably.
You’re not just hanging shelves—you’re creating functional storage that lasts.
Smart loading protects both your investment and wall integrity.
How to Test Shelf Stability Before Use
You should always verify your heavy shelf installation’s structural integrity before committing to full loading.
Start by applying gradual pressure downward across the shelf’s entire surface area, checking for flex or movement. Test lateral stability by gently pushing horizontally at different points along the shelf edge. Listen for any cracking sounds from drywall or anchors that might indicate failure points.
Gradually increase weight distribution using sandbags or books, monitoring bracket screws and drywall anchors for signs of stress. Check that all mounting hardware remains tight and secure. Pay attention to whether the shelf maintains level positioning under load.
If you notice any sagging, loosening, or unusual sounds, immediately remove weight and re-evaluate your installation method. Only proceed with full loading once you’re confident the shelf can safely support intended weight without compromising structural integrity.
10 Common Shelf Installation Mistakes That Cause Collapse
You’ll compromise your shelf’s structural integrity when you exceed the manufacturer’s weight specifications or choose mounting hardware that doesn’t match your drywall’s gauge and stud placement.
These critical errors create stress points that fail under normal loading conditions, leading to sudden collapse.
Understanding proper load distribution and anchor selection prevents these dangerous oversights.
Overloading Shelves Beyond Capacity
One critical mistake that compromises shelf stability involves exceeding the weight limits of your chosen mounting system.
You’ll create dangerous conditions when ignoring maximum load ratings.
- Weight distribution matters: Concentrating heavy items at shelf edges multiplies stress on mounting points exponentially.
- Don’t trust visual appearance: Lightweight-looking books or decor can quickly accumulate devastating poundage beyond rated capacity.
- Seasonal accumulation kills: Gradually adding items over months without recalculating total load leads to sudden catastrophic failure.
- Temperature affects materials: Drywall expands and contracts, weakening anchor grip when overloaded during extreme weather conditions.
Understanding these principles keeps your shelves secure and your belongings protected.
Calculate total weight before installation, then add safety margins.
Your family’s safety depends on respecting these limits.
Improper Mounting Hardware Selection
Three critical hardware selection errors consistently lead to shelf collapse when mounting heavy loads on drywall.
You choose anchors too small for your shelf’s weight, ignoring manufacturer specifications that match load capacity to hardware size.
You opt for cheap plastic anchors instead of toggle bolts or molly bolts designed for heavy-duty applications. Standard picture hangers won’t support substantial weight.
You fail to evaluate drywall thickness and composition, using hardware intended for plaster or concrete. Different wall types require specific fasteners.
You overlook standoff distance between shelf and wall, creating leverage that amplifies downward force on mounting points.
Proper hardware selection means calculating total load weight, including items you’ll store, then choosing anchors rated for at least 50% above that weight.
Don’t guess—measure your shelf’s exact dimensions and weight requirements before purchasing mounting hardware.
How to Reinforce Drywall Behind Heavy Shelves
Before mounting heavy shelves on drywall, reinforce the wall structure behind the installation area to prevent sagging or anchor failure.
You’ll need to strengthen the mounting zone using these methods:
- Install plywood backing boards between studs, securing them with construction adhesive and screws for maximum support.
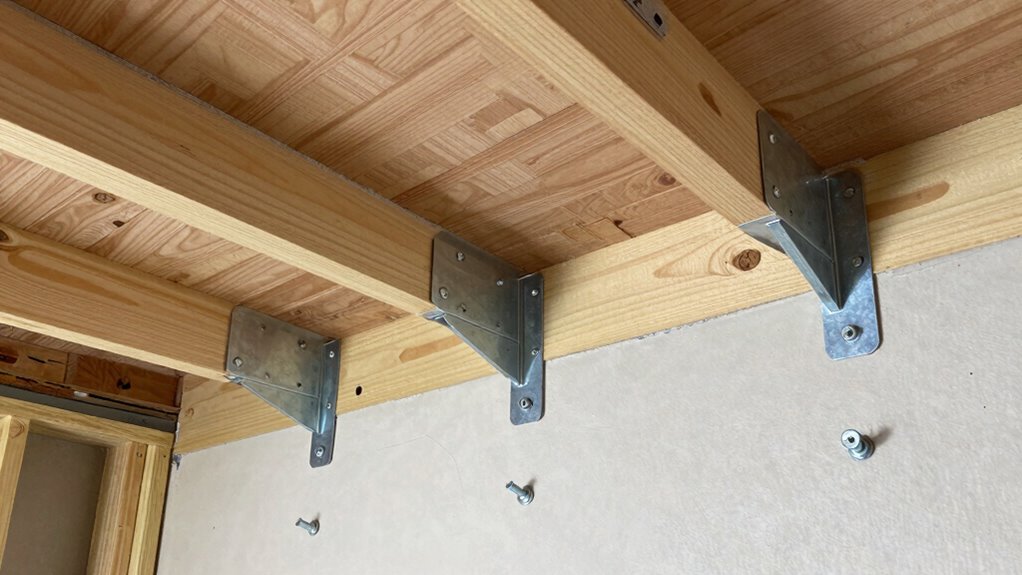
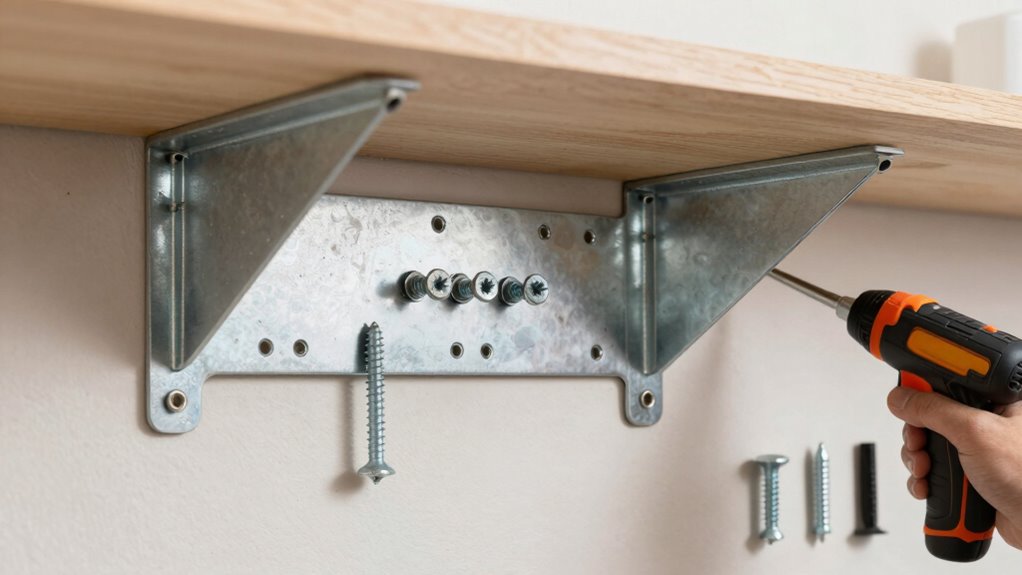
- Use metal reinforcement plates behind the drywall where brackets will attach, distributing weight across larger areas.
- Add extra drywall screws into existing studs within your shelf footprint, creating redundant load paths.
- Apply construction adhesive behind bracket mounting points to eliminate hollow wall cavities.
These reinforcement techniques create solid anchor points that prevent drywall crumbling under heavy loads.
You’re fundamentally building a stronger foundation for your shelves.
Don’t skip this step when planning your installation.
Alternatives to Drywall for Heavy Shelf Support
While drywall remains the most common mounting surface, you’ll achieve superior load-bearing capacity by anchoring shelves directly into structural elements like wood or metal studs.
These framing members provide reliable support that drywall anchors simply can’t match. You should locate studs using a stud finder or knock-test method, then drill pilot holes through shelf brackets into the wood or metal framework.
Wood studs offer better screw retention than metal studs, which require specialized toggle bolts or molly bolts.
Concrete and masonry walls provide excellent alternatives, accepting heavy-duty anchors designed for porous materials.
Plywood or MDF backing panels can bridge multiple studs, creating solid mounting surfaces where studs don’t align perfectly. These alternatives eliminate drywall damage while supporting substantial weights safely.
How to Maintain Shelves Mounted on Drywall
Although drywall-mounted shelves can last for years with proper care, you’ll need to conduct regular inspections to prevent catastrophic failures that could damage both your belongings and the wall structure.
Check screw heads quarterly for signs of loosening or wall crumbling around anchor points. Monitor shelf alignment monthly, ensuring brackets haven’t shifted or sagged. Clean dust accumulation underneath and behind shelves semi-annually to prevent moisture buildup that compromises drywall integrity.
- Inspect anchor points every three months for wall cracks or screw movement
- Test weight distribution monthly by gently pressing down on shelf edges
- Clean behind shelves every six months to prevent dust and moisture accumulation
- Monitor bracket alignment weekly for any visible shifting or tilting
Address minor issues immediately before they escalate into costly repairs.
Fix a Sagging Shelf on Drywall
A sagging shelf on drywall typically indicates anchor failure or improper weight distribution, requiring immediate attention to prevent complete detachment.
You’ll need to unload the shelf completely before evaluating the damage. Check for loose screws, cracked drywall, or failed anchors.
Remove any compromised hardware using a screwdriver or drill. Don’t simply tighten loose screws without addressing underlying issues.
Replace standard anchors with heavier-duty options like toggle bolts or molly bolts rated for your shelf’s weight. Pre-drill holes slightly larger than your anchors to guarantee proper fit.
Reinstall the shelf bracket, ensuring it sits flush against the wall. Level the shelf carefully before reloading it.
Test stability by applying gentle pressure. If sagging persists, you’re missing structural support behind your drywall.
Make Your Shelves Stronger for Long-Term Heavy Use
To guarantee your shelves can handle long-term heavy use, you’ll need to upgrade your mounting system beyond basic drywall anchors. Standard plastic anchors fail under sustained weight, so you must install proper support hardware.
- Toggle bolts provide superior holding power by expanding behind drywall, supporting up to 50 pounds each.
- Steel mounting plates distribute weight across larger surface areas, preventing drywall crumbling around anchor points.
- Wall stud attachment offers maximum strength when you locate and mount directly into wooden framing members.
- Bracket reinforcement with L-shaped metal supports transfers load from shelf edge to wall structure effectively.
Don’t rely on cheap hardware store solutions. Invest in quality fasteners rated for your shelf’s total load capacity.
Check manufacturer specifications carefully. Your safety depends on proper installation techniques and appropriate material selection. Test mounts before full loading.
Conclusion
You’ve got the knowledge to mount heavy shelves safely now. Remember: measure twice, drill once. Use proper anchors like toggle bolts for maximum holding power. Don’t guess with weight limits – calculate them carefully. Check your work with a level every time. Keep those shelves secure by tightening loose screws regularly. Your walls and your stuff will thank you for doing it right the first time.
