

Nearly 70% of bathroom water damage originates from failing seals around fixtures and joints. You’ll want to address these gaps before they compromise your walls or flooring. Proper surface preparation and technique determine whether your silicone sealant lasts months or years. Let’s examine the critical steps professionals use to create durable, leak-proof barriers.
Why Bathroom Gaps Cause Water Damage
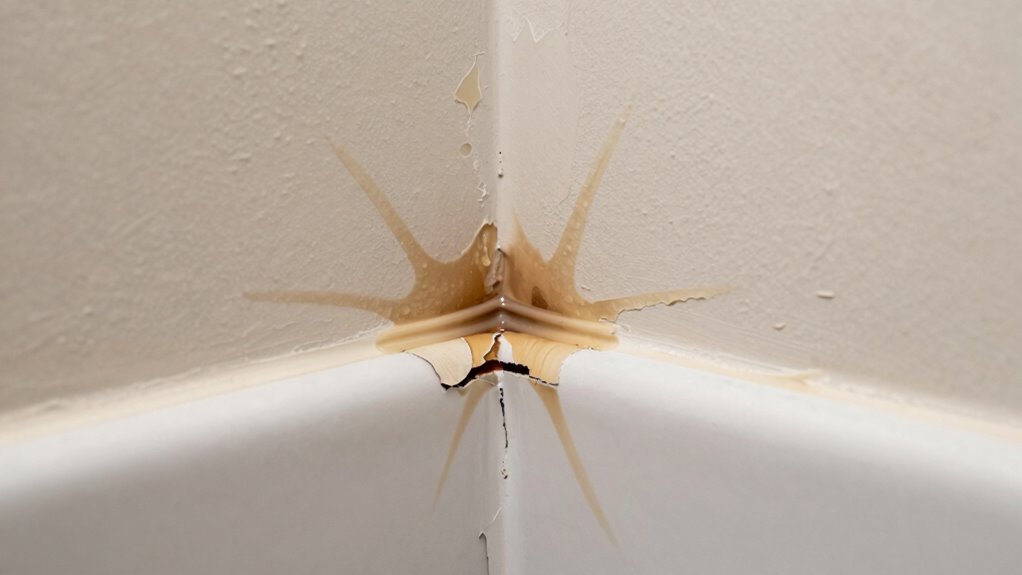
When gaps exist around bathroom fixtures, water seeps through these openings and compromises surrounding materials.
You’ll notice damage starting behind sinks, around tubs, and near shower enclosures where sealing has failed. Water penetration accelerates material degradation, causing wood rot, mold growth, and structural weakening.
These gaps create pathways for moisture migration into wall cavities and subflooring. You’re fundamentally inviting costly repairs when ignoring these vulnerable areas. Proper sealing prevents water infiltration that leads to expensive replacements of damaged drywall, flooring, and framing.
Addressing gaps immediately protects your investment and maintains bathroom functionality.
You’ll want to identify common problem areas: faucet connections, drain assemblies, and fixture junctions. Regular inspection reveals developing gaps before they cause significant damage.
Types of Caulk for Sealing Bathroom Gaps
Because bathroom environments demand durability against moisture and temperature fluctuations, selecting the right caulk type becomes critical for effective gap sealing.
You’ll want silicone caulk for areas exposed to direct water contact, as it remains flexible and waterproof.
Acrylic latex caulk works well for dry areas and offers easy cleanup with water.
Polyurethane caulk provides excellent adhesion and chemical resistance, making it ideal for challenging applications.
Butyl rubber caulk excels in extreme temperature conditions.
Tub and tile caulk combines silicone’s waterproofing with easier tooling.
You should match caulk chemistry to your specific gap location and exposure levels.
Avoid generic all-purpose caulk in wet zones.
Read manufacturer specifications carefully, as bathroom applications require caulk that won’t shrink, crack, or mildew over time.
Where to Check for Hidden Bathroom Gaps
While you’re sealing visible gaps around fixtures and walls, don’t overlook hidden areas where water infiltration often occurs.
These concealed spots compromise your bathroom’s integrity and cause costly damage behind surfaces.
Check these critical hidden zones:
- Underneath bathtub edges – Water seeps beneath rim edges where tub meets wall, creating invisible moisture pockets that promote mold growth and structural damage.
- Around pipe penetrations – Gaps around supply lines, drain pipes, and vents through floors or walls allow water migration into adjacent rooms or wall cavities.
- Behind vanity backsplashes – Junctions between countertops and wall surfaces often gap over time, letting water penetrate cabinet bases and flooring underneath.
Don’t let hidden gaps undermine your sealing efforts.
Address these problem areas before applying new caulk for complete protection.
What Tools You Need for Caulk Sealing
Caulk sealing requires specific tools for professional results.
You’ll need a quality silicone caulk gun that delivers smooth, controlled application. Select a sharp utility knife for cutting the caulk tube nozzle at the correct angle. A caulk smoothing tool or your finger wrapped in plastic helps achieve neat, professional beads. Gather painter’s tape to mask adjacent surfaces and prevent overspill.
Silicone remover or acetone becomes essential for correcting mistakes. Don’t overlook safety glasses and gloves for protection. A putty knife helps remove old caulk residue. Keep paper towels nearby for immediate cleanup.
These tools guarantee you’ll achieve that seamless, watertight seal every time. Professional-grade equipment makes the difference between amateur repairs and lasting results.
Cleaning Bathroom Surfaces Before Sealing

Before applying new caulk, you must thoroughly clean all bathroom surfaces to guarantee proper adhesion. Grease, soap scum, and moisture prevent sealant from bonding effectively, leading to premature failure. Your success depends on creating a pristine surface foundation.
- Remove all residue – Scrub away soap deposits, hard water stains, and grime using appropriate cleaners.
- Degrease thoroughly – Use solvents or degreasers to eliminate invisible oils that compromise adhesion.
- Ensure complete dryness – Allow surfaces to air dry completely, using fans or heat if necessary.
Clean surfaces shouldn’t feel slippery or leave residue on your finger. Achieving this standard requires elbow grease and patience.
Take pride in preparing properly – your sealing work will reflect the care you invest upfront.
Removing Old Caulk From Tub or Tile
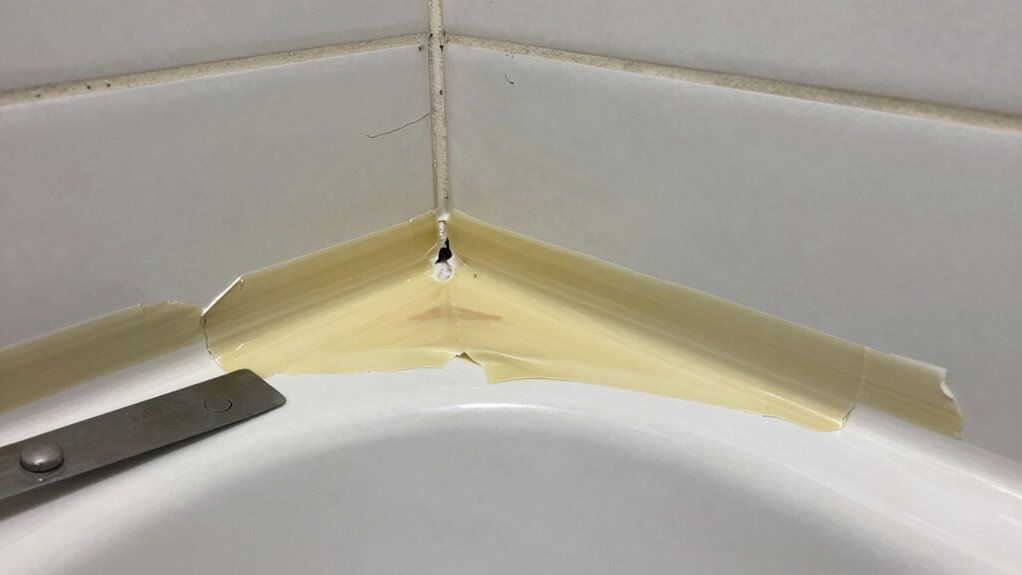
Start by cutting away loose caulk with a utility knife or caulk removal tool. Work systematically along the joint, scoring the old silicone where it’s lifting or cracked.
Pull away large sections with your fingers or needle-nose pliers. For stubborn residue, use a plastic scraper or old credit card to avoid scratching surfaces.
Apply mineral spirits or specialized caulk remover to dissolve remaining silicone beads. Let solvents sit briefly according to manufacturer instructions.
Scrape clean with a razor blade held at a shallow angle. Wipe the area with alcohol to remove any oily residue left behind.
Ascertain all old material is completely removed before applying new silicone. Check corners and edges carefully where caulk tends to accumulate.
Choosing Painter’s Tape for Clean Lines
You’ll want to select a high-quality painter’s tape that won’t leave residue while providing sharp, clean edges during your gap sealing project.
Apply the tape firmly along the edges where you plan to caulk, ensuring it adheres well to prevent paint bleed-through.
Proper tape placement and selection directly impact the precision of your finished caulk lines.
Painter’S Tape Benefits
Painter’s tape offers several advantages when creating clean lines during bathroom gap sealing projects. You’ll achieve professional results faster while protecting surrounding surfaces from accidental silicone contact.
- Precision Edges: Sharp, clean lines that look professionally installed rather than amateurish
- Surface Protection: Prevents silicone from adhering to areas where you don’t want it, saving cleanup time
- Confidence Boost: Eliminates worry about making mistakes, helping you feel competent in your DIY skills
Quality painter’s tape removes cleanly without residue, ensuring your bathroom sealing job looks seamless.
You’re not just applying tape; you’re setting yourself up for success. The right tape choice makes the difference between a frustrating experience and feeling proud of your workmanship.
Proper Tape Application Techniques
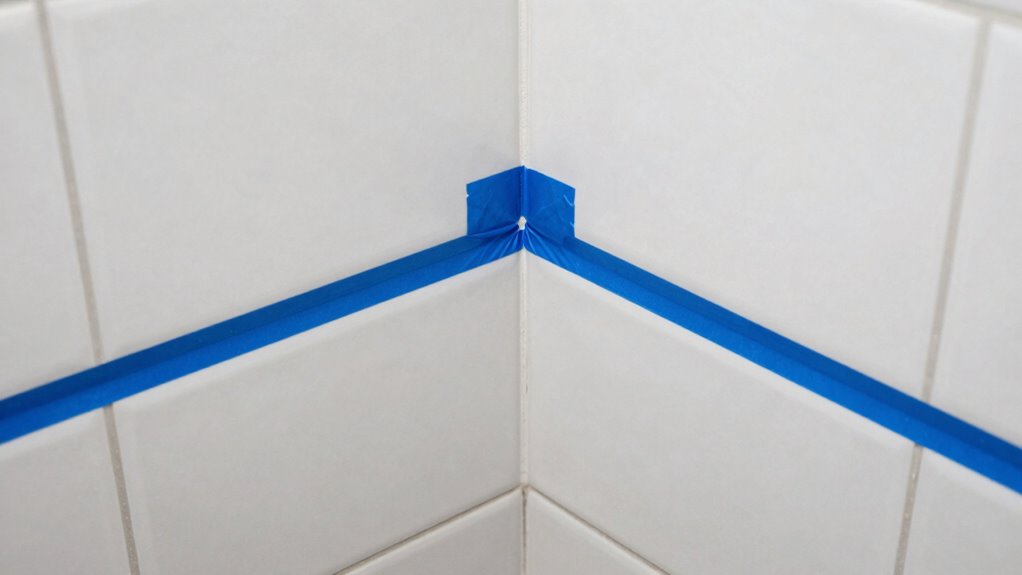
Apply painter’s tape correctly by positioning it precisely along gap edges before sealing. You should use a putty knife or credit card to press the tape firmly into place, eliminating air bubbles that cause silicone seepage.
Choose blue painter’s tape rated for your specific surface type – delicate surfaces need low-adhesion varieties while tile requires stronger bonding.
Maintain consistent tape width by measuring gaps beforehand and cutting tape accordingly. Don’t overlap tape edges excessively; butt joints flush against each other create cleaner lines.
Press tape edges down firmly using your finger or plastic scraper, working from center outward to remove trapped air.
Remove tape immediately after silicone application while sealant remains tacky. Pull tape slowly at a forty-five-degree angle away from the sealed gap. This technique prevents cured silicone from tearing and guarantees professional-looking results that’ll make you feel confident in your bathroom’s appearance.
Masking Surfaces for Pro-Grade Seams
A professional approach to masking surfaces guarantees clean, durable seams that will withstand bathroom moisture and temperature fluctuations.
You’ll achieve razor-sharp lines by applying painter’s tape directly adjacent to gap edges before caulking. Press tape firmly using a putty knife edge for maximum adhesion and prevent silicone bleeding underneath.
- Use high-quality painter’s tape rated for moisture resistance
- Apply tape precisely along gap edges with minimal gaps or bubbles
- Seal tape edges with your finger or tool for instant grab
Masking creates clean caulk lines that look professionally installed. You’re not just covering gaps – you’re crafting seamless connections that elevate your bathroom’s appearance while ensuring long-term performance against harsh conditions.
Loading Caulk Into the Gun Correctly
One essential step before sealing those freshly masked gaps is properly loading your caulk tube into the dispensing gun.
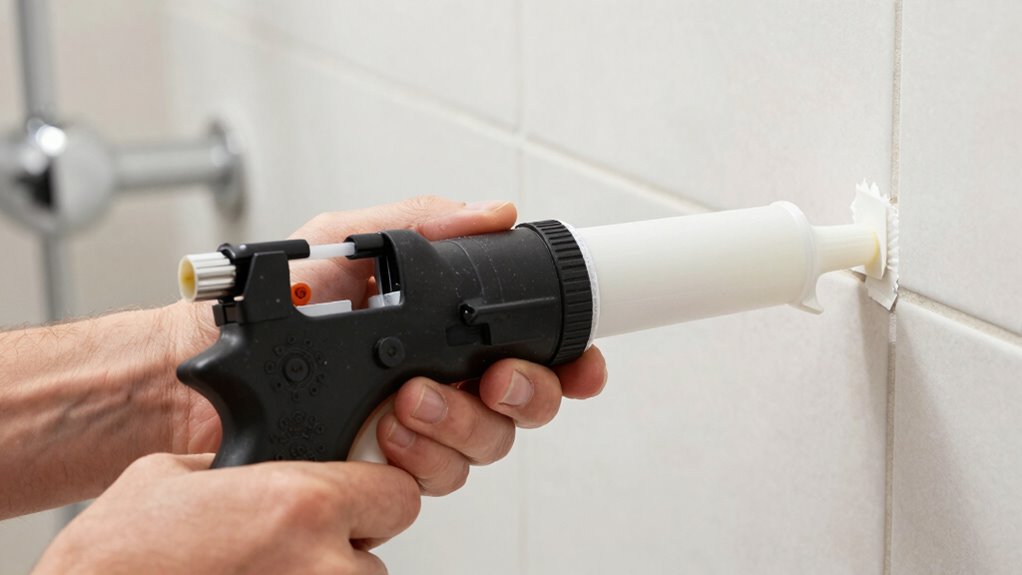
You’ll want to insert the tube into the gun’s barrel with the nozzle end facing forward. Make certain it sits flush against the plunger plate. Push the tube forward until you feel resistance, guaranteeing proper contact.
Check that the rod or wire inside the trigger mechanism engages correctly with the caulk tube’s rod or wire.
Failure to load properly results in wasted material and messy application. Experienced professionals always verify their caulk tube installation before cutting nozzles.
You’re not done until you’ve confirmed everything seats correctly. Test the trigger to ascertain smooth operation. Proper loading prevents frustrating interruptions during your sealing process.
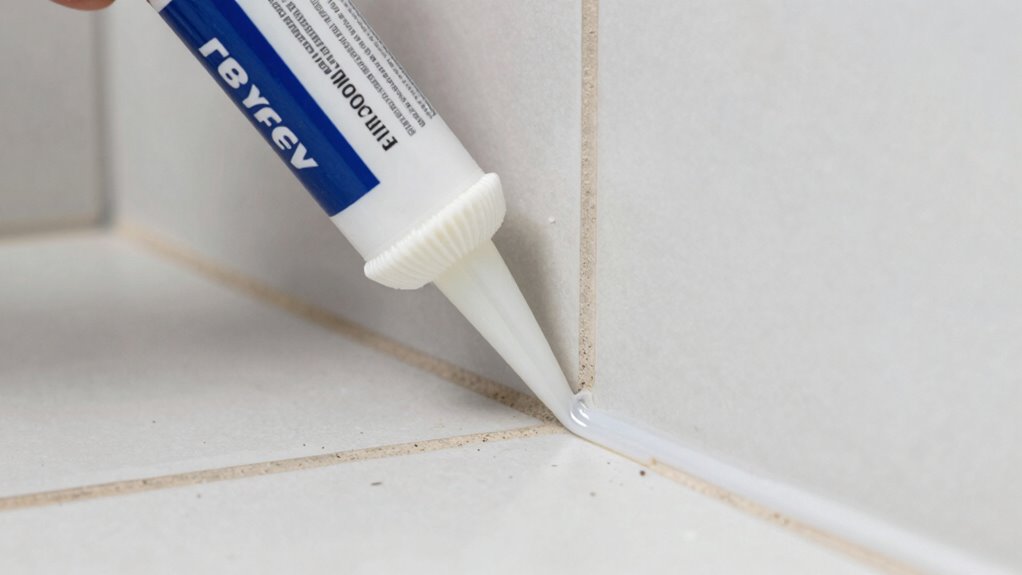
Cutting Nozzles for the Right Bead Size

Nozzle cutting determines your bead’s final size and shape, so don’t rush this critical preparation step.
You’ll achieve professional results when you cut the tip at the correct angle and diameter for your specific gap size.
- Small gaps need precision: Cut a 45-degree angle with a sharp utility knife, removing just enough material for a thin, controlled bead that won’t squeeze out unnecessarily.
- Medium joints require balance: Create a slightly larger opening while maintaining clean edges to produce consistent, uniform bead patterns without messy overflow.
- Wide gaps demand clean cuts: Remove more material but keep the opening smooth and even to prevent clogging and guarantee proper silicone flow.
Cut slowly and test your nozzle on scrap material first.
Trim gradually rather than removing too much initially.
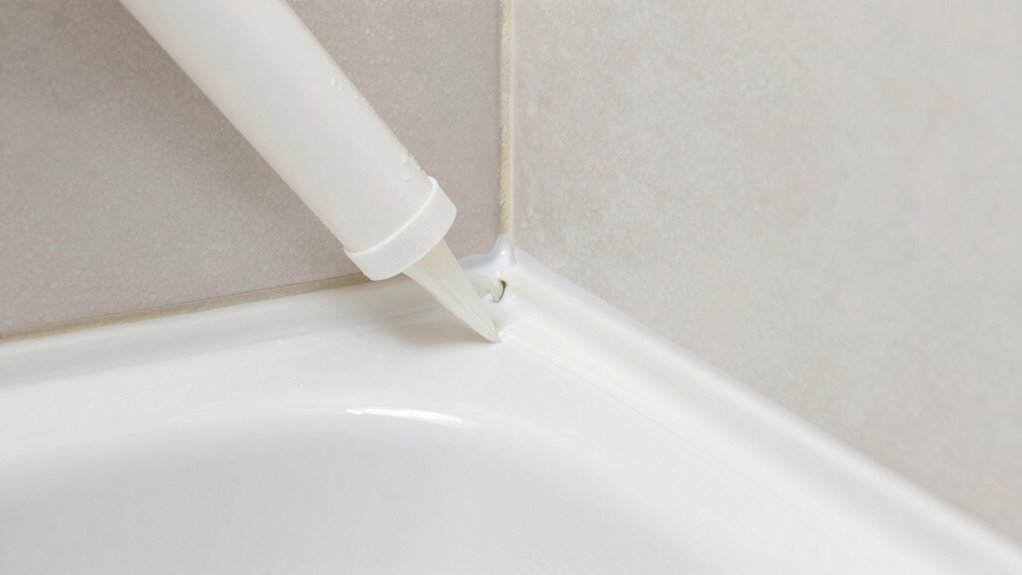
Applying Even Pressure at the Right Angle
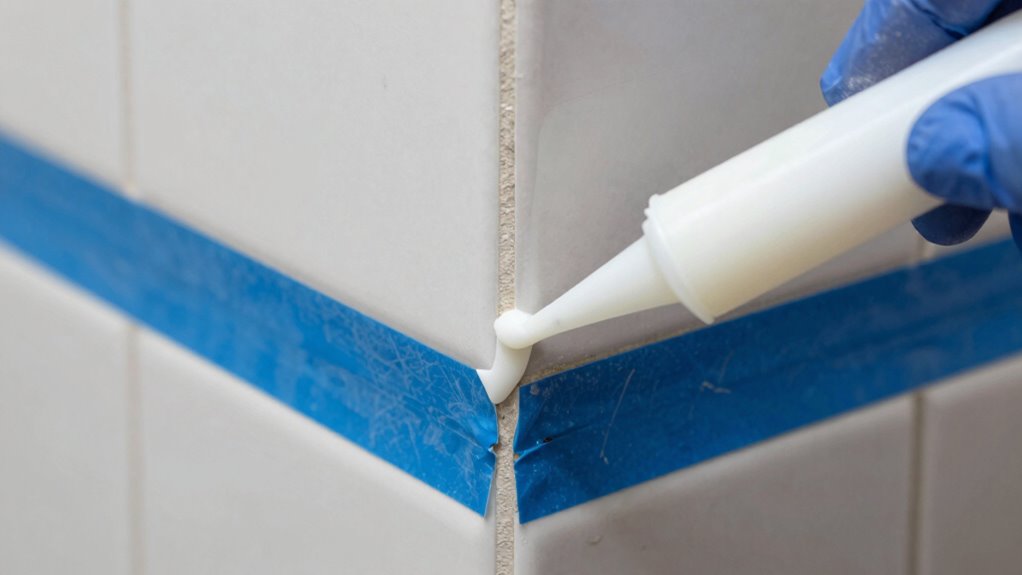
Hold the sealant gun at a consistent 45-degree angle while maintaining steady, even pressure on the trigger to produce uniform bead deposition.
You’ll achieve better control and consistent results by keeping your wrist firm and moving at a steady pace. Apply moderate pressure – too light and you’ll get gaps, too heavy and you’ll create messy overflow.
Keep the nozzle in constant contact with the surface, moving smoothly along joint lines. Your arm should move in one continuous motion from start to finish.
Practice this technique on scrap material first to develop muscle memory. Maintaining proper angle and pressure guarantees professional-looking seals every time.
Don’t rush this step – proper application prevents future water damage and callbacks.
Smoothing Caulk With Tools or Fingers?
You’ll achieve cleaner results using a caulking tool rather than your fingers.
Apply steady pressure with the tool at a consistent angle while moving smoothly across the joint.
Your choice between tools and fingers depends on the gap size and desired finish quality.
Tool Application Techniques
Apply caulk smoothly by using either a specialized tool or your finger for the best results.
Professional caulkers rely on proper tool techniques to achieve seamless seals that last. Your choice of application method directly impacts the final appearance and durability of your bathroom sealant job.
Choose tools designed specifically for caulk application:
- Use a high-quality caulk smoothing tool or caulk comb for consistent bead width
- Apply steady pressure while dragging the tool through fresh caulk
- Maintain consistent angle and speed to prevent air bubbles and uneven thickness
Tool application provides superior control compared to finger smoothing.
You’ll create professional-grade seals that resist water penetration and look factory-finished. Proper tool technique eliminates common mistakes like over-smoothing or creating weak spots.
Master these methods and you’ll join the ranks of experienced DIYers who achieve perfect caulk jobs every time.
Finger Smoothing Methods
A skilled tradesperson knows that finger smoothing offers distinct advantages when properly executed. You should dampen your finger with soapy water before contacting fresh silicone.
Apply gentle, consistent pressure while moving in smooth, linear motions along the bead. Your finger temperature affects silicone flow, so work quickly but deliberately. Avoid excessive pressure that creates thin spots or removes too much material.
Wipe your finger frequently on a clean cloth to prevent buildup. Finger smoothing works best on vertical surfaces and tight corners where tools struggle. You’ll achieve superior adhesion and waterproofing compared to tool-only methods.
Master this technique through practice, adjusting finger angle and pressure based on gap width. Professional results require developing proper tactile sensitivity and consistent motion patterns.
Avoiding Common Caulking Mistakes
Why do many homeowners struggle with caulking despite having the right materials? You’re not alone in wondering what went wrong when your silicone bead looks messy or fails prematurely.
- Surface preparation matters: You skip cleaning and drying surfaces thoroughly, causing poor adhesion and quick failure.
- Bead size affects performance: You apply too much or too little caulk, creating weak joints that crack or shrink.
- Tool selection impacts finish: You use inappropriate tools for smoothing, resulting in rough, uneven surfaces that trap water.
Master these fundamentals and you’ll achieve professional results that last. Proper caulking isn’t just about technique—it’s about understanding the process completely.
Fixing Caulk That Isn’t Sticking
You’ll often find that caulk failures stem from poor surface preparation and inadequate cleaning methods.
Without proper cleaning, contaminants like soap scum, mildew, and old caulk residue prevent new caulk from adhering properly.
These preparation shortcuts lead to peeling, cracking, and gap reformation within weeks of application.
Poor Surface Preparation
Poor surface preparation causes caulk to fail prematurely, creating gaps that allow moisture penetration. You must properly prepare surfaces before applying silicone sealant to guarantee lasting adhesion and prevent costly repairs.
Your success depends on understanding common preparation mistakes:
- Surface contamination – Oil, soap scum, and residue create invisible barriers that prevent proper bonding.
- Inadequate drying time – Applying caulk to damp surfaces guarantees poor adhesion and bubble formation.
- Skipping primer application – Porous materials like tile grout require primer for ideal sealant performance.
You should always clean surfaces thoroughly, allow complete drying, and apply appropriate primer when needed.
These steps aren’t optional—they’re essential for professional results that protect your bathroom from water damage.
Inadequate Cleaning Methods
One critical factor that undermines caulk adhesion is insufficient removal of contaminants from bathroom surfaces. You must eliminate soap scum, mineral deposits, and grime before applying silicone.
Standard cleaning with water isn’t enough; these residues create invisible barriers that prevent proper bonding. Use denatured alcohol or acetone to degrease surfaces thoroughly. Scrub with a stiff brush to remove stubborn buildup.
Don’t skip the final wipe-down with isopropyl alcohol, which eliminates any remaining oils or residues. Avoid cleaning products containing silicone, as they leave behind films that repel caulk.
Remember: if you can’t achieve a completely clean surface, your caulk job will fail prematurely. Take time to clean properly; it’s essential for lasting results.
How Long to Let Bathroom Caulk Dry
While bathroom caulk may feel dry to the touch within hours, allowing adequate curing time guarantees peak performance and longevity. You shouldn’t rush this critical step if you want lasting results.
Most silicone caulk requires 24-48 hours to cure completely, though humidity and temperature affect this timeline. Thin applications cure faster than thick beads. Avoid exposing uncured caulk to water or stress during this period.
- Temperature matters: Colder conditions extend curing time considerably
- Humidity helps: Moisture in the air actually accelerates silicone curing
- Thickness controls timing: Thicker beads need more time to cure through completely
You’ll know curing is complete when the caulk feels firm and rubbery throughout. Test by gently pressing your fingernail into an inconspicuous area. Properly cured caulk won’t indent easily and maintains its elastic properties for years.
Does Caulk Quality Really Affect Durability?
You’ll notice that premium caulks last considerably longer than bargain brands, but proper application technique matters more than product cost.
High-quality silicone and polyurethane formulations resist moisture and temperature changes better, yet fail quickly with poor surface preparation.
Your choice of caulk should match the gap size and environmental conditions, but mastering application fundamentals guarantees lasting results regardless of brand.
Caulk Quality Impact On Longevity
Higher-quality caulk formulations provide superior durability compared to bargain alternatives, directly impacting how long your bathroom gap seals remain effective. You’ll notice premium silicones contain enhanced polymers that resist cracking and shrinking over time.
- Polymer density – Higher-grade caulk uses concentrated silicone polymers that maintain flexibility without degrading.
- Additive quality – Superior formulations include UV stabilizers and antimicrobial agents that prevent premature failure.
- Curing technology – Advanced caulk utilizes faster, more complete curing processes that create lasting seals.
Cheap caulk may save money initially but fails within months, forcing you to reapply frequently. Premium caulk costs more but delivers years of reliable performance, making it the smarter long-term investment for your bathroom maintenance routine.
Proper Application Techniques Matter
Although caulk quality substantially impacts seal longevity, proper application techniques prove equally critical in determining how well your bathroom gaps remain sealed.
You must clean surfaces thoroughly before applying silicone, removing soap scum, mildew, and old caulk residues completely. Apply masking tape adjacent to joints for clean edges.
Load your caulk gun correctly, maintaining steady pressure while extruding material at a consistent speed. Work in small sections, smoothing immediately with a damp finger or tool.
Avoid over-smoothing, which reduces thickness unnecessarily. Maintain wet-edge technique to prevent lap marks. Temperature and humidity affect curing time, so check manufacturer specifications.
Don’t rush the process—proper preparation and execution create professional results that last longer. Your technique directly influences seal performance and appearance.
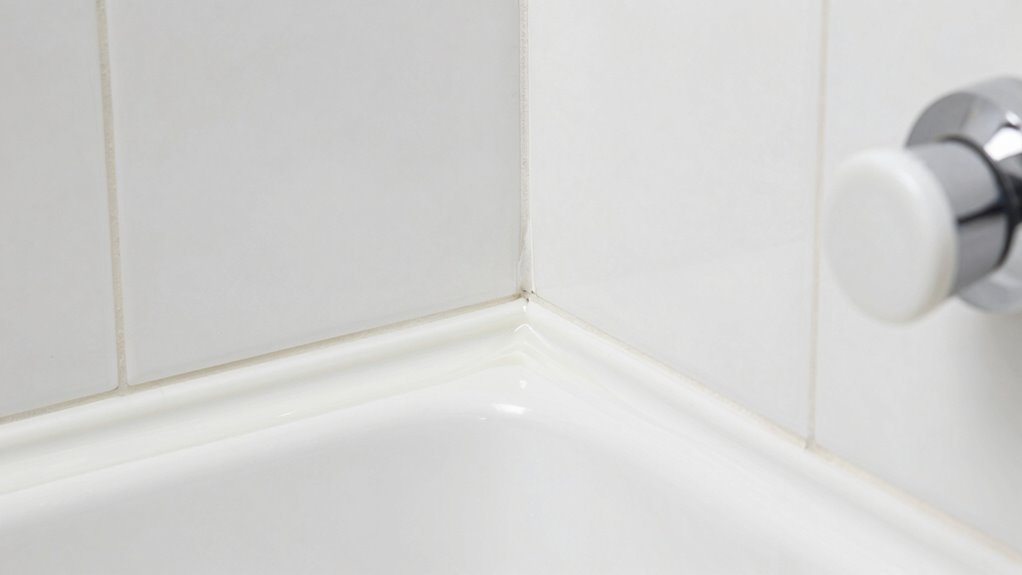
Matching Caulk Finishes to Tile or Fixtures
When selecting caulk for bathroom gaps, matching the finish to your tile or fixtures guarantees a seamless, professional appearance that won’t detract from your overall design.
You’ll want to take into account both color and texture to achieve perfect integration.
- Color coordination: Match caulk color to your grout lines or fixture finishes. Neutral tones like white, almond, or gray work best for most applications.
- Texture compatibility: Choose smooth caulk for glossy surfaces and textured varieties for matte or rough tiles to prevent visual mismatch.
- Material consideration: Select silicone for wet areas and acrylic for drier zones, ensuring longevity matches your bathroom’s humidity levels.
Test samples before committing to full application.
Maintaining Caulk Over Time
Proper caulk maintenance extends the lifespan of your bathroom seals and prevents moisture damage to surrounding surfaces. You should inspect caulk lines monthly for cracks, discoloration, or separation.
Clean mildew buildup immediately using bleach-based cleaners or specialized caulk cleaners. Don’t let soap scum accumulate near joints. Address small cracks promptly by applying fresh silicone over deteriorated areas.
You’ll need to remove old caulk completely when it’s extensively damaged. Maintain consistent bathroom ventilation to reduce humidity levels that accelerate caulk deterioration. Avoid using abrasive scrubbers on caulk surfaces.
You should reapply caulk every two to three years maximum, even if it appears intact. Regular maintenance prevents costly water damage and keeps your bathroom looking professional.
When to Call a Pro for Leakproof Seals
You should call a professional when you encounter complex plumbing issues that require specialized tools or expertise beyond basic caulk application.
Persistent water damage indicates underlying problems that demand immediate professional assessment to prevent costly structural repairs.
Structural sealant problems often involve hidden gaps or cracks that require advanced detection methods and commercial-grade materials for effective resolution.
Complex Plumbing Issues
While basic gap sealing around fixtures handles most moisture issues, complex plumbing problems require professional intervention to achieve truly leakproof results.
You’ll want to call a plumber when faced with intricate pipe configurations, hidden water damage behind walls and floors, or when your bathroom’s structural integrity is compromised. These situations go beyond simple silicone application and demand expert assessment and repair strategies that guarantee long-term waterproofing success.
Don’t risk improper repairs that lead to costly water damage – trust experienced professionals who understand complex plumbing systems.
Your bathroom’s moisture barriers need proper installation and sealing techniques that only qualified plumbers possess.
- Hidden pipe leaks behind tiled surfaces
- Structural damage affecting waterproofing membranes
- Complex fixture installations requiring specialized sealing methods
Persistent Water Damage
When persistent water damage continues despite your best sealing efforts, it’s time to call in professionals who can identify hidden moisture sources and implement permanent solutions.
You’re dealing with problems beyond surface-level gaps when water keeps penetrating sealed areas. Professionals use moisture meters, thermal imaging, and endoscopic cameras to locate concealed leaks others miss. They understand how water travels through wall cavities, under floors, and behind fixtures.
Amateur attempts often seal visible gaps while ignoring underlying issues like deteriorated grout, cracked tiles, or compromised substrate. Experienced contractors diagnose whether damage stems from inadequate ventilation, poor drainage, or structural movement.
They’ll recommend complete removal and replacement of affected materials rather than patching over problems. Don’t let recurring moisture create mold, rot, or structural compromise.
Professionals restore waterproofing integrity systematically, ensuring your bathroom remains dry permanently.
Structural Sealant Problems
Structural sealant problems often reveal themselves through recurring leaks that persist despite surface-level repairs. You’re dealing with deeper issues when water continues penetrating gaps around tubs, showers, or fixtures. These persistent leaks indicate compromised sealant adhesion or improper installation that requires professional assessment.
Don’t ignore these warning signs:
- Water stains appearing in same locations repeatedly
- Caulk separating from surfaces within months of application
- Mold growth behind seemingly intact sealant layers
You’ll need expert intervention when structural movement has compromised the building envelope.
Professional sealant contractors possess specialized tools and materials unavailable to homeowners. They identify hidden moisture pathways and apply commercial-grade sealants that last.
Attempting complex structural sealing without proper training creates bigger problems. Save money long-term by calling professionals who guarantee their workmanship and secure leakproof results.
Cost Comparison: DIY vs Pro Bathroom Caulking
A careful cost analysis reveals significant differences between tackling bathroom caulking yourself versus hiring professionals.
You’ll spend $15-30 on quality silicone and tools for DIY, while professionals charge $150-400 per bathroom.
However, you’re missing essential factors. Professionals bring specialized equipment, premium sealants, and warranty coverage you can’t replicate.
Your time costs money too – expect 2-4 hours learning proper technique plus execution time. Professionals complete jobs in under an hour.
Material mistakes cost extra when you’re inexperienced. You’ll likely need touch-ups sooner without proper training.
Professional caulking prevents water damage, mold growth, and structural issues that cost thousands later.
While DIY seems cheaper initially, professional installation offers long-term value, durability, and peace of mind.
Your skill level determines whether DIY savings outweigh professional expertise and guaranteed results.
Conclusion
You absolutely cannot ignore bathroom gaps—they’re silent water destroyers waiting to wreck your home. Don’t just slap any caulk on those gaps; match your sealant to your fixtures like a pro. Keep those joints pristine with regular maintenance checks. If you’re not confident tackling this yourself, call in professionals before tiny cracks become catastrophic leaks. Your wallet will thank you for preventing major water damage disasters.
